Table of Contents
Advertisement
Quick Links
All manuals and user guides at all-guides.com
TREADMILL EXERCISER
Model No. 831.293061
Serial No.
User's Manual
Serial Number Decal
• Assembly
• Operation
• Maintenance
• Part List and Drawing
CAUTION
Read all precautions and instruc-
tions in this manual before using
this equipment. Save this manual
Sears, Roebuck and Co., Hoffman Estates, IL 60179
for future reference.
Advertisement
Table of Contents

Related Manuals for Pro-Form 831.293061


Summary of Contents for Pro-Form 831.293061
- Page 1 All manuals and user guides at all-guides.com TREADMILL EXERCISER Model No. 831.293061 Serial No. User’s Manual Serial Number Decal • Assembly • Operation • Maintenance • Part List and Drawing CAUTION Read all precautions and instruc- tions in this manual before using this equipment.
-
Page 2: Table Of Contents
All manuals and user guides at all-guides.com TABLE OF CONTENTS IMPORTANT PRECAUTIONS ..............2 BEFORE YOU BEGIN . - Page 3 All manuals and user guides at all-guides.com 15. Never start the treadmill while you are stand- 21. When using iFIT.com CDs and videos, you ing on the walking belt. Always hold the can manually override the speed setting at handrails while using the treadmill. any time by pressing the speed buttons.
-
Page 4: Before You Begin
The get the most from your exercise program in the conve- model number of the treadmill is 831.293061. The ser- nience and privacy of your home. And when you’re not ial number can be found on a decal attached to the... -
Page 5: Assembly
All manuals and user guides at all-guides.com ASSEMBLY Assembly requires two persons. Set the treadmill in a cleared area and remove all packing materials. Do not dispose of the packing materials until assembly is completed. Note: The underside of the treadmill walking belt is coated with high-performance lubricant. - Page 6 All manuals and user guides at all-guides.com 3. Attach the Latch Assembly (82) to the Left Upright (84) with the two Latch Screws (134). Start both Latch Screws before tightening either of them. Note: The Latch Screws may be preattached to the Left Upright. 4.
- Page 7 All manuals and user guides at all-guides.com 6. If the Wheels (not shown) are touching the floor, or if the treadmill rocks slightly, see HOW TO LEVEL THE TREADMILL on page 20. If you wish to adjust the height of the Uprights (80, 84), go to step 7.
-
Page 8: Operation And Adjustment
All manuals and user guides at all-guides.com OPERATION AND ADJUSTMENT THE PERFORMANT LUBE WALKING BELT an equipment-grounding conductor and a grounding plug. Plug the power cord into a surge suppressor, Your treadmill features a walking belt coated with and plug the surge suppressor into an appropriate PERFORMANT LUBE , a high-performance lubricant. - Page 9 All manuals and user guides at all-guides.com Clip Note: If there are thin sheets of clear plastic on the console, remove them. FEATURES OF THE CONSOLE cable, you can connect the treadmill to your home stereo, portable stereo, or computer and play special The treadmill console offers an impressive array of iFIT.com CD and video programs (one iFIT.com CD is features that help you get the most from your workouts.
- Page 10 All manuals and user guides at all-guides.com buttons. Each time a HOW TO TURN ON THE POWER button is pressed, the speed setting will change by 0.1 mph; if a Plug in the power cord (see page 8). button is held down, the speed setting will change in increments of 0.5 mph.
- Page 11 All manuals and user guides at all-guides.com To change the unit of Measure your heart rate if desired. measurement, first hold down the Stop button You can measure your heart rate using either the while inserting the key handgrip pulse sensor or the optional chest pulse into the console.
- Page 12 All manuals and user guides at all-guides.com The speed setting for the HOW TO USE PRESET PROGRAMS Current Segment first segment is shown in the flashing Current Segment column of the Insert the key fully into the console. matrix. (The incline set- tings are not shown in See HOW TO TURN ON THE POWER on page the matrix.) The speed...
- Page 13 All manuals and user guides at all-guides.com To stop the program temporarily, press the Stop HOW TO USE HEART RATE PROGRAMS button. The Time/Pace display will begin to flash. To restart the program, press the Start button or the Speed button.
- Page 14 All manuals and user guides at all-guides.com During heart rate pro- automatically increase or decrease to bring your grams, the matrix will heart rate closer to the target heart rate. If the show a graphic that speed reaches the maximum speed setting of the represents your heart program (see step 4 at the left) and your heart rate.
- Page 15 All manuals and user guides at all-guides.com HOW TO CONNECT YOUR PORTABLE STEREO HOW TO CONNECT THE TREADMILL TO YOUR CD PLAYER, VCR, OR COMPUTER Note: If your stereo has an RCA-type AUDIO OUT jack, see instruction A below. If your stereo has a 3.5mm LINE OUT jack, see instruction B.
- Page 16 All manuals and user guides at all-guides.com HOW TO CONNECT YOUR HOME STEREO HOW TO CONNECT YOUR COMPUTER Note: If your stereo has an unused LINE OUT jack, Note: If your computer has a 3.5mm LINE OUT jack, see instruction A below. If the LINE OUT jack is see instruction A.
- Page 17 All manuals and user guides at all-guides.com HOW TO CONNECT YOUR VCR HOW TO USE IFIT.COM CD AND VIDEO PROGRAMS Note: If your VCR has an unused AUDIO OUT jack, see instruction A below. If the AUDIO OUT jack is being used, see instruction B.
- Page 18 All manuals and user guides at all-guides.com If the speed or incline settings are too high or too • Make sure that the audio cable is properly low, you can manually override the settings at any connected, that it is fully plugged in, and that time by pressing the Speed or Incline buttons on it is not wrapped around a power cord.
- Page 19 All manuals and user guides at all-guides.com Hold the handrails, step onto the walking belt, and HOW TO USE PROGRAMS DIRECTLY FROM begin walking. During the program, an electronic OUR WEB SITE “chirping” sound will alert you when the speed and/or incline of the treadmill is about to change.
- Page 20 All manuals and user guides at all-guides.com THE INFORMATION MODE/DEMO MODE THE OPTIONAL CHEST PULSE SENSOR The console features an information mode that keeps An optional chest pulse sensor adds even more track of the total number of hours that the treadmill has features to the console.
-
Page 21: How To Fold And Move The Treadmill
All manuals and user guides at all-guides.com HOW TO FOLD AND MOVE THE TREADMILL HOW TO FOLD THE TREADMILL FOR STORAGE Before folding the treadmill, adjust the incline to the lowest position. If this is not done, the treadmill may be per- manently damaged. -
Page 22: Troubleshooting
All manuals and user guides at all-guides.com TROUBLESHOOTING Most treadmill problems can be solved by following the simple steps below. Find the symptom that applies, and follow the steps listed. If further assistance is needed, call toll-free 1-800-4-MY-HOME ® (1-800-469-4663). PROBLEM: The power does not turn on SOLUTION: a. - Page 23 All manuals and user guides at all-guides.com With the help of a second person, carefully raise the Upright Base (97) as shown. Carefully pivot the Hood (123) off. Locate the Reed Switch (22) and the Magnet (19) on the left side of the Pulley (18). Turn the Pulley until the 1/8”...
-
Page 24: Conditioning Guidelines
All manuals and user guides at all-guides.com CONDITIONING GUIDELINES ergy. Only after the first few minutes does your body WARNING: begin to use stored fat calories for energy. If your goal Before beginning this is to burn fat, adjust the speed and incline of the tread- or any exercise program, consult your physi- mill until your heart rate is near the lowest number in cian. - Page 25 All manuals and user guides at all-guides.com SUGGESTED STRETCHES The correct form for several basic stretches is shown at the right. Move slowly as you stretch—never bounce. 1. Toe Touch Stretch Stand with your knees bent slightly and slowly bend forward from your hips.
-
Page 26: Part List
All manuals and user guides at all-guides.com PART LIST—Model No. 831.293061 R0803A To locate the parts listed below, refer to the EXPLODED DRAWING attached in the center of this manual. Key No. Qty. Description Key No. Qty. Description Left Foot Rail... -
Page 27: Part Identification Chart
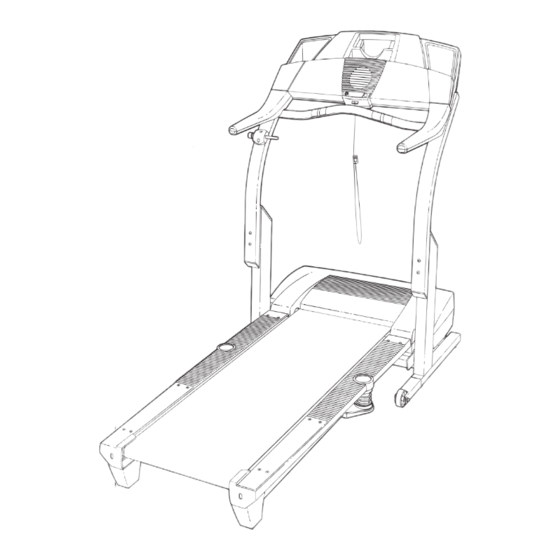
All manuals and user guides at all-guides.com Key No. Qty. Description Key No. Qty. Description Console Base Console Back Lift Frame Pivot Nut Photo Switch Star Washer Ground Screw/Choke Screw Rear Roller Star Washer Key Clip Upright Star Washer Fan Screw Front Isolator Front Isolator Screw Console... - Page 28 All manuals and user guides at all-guides.com EXPLODED DRAWING—Model No. 831.293061 R0803A...
- Page 29 All manuals and user guides at all-guides.com EXPLODED DRAWING—Model No. 831.293061 R0803A...
-
Page 30: Full One Year Warranty
All manuals and user guides at all-guides.com FULL ONE YEAR WARRANTY For one year from the date of purchase, if failure occurs due to defect in material or workmanship in this Sears Treadmill Exerciser, contact the nearest Sears Service Center throughout the United States and Sears will repair or replace the Treadmill Exerciser, free of charge.
Need help?
Do you have a question about the 831.293061 and is the answer not in the manual?
Questions and answers