Table of Contents
Advertisement
Quick Links
S ING LE S PLI T A IR CO N DIT IO N ER S - R 3 2
U SER MANU AL an d INS TA L L ATIO N GU IDE
INDOOR UNIT
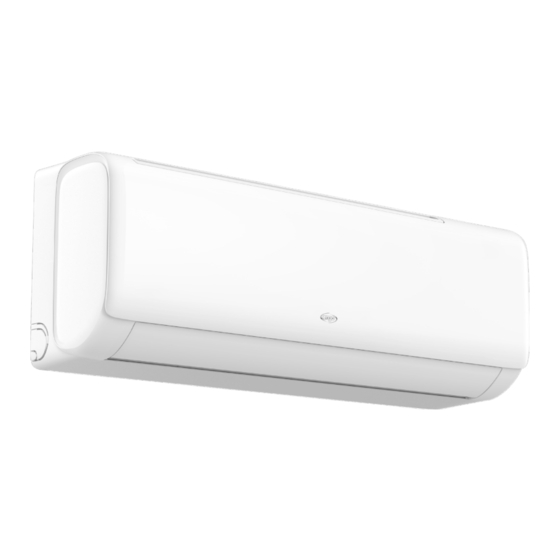
ARGO DELUXE 9000 UI
ARGO DELUXE 12000 UI
ARGO DELUXE 18000 UI
ARGO DELUXE 24000 UI
Please read this manual carefully before installing and using the air conditioner, and retain for future
reference.
A RG O D EL U X E
V 11/23
OUTDOOR UNIT
ARGO DELUXE 9000 UE
ARGO DELUXE 12000 UE
ARGO DELUXE 18000 UE
ARGO DELUXE 24000 UE
E N
Advertisement
Table of Contents

Related Manuals for Argo DELUXE Series


Summary of Contents for Argo DELUXE Series
- Page 1 S ING LE S PLI T A IR CO N DIT IO N ER S - R 3 2 U SER MANU AL an d INS TA L L ATIO N GU IDE INDOOR UNIT OUTDOOR UNIT ARGO DELUXE 9000 UI ARGO DELUXE 9000 UE ARGO DELUXE 12000 UI ARGO DELUXE 12000 UE...
-
Page 2: Table Of Contents
INDEX General warnings Safety precautions Notices for usage Description of parts Remote control guide WiFi guide Cleaning and care Troubleshooting Notices for the installation Indoor unit installation Outdoor unit installation Maintenance notes Warnings for the refrigeration system specialist REQUIREMENTS FOR INSTALLATION AND MAINTENANCE PERSONNEL All personnel who carry out installation and/or maintenance operations on the units must be equipped with PEF (European Refrigerators License) as required by the D.P.R. -
Page 3: General Warnings
GENERAL WARNINGS Appliance filled with flammable Before using the appliance, read the owner’s manual. gas R32. Before installing the appliance, Before repairing the appliance, read the read the installation manual. service manual. THE REFRIGERANT R32 • To realize the function of the air conditioner unit, a special refrigerant circulates in the system. The refrigerant is the fluoride R32 = GWP (Global warming potential). -
Page 4: Safety Precautions
SAFETY PRECAUTIONS WARNING • This appliance can be used by children aged from 8 years and above and persons with reduced physical, sensory or mental capabilities or lack of experience and knowledge if they have been given supervision or instruction concerning use of the appliance in a safe way and understand the hazards involved. - Page 5 be cut in time to prevent the occurrence of danger. • Don’t put hands or any objects into the air inlets or outlets. This may cause personal injury or damage to the unit. • Please note whether the installed stand is firm enough or not. If it is damaged, it may lead to the fall of the unit and cause the injury.
-
Page 6: Notices For Usage
INFORMATION FOR CORRECT DISPOSAL OF THE PRODUCT IN ACCORDANCE WITH THE EUROPEAN DIRECTIVE 2012/19/EU At the end of its working life this equipment must not be disposed of as an household waste. It must be taken to special local community waste collection centres or to a dealer providing this service. Disposing of electrical and electronic equipment separately avoids possible negative effects on the environment and human health deriving from an inappropriate disposal and enables its components to be recovered and recycled to obtain significant savings in energy and resources. -
Page 7: Description Of Parts 3
DESCRIPTION OF PARTS INDOOR UNIT Air inlet Air filter Air inlet grille Panel Emergency button Pipe protection Air louver ring Air vent Air outlet Air inlet OUTDOOR UNIT Air outlet grille Connecting pipe Drain hose Air outlet Note: all the illustrations in this manual are for explanation purpose only. Your air conditioner may be slightly different. -
Page 8: Remote Control Guide 3
REMOTE CONTROL USER GUIDE When using the remote control for the first time, install the batteries making sure to correctly position the two polarities “+” and “-”. To insert the batteries, follow the instructions below: • Open the battery compartment by sliding the door outwards (see the direction of the arrow in fig.1). •... - Page 9 BUTTONS DESCRIPTION 1. ON/OFF button Press this button to turn the unit on or off. This button can also be used to reset the timer and the SLEEP function. 2. MODE button Press this button to select the operating mode: AUTO (automatic) - COOL (cooling) - DRY (dehumidification) - HEAT (heating) - FAN (ventilation), according to the sequence below: 3.
- Page 10 In FAN (ventilation) mode it is possible to select the ventilation speed between Low - Mid - High, but it is not possible to set the Turbo speed. In AUTO mode (automatic) it’s possible to select the fan speed and set the Turbo speed. In DRY (dehumidification) mode it is not possible to select the ventilation speed.
- Page 11 ELE.H function Function not available. DISPLAY function With the unit turned on, press the Menu button and using the + - and U/D SWING or L/R SWING buttons select the DISPLAY function, pressing OK on the corresponding indication shown on the display. By subsequently pressing the button, the display on the indoor unit turns off or on.
- Page 12 OPERATION MODE Automatic mode (AUTO) • Press the “MODE” button, select the automatic operation mode. • By pressing the “SPEED” button, you can select the fan speed from LOW, MID, HIGH, AUTO. • Press the “ON/OFF” button, the air-conditioner starts to operate. •...
-
Page 13: Wifi Guide 4
WIFI GUIDE INTRODUCTION The air conditioner is equipped with remote control technology, with a Wi-Fi module inside the appliance connected to the display and the air conditioner control. The air conditioner must be in constant connection with a wireless router or access point connected to the internet. -
Page 14: Cleaning And Care
CLEAN AND CARE WARNING • Before the cleaning of the air conditioner, it must be shut down and the electricity must be cut off for more than 5 minutes, otherwise there might be the risk of electric shocks. • Do not wet the air conditioner, which can cause an electric shock. Make sure not to rinse the air conditioner with water under any circumstances. -
Page 15: Troubleshooting 4
TROUBLESHOOTING WARNING Do not repair the air conditioner by yourself as wrong maintenance may cause electric shock or fire or explode, please contact the authorized service center and let the professionals conduct the maintenance, and checking the following items prior to contacting for maintenance can save your time and money. Phenomenon Causes Troubleshooting... - Page 16 WARNING Immediately stop operation of the appliance, disconnect the electricity and contact the nearest Technical Assistance Centre in the following cases: • Hear any harsh sound or smell any awful odor during running. • Abnormal heating of power cable and plug occurs. •...
- Page 17 Filling the refrigerator circuit • Use refrigerant filling appliances specialized for R32. Make sure that different kinds of refrigerant don’t contaminate one another. • The refrigerant tank should be kept upright when filling with the refrigerant. • Stick the label on the system after filling is finished. •...
- Page 18 • Check the surrounding environment of installation site: R32 shall not be installed in the enclosed reserved space of a building. • When using electric drill to make holes in the wall, check first whether there is pre-buried pipeline for water, electricity and gas.
- Page 19 • Correctly connect the live, neutral and earth wires to the power outlet. • Disconnect the power supply before carrying out any work on the electrical circuit or carrying out any safety work. For models with a plug, make sure the plug is easily accessible after installation. •...
- Page 20 INSTALLATION OF INDOOR UNIT DIMENSION DRAWING OF INDOOR UNIT INSTALLATION Space to the ceiling 15 cm above Space to the Space to wall the wall 20 cm above 20 cm above 200 cm above Space to the floor MOUNTING PLATE 1.
- Page 21 Note: carefully check if there is any damage of joints before installation. The joints shall not be reused, unless after re-flaring the pipe. Tightening torque table The size of pipe (mm) Torque (N • m) Ф6/Ф6.35 15~25 Ф9/Ф9.52 35~40 Ф12/Ф12/Ф7 45~60 Ф15.88 73~78...
-
Page 22: Outdoor Unit Installation
AFTER INSTALLATION CHECK 1. The screws whether have been fixed effectively, and there is no risk of loosening. 2. Connector of display board whether put in the right place and do not touch the terminal board. 3. Control box cover whether cover tightly. INSTALLATION OF OUTDOOR UNIT DIMENSION DRAWING OF OUTDOOR UNIT INSTALLATION Space to the obstruction... - Page 23 INSTALL THE CONNECTION PIPE Connect the Outdoor Unit with Connecting Pipe: Aim the counter-bore of the connecting pipe at the stop valve, and tighten the Taper nut with fingers. Then tighten the Taper nut with a torque wrench. When prolonging the piping, extra amount of refrigerant must be added so that the operation and performance of the air conditioner will not be compromised Piping lenght Amount of refrigerant to be added...
- Page 24 VACUUMING • Exclusive R32 refrigerant pump must be used in making R32 Pressure gauge Compound meter refrigerant vacuum. -76 cmHg Manifold valve Before working on the air conditioner, remove the cover of the stop Handle Lo Handle Hi valve (gas and liquid valves) and be sure to retighten it afterward (to Charge hose prevent the potential air leakage).
-
Page 25: Maintenance Notes
MAINTENANCE NOTES ATTENTION: for maintenance or scrap, please contact authorized service centers. Maintenance by unqualified person may cause dangers. APPENDICES Connecting pipe diameter Additional refrigerant Piping configuration: Liquid pipe (mm) Gas pipe (mm) (g/m) Ф6.35 Ф9.52 PROCEDURE FOR EXTENDING THE PIPING Note: improper extension of piping is the main cause of refrigerant leaks. -
Page 26: Warnings For The Refrigeration System Specialist
WARNINGS FOR THE REFRIGERATION SYSTEM SPECIALIST Here are warnings and safety instructions for the maintenance of systems containing flammable refrigerant (repairs should only be carried out by specialists). 1. Any person involved in the work or in the interruption of a refrigeration circuit must be equipped with PEF (European Refrigerators License) as required by the D.P.R. - Page 27 the correct specifications. The manufacturer’s maintenance and service guidelines should always be followed. If in doubt, consult the manufacturer’s technical department for assistance. 7. Repairs on sealed components. During repairs to sealed components, all electrical supplies must be disconnected from the equipment being worked on before removing the sealed covers, etc. If it is absolutely necessary to have an electrical power supply to the equipment during maintenance, then a leak detection device must be placed at the most critical point to warn of a potentially dangerous situation.
- Page 28 If compressors or compressor oils need to be removed, make sure they have been evacuated to an acceptable level to ensure that flammable refrigerant does not remain within the lubricant. The evacuation process must be carried out before returning the compressor to suppliers. To speed up this process, only electrical heating of the compressor body must be used.
- Page 29 The unit contains R32, a fluorinated greenhouse gas with global warming potential (GWP) = 675. Do not release R32 into the atmosphere. ARGO DELUXE 9000 UE - Kg. 0,55 = 0,37 Tonn CO equiv. ARGO DELUXE 12000 UE - Kg. 0,60 = 0,41 Tonn CO equiv.
Need help?
Do you have a question about the DELUXE Series and is the answer not in the manual?
Questions and answers