Table of Contents
Advertisement
Quick Links
E N
DAVEN P L US
PORTABL E AI R CO ND ITION ER (L OCA L)
OPERATING INSTRUCTIONS
Read the instructions carefully before operating the appliance or carrying out maintenance work. Observe
all the safety instructions; failure to do so may lead to accidents and/or damage. Store these instructions in
a safe place for future reference.
V 04/23
Advertisement
Table of Contents

Related Manuals for Argo DAVEN PLUS


Summary of Contents for Argo DAVEN PLUS
- Page 1 DAVEN P L US PORTABL E AI R CO ND ITION ER (L OCA L) OPERATING INSTRUCTIONS Read the instructions carefully before operating the appliance or carrying out maintenance work. Observe all the safety instructions; failure to do so may lead to accidents and/or damage. Store these instructions in a safe place for future reference.
- Page 2 Appliance is filled with flammable Before installing and using the appliance, read the owner gas R290. manual. Before installing the appliance, Any repairs you need, contact the nearest read the installation manual. authorized Service Centre and strictly follow manufacturer’s Service Manual. THE REFRIGERANT R290 •...
- Page 3 GENERAL OPERATING AND SAFETY INSTRUCTIONS • This appliance is a local air conditioner designed for domestic use. • Only use this air-conditioner as described in this manual. • Ensure that the required voltage and frequency (220-240V~/50 Hz) match the available power source. •...
- Page 4 • Before moving or cleaning the device, ensure that it is unplugged from the socket. • Do not move the air conditioner while it is operating; first turn the appliance off, check for any condensate build-up and empty it if necessary. •...
- Page 5 event of a malfunction, contact the service centre directly. WARNING! • Do not expose the air conditioner to direct sunlight, as the colour of the materials may change; moreover, the appliance may overheat causing the protection mechanism to intervene and switch the appliance off. •...
-
Page 6: Description Of The Appliance
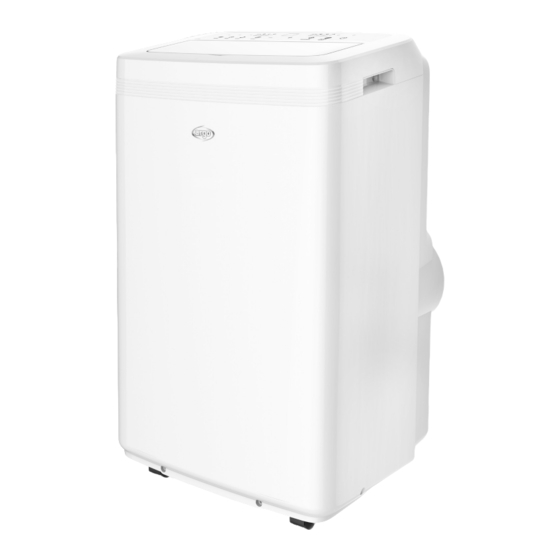
DESCRIPTION OF THE APPLIANCE 1. Air outlet 7. Handle 2. Front panel 8. Continuous drain outlet 3. Control panel 9. Air outlet hose 4. Air Filter 10. Plug socket 5. Upper air intake 11. Pump drain outlet 6. Power cord hook 12. -
Page 7: Appliance Start Up
APPLIANCE START UP Open the packaging and pull out the box. Remove the product and the other elements supplied (illustrated in the box below). Round fitting for window (1) Drainage pipe LCD remote control Window unit kit with plug. to be positioned between the end of the tube and the end fitting for the window End fitting for window,... - Page 8 USE WITH WINDOW UNIT KIT 1. To make the hole in the glass it is advisable to take the porthole kit accessory to the glazier. 2. Insert the window unit into the window. 3. Insert the round fitting into the retractable flexible pipe and insert the latter with its round fitting into the window unit without the plug.
-
Page 9: How To Use The Appliance
HOW TO USE THE APPLIANCE This appliance can be used for cooling, dehumidifying, ventilating and heating. When switching between modes, the fan continues to rotate but the compressor stops: the compressor will start after 3 minutes. This delay protects the compressor from potential damage. - Page 10 The dehumidification mode is recommended during autumn and winter. If used during summer, it is best to leave the flexible pipe attached so that the hot air is discharged towards the outside rather than into the room. During dehumidification, continuous drainage should be implemented (see the next chapter, “HOW TO ELIMINATE CONDENSATE”).
-
Page 11: Remote Control Operation
REMOTE CONTROL OPERATION 1. Insert the batteries into the remote control, while respecting the indicated polarities. 2. Only use type AAA 1.5V batteries. 3. Remove the batteries if the remote control is not used for a month or longer. 4. Do not attempt to recharge the batteries. Replace all batteries at the same time. - Page 12 FOR OPTIMUM OPERATION OF THE REMOTE CONTROL, ADDRESS THE TRANSMITTER HEAD TOWARDS THE RECEIVER LOCATED ON THE AIR CONDITIONER. To operate the remote control, press the ON/OFF button on the handset. The icon on the remote control display will flash once and you will hear a sound signal indicating that the signal has been sent to the air conditioner. In off mode, the set temperature and set timer will be displayed on the remote control.
- Page 13 1. ON/OFF BUTTON Press this button to switch the unit on or off. When switched on, the appliance will start functioning based on its last settings (save function). 2. FILTER RESET BUTTON Every 250 hours this led will light up to and It means the air filter should be cleaned. After clieaning press this button to reset the running time.
-
Page 14: Care And Maintenance
CARE AND MAINTENANCE WARNING! Prior to carrying out any cleaning or maintenance, unplug the unit from the power socket. 1. Air filter cleaning The air filter must be checked at least once every two weeks of operation. Operation with a dirty or clogged filter always causes a reduction in the efficiency of the air conditioner and can cause serious problems. - Page 15 TIPS FOR MAXIMISING COMFORT AND MINIMISING CONSUMPTION CHECK: • the unit’s extraction and delivery grilles are always unobstructed; • the air filters are always clean: a dirty filter will decrease the passage of air and thus reduce the unit performance; •...
- Page 16 SPECIALIST’S MANUAL Aptitude requirement for maintenance man (repairs. should be done only be specialists). • Any person who is involved with working on or breaking into a refrigerant circuit should hold a current valid certificate from an industry-accredited assessment authority, which authorises their competence to handle refrigerants safely in accordance with an industry recognised assessment specifìcation.
- Page 17 The following checks shall be applied to installations using flammable refrigerants: • The actual refrigerant charge is in accordance with the room size within which the refrigerant containing parts are installed; • The ventilation machinery and outlets are operating adequately and are not obstructed; •...
- Page 18 for use with most refrigerants but the use of detergents containing chiarine shall be avoided as the chiarine may react with the refrigerant and corrode the copper pipe-work. If a leak is suspected, all naked flames shall be removed/extinguished. If a leakage of refrigerant is found which requires brazing, all of the refrigerant shall be recovered from the system, or isolated (by means of shut off valves) in a part of the system remote from the leak.
- Page 19 • Labelling Equipment shall be labelled stating that it has been de-commissioned and emptied of refrigerant. The label shall be dated and signed. For appliances containing flammable refrigerants, ensure that there are labels on the equipment stating the equipment contains flammable refrigerant. •...
- Page 20 www.argoclima.com Argoclima assumes no responsibility for any errors or inaccuracies in the content of this manual and reserves the right to make to this, at any time and without notice, any changes deemed appropriate for any technical or commercial need. V 04/23...
Need help?
Do you have a question about the DAVEN PLUS and is the answer not in the manual?
Questions and answers