
Related Manuals for Hobart Welding Products HR200


Summary of Contents for Hobart Welding Products HR200
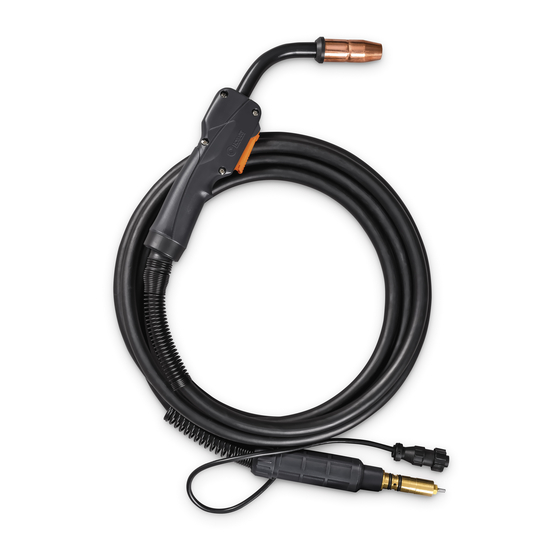
- Page 1 OM-286182C 2023-04 Processes Flux Cored (FCAW) Welding MIG (GMAW) Welding Description Semi-Automatic, Air-Cooled Flux Cored (FCAW) And MIG (GMAW) Welding Gun HR200 Gun OWNER’S MANUAL www.HobartWelders.com...
- Page 2 From Hobart to You Thank you and congratulations on choosing Hobart. Now you can get the job done and get it done right. We know you don’t have time to do it any other way. This Owner’s Manual is designed to help you get the most out of your Hobart products.
-
Page 3: Table Of Contents
TABLE OF CONTENTS SECTION 1 – SAFETY PRECAUTIONS – READ BEFORE USING..............1 Symbol Usage . -
Page 5: Section 1 - Safety Precautions - Read Before Using
SECTION 1 – SAFETY PRECAUTIONS – READ BEFORE USING Protect yourself and others from injury—read, follow, and save these important safety precautions and operating instructions. 1-1. Symbol Usage DANGER! – Indicates a hazardous situation which, if not avoided, will result in death or serious injury. The possible hazards are shown in the adjoining symbols or explained in the text. -
Page 6: California Proposition 65 Warnings
NOISE can damage hearing. READ INSTRUCTIONS. Noise from some processes or equipment can � Read and follow all labels and the Owner’s Manual damage hearing. carefully before installing, operating, or servicing unit. Read the safety information at the beginning � Check for noise level limits exceeding those speci- of the manual and in each section. -
Page 7: Section 2 - Consignes De Sécurité - Lire Avant Utilisation
SECTION 2 – CONSIGNES DE SÉCURITÉ - LIRE AVANT UTILISATION Pour écarter les risques de blessure pour vous-même et pour autrui — lire, appliquer et ranger en lieu sûr ces consignes relatives aux précautions de sécurité et au mode opératoire. 2-1. -
Page 8: Proposition Californienne 65 Avertissements
� Avoir recours à des écrans protecteurs ou à des rideaux pour pro- � Utiliser des bouche-oreilles ou des serre-tête antibruit approuvés téger les autres contre les rayonnements les éblouissements et si le niveau de bruit est élevé. les étincelles ; prévenir toute personne sur les lieux de ne pas re- �... -
Page 9: Section 3 - Installation
SECTION 3 – INSTALLATION 3-1. Specifications Wire Diameter Range Cooling Method Duty Cycle Rating Weight 60%: 200 A With Flux Cored Wire Flux Cored Wire: .023–.045 in. (0.6–1.1 mm) Air Cooled Welding Gun For With 15 ft (4.6 m) Power Cable: 60%: 200 A With CO Shielding GMAW And FCAW Welding... -
Page 10: Section 4 - Operation
SECTION 4 – OPERATION 4-1. Operating The Gun 1 Trigger Switch Press and hold switch to feed energized wire and start flow of shielding gas. Ref. 284972-A OM-286182 Page 6... -
Page 11: Section 5 - Maintenance And Troubleshooting
SECTION 5 – MAINTENANCE AND TROUBLESHOOTING 5-1. Removing Nozzle, Contact Tip, And Adapter, Changing Liner, And Cleaning Gun Casing tools/ 5/8 in. (16 mm) allen_wrench allen_set flathead philips head wrench crescent wrench Liner Stickout pliers needlenose knife steelbrush nutdriver chippinghammer Ref.284972-A allen_wrench allen_set... -
Page 12: Replacing Switch And/Or Neck Assembly
5-2. Replacing Switch And/Or Neck Assembly tools/ allen_wrench allen_set flathead philips head wrench crescent wrench If replacing the head tube continue with the 10 Trigger switch Turn off welding power source/wire following instructions. feeder. 11 Locking Cap � 5 Head Tube Wire size stamped on tip, check and 12 Handle Hardware 6 Jam Nut... -
Page 13: Routine Maintenance
5-3. Routine Maintenance Complete Parts List is available at www.MillerWelds.com Disconnect power before maintaining. A complete Parts List is available at www.MillerWelds.com � Maintain more often during severe conditions. SECTION 6 MAINTENANCE AND TROUBLESHOOTIN � = Check ◇ = Change �... -
Page 14: Section 6 - Parts List
SECTION 6 – PARTS LIST Figure 6-1. Complete Assembly For HR–200 MIG Gun OM-286182 Page 10... - Page 15 169729 Adapter, Nozzle w/Retaining Ring 170468 O-Ring 169730 Washer, Shock 771002 Kit, Neck Assy Replacement HR200 Includes ..Assembly, Neck ..Nut, Jam 771003 Kit,Handle Assy Replacement HR200 Includes ..Handle, Right ..Handle, Left ..Screw, Socket Head Cap ..
- Page 16 Notes...
- Page 17 Notes...
- Page 19 Effective January 1, 2023 5/3/1 WARRANTY applies to all Hobart welding equipment, plasma cutters and spot welders with a serial num- ber preface of ND or newer. This limited warranty supersedes all previous Hobart warranties and is exclusive with no other guarantees or warranties expressed or implied.
- Page 20 Owner’s Record Please complete and retain with your personal records. Model Name Serial/Style Number Purchase Date (Date which equipment was delivered to original customer.) Distributor Address City State Thank you for purchasing Hobart. Our trained technical support team is dedicated to your satisfaction.
Need help?
Do you have a question about the HR200 and is the answer not in the manual?
Questions and answers