
Related Manuals for Hobart Welding Products H100S4-10


Summary of Contents for Hobart Welding Products H100S4-10
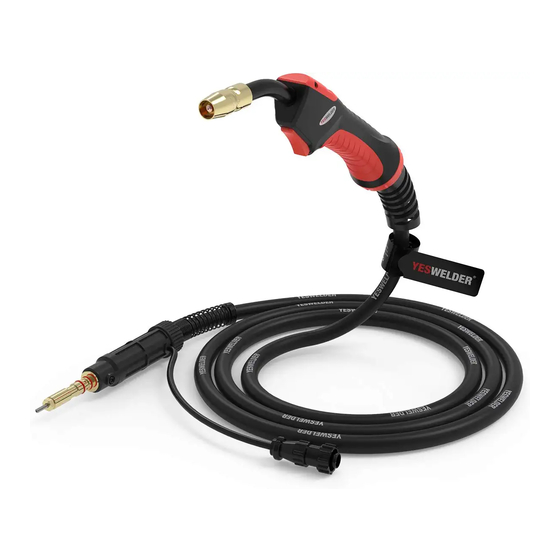
- Page 1 OM-245987C 2018−09 Processes MIG (GMAW) Welding Flux Cored (FCAW) Welding Description Semi-Automatic Air-Cooled MIG (GMAW) Welding Gun H100S4−10 Gun File: MIG (GMAW) www.HobartWelders.com...
-
Page 2: Table Of Contents
TABLE OF CONTENTS SECTION 1 −SAFETY PRECAUTIONS FOR GMAW WELDING GUNS − READ BEFORE USING ..1-1. Symbol Usage ..............1-2. -
Page 3: Section 1 −Safety Precautions For Gmaw Welding Guns − Read Before Using
SECTION 1 −SAFETY PRECAUTIONS FOR GMAW WELDING GUNS − READ BEFORE USING SR7 (MIG) 2018-01 Protect yourself and others from injury — read, follow, and save these important safety precautions and operating instructions. 1-1. Symbol Usage DANGER! − Indicates a hazardous situation which, if Indicates special instructions. -
Page 4: Proposition 65 Warnings
NOISE can damage hearing. READ INSTRUCTIONS. D Read and follow all labels and the Owner’s Noise from some processes or equipment can damage hearing. Manual carefully before installing, operating, or servicing unit. Read the safety information at D Check for noise level limits exceeding those the beginning of the manual and in each specified by OSHA. -
Page 5: Section 2 − Mesures De Sécurité Visant Les Pistolets De Soudage Gmaw − À Lire Avant Utilisation
SECTION 2 − MESURES DE SÉCURITÉ VISANT LES PISTOLETS DE SOUDAGE GMAW − À LIRE AVANT UTILISATION SR7(MIG)_2018−01_fre Pour écarter les risques de blessure pour vous−même et pour autrui — lire, appliquer et ranger en lieu sûr ces consignes relatives aux précautions de sécurité... -
Page 6: Proposition Californienne 65 Avertissements
D Avoir recours à des écrans protecteurs ou à des rideaux pour D Utiliser des bouche-oreilles ou des serre-tête antibruit approuvés si protéger les autres contre les rayonnements les éblouissements le niveau de bruit est élevé. et les étincelles ; prévenir toute personne sur les lieux de ne pas D Avertir les personnes à... -
Page 7: Section 3 − Installation
Air-Cooled Welding Gun For GMAW And FCAW Welding Note: Using gasless flux cored wire reduces gun duty cycle. H100S4-10 Feeds .023 To .045 in. (0.6 To 1.1 mm) Hard Or Flux Cored Wires Duty Cycle Rating: 100%: 100 A With CO... -
Page 8: Installing Gun
3-3. Installing Gun Gun Securing Knob Gun End Loosen knob. Insert gun end until it bottoms against drive assembly. Tighten knob. Gun Trigger Plug Insert into receptacle, and tighten threaded collar. Friction Terminals Some applications will require cutting off trigger plug and installing 0.250 female friction terminals onto end of leads. -
Page 9: Section 5 − Maintenance & Troubleshooting
SECTION 5 − MAINTENANCE & TROUBLESHOOTING 5-1. Removing Nozzle, Contact Tip, And Adapter, Changing Liner, And Cleaning Gun Casing Turn off welding power source/wire feeder. Nozzle Contact Tip Tip Adapter Head Tube Wire size stamped on tip − check and match wire size. Cut off wire and 8 mm disconnect gun... -
Page 10: Replacing Switch And/Or Head Tube
5-2. Replacing Switch And/Or Head Tube Turn Off welding power source /wire feeder and disconnect gun. Remove handle halves. Remove screws (5) and nuts (4). Remove switch housing. Install new Remove screw on switch and connect leads (polarity is opposite side. important). -
Page 11: Routine Maintenance
5-3. Routine Maintenance Disconnect power Maintain more often before maintaining. during severe conditions. n = Check Z = Change ~ = Clean l = Replace Reference * To be done by Factory Authorized Service Agent Each Spool Of Wire n~ Nozzle and contact tip ~ Blow out gun casing Every Months... -
Page 12: Section 6 − Parts List
SECTION 6 − PARTS LIST 243 842-A Figure 6-1. H100S4-10 Gun Item Dia. Part Mkgs. Description Quantity 245 926 Figure 6-1. H100S4-10 Gun ... . . 169715 NOZZLE, slip type .500 orf flush . - Page 13 Notes Ref. AWS/ANSI D1.1 WELD JOINT TYPES GROOVE FILLET WELD POSITION: FLAT BUTT T−JOINT HORIZONTAL BUTT T−JOINT VERTICAL BUTT T−JOINT OVERHEAD BUTT T−JOINT Ref. 804 248-A...
- Page 14 Notes...
- Page 15 You always get the fast, LIMITED WARRANTY − Subject to the terms and conditions 6 Months — Parts reliable response you below, Miller Electric Mfg. LLC, dba Hobart Welding Products, Batteries need. Most replacement Appleton, Wisconsin, warrants to its original retail purchaser that...
- Page 16 Thank you for purchasing Hobart. Our trained technical support team is dedicated to your satisfaction. For questions regarding performance, op- eration, or service, contact us! Resources Available Always provide Model Name and Serial/Style Number. To locate a Service Center: Call 1-800-332-3281 or visit our website at www.HobartWelders.com/wheretobuy For Technical Assistance: Call 1-800-332-3281...
Need help?
Do you have a question about the H100S4-10 and is the answer not in the manual?
Questions and answers