Table of Contents
Advertisement
Quick Links
Advertisement
Table of Contents

Related Manuals for Kuppersbusch IGVS6506


Summary of Contents for Kuppersbusch IGVS6506
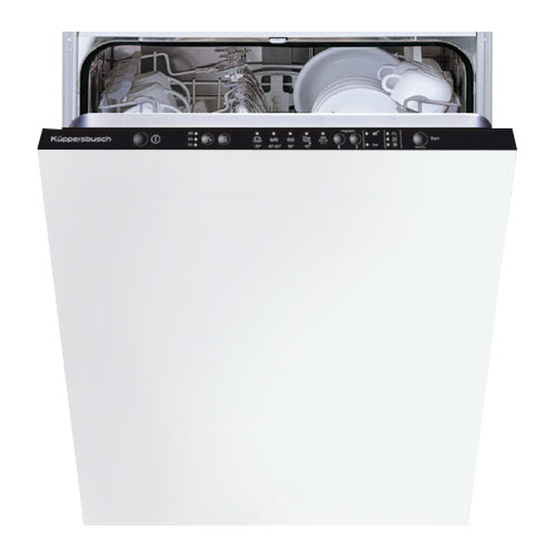
- Page 1 IGVS6506 IGV6506...
-
Page 3: Table Of Contents
Table of contents Intended use ....4 Utensils ....12 Not suitable. -
Page 4: Intended Use
Intended use Optical display while the Intended use programme is running ... 21 Timer programming ... . . 22 I n t e n d e d u s e End of programme . -
Page 5: Delivery
Safety instructions Delivery The electrical connection conditions must correspond 1. Check the packaging and with the specifications dishwasher immediately for on the dishwasher rating plate 92. damage caused in transit. Do not switch on a damaged If the power cord of this appliance, but contact your appliance is damaged, supplier. -
Page 6: In Daily Use
Safety instructions If you cannot obtain any In daily use information from Read and observe the safety the manufacturer, you must information and instructions not install the dishwasher for use on the packaging above or below these for cleaning and rinsing agents. appliances. - Page 7 Safety instructions Warning Warning Risk of injury! Risk of scalding! Open the door carefully when To prevent injuries, e.g. the programme is still running. caused by stumbling, open There is a risk of hot water the dishwasher only briefly spraying out of the appliance. in order to load and unload the dishwasher.
-
Page 8: Protection Of The Environment
Protection of the environment When opening and closing Protection of the the door on an eye-level environment appliance, ensure that children do not become i o n P r o t e c t o f t e n v i r o n m e n t jammed or crushed between Both the packaging of new appliances and the old appliances themselves... -
Page 9: Getting To Know Your Appliance
Getting to know your appliance Appliance interior Getting to know your appliance 1" Top basket G e t t i t o k n o w y o u r a p p l i a n c 1* Knife shelf * Diagrams of the control panel 12 Tablet collecting tray and the interior of the appliance can be... -
Page 10: Setting
Water softening system/Special salt 5. Hold down button > P and press Setting START button h until the dry display ` and salt refill The amount of salt dispensed can be indicator )* flash. set in 4 stages depending on the hardness of your 6. -
Page 11: Detergents With Salt Component
Rinse aid As soon as the salt refill indicator )* Rinse aid on the fascia is lit, top up the salt. R i n s e a i d As soon as the rinse-aid refill indicator )" is lit on the fascia, there is still a rinse-aid reserve of 1-2 rinsing processes. -
Page 12: Setting Amount Of Rinse Aid
Utensils 3. Close cover until it clicks shut. Switching off rinse-aid refill 4. To prevent excessive foam formation indicator during the next rinse cycle, remove any rinse aid which has run over with If the rinse-aid refill indicator )" is a cloth. -
Page 13: Glass And Utensil Damage
Utensils Glass and utensil damage Unloading the dishwasher Causes: To prevent water from dripping off the upper basket onto the utensils in the Glass type and glass production lower basket, it is recommended process. to empty the appliance from the bottom Chemical composition of the detergent. -
Page 14: Pans
Utensils Note Utensils must not be placed above the Heavily soiled utensils (pans) should tablet collecting tray 12. These may be placed in the bottom basket. The block the lid of the detergent dispenser more powerful spray jet provides and prevent it from opening fully. a better dishwashing result. -
Page 15: Etagere
Utensils E tagere * Small accessories holder * E t a g e r e S m a l l a c c e s s o r i e s h o l d e r The etagere and the space underneath * depending on model can be used for small cups and glasses Light-weight plastic accessories, e.g. -
Page 16: Adjusting The Height Of The Basket
Utensils A djusting the height of the Top basket with side levers A d j u s t i n g t h e h e i g h t o f t h e b a s k e t basket * 1. -
Page 17: Detergent
Detergent Adding detergent Detergent 1. If the detergent dispenser 9" is still D e t e r g e closed, press the lock 9* to open You can use tablets as well as powder the detergent dispenser. or liquid detergents for dishwashers, but never use washing up liquid. -
Page 18: Combination Detergent
Detergent Notes If the utensils are only lightly soiled, You will obtain optimum rinsing slightly less than the indicated amount and drying results by using solo of detergent is usually adequate. detergents and applying salt and rinse aid separately. Suitable detergents and care products If programmes are short, tablets can be purchased online may not have full cleaning effect... -
Page 19: Overview Of Programmes
Overview of programmes Overview of programmes p r o g r a m m e s O v e r v i e w o f The max. possible number of programmes is illustrated in this overview. The corresponding programmes and their arrangement can be found on the fascia. -
Page 20: Programme Selection
Additional options Ï Programme selection Intensive zone * I n t e n s i v e z o n e You can select a suitable programme Perfect for a mixed load. You can wash according to the type of utensils and very soiled pots and pans in the lower degree of soiling. -
Page 21: Operating The Appliance
Operating the appliance Switching on the appliance Operating the appliance 1. Turn on the tap fully. 2. Open the door. O p e r a t i i a n c e t h e a p p l 3. Switch on ON/OFF switch (. Programme data The Eco 50°... -
Page 22: Timer Programming
Operating the appliance T imer programming * To change the setting: T i m e r p r o g r a m m i n g 1. Press the button < H until the required setting has been * depending on model selected. -
Page 23: Changing The Programme
Cleaning and maintenance Changing the programme Cleaning and maintenance When the START button h has been pressed, the programme cannot be C l e a n i a n d m a i n t e n a n c e changed. -
Page 24: Special Salt And Rinse Aid
Cleaning and maintenance Warning – Health hazard 3. Remove any residue and clean filters under running water. Never use other domestic detergents, e.g. containing chlorine! 4. Re-install filter system in reverse sequence and ensure that the arrow marks are opposite each other after Special salt and rinse aid closing the filter system. -
Page 25: Fault, What To Do
Fault, what to do? In this case: Fault, what to do? 1. First always disconnect F a u l t , w h a t d o ? the appliance from the power supply. Experience has shown that you can 2. -
Page 26: Fault Table
Fault, what to do? Fault table Fault Cause Remedial action “Check water supply” Supply hose kinked. Install supply hose without kinks. display )2 lights up. Tap turned off. Turn the tap on. Tap jammed or calcified. Turn the tap on. Flow rate must be min. - Page 27 Fault, what to do? Fault Cause Remedial action Displays flash. Door not closed properly. Close the door. Ensure that no objects (utensil, fragrance dispenser) are protruding over the basket and preventing the door from closing. Refill indicator for salt )* No rinse aid.
- Page 28 Fault, what to do? Fault Cause Remedial action Cutlery not dry. Cutlery not arranged properly in Separate cutlery if possible, prevent contact the cutlery basket. points. Cutlery not arranged properly in Arrange cutlery properly and separate if the cutlery drawer. possible.
- Page 29 Fault, what to do? Fault Cause Remedial action Detergent residue. Detergent dispenser cover Detergent dispenser cover must not be blocked by utensils and therefore obstructed by utensils. does not open fully. Do not place utensils or fragrance dispenser in the tablet collecting tray. Detergent dispenser cover Tablet must be inserted flat and not upright.
- Page 30 Fault, what to do? Fault Cause Remedial action White, stubborn coatings; Detergent substances are Change detergent brand. limescale on the utensils, deposited. These coatings cannot Clean appliance mechanically. container or door. usually be removed with chemicals (appliance cleaner, ...). Hardness range incorrectly set or Set water softening system according to water hardness greater than 8.9 instructions for use or top up salt.
- Page 31 Fault, what to do? Fault Cause Remedial action Removable streaks on Too much rinse aid. Set rinse aid amount to lower setting. glasses, glasses with No rinse aid added or setting too Add rinse aid and check dosage metallic appearance and low.
- Page 32 Fault, what to do? Fault Cause Remedial action The door is difficult to Child lock is activated. Deactivate child lock. (See instructions for open. use at the back) Door cannot be closed. Door lock has been activated. Close door with increased force. Door cannot be closed due to Check appliance installation: Door installation.
-
Page 33: Customer Service
Customer service Customer service Installation and connection C u s t o m e r s e r v i c e If you are unable to rectify the fault, l a t i o n I n s t a l a n d c o n n e c t i please contact your customer service. -
Page 34: Delivery
Installation and connection Delivery Installation Your dishwasher has been checked The required installation dimensions can thoroughly in the factory to ensure that it be found in the installation instructions. is in working order. This may cause Level the appliance with the aid of the small water stains. -
Page 35: Drinking Water Connection
Installation and connection Drinking water connection Electrical connection 1. Fasten the drinking water connection Connect the appliance to an to the tap according alternating current only, ranging from to the installation instructions using 220 V to 240 V and 50 Hz or 60 Hz the enclosed parts. -
Page 36: Removing The Appliance
Installation and connection 5. Press START button h. Removing the appliance 6. Close the door. Also observe Programme sequence starts. the sequence of worksteps here. 7. Open door after approx. 4 minutes. 1. Disconnect the appliance from 8. Press START button h the power supply. - Page 38 *9000828721* 9000828721 (9407) 640EV...
- Page 39 3:30 - 1:25 0:29 * 0:15 1,60 - 0,85 0,80 0,05 19 - 9...
Need help?
Do you have a question about the IGVS6506 and is the answer not in the manual?
Questions and answers