Advertisement
Available languages
Available languages
Quick Links
VS1200 SERIES QUICK START GUIDE
FoodSaver
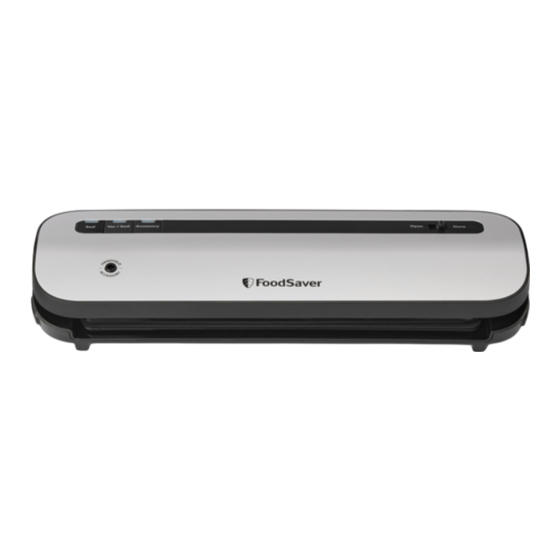
Space Saving Vacuum Sealer
®
MAKE A FOODSAVER
1. Using scissors, cut enough
bag material from roll to
hold item, plus 3 inches
(7.62 cm). Be sure to cut
straight.
2. Insert one end of bag
material across Sealing
Strip.
3. Firmly press down with
your palm on both sides of
the appliance lid to lock.
All lights will illuminate
when lid is fully locked
and ready to operate.
Tip: You should feel and
hear an audible click for
each side when pushing
down with the palms
of your hands on the
appliance lid, indicating
the unit is fully locked.
4. Press Seal Button.
5. When Seal Indicator
Light stops flashing and
becomes constant, sealing
is complete. Press Lid
Release Buttons to open
lid.
VACUUM SEAL FOODSAVER
ZIPPER BAGS:
(sold separately)
1. Prepare Zipper Bags
according to FoodSaver
Accessory Guidelines,
which are included with
accessory purchases. For
Zipper Bags, make sure not
to put any food under the
valve and press zipper closed with finger while bag is
lying down on a flat surface.
2. Firmly press down with your palm on both sides of
the appliance lid to lock. All lights will illuminate when
lid is fully locked and ready to operate.
Tip: You should feel and hear an audible click for each
side when pushing down with the palms of your hands
on the appliance lid, indicating the unit is fully locked.
3. Insert one end of Accessory Hose into Accessory Port on
Appliance. Place Handheld Sealer on Zipper Bag valve.
4. Press Accessory Button.
5. Accessory light will pulse. All lights will illuminate
when complete.
Zipper bags are safe for pantry and fridge use only.
p. 1
VS1200_23EFSQSG2 (digital) QSG.indd 1
VS1200_23EFSQSG2 (digital) QSG.indd 1
HOW TO:
BAG:
®
Place Bag on Sealing Strip
Close and lock lid
Press Seal Button
Press Lid Release Buttons
®
®
VACUUM SEAL A FOODSAVER
1. Place item(s) in bag, allowing
at least 3 inches (7.62 cm) of
space between bag contents
and top of bag.
2. Open Appliance Lid and
place open end of bag into
Vacuum Channel (Drip Tray).
3. Firmly press down with your
palm on both sides of the
appliance lid to lock. All
lights will illuminate when lid
is fully locked and ready to
operate.
Tip: You should feel and hear
an audible click for each side
when pushing down with the
palms of your hands on the
appliance lid, indicating the
unit is fully locked.
4. Press Vac/Seal Button to
begin vacuum and sealing
process. Motor will continue
to run until bag is fully
vacuumed, then will automatically seal.
5. When Vac/Seal Indicator Light stops flashing and
becomes constant, press Release Buttons on both sides
to open. Remove bag.
Refrigerate, freeze or store as needed.
VACUUM SEAL FOODSAVER
CONTAINERS:
(sold separately)
1. Prepare FoodSaver
Preserve
®
& Marinate Container
according to Guidelines,
which are included with
container purchase.
2. Firmly press down with your
palm on both sides of the
appliance lid to lock. All lights will illuminate when lid is
fully locked and ready to operate.
Tip: You should feel and hear an audible click for each
side when pushing down with the palms of your hands
on the appliance lid, indicating the unit is fully locked.
3. Insert one end of Accessory Hose into Accessory Port
on Appliance. Place Handheld Sealer on Container valve.
4. Press Accessory Button.
5. Accessory Light will pulse. All lights will illuminate when
complete.
To release vacuum and open, turn knob on lid to Open.
See Owner's Manual for full instructions and safeguards.
Français
Español
p. 2
p. 3
BAG:
®
Place Bag in Vacuum Channel
Close and lock lid
Press Vac/Seal Button
®
2023/2/8 09:34
2023/2/8 09:34
Advertisement

Subscribe to Our Youtube Channel
Summary of Contents for FoodSaver VS1260
- Page 1 Space Saving Vacuum Sealer ® p. 2 p. 3 HOW TO: MAKE A FOODSAVER BAG: VACUUM SEAL A FOODSAVER BAG: ® ® 1. Using scissors, cut enough 1. Place item(s) in bag, allowing bag material from roll to at least 3 inches (7.62 cm) of...
- Page 2 GUIDE DE DÉMARRAGE RAPIDE SERIES VS1200 English Español Scelleuse sous vide FoodSaver pour rangement compact p. 1 p. 3 COMMENT… FAIRE UN SAC FOODSAVER METTRE UN SAC FOODSAVER SOUS VIDE : 1. À l’aide de ciseaux, couper suffisamment de matériau 1.
- Page 3 GUÍA DE INICIO RÁPIDO DE LA SERIE VS1200 English Français Sellador al vacío FoodSaver Ahorro de espacio ® p. 1 p. 2 CÓMO HACER UNA BOLSA FOODSAVER SELLAR AL VACÍO UNA BOLSA ® FOODSAVER ® 1. sando unas tijeras, corte suficiente material de bolsa 1.


Need help?
Do you have a question about the VS1260 and is the answer not in the manual?
Questions and answers