Table of Contents
Advertisement
Quick Links
Advertisement
Table of Contents

Subscribe to Our Youtube Channel
Related Manuals for Ericsson 86010158


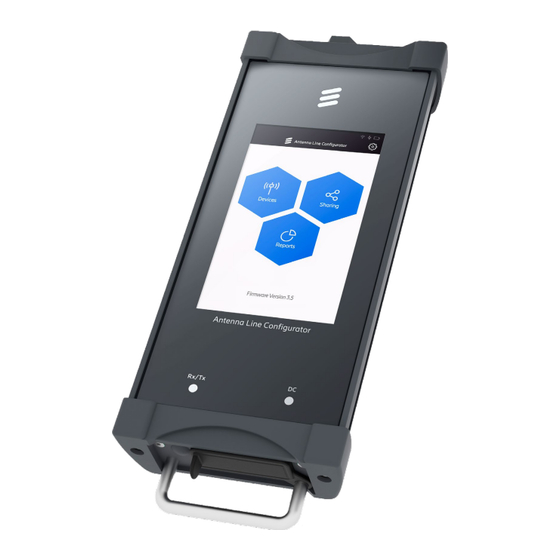
Summary of Contents for Ericsson 86010158
- Page 1 Antenna Line Configurator (ALC) Type no. 86010158 Manual Document version: 3.5...
-
Page 2: Table Of Contents
Ericsson | Antenna Line Configurator Table of contents 1 Safety Instructions � � � � � � � � � � � � � � � � � � � � � � � � � � � � � � � � � � � � � � � � � � � � � � � � � � � � � � � � � � � � � � � � � � � � � � � � � � � � � � � � � � � � � � � � � � � � � � � � � � � � � � � � � � 4 1�1 Explanation of terms �... - Page 3 Ericsson | Antenna Line Configurator Table of contents 9�4 Operate the Ericsson FlexRET � � � � � � � � � � � � � � � � � � � � � � � � � � � � � � � � � � � � � � � � � � � � � � � � � � � � � � � � � � � � � � � � � � � � � � � � � � � � � � � � � � � � � � � � � 44 9�4�1 Change the FlexRET Settings �...
-
Page 4: Safety Instructions
Ericsson | Antenna Line Configurator 1 Safety Instructions 1�1 Explanation of terms These instructions contain all the information necessary to install and operate the Antenna Line Note Configurator (ALC)� Keep these instructions for reference� If the unit is given to another owner, give them to the new owner�... -
Page 5: 1�2 General Instructions
Ericsson | Antenna Line Configurator 1�2 General instructions Possible risk of death or serious physical injury Warning Possible risk of slight or moderately severe physical injury Note Information related to the operation or the use of the instructions General risk of physical injury... -
Page 6: Introduction
• Not necesary to install software on a laptop or PC • First installation and service • Generate and save report files • First installation of Ericsson ALDs using the • Wi-Fi interface for control using a laptop, tablet PC, installation wizard or smartphone through a web browser •... -
Page 7: 2�2 Symbols For Operation
Ericsson | Antenna Line Configurator 2.2 Symbols for Operation Devices button; to detect and configure ALDs Devices button; to detect and configure ALDs Action was successful or checkbox selection Sharing button; site sharing adapter Sharing button; site sharing adapter Scan button; to start or restarts a scan... - Page 8 Ericsson | Antenna Line Configurator System information button Provenence icon automatic (AISG 3) System configuration button; to configure the ALC Provenence icon factory (AISG 3) User configuration button; to set e�g� installer id, Provenence icon manually (AISG 3) language Provenence icon not-set (AISG 3) Service button; to create HDLC-log Provenence icon production (AISG 3)
-
Page 9: Prerequisites
• Correct calibration requires that the RCU is installed at the provided antenna interface� • Make sure that the USB stick has ≥ 512 MB of storage space. Note ALCs with the new Ericsson display only work with firmware version 3.5 or higher. -
Page 10: Controls And Connections
Ericsson | Antenna Line Configurator 4 Controls and Connections ① Touch-screen ② LED is lit: Data is transmitted to the AISG bus ③ LED for the DC charging: • DC is lit in blue: ALC is in the standby mode • DC is lit in yellow: ALC is turned on/off and the battery is charged •... -
Page 11: Perform The Initial Setup
Ericsson | Antenna Line Configurator 5 Perform the Initial Setup 5�1 First Start-Up When the ALC is switched on for the first time, this is shown: ① and ② Adjust the Date and Time as required� ③ and ④ Enter Installer ID and Installation Company (optional)�... -
Page 12: Operate The Alc
Ericsson | Antenna Line Configurator 6 Operate the ALC 6�1 Power settings 1. Turn on the ALC 2. Turn off the ALC Push the on/off button� Change from symbol to step 1 Push and hold the on/off button for 3 seconds� Change The ALC turns on and the startup screen is shown: to step 1 The ALC turns off�... -
Page 13: 6�2 Charging The Battery
Ericsson | Antenna Line Configurator 6�2 Charging the battery Warning Risk of malfunction! Low battery charge (< 15%) can affect the functions of the device� The battery symbol (4 in Fig� 8) is lit red� • Charge the battery immediately� • To save the battery, turn off the ALC when it is not used for a longer time�... - Page 14 Ericsson | Antenna Line Configurator • If there is too much load connected to the ALC, the • If a short circuit occurs, the following warning message is following warning message is shown: shown: Fig� 6: Short Circuit Warning Message Fig� 5: AISG Bus Overload Warning Message...
-
Page 15: 6�3 Connect A Pc To The Alc
1� Go to the Wi-Fi settings of the PC you want to connect the ALC to� 7� Enter 192�168�0�1 or alc.ericsson for Windows operating systems� For other operating systems, enter only 2� If your PC is connected to a Wi-Fi, disconnect the PC 192�168�0�1�... -
Page 16: 6�4 Install Microsoft Rndis Driver For Windows 7, 8, And 10
Ericsson | Antenna Line Configurator 6�4 Install Microsoft RNDIS Driver for Windows 7, 8, and 10 A Remote Network Driver Interface Specification (RNDIS) is a Microsoft(R) proprietary protocol� Devices that use a USB connection to download and debug an OS image from Platform Builder use this driver to emulate a network connection�... - Page 17 Ericsson | Antenna Line Configurator 12� Select Network adapters, as the RNDIS emulator a 13� Click Next� The following window is shown: network connection: Fig� 10: Update Driver Select Network Adapter Fig� 11: Update Driver Select Microsoft RNDIS 14� Select Microsoft Corporation from the Manufacturer list�...
-
Page 18: Graphical User Interface
Ericsson | Antenna Line Configurator 7 Graphical User Interface 7.1 Introduction The Graphical User Interface (GUI) of the ALC has the following properties: • The GUI is operated through the ALC touch-screen� • All GUI content can be accessed from the main menu� Section 7�3 provides an overview of the GUI menu structure and contains cross-references to the corresponding sections in these instructions�... -
Page 19: 7�1�1 Navigate Within A Submenu
Ericsson | Antenna Line Configurator 7�1�1 Navigate within a Submenu ① Title of the page ② Shows if Wi-Fi is connected or not (on/off) ③ Shows if the DC charger is connected or not ④ Charge status of the ALC rechargeable battery ⑤ Push buttons to open submenus ⑥... -
Page 20: 7�2 Main Menu
Ericsson | Antenna Line Configurator 7�2 Main Menu When the device is switched on, the main menu is shown� All functions of the ALC can be accessed from here� ① Opens the menu for the general ALC settings, see section 7�3 ② Configures individual ALDs, see section 9 Operating the ALC in the Devices Mode ③... -
Page 21: Ald Setup
Ericsson | Antenna Line Configurator 8 ALD Setup 8�1 Introduction ① Shows the voltage, current, and power of the feeder cable and the AISG bus, see section 8�2 ② Measures the mechanical adjustment of an antenna, see section 8�3 ③ Changes the network configuration, see section 8�4 ④... -
Page 22: 8�2 Aisg Bus (Current, Voltage)
Ericsson | Antenna Line Configurator 8�2 AISG Bus (Current, Voltage) The submenu AISG Bus shows how much current, voltage, and power the device connected to the ALD consumes� ① Enables/disables the AISG Bus Power ② Shows the current of the connected ALD ③ Shows the voltage of the connected ALD ④... -
Page 23: 8�3 Mechanical Level
Ericsson | Antenna Line Configurator 8�3 Mechanical Level In the Mechanical submenu you can measure the mechanical adjustment of an antenna� ① Shows the measured value of the mechanical adjustment in degrees ② Calibrates the internal inclination sensor of the ALC ③ Closes the submenu and returns to the previous menu Fig�... -
Page 24: 8�4 Network Configuration
Ericsson | Antenna Line Configurator 8�4 Network Configuration In the Network Configuration submenu you can change the settings of the network configuration� ① Turns the Wi-Fi on and off, see section 8�4�1 ② Changes the IP address, see section 8�4�3 ③ Shows the subnet mask ④... -
Page 25: 8�4�3 Change The Ip Address
Ericsson | Antenna Line Configurator 8�4�3 Change the IP Address ① Tap the IP address value field The numerical keyboard to enter numbers ( ② ) is shown: ② Type the new IP address or enter it with the numerical keyboard� ③ Tap Accept ④... -
Page 26: 8�4�5 Change The Ssid
Ericsson | Antenna Line Configurator 8�4�5 Change the SSID 1� Tap the SSID value field ( ⑤ in Fig� 20)� The keyboard to enter a new SSID ( ② in Fig� 22) is shown� 2� Do steps in section 8�4�4� 8�4�6 Select a Wi-Fi Channel ①... -
Page 27: 8�5 System Information
Ericsson | Antenna Line Configurator 8�5 System Information The System Information submenu shows all ALC key system information� Fig� 24: System information 8�6 Change System Configuration In the Charging System Configuration submenu you can change key system settings� ① Changes date and time, see section 8�6�1 ②... -
Page 28: 8�6�1 Change Date And Time
Ericsson | Antenna Line Configurator 8�6�1 Change Date and Time 1� Tap the Date/Time submenu ( ① in Fig� 25)� 2� Tap the Date value field� The following submenu opens: The calendare opens: Fig� 26: System configuration: Changing the date and time Fig� 27: Changing the date 3�... -
Page 29: 8�6�2 Update The Alc Firmware
Ericsson | Antenna Line Configurator 8�6�2 Update the ALC Firmware Note Before you update the ALC firmware, make sure to load the firmware update onto the USB stick� It is recommended that the firmware file is stored in the /alc-update directory of the USB stick for easier handling�... -
Page 30: 8�6�3 Reset The Alc To Factory Settings
Ericsson | Antenna Line Configurator 8�6�3 Reset the ALC to Factory Settings It is necessary to reset the ALC to factory settings if: • You forgot Wi-Fi settings, for example password� • The ALC must be reset to factory settings� Note Before you set the ALC to the factory settings, be aware that the following settings will be reset to the factory default settings: •... -
Page 31: 8�6�4 Manage Ald Files
Ericsson | Antenna Line Configurator 8�6�4 Manage ALD Files Note Before you import or export ALD files onto/from a USB stick, make sure to connect a USB stick with the corresponding files to the ALC or use the PC with the browser� Tap the File Management ALD submenu ( ④ in Fig� 25)�... -
Page 32: 8�6�4�1 Import/Export/Delete Ald Files
Ericsson | Antenna Line Configurator 8�6�4�1 Import/Export/Delete ALD Files To import/export new files, make sure that a USB stick is inserted into the ALC or you use the PC with the Browser� 1� After all the selections in 8�6�4 are done, tap ⑤ in Fig�... -
Page 33: 8�6�4�2 Import An Ald File
Ericsson | Antenna Line Configurator 8�6�4�2 Import an ALD File Prerequisite: • ALD files are selected on the ALC, see section Import/Export/Deleting ALD Files�� 1� Tap Import ( ① in Fig� 35) to import an ALD Config File 2� Select a folder in which an ALD file is stored�... -
Page 34: 8�6�4�4 Importing/Exporting Files From Or Onto A
Ericsson | Antenna Line Configurator 8�6�4�4 Importing/Exporting Files from or onto a PC Note If the ALC is connected to a PC through Wi-Fi, you can import/export files from/onto the PC directly� 8�7 Change User Configuration In the Changing User Configuration submenu you can change the user settings�... -
Page 35: 8�8 Perform Service
Ericsson | Antenna Line Configurator 8�8 Perform Service The submenu Service is password-protected for security reasons� To get the password, contact Note Ericsson� In the Performing Service submenu you can access the HDLC logging� Logging can only be done with an AISG-Y cable�... - Page 36 Ericsson | Antenna Line Configurator 4� The following page is shown: The following page is shown: 5� Tap Save ① to confirm the entered password Fig� 41: Service: Confirm password Fig� 42: Service: HDLC logging ① Turns HDLC logging on and off� ② Enters a filename with the alphanumerical keyboard� You can enter a filename only if the logging has been turned on�...
- Page 37 Ericsson | Antenna Line Configurator 9� Tap ④ in Fig� 42 to show the log files� 10� Select the log files� The following page is shown: The following page is shown: Fig� 43: Service: HDLC logging – selecting log files Fig� 44: Service: HDLC logging – export or delete log files ①...
-
Page 38: 8�9 Export The Manual
Ericsson | Antenna Line Configurator 8�9 Export the Manual Prerequisite: • A USB stick is plugged into the USB port on the ALC� 1� Tap export Manual ( ⑧ in Section 8�1) The folders on the connected USB stick are shown: 2� Tap Export ( ① in Fig� 39)�... -
Page 39: Operate The Alc In The Devices Mode (Aisg 2)
Ericsson | Antenna Line Configurator 9 Operate the ALC in the Devices Mode (AISG 2) 9�1 Search for an ALD Prerequisite: • An ALD is connected to the ALC through the AISG port connector (HF or RS 485)� 2� Tap Scan ( ① in Fig� 46) to start scanning for ALDs�... - Page 40 Ericsson | Antenna Line Configurator If one or more ALDs are found in the scanning process, If the connection is not possible, the following warning the page is shown as follows: message is shown: Fig� 48: Devices: ALD found Fig� 49: Devices: Warning message “Scan could not be started“...
-
Page 41: 9�1�1 Select The Aisg Protocol Scanning Options
Ericsson | Antenna Line Configurator 9�1�1 Select the AISG Protocol Scanning Options 1� Tap ② in Fig� 48 to open the AISG protocol scanning options� The following page is shown: ① Selects or deselects all scanning options ② Selects or deselects individual scanning options ③... -
Page 42: 9�2 Connect To An Ald
Ericsson | Antenna Line Configurator 9�2 Connect to an ALD 1� After pressing Connect in figure 48, section 9�1 2� After the ALC has established a connection to the ALD, the Connect button is gray and you can view the ALD The following page is shown: properties and change some settings�... -
Page 43: 9�3 Select The Report Type
Ericsson | Antenna Line Configurator 9�3 Select the Report Type ALD reports are where the device data for the ALDs connected to the AISG bus is saved as report files in the ALC internal memory� 1� Tap ④ in Fig� 53� The following page is shown: ①... -
Page 44: 9�4 Operate The Ericsson Flexret
Ericsson | Antenna Line Configurator 9�4 Operate the Ericsson FlexRET Antennas with Ericsson FlexRET are factory-installed Prerequisites: with a Radio Frequency Identification (RFID) tag� The • The ALC has found the ALD� tag contains key configuration data for the antenna� The • The ALD is connected to the ALC, see section 9�1 and 9�2... -
Page 45: 9�4�1 Change The Flexret Settings
Ericsson | Antenna Line Configurator 9�4�1 Change the FlexRET Settings 1� Tap ③ in Fig� 55 section 9�4 to show the FlexRET 2� Tap ① in the previous figure� The following page is properties� The following page is shown: shown: Fig� 56: Devices: FlexRET properties Fig�... -
Page 46: 9�4�1�1 Change The Flexret Protocol Mode
Ericsson | Antenna Line Configurator 9�4�1�1 Change the FlexRET Protocol Mode 1� Tap ⑤ in Fig� 57 to change the FlexRET protocol mode� Depending on the FlexRET you may have more or less possible protocol modes� The following page is shown: ① Selects or deselects the protocol mode between •... -
Page 47: 9�4�2 Configure The Flexret Subunits
• Frequency Band ③ Selects the antenna model number to which the ALD is • Antenna Model Number configured for from the list; the list is valid only for Ericsson • Antenna Serial Number RETs� • Protocol Version To open the list, delete almost all the characters in the ②... -
Page 48: 9�4�2�1 Add The Subunit Properties
Ericsson | Antenna Line Configurator 9�4�2�1 Add the Subunit Properties 1� Tap ① in the previous figure to open the list with the individual subunits� The following page is shown: ① Enters the sector ID ② Enters the base station ID ③ Enters the installer ID ④... -
Page 49: 9�5 Operate The Ret
Ericsson | Antenna Line Configurator 9�5 Operate the RET Prerequisites: • The ALC has found the ALD� • The ALD is connected to the ALC, see section 9�1, and 9�2 The following is shown: 1� Tap ① in Fig� 63 to open the list with the subunits�... -
Page 50: 9�5�1 Change The Ret Settings
Ericsson | Antenna Line Configurator 9�5�1 Change the RET Settings 1� Tap ② in Fig� 63 to show the RET properties� 2� Tap ① in Fig� 65� The following page appears: The following page appears: Fig� 65: Devices: RET properties Fig� 66: Devices: Changing RET properties ①... -
Page 51: 9�5�2 Change The Ret Subunits Settings
• Antenna Model Number ④ Selects the antenna model number to which the ALD is • Antenna Serial Number configured for from the list; the list is valid only for Ericsson • Protocol Version RETs� ② Opens the settings of the selected subunit To open the list, delete almost all the characters in the current antenna model number�... -
Page 52: 9�5�2�1 Update The Antenna Config File
Ericsson | Antenna Line Configurator 9�5�2�1 Update the Antenna Config 1� Tap 2in Fig� 68 to update the antenna Config file� The following page is shown: ① Selects the file ② Exports the file from the ALC onto the subunit is active (the panel and the icon change from gray to red) only if a file has been selected in ①... -
Page 53: 9�6 Operate The Tma
Ericsson | Antenna Line Configurator 9�6 Operate the TMA • The ALC has found the ALD and the ALD has been 1� Tap ① in Fig� 71 to open the list with the subunits� connected to the ALC, see 9�1 and 9�2 The following page appears: •... -
Page 54: 9�6�1 Change The Tma Settings
Ericsson | Antenna Line Configurator 9�6�1 Change the TMA Settings 1� Tap ③ in Fig� 72 to show the TMA properties� 2� Tap ① in Fig� 73� The following page is shown: The following page is shown: Fig� 73: Devices: TMA properties Fig� 74: Devices: Changing TMA properties ①... -
Page 55: 9�6�2 Show Properties Of The Tma Subunits
Ericsson | Antenna Line Configurator 9�6�2 Show Properties of the TMA Subunits 1� Tap ② in Fig� 72 to open the subunit properties� The following page is shown: ① shows the subunit properties The values of the following fields are shownand cannot be changed: •... -
Page 56: 9�7 Operate The Rae
Ericsson | Antenna Line Configurator 9�7 Operate the RAE The ALC has found the ALD and the ALD has been connected to the ALC, see 9�1 and 9�2 1� Tap ① in Fig� 77� The following page is shown: The following is displayed: Fig�... -
Page 57: 9�7�1 Overview Rae Details
Ericsson | Antenna Line Configurator 9�7�1 Overview RAE Details Tap ③ in Fig� 78� The following page is shown: Fig� 80: Devices: RAE actions Fig� 79: Devices: RAE details ① Enters the actions of the RAE main device ① Update the firmware file, see section 9�4�1�2 ②... -
Page 58: 9�7�2 Overview Rae Subunit Settings
Ericsson | Antenna Line Configurator 9�7�2 Overview RAE Subunit Settings 1� Tap ② in Fig� 78 to open the subunit properties� The 1� Tap ② in Fig� 81 to open the subunit properties� The following page is shown: following page is shown: Fig� 81: Devices: Properties of the RAE subunit Fig�... -
Page 59: 9�7�2�1 Operating With Weighting Factor Files
Ericsson | Antenna Line Configurator 9�7�2�1 Operating with Weighting Factor Files Tap ③ in Fig� 82� The following page is shown: Tap ② in Fig� 82� The following page is shown: Fig� 83: Devices: Send Weighting Factor file Fig� 84: Devices: Get the Weighting Factor File ①... -
Page 60: 9�7�2�2 Edit Rae Subunit Details
Ericsson | Antenna Line Configurator 9�7�2�2 Edit RAE Subunit Details Tap ① in Fig� 82� The following page is shown: ① Enters the sector ID ② Enters the base station ID ③ Enters the installer ID ④ Enters the installation date ⑤ Enters the value for the mechanical tilt ⑥... -
Page 61: 9�8 Operate The Asd
Ericsson | Antenna Line Configurator 9�8 Operate the ASD The ALC has found the ALD and the ALD has been connected to the ALC, see 9�1 and 9�2 • The following is displayed: 1� Tap ① in Fig� 86 to open the list with the subunits�... -
Page 62: 9�8�1 Asd Main Device
① Opens the firmware update directory see 9�4�1�2 ② Shows the ASD Main Device values ② Opens the vendor specific file update directory see 9�4�1�2, only available with Ericsson devices� ③ Reconnects the ASD ④ Clears the Alarms ⑤ Opens the Autoset Target page see section 9�8�2... -
Page 63: 9�8�2 Asd Autoset Target / Delete Thresholds
Ericsson | Antenna Line Configurator 9�8�2 ASD Autoset Target / Delete Thresholds Fig� 91: Devices: ASD Delete Thresholds Fig� 90: Devices: ASD Autoset Target ① Select the Target values that should be set ① Select the Thresholds to be deleted automatically ② Save changes ②... -
Page 64: 9�9 Operate The Gls
Ericsson | Antenna Line Configurator 9�9 Operate the GLS The ALC has found the ALD and the ALD has been connected to the ALC, see 9�1 and 9�2 • The following is displayed: 1� Tap ① in Fig�94 to open the list with the subunits�... -
Page 65: 9�9�1 Gls Main Device
Ericsson | Antenna Line Configurator 9�9�1 GLS Main Device Fig� 96: Devices: GLS connected Fig� 97: Devices: GLS connected with subunit ① Opens the actions of the GLS Main Device ① Opens the firmware update directory see 9�4�1�2 ② Shows the GLS Main Device values ②... -
Page 66: Operate The Alc In The Site Sharing Mode
Ericsson | Antenna Line Configurator 10 Operate the ALC in the Site Sharing Mode In the Operating the ALC in the Site Sharing Mode menu, you can access and operate the site sharing adapter connected to the ALC� 10�1 Search for a Site Sharing Adapter Prerequisite: •... - Page 67 Fig� 102: Sharing: Site sharing adapter information Fig� 103: Sharing: Site sharing adapter information – error ① Selects a report type, see section 10�2 4� Contact Ericsson to receive a new ALD Configuration Data (XCD) file� ② Shows the site sharing adapter information ③...
-
Page 68: 10�2 Create A Site Sharing Report
Ericsson | Antenna Line Configurator 10�2 Create a Site Sharing Report 1� Tap ① in Fig� 102� The following page is shown: ① Enters remarks ② Enters a filename; the date and the installer ID is added to the filename automatically if the installer ID has been added in User Configuration/Installer ID;... -
Page 69: 10�3 Configure The Site Sharing Adapter Settings
Ericsson | Antenna Line Configurator 10�3 Configure the Site Sharing Adapter Settings 1� Tap ④ in Fig� 102 to open the site sharing adapter settings� The following page is shown: ① Opens the Password Options, see section 10�3�1 ② Changes the controller mode between one controller and all controllers ③... -
Page 70: 10�3�1 Operate The Password Options
Ericsson | Antenna Line Configurator 10�3�1 Operate the Password Options 1� Tap ① in Fig� 105 to open the Password Options� The following page is shown: ① Sets a password, see section 10�3�1�1 ② Deletes the password, see section 10�3�1�2 ③ Changes the password, see section 10�3�1�3... -
Page 71: 10�3�1�1 Set A Password
Ericsson | Antenna Line Configurator 10�3�1�1 Set a Password 1� Tap ① in Fig� 106 The following page is shown: Fig� 107: Sharing: Password options – setting a new password Fig� 108: Sharing: Password options – saving a new password ① Enter a new password ①... - Page 72 Ericsson | Antenna Line Configurator To make changes, you must now enter the password: 8� Tap Save to save the entered password� The lock on the page with the site sharing adapter settings is locked to show that a password has been set: Fig�...
-
Page 73: 10�3�1�2 Delete A Password
Ericsson | Antenna Line Configurator 10�3�1�2 Delete a Password 1� Tap ② in Fig� 106 The following page is shown: 1� Tap the Password field� 2� Enter the current password with the alphanumeric keyboard� 3� Confirm the password: tap the tick ( ② in Fig� 111)�... -
Page 74: Export Ald And Site Sharing Reports
Ericsson | Antenna Line Configurator 11 Export ALD and Site Sharing Reports In the Export ALD and Site Sharing Reports menu, you can access and export the ALD and site sharing reports� The filing structure for the report files is as follows: Folder... -
Page 75: 11�1 Open The Reports Submenu
Ericsson | Antenna Line Configurator 11�1 Open the Reports Submenu Prerequisite: • The options for the reports are selected in the Select Report Type submenus for the corresponding ALDs� 1� Tap Reports in the main menu, see ④ in Fig� 11� The following page is shown: ①... -
Page 76: 11�1�1 Manage Ald Reports
Ericsson | Antenna Line Configurator 11�1�1 Manage ALD Reports Note The filenames of the report files show the installer ID if it has been set before in Setup > User Configuration > Installer ID� In the example below, the installer ID has been set to ALD�... -
Page 77: 11�1�2 Manage The Site Sharing Reports
Ericsson | Antenna Line Configurator 11�1�2 Manage the Site Sharing Reports 1� Tap Site Sharing Reports ( ② in Fig� 85) to open ALD 2� Select the required files� The Export and Delete button are activated: reports� A list with the reports is shown: Fig�... -
Page 78: Alarms / Warnings / Errors
Ericsson | Antenna Line Configurator 12 Alarms / Warnings / Errors Caused by Reason Type Example / Solution eedback from ALD via ErrorCodes AISG-/VSC-/Other Error (due to AISGSpec, After e�g� Calibrate Black screen with other Error if there is something wrong info “AISG Error – MOTOR_JAM”... -
Page 79: Disposal
Ericsson | Antenna Line Configurator 13 Disposal Dispose of this product in accordance with all national legislation and regulations� Electronic equipment is not domestic waste – in accordance with directive 2002/96/EC OF THE EUROPEAN PARLIAMENT AND THE COUNCIL dated 27 January 2003 on waste electrical and electronic equipment – and it must be disposed of properly�... -
Page 80: End User Licence Agreement (Eula)
14 End User Licence Agreement (EULA) Ericsson AB agrees to grant to Customer, and Customer accepts, a license to the identified Licensed Software to the terms and conditions of this End User License Agreement (“EULA”)� This EULA supplements and defines the “General Terms and Conditions for Ericsson Products and Services”, chapter 8 SOFTWARE LICENSES from Ericsson (hereinafter referred to as... - Page 81 EULA� provided by Ericsson� The warranty period shall be one (1) year starting at the date of delivery of Licensed Software (“warranty period”)� Ericsson shall at its option 1�6 Customer may sell or otherwise transfer Licensed...
- Page 82 Customer� Any further liability claim, and Ericsson shall refund to Customer the license on Ericsson’s part for loss and damage of data shall be subject to the limitations of this section 5� fee paid by Customer therefore� The license fee shall...
- Page 83 Licensed Software from its hardware and deliver any and referring specifically to this EULA� The same applies to all copies and changes of Licensed Software to Ericsson any provision by which the written form obligation is and, if requested, provide Ericsson with its written contracted out�...
-
Page 84: 14�1 Fcc Statements
We, the Ericsson Antenna Technology Germany GmbH, declare that the product „Antenna Line Configurator Redesign 86010158“ is in compliance with Directive 2014/53/EU� • The full text of the EU declaration of conformity is available, please write an email to: mobilcom�eag@ericsson�com Declaration of operation in the EU •... -
Page 85: 14�2 Ic Statements
Ericsson | Antenna Line Configurator 14�2 IC Statements Canada CNR-Gen Section 7�1�3 This device complies with Industry Canada licence-exempt RSS standard(s)� Operation is subject to the following two conditions: (1) This device may not interference, and (2) this device must accept any interference, including interference... -
Page 86: Addresses
Ericsson | Antenna Line Configurator 15 Addresses For questions about marketing, contact: RET hotline for technical information: E-mail: mobilcom�eag@ericsson�com E-mail: customer�service�eag@ericsson�com... - Page 87 Ericsson’s investments in innovation have delivered the benefits of telephony and mobile broadband to billions of people around the world� The Ericsson stock is listed on Nasdaq Stockholm and on Nasdaq New York� ericsson�com © Ericsson AB 2021...
Need help?
Do you have a question about the 86010158 and is the answer not in the manual?
Questions and answers