Advertisement
Quick Links
Installing the AP2605
For additional information, see the HiPath Wireless
Controller, Access Points and Convergence Software User
Guide and Getting Started Guide located at http://
www.enterasys.com/support/manuals/h‐l.html#H.
Unpacking the AP2605
Unpack the AP2605 from its carton. The package
includes:
•
The AP2605 Access Point
•
One wall‐mounting bracket
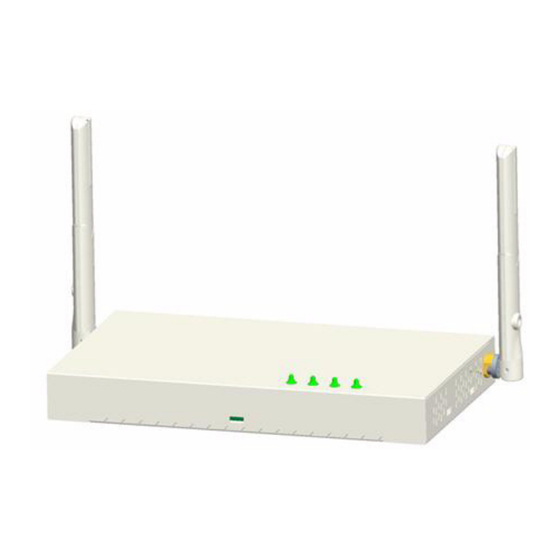
Figure 1
AP2605 Front View
Selecting a Site
The best location for access points is at the center of
your wireless coverage area, within line of sight of all
wireless devices. For optimum performance,
consider these points:
•
Mount the access point as high as possible above
any obstructions in the coverage area.
•
Avoid mounting next to or near building support
columns or other obstructions that may cause
reduced signal or null zones in parts of the
coverage area.
•
Mount away from any signal absorbing or
reflecting structures (such as those containing
metal)
PN 9034487-01
AP2605 Wireless Access Point
Mounting the Access Point
The access point can be mounted on any horizontal
surface or a wall. The access point should be
mounted only to a wall or wood surface that is at
least 1/2‐inch plywood or its equivalent. To mount
the access point on a wall, or ceiling, always use its
wall‐mounting bracket.
1. Using the mounting bracket, mark the position of
the four screw holes on the wall or ceiling. For
concrete or brick walls or ceilings, you will need
to drill holes and insert wall plugs for the screws.
2. Position the mounting bracket over the wall or
ceiling screw holes, then insert the four screws
and tighten them down to secure the bracket
firmly to the wall.
3. Attach the access point to the mounting bracket,
as shown in Figure
Figure 2
Attaching AP to Mounting Bracket
1 Mounting points
2 Bracket fastening screw
2..
3 Tab on bracket
4 Mounting slots
Page 1 of 4
Advertisement

Summary of Contents for Enterasys AP2605
- Page 1 AP2605 Wireless Access Point Installing the AP2605 Mounting the Access Point The access point can be mounted on any horizontal For additional information, see the HiPath Wireless surface or a wall. The access point should be Controller, Access Points and Convergence Software User mounted only to a wall or wood surface that is at Guide and Getting Started Guide located at http:// least 1/2‐inch plywood or its equivalent. To mount www.enterasys.com/support/manuals/h‐l.html#H. the access point on a wall, or ceiling, always use its Unpacking the AP2605 wall‐mounting bracket. 1. Using the mounting bracket, mark the position of Unpack the AP2605 from its carton. The package the four screw holes on the wall or ceiling. For includes: concrete or brick walls or ceilings, you will need • The AP2605 Access Point to drill holes and insert wall plugs for the screws. 2. Position the mounting bracket over the wall or • One wall‐mounting bracket ceiling screw holes, then insert the four screws Figure 1 AP2605 Front View and tighten them down to secure the bracket ...
- Page 2 Powering Up the Access Point Also, the diversity antennas should both be positioned along the same axes, providing the same Note: Powering up the AP2605 initiates its coverage area. For example, if the access point is automatic discovery and registration process with mounted on a horizontal surface, both antennas the HiPath Wireless Controller. The parameters for should be positioned pointing vertically up to this process are configured through the HiPath provide optimum coverage.
- Page 3 Phone 1-800-872-8440 (toll-free in U.S. and Canada) two conditions: (1) This device may not cause or 1-978-684-1000 harmful interference, and (2) This device must accept For the Enterasys Networks Support toll- any interference received, including interference that free number in your country: may cause undesired operation. www.enterasys.com/services/support/ contact/ Industry Canada – Class B Internet mail support@enterasys.com To expedite your message, type This digital apparatus does not exceed the class B ...
- Page 4 SJ/T 11363-2006 standard. Manufacturer’s Name: This table shows where these substances may be found in the supply chain of Enterasys’ electronic Enterasys Networks, Inc. information products, as of the date of sale of the enclosed product. Note that some of the component types listed above may or may not be a part of the enclosed product.


Need help?
Do you have a question about the AP2605 and is the answer not in the manual?
Questions and answers