Table of Contents
Advertisement
Quick Links
Advertisement
Table of Contents

Related Manuals for Ryobi OLP1832B


Summary of Contents for Ryobi OLP1832B
- Page 1 FRONT PAGE OLP1832B...
-
Page 2: Intended Use
■ If operating a power tool in a damp location is IMPORTANT! unavoidable, use a residual current device (RCD) It is essential that you read the instructions in this manual protected supply. Use of an RCD reduces the risk of before assembling, operating, and maintaining the electric shock. - Page 3 ■ Maintain power tools and accessories. Check for CORDLESS LOPPER SAFETY WARNINGS misalignment or binding of moving parts, breakage of parts and any other condition that may affect the DANGER! Keep hands away from the blade. Contact power tool’s operation. If damaged, have the power with the blade will result in serious personal injury.
-
Page 4: Transportation And Storage
bleach-containing products, etc., can cause a short ■ Check all nuts, bolts, and screws at frequent intervals circuit. for proper tightness to ensure that the product is in safe working condition. ■ Charge the battery pack in a location where the ambient ■... -
Page 5: Symbols In This Manual
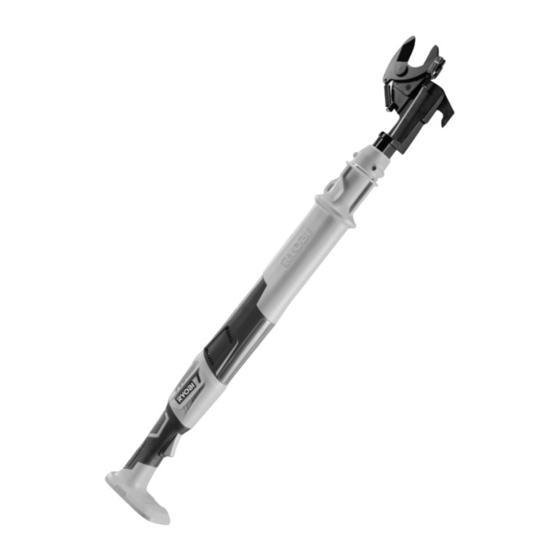
Remove the battery pack before starting any work on the product. Beware of thrown or flying objects. Keep all bystanders, especially children and pets, at least 15 m away from the operating area. Keep hands away from blades SYMBOLS IN THIS MANUAL Parts or accessories sold separately Note Warning... - Page 6 OLP1832B Lock-out trigger Screw Cutting blade Gauge Handle housing Operator’s manual On/off trigger Blade cover Hook Screwdriver Battery pack Charger Know your product...
- Page 7 Wear eye and head protection while Remove the blade cover. Install the hook. Insert the screws and operating the product. When handling turn them clockwise to tighten. the blade assembly, wear non-slip, heavy-duty protective gloves. Wear non-skid, protective footwear that will protect your feet and improve your footing on slippery surfaces.
- Page 8 Operating the Removing a p.11 product blockage 32mm 28mm Cleaning the p.13 product Replacing the Storing the product p.14 p.18 cutting blade...
-
Page 9: Operating The Product
32mm 28mm OPERATING THE PRODUCT WARNING: During operation, hold the product with both hands. 1. Remove the blade cover. 2. Install the hook. Insert the screws and turn them clockwise to tighten. NOTE: The hook can be attached to the other side of the product. - Page 10 4. Squeeze and hold the lock-out trigger and on/off trigger. 5. Use the product for cutting and pruning small limbs and branches. NOTE: The lopper has a 32 mm cutting capacity for softwood, and 28 mm cutting capacity for hardwood. NOTE: Ensure to never stand directly underneath the branch in which you are cutting.
-
Page 11: Removing A Blockage
REMOVING A BLOCKAGE 1. Press the latch on each side of the battery pack. Remove the battery pack. WARNING: Keep bare hands away from the blades at all times. 2. Strike the cutting blade with the rubber mallet to remove the jammed limb or branch. - Page 12 3. Install the battery pack in the product. Make sure that the latch on each side of the battery pack clicks into place and that the battery pack is securely attached before using the product. 4. Squeeze and hold the lock-out trigger and on/off trigger.
-
Page 13: Cleaning The Product
CLEANING THE PRODUCT 1. Press the latch on each side of the battery pack. Remove the battery pack. 2. Clean the product with a soft, dry cloth. NOTE: Do not use water and soap to clean the product. 3. Lubricate the blades lightly before and after use. -
Page 14: Replacing The Cutting Blade
REPLACING THE CUTTING BLADE 1. Press the latch on each side of the battery pack. Remove the battery pack. 2. Turn the nut counterclockwise to loosen 3. Remove the nut, spring washer, and flat washer. 4. Remove the pivot bolt on the other side of the cutting blade. - Page 15 6. Push down the cutting blade. Remove the flat washer between the two blades. 7. Using wrench, turn counterclockwise loosen adjustment screw from the stamping connector. 8. Pull away the cutting blade to remove the stamping connector from the adjustment screw.
- Page 16 11. Hook the bottom of the spring into the hole near the steel wire. Hook the top of the spring into the hole on the cutting blade. 12. Insert the flat washer, spring washer, and nut. 13. Using a wrench, turn the nut clockwise until the spring washer is compressed.
- Page 17 NOTE: The gauge is included in the blade accessory pack. The gauge guides the blades to the correct opening size while turning the adjustment screw. 16. Remove the gauge. Maintenance...
-
Page 18: Storing The Product
STORING THE PRODUCT WARNING: Remove all foreign materials from the product before storing. 1. Press the latch on each side of the battery pack. Remove the battery pack. 2. Install the blade cover. 3. Store the product in a cool, dry, and well- ventilated place that is inaccessible to children and well away from sources of ignition. -
Page 19: Product Specifications
RB18L20, RB18L20A, RB1820C, RB18L25, RB18L25A, RB1825C, RB18L26, RB18L30, RB18L30A, RB18L40, RB18L40A, RB1840C, RB1840X, RB18L50, RB18L50A, RB1850C, RB1850X, RB18L60, RB18L60A, RB1860X, RB18L90, RB18L90A REPLACEMENT PARTS Cutting blade assembly 314558001 NOTE: Visit your local special orders desk or contact RYOBI customer service for replacement parts. - Page 20 Techtronic Industries Australia Pty Ltd 31 Gilby Road, Mount Waverley, VIC 3149 Melbourne, Australia Techtronic Industries N.Z. Limited Unit C, 70 Business Parade South, Highbrook, Auckland 2013, New Zealand RYOBI is a trade mark of Ryobi Limited, and is used under license. 960994112-04...
Need help?
Do you have a question about the OLP1832B and is the answer not in the manual?
Questions and answers