Axis Camera Station S1232 User Manual
Tower recording server
Hide thumbs
Also See for Camera Station S1232:
- User manual (28 pages) ,
- Installation manual (32 pages) ,
- Installation manual (32 pages)
Table of Contents
Advertisement
Quick Links
Advertisement
Table of Contents

Related Manuals for Axis Camera Station S1232


Summary of Contents for Axis Camera Station S1232
- Page 1 AXIS Camera Station S1232 Tower Recording Server User manual...
-
Page 2: Table Of Contents
Configure AXIS Camera Station ........ -
Page 3: About Your Device
Camera Station video management software including licenses plus all necessary system software. The system configuration can easily be imported from AXIS Site Designer, and AXIS Camera Station lets you take full advantage of Axis wide range of video surveillance devices. With enterprise-grade hard disks, operating system stored on solid-state drive, the recorder series provides... -
Page 4: Get Started
3. Initial Axis recorder setup: After the initial Windows setup, AXIS Recorder Toolbox is opened and you are guided through a few steps to set up basic and necessary settings, for example, computer name, date and time, and network. See Initial Axis recorder setup on page 13. -
Page 5: Install Your Device
Prepare additional accessories used for installation: monitor, mouse, keyboard and network cable. • Understand the usage of different user accounts. The following table lists the user accounts that can be used for installation, configuration and operation of your Axis system. User account Description... - Page 6 AXIS Camera Station S1232 Tower Recording Server Install your device...
- Page 7 AXIS Camera Station S1232 Tower Recording Server Install your device...
- Page 8 AXIS Camera Station S1232 Tower Recording Server Install your device...
- Page 9 AXIS Camera Station S1232 Tower Recording Server Install your device...
- Page 10 AXIS Camera Station S1232 Tower Recording Server Install your device...
- Page 11 AXIS Camera Station S1232 Tower Recording Server Install your device...
- Page 12 AXIS Camera Station S1232 Tower Recording Server Install your device...
-
Page 13: Configure Your Device
If your device is not connected to a network or there is no DHCP server available, enter the IP address, subnet mask, gateway, and preferred DNS manually depending on the network requirements. 5. Click Finish. If you have changed the computer name, AXIS Recorder Toolbox will prompt you to restart the device. Configure AXIS Camera Station This Get started tutorial will walk you through the basic steps to make your system up and running. - Page 14 Start the video management system Double-click the AXIS Camera Station client icon to start the client. When you start the client for the first time, it attempts to log in to the AXIS Camera Station server installed on the same computer as the client.
- Page 15 See Signed video and the camera’s user manual for more information. Network configuration Configure proxy or firewall settings before using AXIS Camera Station if the AXIS Camera Station client, AXIS Camera Station server, and the connected network devices are on different networks. Client proxy settings When a proxy server separates the client and the server, configure the client proxy settings.
-
Page 16: License A System Online
When a NAT, firewall, or similar separates the client and the server, configure the NAT or firewall to ensure that the HTTP port, TCP port, and streaming port specified in AXIS Camera Station Service Control can pass through the firewall or NAT. Contact the network administrator for instructions on configuring the NAT or firewall. - Page 17 11. Under License keys, click Download license file and save the file to a USB flash drive. 12. In AXIS Camera Station client, go to Configuration > Licenses > Management. 13. Click Import license file and select the license file on your USB flash drive.
-
Page 18: Manage Windows® User Accounts
AXIS Camera Station S1232 Tower Recording Server Manage Windows® user accounts Manage Windows® user accounts Create a user account To help keep your personal data and information more secure, we recommend that you add a password for each local account. -
Page 19: Change A User Account's Password
AXIS Camera Station S1232 Tower Recording Server Manage Windows® user accounts 1. Go to Settings > Accounts > Other people. 2. Go to the account you want to remove and click Remove. Change a user account's password 1. Log in with an administrator account. -
Page 20: Manage Axis Camera Station User Accounts
AXIS Camera Station S1232 Tower Recording Server Manage AXIS Camera Station user accounts Manage AXIS Camera Station user accounts Configure user permissions Go to Configuration > Security > User permissions to view the users and groups that exists in . -
Page 21: User Or Group Privileges
AXIS Camera Station S1232 Tower Recording Server Manage AXIS Camera Station user accounts Scope Server Select to search for users or groups on the local computer. Domain Select to search for Active Directory users or groups. Selected server When connected to multiple servers, select a server from the Selected server drop-down menu. - Page 22 AXIS Camera Station S1232 Tower Recording Server Manage AXIS Camera Station user accounts Views The following access privileges are available for users or groups with the Operator or Viewer role. You can select multiple views and set the access privileges.
-
Page 23: Manage Your Device
AXIS Camera Station S1232 Tower Recording Server Manage your device Manage your device Update Windows® Windows® periodically checks for updates. When an update is available, your device automatically downloads the update but you've to install it manually. Note Recording will be interrupted during a scheduled system restart. -
Page 24: Change The Raid
The demand for storage can differ. Retention time of stored data or for storing high-resolution recordings often leads to the same: the need for installing more storage. This section explains how to expand your AXIS S12 series with more hard drives and... - Page 25 Manage your device Note The following instructions are to be used when adding additional storage to certain AXIS S12 series. These instructions are as is, and Axis Communications AB takes no responsibility for loss of data and/or misconfiguration during these steps.
- Page 26 3. Click Create Virtual Disk. CAUTION There are more parameters available for modification. However, Axis Communications AB does not take responsibility for any misconfigurations that may happen when modifying those parameters. Always exercise caution when modifying parameters. Reconfigure a RAID storage array An online virtual disk can be reconfigured in ways that expands its capacity and changes its RAID level.
- Page 27 AXIS Camera Station S1232 Tower Recording Server Manage your device 3. To view the properties, click the virtual disk. 4. In the Operations drop-down, select Reconfigure Virtual Disks and press GO. 5. Select the RAID Level and press Choose the Operation.
-
Page 28: Configure Idrac
AXIS Camera Station S1232 Tower Recording Server Manage your device Configure iDRAC The Integrated Dell Remote Access Controller 9 (iDRAC9) with Lifecycle Controller is designed to make system administrators more productive and improve the overall availability of Dell systems. iDRAC alerts administrators to system issues, help them perform remote system management and reduces the need for physical access to the system. - Page 29 To learn more about the cybersecurity features in Axis devices, go to axis.com/learning/white-papers and search for cybersecurity. Axis security notification service Axis provides a notification service with information about vulnerability and other security related matters for Axis devices. To receive notifications, you can subscribe at axis.com/security-notification-service.
-
Page 30: Troubleshooting
To check the current BIOS: 1. Power on the device. 2. Wait until you see the Axis splash screen. You’ll see the version number above the splash screen. Upgrade BIOS You should upgrade the BIOS only when you are instructed by Axis technical support. -
Page 31: Export A Supportassist Collection
6. When you see the AXIS splash screen, press F11. 7. Click One-shot UEFI Boot Menu. 8. Navigate to your USB drive and press ENTER. The system boots into the AXIS Recovery Kit. 9. Click Reinstall Operating System. The recovery takes roughly 10 to 15 min to complete. You find detailed instructions in the download for the recovery kit. -
Page 32: Troubleshoot The Power Supply Unit
Troubleshoot memory errors 1. Upgrade the BIOS to the latest version. 2. If the errors persist, contact Axis technical support. Troubleshoot AXIS Camera Station For information about how to troubleshoot AXIS Camera Station, go to the AXIS Camera Station user manual. -
Page 33: Product Overview
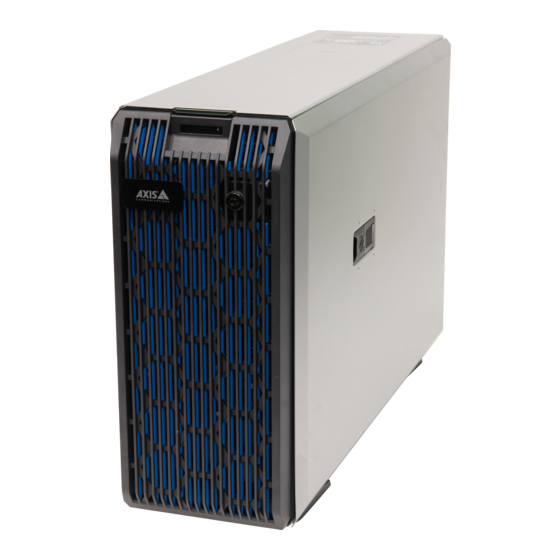
AXIS Camera Station S1232 Tower Recording Server Product overview Product overview Front and rear sides Hard drive tray Hard drive tray release button Hard drive activity LED Hard drive status LED Solid state drive tray Power button/power LED Information tag System identification button and indicator USB 3.0 port... -
Page 34: Specifications
AXIS Camera Station S1232 Tower Recording Server Product overview 16 1 GbE Ethernet port 2 17 USB 2.0 port 18 1 GbE Ethernet port 1 19 iDRAC dedicated Ethernet port 20 VGA port (Do not use) 21 Serial port Specifications... - Page 35 AXIS Camera Station S1232 Tower Recording Server Product overview Blinking green The firmware of the PSU is being updated. CAUTION Do not disconnect the power cord or unplug the PSU when updating firmware. If firmware update is interrupted, the PSUs will not function.
-
Page 36: Need More Help
Need more help? Need more help? Useful links • AXIS Camera Station user manual • Configure Axis Secure Remote Access • What to include in an Antivirus allowlist for AXIS Camera Station Contact support If you need more help, go to axis.com/support. - Page 37 User manual Ver. M4.2 AXIS Camera Station S1232 Tower Recording Server Date: February 2024 © Axis Communications AB, 2022 - 2024 Part no. T10177843...
Need help?
Do you have a question about the Camera Station S1232 and is the answer not in the manual?
Questions and answers