Table of Contents
Advertisement
Available languages
Available languages
Quick Links
PROJECT SOURCE and logo design are
trademarks or registered trademarks of LF,
LLC. All rights reserved.
Serial Number
Purchase Date
Thank you for purchasing this PROJECT SOURCE product.
Questions, problems or missing parts?
Before returning, contact us on:
866-389-8827 , 8 a.m. - 8 p.m., EST, Monday - Sunday or ascs@lowes.com.
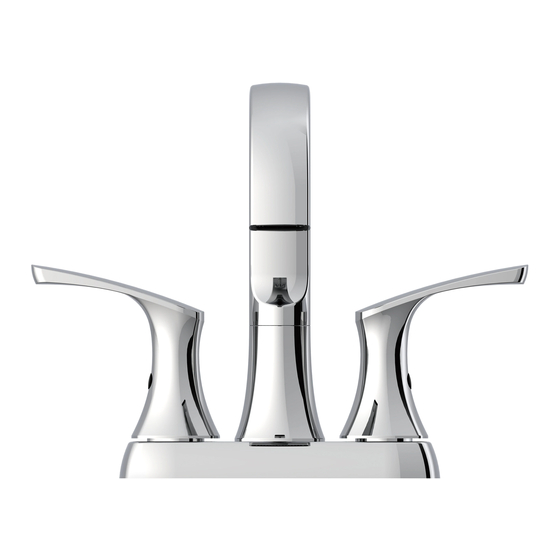
AS23617
CENTERSET BATH
1
ITEM #5649430
#5649432
#5522532
#5649431
MODEL #F51A1114CP
#F51A1114NP
#F51A1114BL
#F51A1114CZ
FAUCET
Español p. 13
Advertisement
Chapters
Table of Contents

Subscribe to Our Youtube Channel
Related Manuals for Project Source F51A1114CP


Summary of Contents for Project Source F51A1114CP
- Page 1 LLC. All rights reserved. Español p. 13 Serial Number Purchase Date Thank you for purchasing this PROJECT SOURCE product. Questions, problems or missing parts? Before returning, contact us on: 866-389-8827 , 8 a.m. - 8 p.m., EST, Monday - Sunday or ascs@lowes.com.
-
Page 2: Table Of Contents
TABLE OF CONTENTS Package Contents ..........................Hardware Contents ..........................Safety Information ..........................Preparation ............................Assembly Instructions ......................... Operating Instructions ........................Care and Maintenance ........................Troubleshooting ..........................Warranty ............................. Replacement Parts List ........................ -
Page 3: Package Contents
PACKAGE CONTENTS PART DESCRIPTION QUANTITY PART DESCRIPTION QUANTITY Faucet Main plunger Aerator (Preassembled Rubber washer to Faucet (A)) Lock nut Lock Nuts Drain assembly... -
Page 4: Hardware Contents
HARDWARE CONTENTS (shown actual size) Aerator Wrench Qty. 1 SAFETY INFORMATION Please read and understand this entire manual before attempting to assemble, operate or install the product. WARNING • Follow these installation instructions carefully. Proper installation is the installer’s responsibility. •... -
Page 5: Preparation
PREPARATION Before beginning assembly of product, make sure all parts are present. Compare parts with package contents list. If any part is missing or damaged, do not attempt to assemble the product. Estimated Assembly Time: 12 minutes Tools Required for Assembly (not included): Adjustable Wrench, Silicone Sealant. Helpful Tools (not included): Channel-lock Pliers, Safety Goggles. -
Page 6: Assembly Instructions
ASSEMBLY INSTRUCTIONS 1. Turn off water supply. Remove existing faucet if necessary. 2. Place a bead of clear silicone sealant (not included) around the base of the faucet (A). Install faucet (A) through top of sink (not included). 3. Tighten lock nuts (C) onto the faucet (A). - Page 7 ASSEMBLY INSTRUCTIONS 4. Determine which type of connection you will be making. (1) Ball nose risers (3/8” O.D. copper tubing) with coupling nuts (not included) or (2) 1/2” I.P.S faucet connectors. Attach water supply lines (not included) to the faucet (A). 5.
- Page 8 ASSEMBLY INSTRUCTIONS 7. Turn on water supply.
-
Page 9: Operating Instructions
OPERATING INSTRUCTIONS 1. Using aerator wrench (AA). Remove aerator (B) from faucet (A). Hardware Used Aerator Wrench 2. Turn on both hot and cold water to flush out any debris and check for leaks around drain. 10-1 3. Replace aerator (B). 10-2 Hardware Used Aerator Wrench... -
Page 10: Care And Maintenance
CARE AND MAINTENANCE • Clean periodically with a soft cloth. Avoid abrasive cleaners, steel wool and harsh chemicals as these will dull the finish and void your warranty. TROUBLESHOOTING PROBLEM POSSIBLE CAUSE CORRECTIVE ACTION Leak from under Retainer nut has come loose. Tighten the retainer nut. -
Page 11: Replacement Parts List
REPLACEMENT PARTS LIST For replacement parts, call our customer service department at 866-389-8827, 8 a.m. - 8 p.m., EST, Monday - Sunday. You could also contact us at ascs@lowes.com. PART DESCRIPTION PART # Metal Handle A079147 Index Bottom A66D558 Handle Adapter - Cold A66D574C Handle Adapter - Hot A66D574H... - Page 13 Número de serie Fecha de compra Gracias por comprar este producto PROJECT SOURCE. ¿Preguntas, problemas o piezas faltantes? Antes de devolver, contáctenos al: 866-389-8827 , de lunes a domingo de 8 a.m. a 8 p.m., hora estándar del Este,...
- Page 14 ÍNDICE Contenido Del Paquete ........................Aditamentos ............................Información De Seguridad ........................Preparación ............................Instrucciones De Ensamblaje ......................Instrucciones De Funcionamiento ...................... Cuidado Y Mantenimiento ........................Solución De Problemas ........................Garantía ............................. Lista De Piezas De Repuesto ......................
-
Page 15: Contenido Del Paquete
CONTENIDO DEL PAQUETE PIEZA DESCRIPCIÓN CANTIDAD PIEZA DESCRIPCIÓN CANTIDAD Grifo Émbolo principal Aireador (Preensam- Arandela de goma blada al cuerpo del grifo (A)) Contratuerca Contratuercas Tubo de desagüe... -
Page 16: Aditamentos
ADITAMENTOS (grandeur réelle) Llave para aireador Qty. 1 INFORMACIÓN DE SEGURIDAD Lea y comprenda completamente este manual antes de intentar ensamblar, usar o instalar el producto. ADVERTENCIA • Siga con atención las siguientes instrucciones de instalación. El instalador tiene la responsabilidad de realizar una instalación adecuada. -
Page 17: Preparación
PREPARACIÓN Antes de comenzar a ensamblar el producto, asegúrese de tener todas las piezas. Compare las piezas con la lista del contenido del paquete y la lista de aditamentos. No intente ensamblar el producto si falta alguna pieza o si estas están dañadas. Tiempo estimado de ensamblaje: 12 minutos Herramientas necesarias para el ensamblaje (no se incluyen): Llave ajustable, sellador de silicona. -
Page 18: Instrucciones De Ensamblaje
INSTRUCCIONES DE ENSAMBLAJE 1. Interrumpa el suministro de agua. Si es necesario, retire el grifo existente. 2. Coloque un cordón de sellador de silicona transparente (no se incluye) alrededor de la base del grifo (A). Instale el grifo (A) a través de la parte superior del lavabo (no se incluye). - Page 19 INSTRUCCIONES DE ENSAMBLAJE 4. Determine qué tipo de conexión realizará. (1) Elevadores de punta esférica (tubería de cobre de 3/8 pulg de diámetro exterior) con tuercas de acoplamiento (no se incluyen) o (2) conectores para grifo IPS de 1/2 pulg. Conecte las tuberías de suministro de agua (no se incluyen) al grifo (A).
- Page 20 INSTRUCCIONES DE ENSAMBLAJE 7. Restablezca el suministro de agua.
-
Page 21: Instrucciones De Funcionamiento
INSTRUCCIONES DE FUNCIONAMIENTO 1. Con la llave del aireador (D). Retire el aireador (B) del grifo (A). Aditamentos utilizados Llave para aireador 2. Abra las manijas de agua caliente y fría, deje correr el agua para eliminar cualquier desecho y revise si hay fugas alrededor del desagüe. -
Page 22: Cuidado Y Mantenimiento
CUIDADO Y MANTENIMIENTO • Limpie periódicamente con un paño suave. Evite utilizar limpiadores abrasivos, lana de acero y químicos agresivos, ya que pueden dañar el acabado y anular la garantía. SOLUCIÓN DE PROBLEMAS PROBLEMA CAUSA POSIBLE ACCIÓN CORRECTIVA Hay una fuga debajo La tuerca de retención está... -
Page 23: Lista De Piezas De Repuesto
LISTA DE PIEZAS DE REPUESTO Para obtener piezas de repuesto, llame a nuestro Departamento de Servicio al Cliente al 866-389-8827, de lunes a domingo de 8 a.m. a 8 p.m., hora estándar del Este. También puede ponerse en contacto con nosotros en ascs@lowes.com. PIEZA DESCRIPCIÓN PIEZA #...
Need help?
Do you have a question about the F51A1114CP and is the answer not in the manual?
Questions and answers
Just installed a new one but it drips a bit
The Project Source F51A1114CP may be dripping after installation due to a faulty or worn-out cartridge. The manual suggests removing the handle assembly, taking out the existing cartridge, and replacing it with a new one to resolve the issue.
This answer is automatically generated