Table of Contents
Advertisement
Quick Links
ATTACH YOUR RECEIPT HERE
Serial Number ____________________________ Purchase Date _________________________
Questions, problems, missing parts? Before returning to your retailer, call our
customer service department at 1-866-389-8827, 8 a.m. - 8 p.m., EST, Monday - Friday.
AB15741
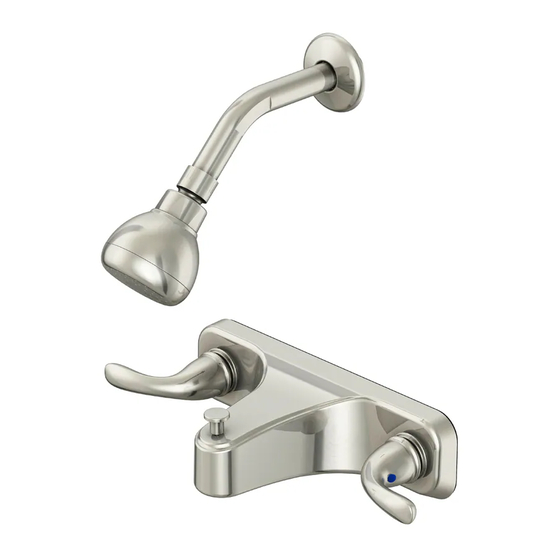
SHOWER FAUCET
1
ITEM #0066398
#0434267
TUB AND
MODEL #F2010000NP
Français / Español p. 10
Advertisement
Table of Contents

Subscribe to Our Youtube Channel
Related Manuals for Project Source F2010000NP


Summary of Contents for Project Source F2010000NP
- Page 1 ITEM #0066398 #0434267 TUB AND SHOWER FAUCET MODEL #F2010000NP Français / Español p. 10 ATTACH YOUR RECEIPT HERE Serial Number ____________________________ Purchase Date _________________________ Questions, problems, missing parts? Before returning to your retailer, call our customer service department at 1-866-389-8827, 8 a.m. - 8 p.m., EST, Monday - Friday.
-
Page 2: Package Contents
PACKAGE CONTENTS PART DESCRIPTION QUANTITY Shower Arm Shower Arm Flange Showerhead Faucet Putty Plate (preassembled) Screen washer (preassembled) HARDWARE CONTENTS (shown actual size) Lock Nut Thread Tape Allen Wrench... -
Page 3: Safety Information
SAFETY INFORMATION Please read and understand this entire manual before attempting to assemble, operate or install the product. WARNING • Follow these installation instructions carefully. Proper installation is the installer’s responsibility. • Check local building codes before beginning installation to ensure compliance. •... - Page 4 ASSEMBLY INSTRUCTIONS 1. Shut off main water supply before installation. 2. Place a bead of clear silicone sealant (not included) around the base of the putty plate (E). Install faucet through shower wall. 3. Install lock nuts (AA) onto threaded shanks of faucet (D) and hand tighten.
- Page 5 ASSEMBLY INSTRUCTIONS 4. Suggested installation: Attach a 1/2 in. female adapter with gasket (Slip x FIPT) (not included) to each threaded shank. Slip adapters over 1/2 in. water supply pipe using proper adhesive (not included) where applicable. 5. Install shower arm (A) and shower arm flange (B) to vertical shower pipe elbow (not included).
- Page 6 OPERATING INSTRUCTIONS 1. Turn on water and lift shower diverter. Check for leaks at shower arm (A). 2. Install showerhead (C) to shower arm (A). Hand tighten shower head. GENTLY CLEAN THE SCREEN WASHER 1. Use a clean strap wrench to remove the shower head (C) from shower arm (A).
- Page 7 GENTLY CLEAN THE SCREEN WASHER 2. Use a flathead screwdriver (not included) to carefully remove the screen washer (F). 3. Gently clean the screen washer (F) with a toothbrush (not included). 4. Reinstall the screen washer (F) and showerhead (C). Hand tighten shower head.
-
Page 8: Care And Maintenance
CARE AND MAINTENANCE • Clean periodically with a soft cloth. Avoid abrasive cleaners, steel wool and harsh chemicals as these will dull the finish and void your warranty. TROUBLESHOOTING PROBLEM POSSIBLE CAUSE CORRECTIVE ACTION Leak from under handle. Retainer nut has come loose. Tighten the retainer nut. -
Page 9: Replacement Parts List
REPLACEMENT PARTS LIST For replacement parts, call our customer service department at 1-866-389-8827, 8 a.m. - 8 p.m., EST, Monday - Friday. PART DESCRIPTION PART # Shower Head (0066398) S1210302 Shower Head (0434267) S1214F01 Shower Arm A020000 Shower Arm Flange A019000 Adaptor &... - Page 10 ARTICLE #0066398 #0434267 ROBINET POUR BAIGNOIRE ET DOUCHE MODÈLE #F2010000NP ARTÍCULO #0066398 #0434267 GRIFO PARA BAÑERA Y DUCHA MODELO #F2010000NP JOIGNEZ VOTRE REÇU ICI / ADJUNTE SU RECIBO AQUÍ Numéro de série / Número de serie __________________________________________________ Date d’achat / Fecha de compra _____________________________________________________ Des questions, des problèmes, des pièces manquantes? Avant de retourner l’article...
- Page 11 CONTENU DE L’EMBALLAGE / CONTENIDO DEL PAQUETE PIÈCE DESCRIPTION / DESCRIPCIÓN QUANTITÉ PIEZA CANTIDAD Robinet / Brazo de la ducha Bride pour bras de douche / Brida del brazo de la ducha Pomme de douche / Cabezal de ducha Robinet / Grifo Plaque à...
- Page 12 CONSIGNES DE SÉCURITÉ / INFORMACIÓN DE SEGURIDAD Assurez-vous de lire et de comprendre l’intégralité du présent manuel avant de tenter d’assembler, d’installer ou d’utiliser l’article. AVERTISSEMENT • Suivez attentivement les instructions pour l’installation. Il incombe à l’installateur d’effectuer une installation adéquate. •...
- Page 13 PRÉPARATION / PREPARACIÓN Avant de commencer l’assemblage du produit, assurez-vous d’avoir toutes les pièces. Comparez le contenu de l’emballage avec la liste des pièces et celle de la quincaillerie. S’il y a des pièces manquantes ou endommagées, ne tentez pas d’assembler le produit. Temps d’assemblage approximatif : 30 minutes.
- Page 14 INSTRUCTIONS POUR L’ASSEMBLAGE / INSTRUCCIONES DE ENSAMBLAJE 1. Avant de commencer l'installation, fermez l'alimentation en eau. Antes de hacer la instalación cierre el suministro principal de agua. 2. Appliquez un trait de scellant à base de silicone transparent (non inclus) autour de la base du robinet (E).
- Page 15 INSTRUCTIONS POUR L’ASSEMBLAGE / INSTRUCCIONES DE ENSAMBLAJE 4. Installation suggérée : Fixez un adaptateur femelle de 1/2 po avec joint (collé x fileté) (non inclus) à chaque tige filetée. Glissez les adaptateurs sur le tuyau d’alimentation en eau de 1/2 po, en appliquant un adhésif adéquat (non inclus) au besoin.
- Page 16 MODE D’EMPLOI / INSTRUCCIONES DE FUNCIONAMIENTO 1. Faites couler l’eau et levez l’inverseur. Vérifiez si le bras de douche (A) fuit. Abra el paso del agua y levante el desviador de la ducha. Revise que no haya fugas en el brazo de la ducha (A). 2.
- Page 17 NETTOYEZ DOUCEMENT LA RONDELLE À GRILLE / LIMPIE CON CUIDADO LA ARANDELA CON FILTRO 2. Retirez soigneusement la rondelle à grille (F) à l’aide d’un tournevis à tête plate (non inclus). Use un destornillador de cabeza plana (no se incluye) para retirar con cuidado la aran- dela con filtro (F).
-
Page 18: Dépannage / Solución De Problemas
ENTRETIEN / CUIDADO Y MANTENIMIENTO • Nettoyez l’article périodiquement à l’aide d’un linge doux. N’utilisez pas de nettoyant abrasif, de laine d’acier ni de produit chimique puissant; ceux-ci risquent de ternir le fini et leur utilisation annulera votre garantie. • Limpie periódicamente con un paño suave. Evite utilizar limpiadores abrasivos, lana de acero y químicos agresivos, ya que pueden dañar el acabado y anular la garantía. -
Page 19: Garantie / Garantía
GARANTIE / GARANTÍA Le fabricant garantit le robinet contre les défauts de matériaux ou de fabrication présents au moment de l’expédition de l’usine pendant une période limitée à compter de la date d’achat. Cette garantie ne s’applique qu’à l’acheteur initial. Le fabricant convient de corriger un tel défaut sans frais ou, à sa discrétion, de remplacer le robinet par un modèle comparable ou de qualité... - Page 20 LISTE DES PIÈCES DE RECHANGE / LISTA DE PIEZAS DE REPUESTO Pour obtenir des pièces de rechange, veuillez Para obtener piezas de repuesto, llame a communiquer avec notre service à la clientèle nuestro Departamento de Servicio al Cliente au 1 866 389-8827, entre 8 h et 20 h (HNE), du al 1-866-389-8827, de lunes a viernes de lundi au vendredi.
Need help?
Do you have a question about the F2010000NP and is the answer not in the manual?
Questions and answers