Table of Contents
Advertisement
Quick Links
SERVICE
TFT-LCD TV
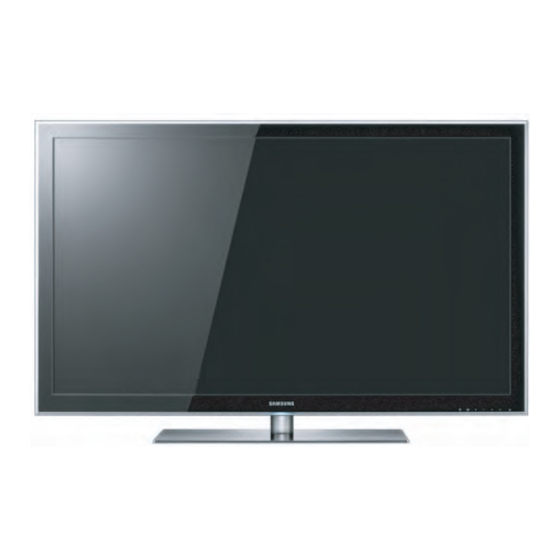
UN46B8000XFXZA
Refer to the service manual in the GSPN (see the rear cover) for the more information.
LCD-TV
Chassis
: N73A
Model
: UN46B8000XFXZA
Manual
1. Precautions
2. Product specifications
3. Disassembly and Reassembly
4. Troubleshooting
5. Exploded View & Part List
6. Wiring Diagram
Contens
Advertisement
Table of Contents

Subscribe to Our Youtube Channel
Related Manuals for Samsung UN46B8000XFXZA


Summary of Contents for Samsung UN46B8000XFXZA
- Page 1 LCD-TV Chassis : N73A Model : UN46B8000XFXZA SERVICE Manual TFT-LCD TV Contens 1. Precautions 2. Product specifications 3. Disassembly and Reassembly 4. Troubleshooting 5. Exploded View & Part List 6. Wiring Diagram UN46B8000XFXZA Refer to the service manual in the GSPN (see the rear cover) for the more information.
-
Page 2: Table Of Contents
Contents 1. Precautions ......................1-1 1-1. Safety Precautions ......................1-1 1-2. Servicing Precautions ..................... 1-2 1-3. Electrostatically Sensitive Devices (ESD) Precautions ..........1-2 1-4. Installation Precautions ....................1-3 2. Product specifications .................... 2-1 2-1. Feature & Specifications ....................2-1 2-2. MJC : Motion Judder Cancellation (FRC) ............... 2-5 2-3. - Page 3 GSPN (Global Service Partner Network) Area Web Site North America http://service.samsungportal.com Latin America http://latin.samsungportal.com http://cis.samsungportal.com Europe http://europe.samsungportal.com China http://china.samsungportal.com Asia http://asia.samsungportal.com Mideast & Africa http://mea.samsungportal.com © 2009 Samsung Electronics Co.,Ltd. This Service Manual is a property of Samsung Electronics Co.,Ltd. All rights reserved. Any unauthorized use of Manual can be punished under applicable Printed in Korea International and/or domestic law. P/N: BN82-00567A-00...
- Page 4 3. Disassembly and Reassemble 3. Disassembly and Reassembly This section of the service manual describes the disassembly and reassembly procedures for the UN46B8000XF LCD TV. WARNING: This monitor contains electrostatically sensitive devices. Use caution when handling these components. 3-1. Disassembly and Reassembly Cautions: 1.
- Page 5 3. Disassembly and Reassemble Description Picture Description Screws 2. Remove the screws of rear-cover. 2-1. Pull out a AC Power Cord 3. Lift up the rear-cover.
- Page 6 3. Disassembly and Reassemble Description Picture Description Screws 4. Remove the cables and screws from Woofer x 2 SMPS, Main board and Woofer and Bracket stand link.
- Page 7 3. Disassembly and Reassemble Description Picture Description Screws 5. Remove the panel bracket screws from the panel. Reassembly procedures are in the reverse order of disassembly procedures. ※...
- Page 8 5. Exploded View & Part List 5. Exploded View & Part List 5-1. UN46B8000XF Exploded View...
- Page 9 ASSY COVER P-FRONT;46 B8000,PC(CLR)+PC(D M0215 BN07-00699A LCD-PANEL;LTF460HG02,SSEZGX,10bit,46inch T0175 BN96-09470B ASSY SPEAKER P;8ohm,4pin,15W,R:850 / L:5 M0115 BN61-05536A BRACKET-STAND LINK;UB7000 46inch,HGI,T3. S.N.A P003 BN44-00270A SMPS-PD;PSLF251B01A,PD4612F2,AC/DC,211W, M0014 BN94-02661E ASSY PCB MAIN;UN46B8000XFXZA M0013 BN96-11072A ASSY COVER P-REAR;46 B8000,PCM T0.5,BKN- M0027 BN96-11089A ASSY STAND P-BASE;46 B8000,SUS304 T0.6,P...
- Page 10 5. Exploded View & Part List 5-4. UN46B8000XF Parts List Level Location No. Code No. Description & Specification Q’ty SA/SNA Remark BN90-02047B ASSY COVER FRONT;46 B8000 S.N.A T0527 AA68-03539A LABEL BAR CODE;65X40mm,ART PAPER S.N.A T0003 BN96-11067B ASSY COVER P-FRONT;46 B8000,PC(CLR)+PC(D ...3 CIS1 0203-001598...
- Page 11 ASSY STAND P-GUIDE NECK;UB8000,PC insert S.N.A ..4 BN61-05384A GUIDE-STAND NECK;UB8000,PC insert,Clear S.N.A ..4 BN61-05565A HOLDER-INSERT;UB8000 46inch,PC, Extrusio S.N.A M0017 BN91-03725A ASSY CHASSIS;UN40B8000XFXZA S.N.A M0014 BN94-02661E ASSY PCB MAIN;UN46B8000XFXZA ...3 0202-001557 SOLDER-CREAM;LST57-A,D38-63,42SN/57BI/1A 6.411 S.N.A ...3 0202-001608 SOLDER-WIRE FLUX;LFC7-107,D0.8,99.3Sn/0. 0.25 S.N.A ...3 0204-002420 SOLVENT;1M-1000,C3H70H,96 7.59 S.N.A ...3...
- Page 12 5. Exploded View & Part List Level Location No. Code No. Description & Specification Q’ty SA/SNA Remark ..4 Q101 0501-000445 TR-SMALL SIGNAL;KTC3875S-Y,NPN,150mW,SOT ..4 0501-000669 TR-SMALL SIGNAL;KTA1505Y,PNP,150mW,SOT-2 ..4 CEQ2 0505-000110 FET-SILICON;2N7002,N,60V,115mA,7.5ohm,0..4 Q409 0505-001916 FET-SILICON;Si4800BDY,N,30V,9A,0.03ohm,2 ..4 1001-000164 IC-ANALOG MULTIPLEX;74HC4052,CMOS,SOP,16 ..4 1001-001109 IC-ANALOG SWITCH;FST3125M,BUS SWITCH &...
- Page 13 5. Exploded View & Part List Level Location No. Code No. Description & Specification Q’ty SA/SNA Remark ..4 HDR17 2007-000172 R-CHIP;10ohm,5%,1/16W,TP,1005 S.N.A ..4 R338 2007-000173 R-CHIP;22ohm,5%,1/16W,TP,1005 S.N.A ..4 UR23 2007-000174 R-CHIP;47ohm,5%,1/16W,TP,1005 S.N.A ..4 R2136 2007-000239 R-CHIP;1.5Kohm,1%,1/10W,TP,1608 S.N.A ..4 R414 2007-000362 R-CHIP;12ohm,5%,1/10W,TP,1608 ..4 MR17...
- Page 14 5. Exploded View & Part List Level Location No. Code No. Description & Specification Q’ty SA/SNA Remark ..4 2203-000550 C-CER,CHIP;0.02nF,5%,50V,C0G,1005 S.N.A ..4 V1233 2203-000575 C-CER,CHIP;220nF,10%,25V,X7R,TP,2012 S.N.A ..4 2203-000679 C-CER,CHIP;0.027nF,5%,50V,C0G,1005 ..4 C1101 2203-000697 C-CER,CHIP;0.002NF,0.25PF,50V,C0G,TP,160 ..4 2203-000761 C-CER,CHIP;330nF,10%,16V,X7R,TP,2012,- S.N.A ..4 AC109 2203-000783 C-CER,CHIP;0.33nF,5%,50V,C0G,1608 ..4 AAC45...
- Page 15 LABEL-01,POP LED TV;6000,PET(7005TH),T0. S.N.A T0527 BP68-00052B LABEL-00,RATING;CCTV,TETRON PAPER,T0.05, S.N.A M0045 BN92-04457A ASSY ACCESSORY;UN40B8000XFXZA S.N.A T0214 0203-001602 TAPE-OPP MASKING;#232,0.14,15,50000,YEL 0.06 S.N.A BN68-01402G MANUAL FLYER-STAND GUIDE;COMM,SAMSUNG,En S.N.A M0045 BN96-10086A ASSY ACCESSORY;UN46B8000XFXZA ...3 T0685 4301-000103 BATTERY-ALKALINE;1.5V,750mAH,AAA[ LR03], S.N.A ...3 T0524 6902-000018 BAG PE;LDPE,T0.1,W280,L400,CLEAR,8,2,20. S.N.A ...3 AA68-03242L MANUAL FLYER-04,SAFETY GUIDE;comm,Samsun...
- Page 16 ..4 6902-000031 BAG ZIPPER;LDPE,T0.05,W80,L160,TRP,0,0,4 S.N.A ..4 M0114 BN61-05373A HOLDER-WIRE;LB7000 46,NYRON S.N.A ..4 BN61-05491A HOLDER-WIRE STAND;UB7000 46inch,NYRON S.N.A ...3 BP68-00263D MANUAL FLYER-WARRANTY CARD;comm,Samsung, S.N.A BN92-05058A ASSY BOX;46 B8000 S.N.A T0527 AA68-50509A LABEL-00,BOX;ALL MODEL,A/P 90(G),250,90 S.N.A M0521 BN69-03515A BOX-SET,IN;46UB7000,CB,C-01,DW1,ECT50,YE S.N.A BN69-03719B BOX-SET,OUT;46UB8000-S,CB,C-03,DW3,YEL,W S.N.A...
-
Page 17: Precautions
1. Precautions 1. Precautions 1-1. Safety Precautions Follow these safety, servicing, and ESD precautions to prevent damage and to protect against potential hazards such as electrical shock. 1-1-1. Warnings For continued safety, do not attempt to modify any circuitry. 1-1-2. Servicing the LCD TV When servicing the LCD TV, Disconnect the AC line cord from the AC outlet. -
Page 18: Servicing Precautions
1. Precautions 1-2. Servicing Precautions WARNING: An electrolytic capacitor installed with the wrong polarity might explode. Caution: Before servicing units covered by this service manual, read and follow the Safety Precautions section of this manual. Note: If unforeseen circumstances create conflict between the following servicing precautions and any of the safety precautions, always follow the safety precautions. -
Page 19: Installation Precautions
1. Precautions 1-4. Installation Precautions For safety reasons, more than two people are required for carrying the product. Keep the power cord away from any heat emitting devices, as a melted covering may cause fire or electric shock. Do not place the product in areas with poor ventilation such as a bookshelf or closet. The increased internal temperature may cause fire. - Page 20 1. Precautions Memo...
-
Page 21: Product Specifications
2. Product specifications 2. Product specifications 2-1. Feature & Specifications Model UN46B8000XF Feature Digital-TV, RF, 4-HDMI, 1-Component, 1-AV, USB1, USB2 (HDD is available only in USB1), D-SUB, Internet@TV � Brightness : 500cd/m � Contrast Ratio : 5000000:1 � Response time : 3ms �... - Page 22 2. Product specifications CHANNEL FREQUENCY TABLE OUTPUT FREQUENCY : ANALOG fv:45.75MHz, fs:41.25MHz DIGITAL Fc:44MHz TUNING STEP SIZE : FIRST PLL 250KHz SECOND PLL 62.5KHz OSD CH NO CH NO CH NO CH NO Air-DTV Air-NTSC BAND Cable STD BAND Cable HRC Cable IRC 72.
- Page 23 2. Product specifications OSD CH NO CH NO CH NO CH NO Air-DTV Air-NTSC BAND Cable STD BAND Cable HRC Cable IRC 499.25 ULTRA 498.00 499.25 505.25 ULTRA 504.00 505.25 511.25 ULTRA 510.00 511.25 517.25 ULTRA 516.00 517.25 523.25 ULTRA 522.00 523.25 529.25...
-
Page 24: Mjc : Motion Judder Cancellation (Frc)
2. Product specifications 2-2. MJC : Motion Judder Cancellation (FRC) Technology Example • Motion Judder cancellation for HD film image. • Adaptive Recursive Search (ARS) - Implementation IPC/MJC at same time <Motion Judder> - Search Range Horizontal : ± ± 12 Line 72 Pixel, Vertical : <Motion Judder Cancellation>... -
Page 25: Internet@Tv
2. Product specifications 2-3. Internet@TV 2-3-1. Overlay Mode It offers contents to maximize the benefits of the large screen size. Overlay Overlay Overlay Overlay Overlay Overlay Overlay Overlay (Dock Mode) (Dock Mode) (Dock Mode) (Dock Mode) (Sidebar Mode) (Sidebar Mode) (Sidebar Mode) (Sidebar Mode) A. - Page 26 2. Product specifications 2-3-3. Yahoo OOBE Description A. All users go through OOBE (Guided Setup) to access the dock the first time. B. All users must specify a location and accept the TOS before the TV Widgets service are accessible. The rest of the screens are optional.
- Page 27 2. Product specifications Tutorial: Screens explaining how dock works. Tutorial: Screens explaining the sidebar and global nav buttons. Final screen before dock comes up.
- Page 28 2. Product specifications 2-3-4. Gallery Widget Overview A. In the TV Widgets, widget gallery services are online services where widget developers publish widgets for download. B. The default widget gallery for the platform is the Widget Gallery Services. C. To find and install new widgets, launch the gallery widget from the dock. D.
- Page 29 2. Product specifications 2-3-5. Profile Widget Overview A. The Profile widget is the way to configure your widget environment for your user profile. With the settings widget you can configure: i. Profile Management: Create, edit and switch profiles. ii. Security Settings: Setup a Profile and/or Owner PIN for security purposes. iii.
- Page 30 2. Product specifications 2-3-6. Flickr TV Widget Description A. Flickr TV Widget is a Widget for displaying photos from Flickr. You can view your: Personal photos Your sets of photos iii. Explore Flickr’s user community photos Your favorite photos Your contacts’...
- Page 31 2. Product specifications Initial Sidebar View A. If the user is not signed and user is signed but user has no photo then the default images will be displayed from the Flickr Explore category. B. If the user is signed in and the user has 1 photo or more photos, then the photos will be displayed in the top portion of the Widget Sidebar.
- Page 32 2. Product specifications 2-3-7. Weather Widget Overview A. The Weather Widget utilizes the “Tab View” layout of the Widget Sidebar i. The tab view is a viewable area than contains groups of user interface elements organized under tab headers. ii.
- Page 33 2. Product specifications 2-3-9. News Widget Overview A. The News Widget sidebar will then be displayed B. Several stories will be displayed in the top featured area of the Widget Navigation will be available to move from one story to the next These stories are automatically updated by Yahoo! iii.
-
Page 34: Using The Content Library
2. Product specifications 2-4. Using the Content Library The Content Library allows you to enjoy various content on your TV. You can use the default content stored in the TV memory or you can enjoy new content using a USB device or via the Internet. Using the Content Library Menu Press the MENU button. -
Page 35: Using The Tv Memory Contents
You can view various recipes that you can then easily follow step by step. Enjoy thesecontents which give you great ideas for meals. - The recipes introduced in the Cooking contents on the Samsung TV are based on recipes published by Anness Publishing. -
Page 36: Using The Content Management
New content other than the built-in contents will be provided via the Samsung.com website with or without charge. Downloading Content Visit the www.samsung.com website and open the Content Library page. Enter the product number (UDN, Unique Device Number). Select a content item in the Contents Download page. -
Page 37: Media Play
Compatibility problem. Before connecting your device to the TV, please back up your files to prevent them from damage or loss of data.SAMSUNG is not responsible for any data file damage or data loss. Do not disconnect the USB device while it is loading. - Page 38 2. Product specifications -. movie format File Extention Container Video Decoder Resolution Audio codec Divx 3.11/4.x/5.1/6.0 720 x 576 XviD 1920 x 1080 *.avi H.264 BP/MP/HP 1920 x 1080 LPCM MPEG4 SP/ASP 1920 x 1080 ADPCM Motion JPEG 800 x 600 Divx 3.11/4.x/5.1/6.0 720 x 576 XviD...
- Page 39 2. Product specifications RF remocon Non-directional RF Remote Controller. - Frequency Range : 2.4 GHz~2.5GHz - Bandwidth : 5MHz (16 channels) - Using Channel : 3Channel(2425MHz, 2450MHz, 2475MHz) - SPEC : based on 802.15.4 - Need Pairing to Use RF Remote Controller $1.75 RF IC RF IC...
- Page 40 2. Product specifications AutoPairing What is Pairing? A process that enables two-way communication between the TV and the remote control when their MAC addresses match after the TV saved the MAC address of the remote control and vice versa. Problems with the Existing Pairing Method - Users had difficulty in pairing the RF remote control.
- Page 41 2. Product specifications 2. When the TV is turned on (When powered on using the Function key.) 1) Press any key on the RF remote control. → The remote control enters Pairing Mode. (After paring is complete, the key pressed by the user transmits the corresponding command to the TV.) The customer cannot recognize the internal pairing operation.
- Page 42 2. Product specifications Gerneral Pairing You can pair the TV and the remote control so that the remote control only controls the TV 1. Plug the TV power plug into the power outlet. Turn the TV power switch off.} 2. Press the PAIRING on the remote control button. Use a sharp object to press the button.
-
Page 43: Spec Comparison To The Old Models
2. Product specifications 2-8. Spec Comparison to the Old Models UB8X SAPPHIRE Model (UN46B8000XF/UN55B8000XF) (LN46A850S1F/LN52A850S1F) Design Display Type LCD TV LCD TV Resolution 1920 x 1080 1920 x 1080 LCD Panel TFT LCD Panel 240Hz TFT LCD Panel 120Hz Screen Size 46”... -
Page 44: Accessories
2. Product specifications 2-9. Accessories Product Description Code. No Remark Remote Control & Batteries BN59-00849A (AAA x 2) Simple Remote Control BN59-00788B Cover-Bottom BN63-05654A Warranty Card / Registration Card / BP68-00263D Safety Guide Manual (Not available in all location) Cleaning Cloth BN63-01798B Supplied Accessories... - Page 45 2. Product specifications Product Description Code. No Remark Holder wire BN61-05373A Supplied Accessories Holder wire stand BN61-05491A (3EA) 2-26...
-
Page 46: Troubleshooting
4. Troubleshooting 4. Troubleshooting 4-1. Troubleshooting Check the various cable connections first. • Check to see if there is a burnt or damaged cable. • Check to see if there is a disconnected or loose cable connection. • Check to see if the cables are connected according to the connection diagram. Check the power input to the Main Board. - Page 47 4. Troubleshooting Simple flow chart of malfunction Does the TV turn on? Can you see anything on the screen? Can you see OSD menu running on the screen? Can you see Digital Channel broadcast ? Check LVDS cable connected Check the Power Cord to Main Board.
- Page 48 4. Troubleshooting EX -LINK US B2 CN201 AUDIO O UT CN1501-1 US B1 IC601 O PTICAL HDMI4 IC501 CN100 HDMI3 CN1501 HDMI2 CN1601 HDMI1/DVI AUDIO CO MPNENT D-S UB CN201 pin 9 pin 27...
- Page 49 The WLAN does not work. An explanation of Equipment other than the WLAN USB stick supplied by Samsung Electronics (as a bundle) will not work. Media play The sharer must support IEEE 801.11 g/b. IEEE 801.11 n is supported.
- Page 50 The DLNA server that I could see on the PC Share Manager 1.Check if the PC is turned off. 2. Check if the Samsung TV has suddenly disappeared. What Search TV is set to reject connections in the access control menu should I do? of the Samsung PC Share Manager.
- Page 51 4. Troubleshooting I cannot play files with the wmv or flv DLNA Video Play The video play function is not supported for files with these extension. extensions. I cannot use the 20 second Seek DLNA Video Play To use the Seek function while playing at 2x Fast Forward, function while playing at 2x Fast press the Play button to first make the playing speed Forward.
- Page 52 Images provided by Samsung.com or a 3rd party content personal photos using the Gallery Content Library provider linked to Samsung.com will not be played in the function. How can I do this? [content Library]. However, you can use the SlideShow function of WiseLink Pro.
- Page 53 4. Troubleshooting Pairing the remote control failed. 1. The remote control must be less than 1 meter from the TV. 2. Check if the TV power cord is connected. 3. Check if the following pairing procedures are kept. 1) Press the Pairing key on the remote control. 2) Set the Picture OFF setting of the TV to Picture ON.
- Page 54 4. Troubleshooting 4-1-1. No Power The PD board(SMPS) relay does not work when connecting the power cord. Symptom The units appears to be dead. The PD relay does not work when connecting the power cord if the cables are improperly connected or the Main Board or PD is not functioning.
- Page 55 4. Troubleshooting PIN9(B13V) PIN15(B5V) PIN23(B12VS) PIN27(A5V) 4-10...
- Page 56 4. Troubleshooting 4-1-2. No Video (Analog PC signal) Symptom Audio is normal but no picture is displayed on the screen. Check the PC source Major Check the IC601(chelsea) checkpoints This may happen when the LVDS cable connecting the Main Board and the Panel is disconnected. Caution Make sure to disconnect the power before working on the PD board(SMPS).
- Page 57 4. Troubleshooting WAVEFORMS PC Input (V-Sync, H-Sync) LVDS Out (CLK + / -) 4-12...
- Page 58 4. Troubleshooting 4-1-3. No Video (HDMI - Digital Signal) Symptom Audio is normal but no picture is displayed on the screen. Check the HDMI source Major Check the IC601(chelsea) checkpoints This may happen when the LVDS cable connecting the Main Board and the Panel is disconnected. Caution Make sure to disconnect the power before working on the PD board(SMPS).
- Page 59 4. Troubleshooting WAVEFORMS HDMI Input (CLK + / -) Tuner CVBS Out (Pattern: Grey Bar) TS DATA Out (Clk, Data [0]) 4-14...
- Page 60 4. Troubleshooting 4-1-4. No Video (Tuner_CVBS) Symptom Audio is normal but no picture is displayed on the screen. Check the Tuner CVBS source Major Check the Chelsea checkpoints This may happen when the LVDS cable connecting the Main Board and the Panel is disconnected. Caution Make sure to disconnect the power before working on the PD board(SMPS).
- Page 61 4. Troubleshooting TU501 pin8(CVBS) pin14~42 CN1002 4-16...
- Page 62 4. Troubleshooting WAVEFORMS Tuner CVBS Out (Pattern: Grey Bar) Eagle+ Out (Clk, H-Sync) 4-17...
- Page 63 4. Troubleshooting 4-1-5. No Video (Tuner DTV) Symptom Audio is normal but no picture is displayed on the screen. Check the DTV source Major Check the Chelsea checkpoints This may happen when the LVDS cable connecting the Main Board and the Panel is disconnected. Caution Make sure to disconnect the power before working on the PD board(SMPS).
- Page 64 4. Troubleshooting pin15/16 TU501 pin14~42 CN1002 4-19...
- Page 65 4. Troubleshooting WAVEFORMS Tuner CVBS Out (Pattern: Grey Bar) TS DATA Out (Clk, Data [0]) 4-20...
- Page 66 4. Troubleshooting 4-1-6. No Video (Video CVBS) Symptom Audio is normal but no picture is displayed on the screen. Check the Video CVBS source Major Check the Chelsea checkpoints This may happen when the LVDS cable connecting the Main Board and the Panel is disconnected. Caution Make sure to disconnect the power before working on the PD board(SMPS).
- Page 67 4. Troubleshooting R1342, R1343 R1342, R1343 pin14~42 CN1002 4-22...
- Page 68 4. Troubleshooting WAVEFORMS Tuner CVBS Out (Pattern: Grey Bar) 4-23...
- Page 69 4. Troubleshooting 4-1-7. No Video (Component) Symptom Audio is normal but no picture is displayed on the screen. Check the Component source Major Check the Chelsea checkpoints This may happen when the LVDS cable connecting the Main Board and the Panel is disconnected. Caution Make sure to disconnect the power before working on the PD board(SMPS).
- Page 70 4. Troubleshooting R1342, R1343 R336, R347 R348, R359 R324, R335 4-25...
- Page 71 4. Troubleshooting R1342, R1343 pin14~42 CN1002 4-26...
- Page 72 4. Troubleshooting WAVEFORMS Tuner CVBS Out (Pattern: Grey Bar) Component Input (Y/Pb) 4-27...
- Page 73 4. Troubleshooting 4-1-8. No Sound Symptom Video is normal but there is no sound.. When the speaker connectors are disconnected or damaged. Major When the sound processing part of the Main Board is not functioning. checkpoints Speaker defect.. Caution Make sure to disconnect the power before working on the PD board(SMPS). CN1303 CN1501 IC1502...
- Page 74 4. Troubleshooting pin1~4 IC1501 IC1502 pin27~29 4-29...
- Page 75 4. Troubleshooting WAVEFORMS Audio Input (Sign Wave) I2S Input (Clk, Data) Audio Amp Out (Sign Wave) 4-30...
- Page 76 4. Troubleshooting 4-1-10. Reference Output CNT which run Edge Led (Is unrelated even if right and left changes) If one side of the screen appears to be darker than the other side, swap connectors 1 and 2. If the same problem exists, panel is defective. If the dark side switches to opposite side, then the power supply is at fault.
- Page 77 4. Troubleshooting Connecting a PC Using the D-sub cable Connect a D-Sub Cable between PC IN [PC] connector on the TV and the PC output connector on your computer Connect a PC Audio Cable between the PC IN [AUDIO] jack on the TV and the Audio Out jack of the sound card on your computer.
-
Page 78: Alignments And Adjustments
4. Troubleshooting 4-2. Alignments and Adjustments 4-2-1. General Alignment instruction Usually, a color LCD-TV needs only slight touch-up adjustment upon installation. Check the basic characteristics such as height, horizontal and vertical sync. Use the specified test equipment or its equivalent. Correct impedance matching is essential. - Page 79 4. Troubleshooting 4-3. Factory Mode Adjustments 4-3-1 Entering Factory Mode To enter ‘Service Mode’ Press the remote -control keys in this sequence : - If you do not have Factory remote - control Power OFF MUTE Power On 4-3-2 How to Access Service Mode Using the Customer Remote Turn the power off and set to stand-by mode Press the remote buttons in this order;...
- Page 80 4. Troubleshooting 4-3-3 Factory Data Option Main: Opiton, Mode : CDTV, RES :480I Option Factory Reset Type 46A2UF0E / 55A2UF0E Model UB8000 TUNER SEC_Custom Region Light Effect Media Link Type America PDP GROUP … ADC/WB AV Calibration Success Comp Calibration Success PC Calibration...
- Page 81 4. Troubleshooting ADC Result 1st_Y_GH 1st_Y_GL 1st_Cb_BH 1st_Cb_BL 1st_Cr_RH 1st_Cr_RL 2nd_R_L 2nd_G_L 2nd_B_L 2nd_R_H 2nd_G_H 2nd_B_H White Balance Sub Brightness R-Offset G-Offset B-Offset Sub Contrast R-Gain G-Gain B-Gain Movie R-Offset … Movie B-Offset … Movie R-Gain … Movie B-Gain … 4-36...
- Page 82 4. Troubleshooting Contol EDID EDID ON/OFF EDID WRITE ALL Success EDID WRITE PC Success EDID WRITE HDMI Success EDID WRITE HDMI1 EDID WRITE HDMI2 EDID WRITE HDMI3 EDID WRITE HDMI4 EDID 1.2 PORT None Sub Option RF Mute Time 600ms TOOLS Support ND ADJ Support...
- Page 83 4. Troubleshooting Sound SAP High Threshold 0x1ah Pilot Level Low Thld 0x10h SAP Low Threshold 0x9h A2 Pilot AM Carr High Thld … Speaker Delay Normal 0x59h A2 Pilot AM Carr Low Thld … Auxout Delay Normal 0x59h NICAM Error High Thld …...
- Page 84 4. Troubleshooting Expert (It is just for experts. The service man doesn’t have to change option.) N/D ADJ Expert Source … Advanced (Press the 0 button four times on advanced to enter hidden menu) BM_slope1 Skin-Enable FBE3 BM_slope2 Skin-UV BM_slope3 FBE Sub color...
- Page 85 4. Troubleshooting Standard Contrast EPA Standard Standard Brightness Standard Sharpness Standard Color Standard Tint Standard Backlight CH_VDEC AGC_mode CTI_level Gain_VCR ST_Beg_NTSC Y_Gain_Man VS_Slice_Level Saturation HS_Slice_Level FB_Delay_adj Y_Shape_sel RGB_Delay_adj Y_Shape_SCM h_pk_gain C_Shape_sel v_pk_gain C_Shape_SCM h_pk_band If_iir 2d_pk_gain If_filt_sel 2d_pk_band LTI_en slice_mod_fine LTI_level scm_fdet_lvl CTI_en...
- Page 86 4. Troubleshooting CH_DP MJC_DBG MB_STEPS SD2HD_DCR LIMIT_MV_STEP SD2HD_DE GLOBAL_FALLBACK SD2HD_SCL LOCAL_FALLBACK SD2HD_LTI SD2HD_NARS SD2HD_DUR SD2HD_Metric 131220 Coring_ON_OFF SD_CSC 7094 HD_CSC 7438 M_SD_CSC 7094 M_HD_CSC 7438 PC_SD_CSC 7094 OFF_Y HIGH_Y OFF_C HIGH_C OFF_Noise_bias HIGH_Noise_bias OFF_YMAX HIGH_YMAX OFF_FADER HIGH_FADER LOW_Y LOW_C LOW_Noise_bias LOW_YMAX LOW_FADER MED_Y...
- Page 87 4. Troubleshooting S1_Pre_GainH1 S3_Pre_GainH1 Sharpness_LNA S1_Pre_GainH2 S3_Pre_GainH2 S1_Pre_GainH3 S3_Pre_GainH3 S1_Post_GainH1 S3_Post_GainH1 S1_Post_GainH2 S3_Post_GainH2 S1_Post_GainH3 S3_Post_GainH3 S1_Post_GainV1 S3_Post_GainV1 S1_Post_GainV2 S3_Post_GainV2 S1_Post_GainV3 S3_Post_GainV3 S2_Pre_GainH1 S2_Pre_GainH2 S2_Pre_GainH3 S2_Post_GainH1 S2_Post_GainH2 S2_Post_GainH3 S2_Post_GainV1 S2_Post_GainV2 S2_Post_GainV3 Contrast Dimming CE_DIMMING Dimming in Standard Dimming in Movie Synctip_Noise LNA_Plus dB01_th dB12_th...
- Page 88 4. Troubleshooting SSC_OnOff Film_Low_SD FRCQ Option SSC_Width Film_Medium_SD SSC_Freq Film_High_SD FMD_Demo Film_Low_HD CSB Vertical Film_Medium_HD CSB Horizontal Film_High_HD X_VStabStatVid Video_Judder_Low X_VStabStatF Video_Judder_Med X_VStabCorF Video_Judder_High X_VStabSensF Hangup Detection X_HaloSizStatVid Q LVDS Sequence 0-1-2-3 X_HaloSizStatF Q LVDS Format JEIDA X_HaloSizCorF Q LVDS bit width 10bit X_HaloSizSensF PC_Mode_OnOff...
-
Page 89: White Balance -Calibration
4. Troubleshooting 4-4. White Balance - Calibration 4-4-1 White Balance -Calibration ADC/WB AV Calibration Comp Calibration PC Calibration HDMI Calibration 4-4-2 Service Adjustment - You must perform Calibration in the Lattice Pattern before adjusting the White Balance. Color Calibration Adjust spec. - Page 90 4. Troubleshooting Method of Color Calibration (AV) 1) Apply the NTSC Lattice (N0. 3) pattern signal to the AV IN 1 port 2) Press the Source key to switch to “AV1” mode 3) Enter Service mode 4) Select the “ADC/WB” and “ADB” menu 5) Select the “AV Calibration”...
- Page 91 4-5. Servicing Information 4-5-1 Upgrading the Software Samsung may offer upgrades for TV’s firmware in the future. Please contact the Samsung call center at 1-800- SAMSUNG (726-7864) to receive information about downloading upgrades and using a USB drive. Upgrades will be possible by connecting a USB drive to the USB port located on your TV.
- Page 92 1) The message “Does the problem still exist with this test pattern?” is displayed. 2) Press “Yes”. This is a TV SET problem. The massage “Contact Samsung’s call center at 1-800-SAMSUNG for assistance.” is displayed. 3) Press “No”. This is not a TV SET problem.
- Page 93 1) The message “Does the problem still exist with this sound test?” is displayed. 2) Press “Yes”. This is a TV SET problem. The message “Contact Samsung’s call center at 1-800-SAMSUNG for assistance.”is displayed 3) Press “No”. This is not a TV SET problem.
-
Page 94: Wiring Diagram
6. Wiring Diagram 6. Wiring Diagram 6-1. Wiring Diagram 46”... - Page 95 6. Wiring Diagram CN1002(to T-CON) CN1501(to Speaker) RE[0]- SW_PVCC RO[4]+ FRC_RESET RO[4]- RO[3]+ RO[3]- CN1501-1(to Speaker) LVDS opt H-Sync Out ROCLK+ Panel_WP ROCLK- T_Con Check RO[2]+ RO[2]- CN1204(PC sound) RO[1]+ KEKY2 RE[4]+ RO[1]- RE[4]- RO[0]+ A3.3V RE[3]+ RO[0]- LED_INDICAT RE[3]- BUZZER LED_CTRL KEY1...
- Page 96 6. Wiring Diagram CN1404(to HDMI2) CN1402(to HDMI3) HDMI2_RX2+ DGND HDMI3_RX2+ DGND DGND HDMI2_RXCLK- DGND HDMI3_RXCLK- HDMI2_RX2- HDMI_CEC HDMI3_RX2- HDMI_CEC HDMI2_RX1+ DGND HDMI3_RX1+ DGND DGND HDMI2_DDC_SCL DGND HDMI3_DDC_SCL HDMI2_RX1- HDMI2_DDC_SDA HDMI3_RX1- HDMI3_DDC_SDA HDMI2_RX0+ DGND HDMI3_RX0+ DGND DGND HDMI2_5V DGND HDMI3_5V HDMI2_RX0- HDMI2_HPD HDMI3_RX0- HDMI3_HPD...
-
Page 97: Connector Functions
6. Wiring Diagram 6-3. Connector Functions Connector Functions CNM802<->CN201 Supply power from SMPS to Main Board. CN1002<->T-CON The LVDS signal transfered from Main Board to Panel. 6-4. Cables Main-SMPS Main-Tcon Main-RF module BN39-01099L(30P 100mm) 46” : BN39-01184B(51P 250mm) 46” : BN39-01184A 55”...
Need help?
Do you have a question about the UN46B8000XFXZA and is the answer not in the manual?
Questions and answers