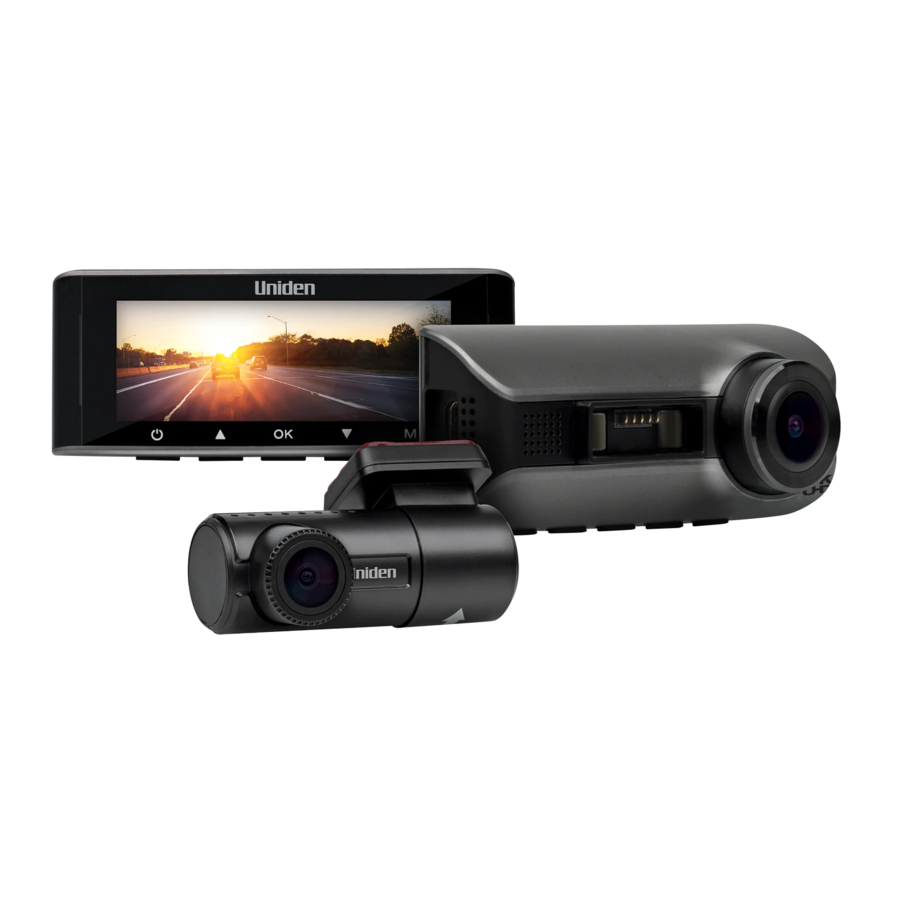
Uniden iGO CAM 90, 90R - 4K Smart Dash Cam Manual
- Owner's manual (24 pages)
Advertisement
- 1 What's In The Box
- 2 Controls & Indicators
- 3 Installation
- 4 Operation
-
5
Troubleshooting
- 5.1 The device cannot take photos or record videos
- 5.2 The device automatically stops when recording
- 5.3 Video is unclear
- 5.4 Cross-stripe interference in an image
- 5.5 The device crashes/freezes
- 5.6 SD Card Error
- 5.7 Display turns off after a few minutes
- 5.8 Memory card is full
- 5.9 The unit feels warm during operation
- 6 Specification
- 7 Important Safety Instructions
- 8 Warranty
- 9 Documents / Resources
What's In The Box
Make Sure These Items Arrived in the Box
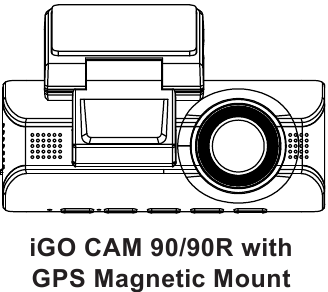
iGo Cam 90/90R includes
- Car Cigarette Charger
- Slide Cover with 3M Sticker
- Windscreen Protective Film
iGo Cam 90R includes
- If any item is missing or damaged, contact your place of purchase immediately.Never use damaged products!
- Internal camera (IC90) available as optional accessories.
- Need help? Get answers at our website: www.uniden.com.au for Australian model.
Controls & Indicators

| Ref | Component | Description |
| 1 | LCD Screen | |
| 2 | Speaker | |
| 3 | Camera Lens | |
| 4 |  | Press & hold for 2 seconds to turn power on. Press & hold for 3 seconds to turn power off. Switch the display on/off. |
| 5 |  | Press to turn on/off audio recording. In Menu list, press to shift to the previous selection. |
| 6 | OK | Press to start or stop video recording. Press to confirm a selection in the Menu. Press to confirm a change in the settings. Press to take snapshot in photo mode. |
| 7 |  | Press to change camera viewing screen when internal/rear camera is connected. Press and hold to switch the Wi-Fi access point on. In Menu list, press to shift to the next selection. |
| 8 | MIC | Records sound. |
| 9 | M | Press to open the Settings Menu. Press to manually lock the current recording file while recording. Press and hold to switch between Record, Picture and Playback mode when the device is not recording. |
| 10 | Reset | If the device fails to operate properly, try resetting the device. Press the reset button by using a fine pen or paperclip. |
| 11 | GPS Module | |
| 12 | Mini USB Port | Insert DC car charger mini USB cable. |
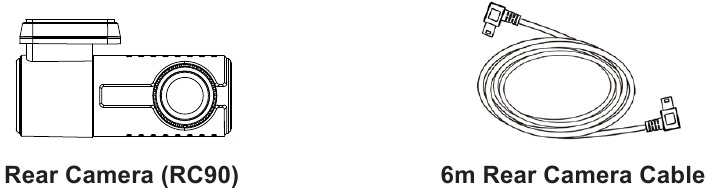
| 13 | Rear Camera Port | Connect the rear camera connector cable (not included with iGo Cam 90/90R). Please check label. |
| 14 | Micro SD Card Slot | Insert micro SD Card (up to 128GB min Class U3) |
| 15 | Internal Camera Port | Connect the internal/cabin camera. Internal camera is sold separately. |
| 16 | Rear Camera Output | Connect the rear camera connector cable (not included with iGo Cam 90/90R). Please check label. |
Installation
Location
To have a better view, try to install the front camera at the center of the windshield. Make sure the lens is located in a place where the windshield is clean to ensure the view is clear. The recommended rear camera installation location is dead centre of the rear windshield.
Make sure the device is not installed in a place where it will interfere with the airbag. Make sure the GPS will not be obstructed by the windshield's sun control film (window tint).
Installing the Front Camera
- Slide the sticker mount bracket into the device bracket slot and make sure it fits tightly.
- Clean the area you desire to have the dash cam placed before sticking the device.
- Peel off the sticker protective film from the 3M sticker on the GPS module.
- Press and apply force on the mount onto the windshield behind the rear- view mirror.
- Arrange and hide the cables to avoid obstruction for the driver's view.
- Adjust the viewing angle of the camera. We recommend the camera should point slightly downwards ~10° below eye level.

NOTE
Do not install the product in a location where it can obstruct the driver's field of vision.
Installing the Rear Camera
(for iGoCam 90R)
Always check the label on the rear camera cable before connecting the camera to the rear camera and front camera. This is to ensure the cable is connected to the corresponding connector port. Otherwise, the rear camera video feed will not display on the front camera screen.
- Peel off the sticker protective film from the 3M sticker on the rear camera.
- Mount the rear camera and apply force on the mount onto the centre rear of the windshield.
- Check the label on the rear camera cable before connecting one end to the rear camera and the other end to the front camera.
- Arrange and hide the cables to avoid obstruction for the driver's rear view.
- Adjust the viewing angle of the camera. We recommend the camera should point slightly downwards ~10° below eye level.
When the rear camera is connected to the front camera and it is currently powered on, the rear camera will be displayed in the right side of the LCD screen. The recording resolution for the rear camera is 1080P.
NOTE
Please ensure the rear camera connection cable is connected/ disconnected when the device power is off or it will damage the product.
GPS Reception information
Surroundings with tall buildings, tunnels or poor weather conditions may result in poor GPS reception or even lose GPS signal. Over-tinting or a rain sensor on the windshield can affect GPS reception.
If the signal is unstable even when you are driving, please try changing the installation spot of your dash camera. For the first time use, it takes about 15~20 minutes to get GPS signal, and after that, it normally takes about 3 minutes.
NOTE
Sticker mount is difficult to remove after it is installed and will not stick well on a curved/textured or wet surface.
Operation
Micro SD Card
NOTE
A compatible micro SD card (not supplied) has to be inserted before you start using the unit. Ensure that the unit is turned off before inserting or removing the micro SD card.
The device can support micro SDHC cards (High Capacity SD) or SDXC cards (Extended Capacity SD) up to 128GB in capacity. A micro SD card of at least 16GB capacity and minimum speed of Class U3 is required.
Insert a formatted micro SD card gently in the slot at the side of the unit. To remove the card from the slot, press the edge of the micro SD card inwards for it to pop out and then pull it out of the slot.
It is important to format the micro SD card before using it, so as to avoid any damage to the files created on iGO CAM 90/90R.
Uniden only recommends using good quality MLC/SLC micro SD cards.
Please ensure that the SD card used is rated for Dash Cam use.
Video Storage Capacity
Refer to the table below for reference for the recording time for different card capacity and some of the recording resolution.
| Resolution | 16GB | 32GB | 64GB | 128GB |
| Single Channel Recording (Front camera only) | ||||
| 2160P | 40 mins | 80 mins | 160 mins | 320 mins |
| 1440P | 45 mins | 90 mins | 180 mins | 360 mins |
| 1080P | 55 mins | 110 mins | 220 mins | 440 mins |
| Dual Channel Recording (Front and Rear camera) | ||||
| 2160P + 1080P | 35 mins | 70 mins | 140 mins | 280 mins |
| 1440P + 1080P | 40 mins | 80 mins | 160 mins | 320 mins |
| 1080P + 1080P | 50 mins | 100 mins | 200 mins | 400 mins |
| Triple Channel Recording (Front, Rear and Internal camera) | ||||
| 1440P + 1080P + 1080P | 35 mins | 70 mins | 140 mins | 280 mins |
| 1080P + 1080P + 1080P | 45 mins | 90 mins | 180 mins | 360 mins |
Power Information
The device is designed mainly for in-vehicle use, drawing on vehicle power or the vehicle battery when using the Hard Wire Kit (HWK-2). The iGO CAM 90/90R has an in-built high quality, long life supercapacitor. It provides enough backup power to ensure any recording in progress is stored safely before shutting the camera off.
Power On
NOTE
When connected to a car charger with power, the device will automatically power on and start recording.
- Connect the DC car adaptor to the power connector USB port found on the device.
- Connect the other end of the DC car adaptor to your car's cigarette lighter.
- The device will power on automatically when the car supplies the power to the device.
- The red dot on the screen will start flashing and recording starts automatically.
At other times, press and hold the power button for at least 2 seconds.
NOTE
Be sure insert the SD card before powering up the device. Format the SD card before you start recording for the first time.
Power Off
When the car's engine is turned off, the device will automatically turn off in a few seconds.
At other times, press and hold the power button for at least 3 seconds to turn off the device. Do no eject the SD card immediately to prevent damage to the last recorded file.
If you wish to switch the device back on, press and hold the power button for at least 2 seconds.
NOTE
Only use the DC car adaptor that comes with your device. Any other adaptor might damage the device.
Record Mode
NOTE
To record a video, ensure that a valid micro SD card (not supplied) is inserted in the given slot. Also note, that inserting/ removing the SD card when the device is recording causes the device to shutdown and in worst case malfunction.
Using the iGO CAM 90/90R you can record videos.
Press and hold the M button to switch between Record, Picture and Playback modes.
Recording
When connected to a car charger with power, the unit automatically goes into the record mode and starts recording.
A flashing red dot icon and a recording timer indicates that the device is recording. To stop recording, press OK and the red dot disappears, indicating that the recording has stopped.
Protect the Current Recording
While recording, if you want to lock the current recordings, then press the M button. Those recordings have been locked and will not be overwritten by normal video recordings.
This also applies when the G-Sensor registers an impact while recording.
Rear Camera
Rear Camera helps you capture rear footages. Insert the rear camera cable into the front camera and the rear camera. The footage from the rear camera should be visible on the screen.
Always check the label on the rear camera cable to ensure the cable is connected to the corresponding connector port. Otherwise, the rear camera video feed will not display on the front camera screen.
Menu Settings
NOTE
Please note, you cannot access the Menu Settings while the device is recording. To access the Menu settings, you will need to stop recording by pressing the OK button.
Press M button to open the Menu Settings. Press M once more to exit from the Menu settings or return to previous page. Otherwise press and hold M to open
Press the relevant UP and DOWN keys to scan through the options, under each menu setting. Press OK to select the required option.
| Main Menu | Setting | Description |
| Recording | Video Resolution | Set the recording resolution for the front camera. The options available are: 3840x 2160P (in single and twin channel recording only), 2560x1440P and 1920x1080P. Higher resolutions will give you a sharper image, but take up more memory on the card. The rear camera and internal camera resolution is fixed at 1080P. |
| Loop Recording | Use this option to set the length of each video clip. If you choose the option 'Off' then the recorder will not loop record and the files will not be overwritten on the micro SD card. | |
| Audio Recording | Use this setting to enable or disable audio recording. The microphone icon on the live view screen indicates yellow when the audio recording is turned on. | |
| Time Lapse Recording | Time Lapse setting helps you compress a long recording to just under a few seconds. By default, the option is turned off. The options available are Off, 5 fps, 2 fps and 1 fps. For example, if you opt for 1 fps, then an image is captured every 1 second. The captured images are then stitched together to playback in 30 fps. | |
| Recording | Mirror Rear Image | Enable to display in mirrored image for the rear and internal camera. Disable to display in real image for rear and internal camera. Recordings are recorded in real image. |
| Motion Detection | Enable this setting to allow the unit to record only when only the front camera detects movement. | |
| WDR | Enable/disable the Wide Dynamic Range (WDR) feature to improves the overall exposure throughout your entire image. | |
| Anti-Flicker | Change depending on the electrical power frequency in your area (Default setting is 50Hz and you may not have to change this setting). | |
| G Sensor | This functions helps protect/lock video files in case of a sudden impact/collision. You can change the sensitivity level of the G-sensor. | |
| Exposure | Set the brightness sensitivity for better effect in different lighting condition | |
| Playback | Normal Recording | Normal video recordings are save in this folder. |
| Event Recording | Locked/event recordings are save in this folder. | |
| Photo | All the snapshots are save in this folder. | |
| Return to the folder selection and press and hold M to exit. | ||
| Parking Mode | Parking mode only works with the optional Hard Wire Kit (HWK-2). The unit must have sufficient external power supplied in order to record in parking mode. Parking Guard: Parking Monitor: | |
| Date & Time | Set the date, time and the date display format. | |
| Safety | Camera Alert | Set the alerts distance when there is a fixed Speed/Red Light/Red Light-Speed or Average Speed Camera. |
| Viewing Mode | Choose to either have Live view or the speedometer displayed on the LCD. | |
| Fatigue Reminder | Set alert timer to periodically reminding you to take a break before continuing to drive. | |
| Wi-Fi | Turn on the WiFi access point and display the SSID and password for App data transfer or view recorded files. Wi-Fi access point needs to be turn off before return to access the device. | |
| Watermark | Date & Time | Opt to have the date and time displayed on the recordings. |
| Speed | Opt to have the date and time displayed on the recordings. | |
| GPS | Opt to have the GPS coordinates displayed on the recordings. | |
| Storage | Format SD Card Reminder | Set a reminder to remind every 15, 30, or 60 days to format your micro SD card. Before you format your micro SD card, always remember to backup whichever footage clips or photos you would like to keep before formatting, all data on the micro SD card will be deleted during the process of formatting. |
| Format SD Card | Use this option to format the SD card. (All files will be permanently erased.) | |
| Storage Information | Indicates the capacity of the inserted micro SD card. | |
| Settings | Key Beep | Enable or disable this feature to sound a tone or go mute when you press the keys. |
| Voice Control | Enable or disable this feature to use voice commands to operate the camera | |
| Voice Command | List of commands recognised by the camera. Switching WiFi On/Off: Turn the display On/Off: Take a snapshot: Lock the current recording file: | |
| LCD Auto Off | Set the LCD display off timer. Off to disable this feature. | |
| IR LED | This setting only pops up when internal camera (not included) is connected. | |
| Car Plate Stamp | Edit the car plate stamp. Use the UP/DOWN keys to select a number or an alphabet. Press M to move to the next character and press OK to confirm and exit. | |
| Time Zone | Set the correct time zone for the GPS to get the correct time settings for the device. | |
| Daylight Saving Time | Enable or disable daylight saving time. | |
| GPS Information | To view the GPS signal connection status and strength. | |
| Factory Default Settings | Resets the device to factory settings. Note that restoring defaults will not erase data on the SD card. | |
| Version | Display the device firmware version. | |
Photo Mode
Press and hold the M button in record mode to switch to the photo mode. The photo icon will display on the top left corner of the screen.
Press the OK button to take a photo.
Playback Mode
Press and hold the M button in photo mode to switch to the playback mode. The device stores video and photos on the SD Card. Playback mode will allow you to review the saved videos and photos and playback the video with audio.
When in the Playback mode, select the folder and toggle the files by pressing the UP and DOWN keys to scan through the various video/image files and press OK button to play a video file.
During video playback pressing the UP or DOWN keys to select the options for. Press OK button to confirm selection.
NOTE
To return to Record Mode, press and hold the M button at the folder selection page. Press OK to start recording.
Uniden Player
Uniden Player allows you to view the recordings on the iGO CAM 90/90R and trace them on a map. The software is supported on Windows 7, Windows 8 and Windows 10.
Installing Uniden Player
Download the Uniden Player from the Uniden website. You may need to unzip the file using the appropriate archiving software before you can use the player. Double click on the Uniden Player icon.
Access the Recorded Files
Before playing the recorded files on the Uniden Player, ensure that you can access the files easily.
Remove the micro SD card from the recorder, and access the card (files) on the computer via a card reader (not provided).

Ensure that the PC is connected to the internet to view the map screen.
- Click on the Open icon to open the files on to the Uniden Player.
- Click on the PLAY button (Playback Controls) to start playback.
Click on the 'Snapshot' icon to take photos of the recording. These photos will automatically save into a folder named 'screenshot'. This folder is located in the Uniden Player folder stored in your PC.
NOTE
Uniden Player version is subject to change without notice. See Uniden website to download the latest GPS Player.
Using the App
iGO 90/90R App allows you to control the iGo CAM 90/90R via WiFi. You can easily preview, browsing files, playback and transfer the files in the SD card into your mobile phone. The app also allows you modify some of the device setting.
The iGo CAM 90/90R WiFi access point is off by default and you will need to turn it on to allows your mobile phone to connect to it.
NOTE
Connect your mobile phone to your iGo CAM 90/90R within a line of sight range of 10m.
NOTE
Press and hold the EMERGENCY button to turn on/off the WiFi access point.
- Search and download the "iGoCam" App from the App Store for iOS devices or Play Store for Android devices.


- Turn on the WiFi access point of the iGo CAM 90/90R. The SSID and the SSID and password can be found in menu settings.
- Go to your mobile phone WiFi setting and connect to the iGo CAM 90/90R access point. The SSID usually starts with iGOCAM.. and the default password is 12345678.
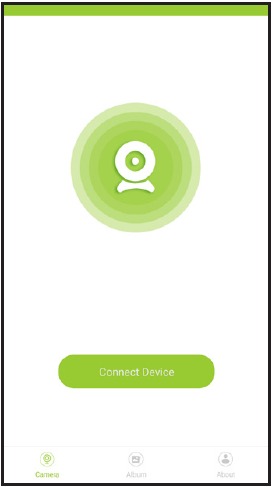
- Go back to the app and tap "Connect Device"
![]()
Camera
Tap to view live video stream from the camera, take a snapshot, and view camera settings.
Album
Tap the Album tab to view or playback downloaded photos or videos.
About
Tap to view app information and clear cache data.

Live View
Snapshot
Take a quick snapshot.
Album
Tap the Album icon to view saved photos or videos on the SD card. You can tap to the video file to play directly or download the video file to the mobile phone storage.
Recording Switch
Start/stop the connected iGo Cam recording.
Camera View Switch
If a rear camera is connected, you can switch camera views.
Microphone
Turn on/off the connected iGo Cam camera audio recording.
Settings
Modify camera settings.
NOTE
You can change Wi-Fi SSID and password in the Camera Settings using the app.
Troubleshooting
Listed below are some of the problems and the possible solutions.
| General Problems | Possible Solutions |
The device cannot take photos or record videos |
|
The device automatically stops when recording | |
Video is unclear | Ensure that there are no fingerprints or dirt on the lens. Ensure that the lens is always kept clean. |
Cross-stripe interference in an image | This is due to the light frequency. Change the light frequency depending on the light source. |
The device crashes/freezes | Press the 'Reset' button, with a pin, to restart the device. |
SD Card Error | Please format the SD card and use recommended card only. Please make sure the SD card is recommended dash cam use. |
Display turns off after a few minutes | Please check the LCD Auto Off setting and select Off. |
Memory card is full | Please allow loop recording to overwrite older recording files or delete unwanted files including emergency recordings. |
The unit feels warm during operation | It is normal for the camera to get warm during operation. Please bear in mind that the if the camera is exposed to high temperature for a long period of time, it might fail to boot up. Cool it down and try again. |
| The recorded video doesn't show mapping information on the Uniden Player. | Please ensure the PC is connected to internet. |
If you still need help, visit our website or call our customer service.
Specification
| Screen Size | 3.19" LCD |
| Sensor Type | Front: 1/1.8" CMOS Rear: 1/2.7" CMOS |
| Recording Resolution | Front Camera: 3840x2160 (Single and twin channel recording only)/2540x1440/1920x1080 Rear Camera: 1920x1080 Internal Camera (Not included): 1920x1080 |
| Frame Rate | 30fps |
| Photo Resolution | 8M/4M/3M/2M/1M |
| Loop Recording | Yes |
| Audio Recording | Yes |
| Viewing Angle | 135°(front) / 150°(rear) |
| WDR | Yes |
| GPS | Built-In |
| Date and Time Stamp | Yes |
| Wi-Fi Access Point | Yes |
| Parking Mode | Yes (requires HWK-2) |
| G-Sensor | Yes |
| Video Format | MP4 |
| Video Codec | H.264 |
| WiFi Access Point | Yes (up to 10m line of sight) |
| Storage | microSD (up to 128GB), Class U3 and above |
| Power Input | 5V 2.5A |
| Supercapacitor | 5.5V 2.5F |
| Operating Temperature | -10°C ~ 60°C |
| Storage Temperature | -20°C ~ 70°C |
Important Safety Instructions
NOTE
Uniden does not represent this product to be waterproof. Do not expose this product to Rain or Moisture.
NOTE
This product is intended for use in a motor vehicle. Don't install the device where it will block the driver's view of the road (including the mirrors!) or the deployment of the airbag.
NOTE
Keep your attention on the road! Don't try to operate or focus on any device while driving. If you have to concentrate on a device, pull off the road for a few minutes.
NOTE
Ensure that the camera lens is kept clean and there is nothing blocking the lens.
NOTE
Don't leave the device in direct sunlight for a long period of time or where the temperature could go above 60°C.
NOTE
You should examine, check and/or verify the device at least once a month including the associated SD card, to ensure the recording are working properly.
NOTE
Never attempt to disassemble, repair or make any modifications to your device.
Warranty
UNIDEN AUSTRALIA PTY LTD
Phone: 1300 366 895
Email: custservice@uniden.com.au
For more exciting new products please visit our website:
Australia: www.uniden.com.au
Documents / Resources
References

Download manual
Here you can download full pdf version of manual, it may contain additional safety instructions, warranty information, FCC rules, etc.
Advertisement


Need help?
Do you have a question about the iGO CAM 90 and is the answer not in the manual?
Questions and answers