Table of Contents
Advertisement
Quick Links
Advertisement
Table of Contents

Subscribe to Our Youtube Channel
Related Manuals for Winmate M900PT Series


Summary of Contents for Winmate M900PT Series
- Page 1 M900P/PT Series 8-inch Rugged Windows Tablet Intel® Apollo Lake Pentium N4200 Windows® 10 IoT Enterprise User Guide Document Version 1.8 Document Part No. 917109001000 https://dc.winmate.com Please read these instructions carefully before using this product, and save this manual for future use.
-
Page 3: Table Of Contents
8-inch Rugged Windows Tablet M900P/PT Series User Guide Contents Contents ..............................1 Chapter 1: Read Me First ........................... 3 1.1 Advisory Conventions ......................... 4 1.2 Safety Information ..........................5 1.3 Handling and Maintenance ......................... 6 1.4 Declaration of Conformity (DoC) ......................7 Chapter 2: Getting Started ......................... - Page 4 8-inch Rugged Windows Tablet M900P/PT Series User Guide 4.9 Using Barcode Reader ........................36 4.9.1 Device Configuring and Setting ....................37 4.9.2 Setting the 1D/2D Barcode Scanner Symbologies ..............41 4.9.3 Adding a Prefix or Suffix ......................43 4.10 Using HF RFID Reader ........................44 4.10.1 RFID Trigger Setting ......................
-
Page 5: Chapter 1: Read Me First
Chapter 1: Read Me First Chapter 1: Read Me First This chapter provides safety information, handling and maintenance precautions and other important information about using the M900P/PT Series rugged tablet. -
Page 6: Advisory Conventions
8-inch Rugged Windows Tablet M900P/PT Series User Guide 1.1 Advisory Conventions Four types of advisories are used throughout the user manual to provide helpful information or to alert you to the potential for hardware damage or personal injury. These are Notes, Important, Cautions, and Warnings. The following is an example of each type of advisory. -
Page 7: Safety Information
Chapter 1: Read Me First 1.2 Safety Information General Product Safety ▪ This product should not be used near water such Sécurité générale as bathtubs, sinks, swimming pools, wet basement, etc. produits [FR] Ce produit ne dois pas être utilisé près de l'eau comme les baignoires, les éviers, les ▪... -
Page 8: Handling And Maintenance
8-inch Rugged Windows Tablet M900P/PT Series User Guide 1.3 Handling and Maintenance General Guideline Touchscreen Guideline Guide Général Guide de l'écran tactile Keep the product at least 13 cm (5 inches) away Use your finger or the stylus on display. Using from electrical appliances that can generate a sharp or metallic object may cause scratches and strong magnetic field such as TV, refrigerator,... -
Page 9: Declaration Of Conformity (Doc)
Chapter 1: Read Me First 1.4 Declaration of Conformity (DoC) FCC Statement This device complies with part 15 FCC rules. Operation is subject to the following two conditions: This device may not cause harmful interference. ⚫ This device must accept any interference received including interference that may ⚫... -
Page 10: Chapter 2: Getting Started
8-inch Rugged Windows Tablet M900P/PT Series User Guide Chapter 2: Getting Started This chapter tells you step by step how to get the Rugged Tablet up and running. -
Page 11: Introduction
Chapter 2: Getting Started 2.1 Introduction Thank you for purchasing 8-inch Rugged Windows Tablet Computer M900P/PT Series. The M900P/PT Series is a compact rugged tablet PC with robust set of features designed to withstand industrial use while providing high tech solutions that increase productivity, improve safety, and reduce operational costs. -
Page 12: Description Of Parts
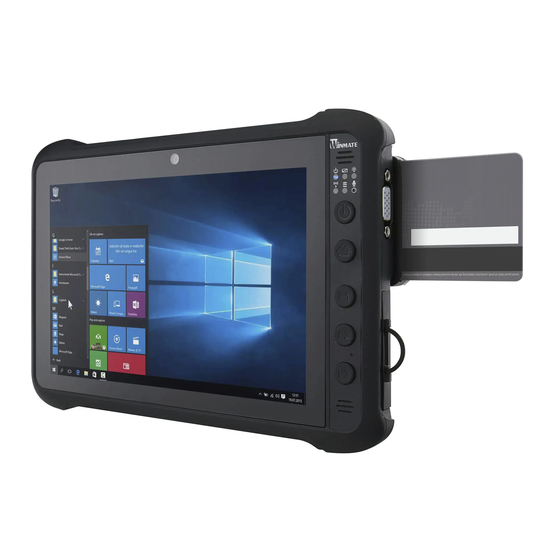
8-inch Rugged Windows Tablet M900P/PT Series User Guide 2.3 Description of Parts M900P Series Item Description Item Description D-Sub To connect a Vehicle Camera 2 MP Webcam. Connector Gateway. 8” Touch Display and act as one of the Mic In/Line Out Connect headset or Screen inputs for the rugged tablet. - Page 13 Chapter 2: Getting Started M900PT Series Item Description Item Description D-Sub To connect a Vehicle Gateway. Camera 2 MP Webcam. Connector 8” Touch Display and act as one of the Mic In/Line Connect headset or headphone Screen inputs for the rugged tablet.
-
Page 14: Hotkey For Specific Functions
8-inch Rugged Windows Tablet M900P/PT Series User Guide 2.4 Hotkey for Specific Functions For the physical buttons on the tablet computer, in addition to its dedicated functions detailed in the previous section, it can also be used to emulate commonly used keyboard key strokes. Under different scenario, a single physical button or a combination of physical buttons provide different keyboard key strokes, which are specified below: In POST (Before Windows boots up):... -
Page 15: First-Time Operation
Chapter 2: Getting Started 2.5 First-Time Operation To get started: 1. Install a SIM card (If your device is equipped with 4G/LTE). 2. Install a storage card. 3. Install the battery. 4. Charge your tablet. 5. Start the tablet. 2.5.1 Installing SIM Card (For 4G/LTE Equipped Devices) The Tablet Computer supports 4G/LTE data connection and fits a Micro-SIM card. -
Page 16: Installing Battery
8-inch Rugged Windows Tablet M900P/PT Series User Guide 2.5.2 Installing Battery To install the battery pack: 1. Disconnect any cords connected to the tablet computer. 2. Turn the tablet over, back facing up. 3. Insert the battery on the connector-pins side first, and then lower the battery into the battery compartment. -
Page 17: Starting The Tablet
Chapter 2: Getting Started 2.5.4 Starting the Tablet Important: When powering on the device for the first time, please make sure there’s no interruption during the Windows setting up process, for example, accidentally powering off. If it happened, please access the recovery menu by pressing Fn1 button on the front bezel to initiate recovery process. -
Page 18: Chapter 3: Setting Up Windows
8-inch Rugged Windows Tablet M900P/PT Series User Guide Chapter 3: Setting Up Windows This chapter details how to setup the Windows that may be installed on the tablet for the first time. -
Page 19: Operating System Introduction
Chapter 3: Setting Up Windows 3.1 Operating System Introduction The M900P/PT Series Tablet Computer operates on Windows 10 IoT Enterprise operating system. Caution Make sure the battery is full charged before starting the Tablet Computer for the first time with internal battery power. Attention Assurez-vous que la batterie est complètement chargée avant de démarrer la tablette PC pour la première fois avec l'alimentation de la batterie interne. - Page 20 8-inch Rugged Windows Tablet M900P/PT Series User Guide 3. On the Here's the legal stuff screen, read through the disclosures, then tap Accept. 4. Windows will then try to connect to network. Tap Skip this step to continue without a wireless connection as you can then set up the network later.
- Page 21 Chapter 3: Setting Up Windows 6. To create a local account, type your User name, password, and Password hint in the fields provided, then tap Next. 7. The initial setup screens are complete, and the desktop is displayed. 8. Read any introductory screens describing features of your computer, and tap Next upon completing each.
-
Page 22: Chapter 4: Operating The Device
8-inch Rugged Windows Tablet M900P/PT Series User Guide Chapter 4: Operating the Device This chapter describes how to operate the M900P/PT Series Rugged Tablet, including camera, Hottab, wireless communications, barcode, RFID and smart card readers. -
Page 23: Hottab Introduction
Hottab provides quick access to the tablet’s functions and features, such as setting up shortcuts, using camera, powering on/off built-in devices, programming function key, and changing power management. Note: Please download the SDK from Winmate Download Center (QR code on the cover page) >> M900P/PT >> Development Kit. -
Page 24: Settings
8-inch Rugged Windows Tablet M900P/PT Series User Guide 4.2 Settings This Hottab menu option provides users information such as PC Information, Battery status, and also device settings such as power management setting, and function key mappings. Perform the following procedure to access the Hottab Setting menu: 1. -
Page 25: Using The Physical Function Keys (Hotkeys)
Chapter 4: Operating the Device 4.2.3 Using the Physical Function Keys (Hotkeys) The function key mapping menu option allows user to change the physical function buttons, Fn1, Fn2 and Fn3. Users can change what application will be launched with short press or long press of keys. -
Page 26: Adjusting Brightness And Volume
8-inch Rugged Windows Tablet M900P/PT Series User Guide 4.2.4 Adjusting Brightness and Volume Brightness adjustment bar appear by clicking Brightness icon. When the Brightness adjustment bar appeared, you can change the brightness level (0 ~ 10) by touch the bar on the screen or push F1 button to increase/ F2 to decrease brightness level. -
Page 27: Adjusting Led Brightness
Chapter 4: Operating the Device 4.2.5 Adjusting LED Brightness 1. Open EZConfig-Scanning V4_IE Icon 2. Open Connected Device... - Page 28 8-inch Rugged Windows Tablet M900P/PT Series User Guide 3. Open Connected Device 4. Open Settings → Device Settings → LED illumination - Manual Trigger Setting change 120.
- Page 29 Chapter 4: Operating the Device 5. Save To Device 6. Open Win-Set Icon...
- Page 30 8-inch Rugged Windows Tablet M900P/PT Series User Guide 7. Barcode Scanner Wedge turns OFF 8. Barcode Scanner Wedge turns On...
- Page 31 Chapter 4: Operating the Device 9. Scanner Barcode...
-
Page 32: Shortcuts
8-inch Rugged Windows Tablet M900P/PT Series User Guide 4.3 Shortcuts Hottab Shortcuts Menu provides an user-friendly interface to configure on-screen software short cuts and allow users to quickly access programs with a few tabs. The Shortcuts menu offers 8 empty slots to store user’s desired quick access. -
Page 33: Switch Via Built-In Hottab Utility
Chapter 4: Operating the Device To change touch mode: (1) Shortly press Function Key 1 (To define the function key refer to User Manual, Chapter 4). (2) Press (Menu) button on the front to open HotTab, or launch HotTab Utility application. Choose “Device ON/OFF, and then click “Touch Set”... -
Page 34: Using Camera
8-inch Rugged Windows Tablet M900P/PT Series User Guide 4.5 Using Camera This Hottab menu option allows users take a picture or record a video. Before use, make sure the camera is powered on under Devices ON/OFF menu with the following scenarios. To open camera interface: 1. - Page 35 Chapter 4: Operating the Device Item Description Review Review Opens Camera settings page. Available Settings: • Settings Picture Save: modify/inspect saved location for pictures. • Video Save Folder: modify/inspect saved location for video recordings. • Picture Quality: Picture compression quality. Camera Switch Switch between front camera or rear camera.
-
Page 36: Using Wireless Communications
8-inch Rugged Windows Tablet M900P/PT Series User Guide 4.6 Using Wireless Communications This section describes how to get a quick access to set-up built-in devices, including turning on/off RF modules, setting up barcode reader, RFID reader, and expansion modules. 4.6.1 Using the Wireless LAN (Wi-Fi) To use the wireless LAN (Wi-Fi) feature to connect to the network, perform the following procedure: 1. -
Page 37: Using The Gps
Chapter 4: Operating the Device To connect to the network using wireless WAN: 1. Open the Hottab utility by press the (Menu) Button located on the front panel, OR launching the Hottab Utility application. 2. Tap on the Device ON/OFF button. 3. -
Page 38: Turning On/Off Led Indicators
8-inch Rugged Windows Tablet M900P/PT Series User Guide 4.7 Turning On/Off LED Indicators The LED Indicators for Power Status, Battery Status, and RF Communication can be turned on/off from Hottab menu. To enable/disable the LED indicators: 1. Open the Hottab utility by pressing the (Menu) button or launching the Hottab. -
Page 39: Device Configuring And Setting
Chapter 4: Operating the Device Tap Disconnect button to stop the connection with Barcode Reader. *To recover the connection, please tap on the button again to re-connect with Barcode Reader. 4.9.1 Device Configuring and Setting 1. Click on Windows and search for EZConfig-Scanning from the Start menu. 2. - Page 40 8-inch Rugged Windows Tablet M900P/PT Series User Guide 4. Once Honeywell N660X is discovered please click “Configure Device” button as shown.
- Page 41 Chapter 4: Operating the Device 4.4.6.2 Scanning mode Settings 1. Click on Device Settings under the Input/Output settings section. 2. Select the desire scanning mode from the drop-down menu shown as below. 3. After selecting a desire scanning mode, click on the “Save to Device” on the side bar.
- Page 42 8-inch Rugged Windows Tablet M900P/PT Series User Guide Scanning mode Description Manual Trigger When in manual trigger mode, the scanner scans until a bar code is read, or until the trigger is released. Two modes are available, Normal and Enhanced. Normal mode offers good scan speed and the longest working ranges (depth of field).
-
Page 43: Setting The 1D/2D Barcode Scanner Symbologies
Chapter 4: Operating the Device 4.9.2 Setting the 1D/2D Barcode Scanner Symbologies The barcode scanner is shipped with default settings shown below. If the default setting suits the usage requirement, setting symbologies is not necessary. Symbologies Default Settings: Symbologies Default setting UPC-A Enable UPC-E... - Page 44 8-inch Rugged Windows Tablet M900P/PT Series User Guide Important 1. The reset to default button will change all setting to default. 2. N660X could disconnect with system after clicking the reset to default button. If the Disconnection happened please scan barcodes below in the following steps. Step 1.
-
Page 45: Adding A Prefix Or Suffix
Chapter 4: Operating the Device 4.9.3 Adding a Prefix or Suffix 1. To add a Prefix or Suffix please click on Data Formatting icon. 2. Click on Editor button under the Prefix or Suffix section and create Prefix/Suffix value by typing in the block or select desire characters in the Control chars, Printable chars, and Extended ASCII. -
Page 46: Using Hf Rfid Reader
8-inch Rugged Windows Tablet M900P/PT Series User Guide 3. When you finish creating Prefix/Suffix, please click on Save to Device on the side bar. 4. For checking the functionality of Prefix/Suffix, please chick on Scan Data Window icon on the top. - Page 47 Chapter 4: Operating the Device Tap on RFID, and the setting utility will show up as below: Tap on the ON button. Check the status color of the ON icon is green, and the status color of the RFID icon on the Hottab menu is orange at the same time.
-
Page 48: Rfid Trigger Setting
8-inch Rugged Windows Tablet M900P/PT Series User Guide 4.10.1 RFID Trigger Setting Item Description Auto Scan The default setting for RFID trigger is Auto Scan. Under this setting, the RFID Reader will always be ready to scan tags. When the RFID tag is detected from RFID antenna, the data will be read automatically. -
Page 49: Settings
Chapter 4: Operating the Device 4.10.2 Settings Item Description Sound The Sound check box defines whether a beep sound will come with the data scanning. Output to This setting defines the output type of the scanned data. Two options are available: Keyboard Wedge Under this setting, the data scanned is sent like keyboard data. - Page 50 8-inch Rugged Windows Tablet M900P/PT Series User Guide Item Description Output to Item Description Prefix User can type in this field to define the characters BEFORE the data scanned. Suffix User can type in this field to define the characters AFTER the data scanned.
-
Page 51: Rfid Output Setting
Chapter 4: Operating the Device Note: User can download the SDK from Winmate Download center website (QR code on the cover page) >> M900P/PT >> Development Kit. 4.10.3 RFID Output Setting Item Description Select RFID The default setting for built-in HF RFID Reader is to Read UID. For some applications, Output Type user might need to read or write further block data;... -
Page 52: Using Smart Card Reader
8-inch Rugged Windows Tablet M900P/PT Series User Guide 4.11 Using Smart Card Reader The Smart Card Reader is a default feature of M900 PT Series tablet and is designed to allow ICC (Chip) card transactions from your tablet computer. Support ISO 7816 Part 1, 2, 3, T=1 and T=0 protocol IC card, EMV Level 1 Compliant. -
Page 53: Chapter 5: Frequently Used Settings
Chapter 5: Frequently Used Settings Chapter 5: Frequently Used Settings This chapter frequently used settings such as changing resolution and scaling, using recovery wizard, docking connector and D-Sub port description, also contain basic troubleshooting guide. -
Page 54: Screen Resolution Scaling And Setting
8-inch Rugged Windows Tablet M900P/PT Series User Guide 5.1 Screen Resolution Scaling and Setting The M900P/PT Series features a 1280 x 800 high resolution display that is perfect for viewing image, video, or other applications, however, Windows user interface (icons, buttons, and other user interface elements) may be too small to read and operate at the default Windows settings. -
Page 55: Changing Screen Resolution
Chapter 5: Frequently Used Settings 2. A “Display” Window will show up. Click on the dropdown option under the “Scale and layout” section and change the scaling option to “125% (Recommended)” or any other desired display scaling. 5.1.2 Changing Screen Resolution Alternatively, instead of changing the display scaling setting, user may choose to change the overall resolution setting to make screen elements bigger. -
Page 56: Replacing Battery
8-inch Rugged Windows Tablet M900P/PT Series User Guide 2. Click on the dropdown option next to “Resolution” and select the desire resolution by tapping on the scale: 3. Hit “Apply”. A prompt “Display Settings” prompt will show up to ask the user if the applied resolution is usable. -
Page 57: Using Recovery Wizard To Restore Computer
Chapter 5: Frequently Used Settings 5.3 Using Recovery Wizard to Restore Computer The M900P/PT Series Tablet Computer has a dedicate recovery partition stored on the hard drive of the tablet to enable quick one-key recovery process. This partition occupies about 11GB of the storage space, and comes built-in to each M900P/PT Series Tablet Computer. - Page 58 8-inch Rugged Windows Tablet M900P/PT Series User Guide 5. Wait till the recovery process to complete. During the recovery process, a command prompt will show up to indicate the percent of recovery process. 6. After recovery is completed, please press any key to continue, and the tablet computer will Shut down automatically.
-
Page 59: Docking Connector Pin Definition
Chapter 5: Frequently Used Settings 5.4 Docking Connector Pin Definition The M900P/PT Series Tablet Computer supports one 19-pin docking connector at the bottom side. The pin definition is listed as the following table. 19 Pin Docking Connector Pin No. Description Pin No. -
Page 60: Com Port Definition
8-inch Rugged Windows Tablet M900P/PT Series User Guide 5.6 COM Port Definition The M900P/PT Series Tablet Computer uses Hottab utility for built-in peripherals control. All the COM port numbers have been defined in the OS image coming with the package. COM Port Device COM 1... - Page 61 Chapter 5: Frequently Used Settings Tap on "Port Setting" tab and click on "Advanced" button. Tap on the dropdown list and choose the correct COM Port Number (refer to the COM Port Definition Table), and click "OK". Double check "Device Manager" to make sure the COM Port number has been re-defined successfully, and then restart the system.
-
Page 62: Pairing With A Wireless Bluetooth Barcode Scanner
8-inch Rugged Windows Tablet M900P/PT Series User Guide 5.7 Pairing with a Wireless Bluetooth Barcode Scanner The computer is affixed with a Bluetooth MAC (Media Access Control) address barcode label that enables wireless Bluetooth Barcode Scanner to quickly establish Bluetooth connection with the computer. It is encoded with leading characters to instruct the wireless Bluetooth barcode scanner to initial Bluetooth Serial Port Profile pairing request. - Page 63 Chapter 5: Frequently Used Settings 3. Once the Bluetooth & other devices Menu appears, click “More Bluetooth options” under Related settings section as shown below. Click OK to continue. 4. go to “Options” tab, and make sure that in the Discovery section, the computer is set to “Allow Bluetooth devices to find this computer”, as shown below: 5.
- Page 64 8-inch Rugged Windows Tablet M900P/PT Series User Guide 6. In the Bluetooth Settings menu, go to “COM Ports” tab. COM port has to be setup for the wireless Bluetooth Barcode Scanner to communicate via the Bluetooth Serial Port Profile. Click on the “Add…” button.
- Page 65 Chapter 5: Frequently Used Settings Click OK to continue. 9. Next, the user has to configure the application that is used to accept the scanned data from the wireless Bluetooth Barcode Scanner. The application has to be configured to accept the same COM Port that has been assigned for the Bluetooth Serial Port Profile in the previous step.
-
Page 66: Set Up The Barcode Scanner For Bluetooth Pairing
8-inch Rugged Windows Tablet M900P/PT Series User Guide 5.7.2 Set up the Barcode Scanner for Bluetooth Pairing Important The wireless Bluetooth Barcode Scanner has to be configured as Bluetooth Serial Port Profile Master device to establish connection via Bluetooth MAC address barcode label. - Page 67 Chapter 5: Frequently Used Settings In order to ensure that Bluetooth Device is successfully pared to the Computer, follow the steps below: 1. Locate the Bluetooth icon in the Notification Area. Select Show Bluetooth Devices. You can access this menu in the Control Panel: ➔Control Panel ➔...
-
Page 68: Basic Troubleshooting
8-inch Rugged Windows Tablet M900P/PT Series User Guide 5.8 Basic Troubleshooting Problem Solution • removable battery Make sure the AC adapter is properly connected, and that the charging. removable battery is properly inserted. • Nothing appears on the screen. The tablet computer may be in sleep mode. Press the power button to wake up the display. - Page 69 Chapter 5: Frequently Used Settings Problem Solution • Barcode scanner does not emit Make sure the Barcode scanner device is enabled in Hottab laser beam and does not seem to utility. • work. Make sure under Windows, the Barcode Reader is set to COM 15 port, so that Hottab can trigger the Barcode Reader hardware.
-
Page 70: Chapter 6: Accessories
8-inch Rugged Windows Tablet M900P/PT Series User Guide Chapter 6: Accessories This chapter lists available accessories and describes how to install accessories to M900P/PT Series Tablet Computer. -
Page 71: Accessories Introduction
Chapter 6: Accessories 6.1 Accessories Introduction The accessories of M900P/PT Series Tablet Computer provide a variety of product support capabilities. Table below lists the accessories available. Accessory Part Number Description Standard Provides power 100-240VAC to Adapter and Power Cord 922D065W19V6 19VDC@3.42A 7.6V, typ. -
Page 72: Installing Vehicle Cradle
❷ Make sure the tablet is firmly inserted into the cradle. ❸ Use RAM mount to install the vehicle mount on the windshield or other flat car surface. Notice that RAM mount kit is not supplied by Winmate. Reverse the procedure to detach a tablet from the vehicle cradle. -
Page 73: Installing Vehicle Gateway Vg-100
I/O based upon message and signals received from the vehicle network. Application Diagram 6.4 Software Settings for VG-100 and VD-M900 Winmate provides ignition software utility to control and set on- or off-delay time settings. 6.4.1 Setup Ignition Delay 1. Long press on Ignition icon... - Page 74 8-inch Rugged Windows Tablet M900P/PT Series User Guide 3. On the Information tab, choose the ignition to use, VG100 or VD-M900P. The default selection is VG100. Make sure the device is connected. 4. If the device connects to VG100, click on the VG100 tab to set the timing delay. If it relates to VD- M900P, click on the VD-M900P tab.
- Page 75 Chapter 6: Accessories By setting Off Delay and Hard Off Delay, a warning message will pop out before the system shuts down automatically. 5. Exit the ignition setting page by clicking on the Exit tab.
-
Page 76: Setup Vg100 Dido
8-inch Rugged Windows Tablet M900P/PT Series User Guide 6.4.2 Setup VG100 DIDO 1. Long press on Ignition icon , if it is showing the red icon , please check your tablet and VG100 connection. 2. Click on Launch DIDO(VG100) Windows. 3. -
Page 77: Setup Vd-M900 Dido
Chapter 6: Accessories 6.4.3 Setup VD-M900 DIDO 1. Long press on Ignition icon , if it is showing the red icon , please check your tablet and VG100 connection. 2. Click on Launch DIDO(VD-M900P) Windows. 3. To control VD-M900P (GPIO) 2-in, 2-out, on VD-M900P(GPIO) row, click on Set DO0 High or Set Do0 Low to set DO0 voltage. -
Page 78: Check For Software Update
8-inch Rugged Windows Tablet M900P/PT Series User Guide 6.4.4 Check for Software Update 1. Long press on Ignition icon 2. Click on Check Update to check if there is any newer version of the software. 3. A dialog box shows Checking for Updates will automatically run. 4. - Page 79 Chapter 6: Accessories 7. You can find your software's version number by long press the Ignition icon.
-
Page 80: Appendix
8-inch Rugged Windows Tablet M900P/PT Series User Guide Appendix This chapter provides additional information about the M900P/PT Series Tablet Computer. -
Page 81: Appendix A: Product Specifications
Appendix Appendix A: Product Specifications Model Name M900P/ M900PT Size 8-inch Resolution 1280 x 800 Brightness 510 nits Display Specification Contrast Ratio 800:1 Viewing Angle 85/85/85/85 Touch Projected capacitive multi-touch Bonding Optical bonding for sunlight viewability Intel® Pentium N4200 Apollo Lake, 1.10 GHz, up to 2.50 GHz with turbo boost technology System Memory 4 GB LPDDR4 (Up to 8 GB) -
Page 82: Appendix B: Order Information
Accessories and Integrated Options may vary depending on your configuration. The product shown in this datasheet is a standard model. For diagrams that contain customized or optional I/O, please contact the Winmate Sales Team for more information. All specifications are subject to change without prior notice. - Page 83 Notes...
- Page 84 Winmate Inc. 9F, No.111-6, Shing-De Rd., San-Chung District, New Taipei City 24158, Taiwan, R.O.C www.winmate.com Copyright © 2022 Winmate Inc. All rights reserved.
Need help?
Do you have a question about the M900PT Series and is the answer not in the manual?
Questions and answers