Table of Contents
Advertisement
Quick Links
WARNINGS:
• TO AVOID FIRE, SHOCK OR DEATH: TURN OFF POWER AT CIRCUIT BREAKER OR
FUSE AND TEST THAT THE POWER IS OFF BEFORE WIRING!
• To be installed and/or used in accordance with electrical codes and regulations.
• If you are not sure about any part of these instructions, consult an electrician.
Product Description
The Weather Resistant 3-Way Switch is a self-contained switch for use in a standard, single-
gang, FS or FD weatherproof box. In addition, the Weather Resistant 3-Way Switch can be
used with another weather-resistant 3-way switch or a wired switch companion.
NOTES:
• Install this switch over smooth, flat surfaces (metal or vinyl siding, clapboard, or plywood).
If the mounting surface is not smooth, use silicone sealant to ensure a proper seal.
• Mount the device in a in single-gang box ONLY.
• Only use the six provided mounting screws.
• When using a standard single-gang wallbox, mount the device in the two center screw
locations and with two of the provided screws. Tighten the screws with 14-16 in.-lb of torque.
• When using an FS or FD weatherproof box, mount the device in the two center screw
locations and the additional four screw locations with the six provided screws. Tighten the
screws with 14-16 in.-lb of torque.
• Use a punch or 9/64 in. drill bit to
remove extra material in additional
four screw mount locations.
Installation
1.
Remove wallplate.
Insert a flat-head screwdriver into the notch at the bottom of the
wallplate to remove it.
2.
Identify your wires (most common):
Weather Resistant 3-Way Wallbox 1
To Switch 2
TRAVELER 1
TRAVELER 2
NEUTRAL
LINE
From Branch Circuit
3.
Wire.
Work on one connection at a time, and connect wires, as shown below.
Weather Resistant 3-Way Switch 1
To Switch 2
TRAVELER 1
LINE
TRAVELER 2
From Branch Circuit
To Back Wire: Remove
insulation per strip gauge on
device approximately
5/8 in. (1.6 cm). Insert
straight wires under clamps
of appropriate terminal
screws. Tighten with
14-18 in.-lb of torque.
NOTES:
• For 15A devices: Back wire terminals accept
up to #10-14 AWG copper or #10-12 AWG
copper-clad wire.
• For 20A devices: Back wire terminals accept
up to #10-12 AWG copper or #10 AWG
copper-clad wire.
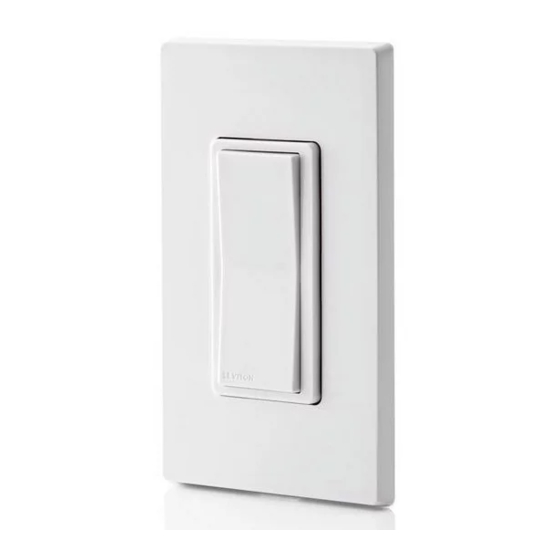
Weather Resistant 3-Way Switch
Cat. No. W5603
Cat. No. W5623
INSTALLATION INSTRUCTIONS
Weather Resistant 3-Way Wallbox 2
To Load
NEUTRAL
LOAD
GROUND
TRAVELER 1
TRAVELER 2
GROUND
From Switch 1
Weather Resistant 3-Way Switch 2
To Load
NEUTRAL
LOAD
GROUND
TRAVELER 1
NEUTRAL
GROUND
TRAVELER 2
From Switch 1
To Side Wire: Remove
insulation approximately
3/4 in. (1.9 cm) per strip
gauge on device.
Loop wires clockwise 3/4
around terminal screws.
Tighten with 14-18 in.-lb
of torque.
NOTES:
• For 15A devices: Side wire terminals
accept up to #12-14 AWG copper or #12
AWG copper-clad wire.
• For 20A devices: Side wire terminals
accept up to #12 AWG copper wire only.
Rated: 15A
120/277V AC
–
Rated: 20A
120/277V AC
–
CAUTIONS:
• To avoid damage to the product, DO NOT use disinfecting products, including foggers,
sprays or other types of atomized cleaning agents.
• DO NOT spray liquid onto the product.
• To clean, use a damp cloth with mild soap.
• Use this device WITH COPPER OR COPPER-CLAD WIRE ONLY.
4.
Mount.
5.
Tighten mounting screws.
Tighten screws with 14-16 in.-lb of torque to ensure a proper seal.
Seal between gasket
and mounting surface.
6.
Install wallplate.
Make sure the notch is on the bottom of the wallplate.
7.
Restore power.
Restore power at circuit breaker or fuse. Installation is complete.
Patents covering this product, if any, can be found on www.leviton.com/patents.
FOR CANADA ONLY
For warranty information and/or product returns, residents of Canada should contact Leviton in writing at
Leviton Manufacturing of Canada ULC to the attention of the Quality Assurance Department,
165 Hymus Blvd, Pointe-Claire (Quebec), Canada H9R 1E9 or by telephone at 1-800-405-5320.
LIMITED 2 YEAR WARRANTY AND EXCLUSIONS
Leviton warrants to the original consumer purchaser and not for the benefit of anyone else that this product
at the time of its sale by Leviton is free of defects in materials and workmanship under normal and proper
use for two years from the purchase date. Leviton's only obligation is to correct such defects by repair
or replacement, at its option. For details visit www.leviton.com or call 1-800-824-3005. This warranty
excludes and there is disclaimed liability for labor for removal of this product or reinstallation. This warranty
is void if this product is installed improperly or in an improper environment, overloaded, misused, opened,
abused, or altered in any manner, or is not used under normal operating conditions or not in accordance
with any labels or instructions. There are no other or implied warranties of any kind, including
merchantability and fitness for a particular purpose, but if any implied warranty is required by the
applicable jurisdiction, the duration of any such implied warranty, including merchantability and fitness
for a particular purpose, is limited to two years. Leviton is not liable for incidental, indirect, special, or
consequential damages, including without limitation, damage to, or loss of use of, any equipment,
lost sales or profits or delay or failure to perform this warranty obligation. The remedies provided
herein are the exclusive remedies under this warranty, whether based on contract, tort or otherwise.
For Technical Assistance Call: 1-800-824-3005 (USA Only) or 1-800-405-5320 (Canada Only) www.leviton.com
DI-000-W56X3-20A-X3
ENGLISH
or
Seal between all mounting
screws and individual
mounting screw gaskets.
Advertisement
Table of Contents

Subscribe to Our Youtube Channel
Related Manuals for Leviton W5623


Summary of Contents for Leviton W5623
- Page 1 Leviton warrants to the original consumer purchaser and not for the benefit of anyone else that this product device approximately 3/4 in. (1.9 cm) per strip at the time of its sale by Leviton is free of defects in materials and workmanship under normal and proper 5/8 in. (1.6 cm). Insert gauge on device.
- Page 2 Étanchéiser les espaces entre le joint et la surface de fixation. Leviton garantiza al consumidor original de sus productos y no para beneficio de nadie más que este producto en el momento de su venta por Leviton está libre de defectos en materiales o fabricación por un período de dos años desde la fecha de la compra original. La única obligación Étanchéiser les espaces entre les joints individuels de chaque vis de fixation.
Need help?
Do you have a question about the W5623 and is the answer not in the manual?
Questions and answers
I am having trouble gettin the wiring correctly on 2 Leviton 5623-2WS switches with light at end of run.
To wire two Leviton W5623 switches with a light at the end of the run (common 3-way switch configuration), follow these general steps:
1. From the power source (breaker):
- Connect the hot (line) wire to the common terminal of Switch 1.
- Connect the neutral wire directly to the neutral terminal of the light.
2. Between the switches:
- Use two wires (called travelers) to connect the traveler terminals of Switch 1 to the traveler terminals of Switch 2.
3. From Switch 2 to the light:
- Connect the common terminal of Switch 2 to the hot terminal of the light.
4. Ground wires:
- Connect the ground wires from each cable to the ground terminal on each switch, and to the light fixture if required.
5. Final steps:
- Ensure all wires are properly stripped (5/8 in. to 3/4 in. depending on method).
- Tighten terminal screws to 14–18 in.-lb.
- Install wall plates and restore power at the circuit breaker.
This setup allows the light to be controlled from two locations, with the light fixture at the end of the circuit.
This answer is automatically generated