
Subscribe to Our Youtube Channel
Related Manuals for Daikin ZANOTTI Uno Series


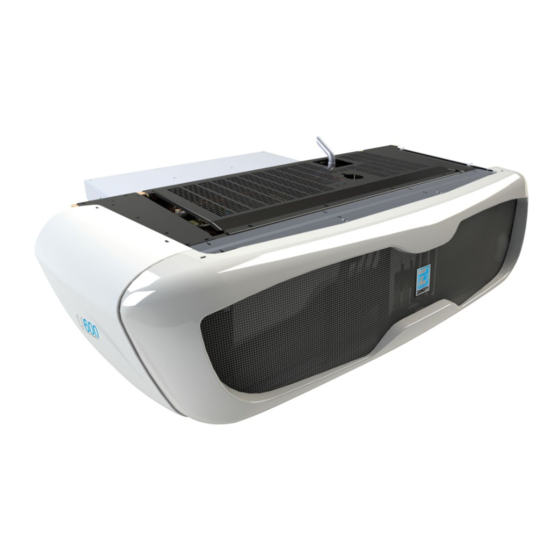
Summary of Contents for Daikin ZANOTTI Uno Series
- Page 1 Refrigeration excellence since 1962 REFRIGERATION UNIT Series Uno INSTALLATION MANUAL TRANSLATION OF THE ORIGINAL INSTRUCTIONS...
- Page 2 Refrigeration unit Series Uno INSTALLATION MANUAL U600 | U800 | U1000 U800 Multi | U1000 Multi REVISION DATE REVISION DESCRIPTION First version 11/2021 Structure and content review 12/2021 Section 4 addition Structure and content review 01/2024 Section 3 The information contained in this manual is the property of ZANOTTI S.p.A. The drawings and other documents accompanying the refrigeration unit are the property of ZANOTTI S.p.A.
-
Page 3: Table Of Contents
Refrigeration unit Series Uno INSTALLATION MANUAL U600 | U800 | U1000 U800 Multi | U1000 Multi GENERAL INFORMATION ............... 6 Introduction ....................... 6 Symbols ......................6 Manufacturer’s contact details ................7 Safety standards ....................7 Manufacturer’s responsibility ................7 Disposal of used materials ................7 TECHNICAL DATA ................... - Page 4 Refrigeration unit Series Uno INSTALLATION MANUAL U600 | U800 | U1000 U800 Multi | U1000 Multi 3.3.2 Preparing the cold room ............... 23 3.3.3 Unpacking the unit ................24 3.3.4 Installation of the unit ................25 U800 Multi | U1000 Multi ................. 29 3.4.1 Installation layout ..................
- Page 5 Refrigeration unit Series Uno INSTALLATION MANUAL U600 | U800 | U1000 U800 Multi | U1000 Multi 4.3.2 Fuse key ....................54 rev.03...
-
Page 6: General Information
Refrigeration unit Series Uno INSTALLATION MANUAL U600 | U800 | U1000 U800 Multi | U1000 Multi 1 GENERAL INFORMATION 1.1 Introduction NOTE ZANOTTI S.p.A., the manufacturer of this refrigeration unit in question is referred to in the manual as Manufacturer. NOTE The company that purchased the refrigeration unit is referred to in the manual as Customer. -
Page 7: Manufacturer's Contact Details
Refrigeration unit Series Uno INSTALLATION MANUAL U600 | U800 | U1000 U800 Multi | U1000 Multi 1.3 Manufacturer’s contact details For any type of information or clarification regarding use, etc., the Manufacturer’s Technical Office is always at the disposal of the Customer’s requests. The latter should ask questions in clear terms, with references to this manual, always indicating the data on the identification plate of the refrigeration unit in question. -
Page 8: Technical Data
Refrigeration unit Series Uno INSTALLATION MANUAL U600 | U800 | U1000 U800 Multi | U1000 Multi 2 TECHNICAL DATA 2.1 U600 Dimensions Figure 1 - Front view Figure 2- Rear view rev.03... - Page 9 Refrigeration unit Series Uno INSTALLATION MANUAL U600 | U800 | U1000 U800 Multi | U1000 Multi Figure 3- Side view rev.03...
- Page 10 Refrigeration unit Series Uno INSTALLATION MANUAL U600 | U800 | U1000 U800 Multi | U1000 Multi Figure 4 - Top View rev.03...
-
Page 11: U800 | U1000 Dimensions
Refrigeration unit Series Uno INSTALLATION MANUAL U600 | U800 | U1000 U800 Multi | U1000 Multi 2.2 U800 | U1000 dimensions Figure 5 - Front view Figure 6- Rear view rev.03... - Page 12 Refrigeration unit Series Uno INSTALLATION MANUAL U600 | U800 | U1000 U800 Multi | U1000 Multi Figure 7- Side view rev.03...
-
Page 13: Weights
Refrigeration unit Series Uno INSTALLATION MANUAL U600 | U800 | U1000 U800 Multi | U1000 Multi Figure 8 - Top View 2.3 Weights U600 U800 U1000 Road mode / 1070 1102 1210 External power Road mode only 1003 1111 rev.03... -
Page 14: Evaporator Size (Multi Temperature Versions)
Refrigeration unit Series Uno INSTALLATION MANUAL U600 | U800 | U1000 U800 Multi | U1000 Multi 2.4 Evaporator Size (Multi temperature versions) 2.4.1 Two-fan Flat Evaporator - U800 Multi Dimensions in mm [in]. Figure 9- Rear view Defrosting Ø12 mm [0.47 in] Suction Ø... - Page 15 Refrigeration unit Series Uno INSTALLATION MANUAL U600 | U800 | U1000 U800 Multi | U1000 Multi [3.46] [8.27] Figure 11- Side view Figure 12 - View 3/4 rev.03...
-
Page 16: Three Fan Flat Evaporator - U1000 Multi
Refrigeration unit Series Uno INSTALLATION MANUAL U600 | U800 | U1000 U800 Multi | U1000 Multi 2.4.2 Three Fan Flat Evaporator - U1000 Multi Dimensions in mm [in]. Figure 13- Rear view Defrosting Ø12 mm [0.47 in] Suction Ø 28 mm [1.10 in] Liquid Ø... - Page 17 Refrigeration unit Series Uno INSTALLATION MANUAL U600 | U800 | U1000 U800 Multi | U1000 Multi [3.46] [8.27] Figure 15- Side view Figure 16 - View 3/4 rev.03...
-
Page 18: Installation
Refrigeration unit Series Uno INSTALLATION MANUAL U600 | U800 | U1000 U800 Multi | U1000 Multi 3 INSTALLATION 3.1 Tools required Before proceeding with the installation of the unit on the truck, it is necessary to check that you have the following tools available: Guard goggles Drill... -
Page 19: Installation Components
Refrigeration unit Series Uno INSTALLATION MANUAL U600 | U800 | U1000 U800 Multi | U1000 Multi 3.2 Installation components 3.2.1 Installation kit Split conduit 80x60 L=1mt [3.28 ft] • Internal plastic bracket • External plastic joint • • Conduit terminal •... -
Page 20: Diesel Fuel Pump Kit
Refrigeration unit Series Uno INSTALLATION MANUAL U600 | U800 | U1000 U800 Multi | U1000 Multi 3.2.2 Diesel fuel pump kit Diesel fuel pump • Diesel fuel pump bracket • • Rubber connector 1/8" D.8 mm • Elbow MF 1/8" Rubber grommet SILIC.X TERM.528 •... -
Page 21: U600 | U800 | U1000
Refrigeration unit Series Uno INSTALLATION MANUAL U600 | U800 | U1000 U800 Multi | U1000 Multi 3.3 U600 | U800 | U1000 3.3.1 Installation layout Figure 17- Side view Condenser Card connection cable guard fuse Evaporator Diesel fuel pump In-cab controller Diesel fuel pump connection cable In-cab controller connection cable Diesel fuel pump pick-up rubber pipe Ø... - Page 22 Refrigeration unit Series Uno INSTALLATION MANUAL U600 | U800 | U1000 U800 Multi | U1000 Multi Figure 18- Rear view Diesel fuel pipe Electric connection cable Diesel fuel return pipe Figure 19- Side view Evaporator Rubber gasket Condenser Horizontal reinforcement CAUTION The truck wall must be able to bear the unit weight from a structural point of view.
-
Page 23: Preparing The Cold Room
Refrigeration unit Series Uno INSTALLATION MANUAL U600 | U800 | U1000 U800 Multi | U1000 Multi 3.3.2 Preparing the cold room Dimensions in mm [in]. View A Vista A Figure 20 - Preparing cold room U600 | U800 | U1000 Horizontal reinforcement Vertical reinforcement rev.03... -
Page 24: Unpacking The Unit
Refrigeration unit Series Uno INSTALLATION MANUAL U600 | U800 | U1000 U800 Multi | U1000 Multi 3.3.3 Unpacking the unit To unpack the unit proceed as follows: Carefully remove the upper and side structures of the packaging crate, then remove the lower •... -
Page 25: Installation Of The Unit
Refrigeration unit Series Uno INSTALLATION MANUAL U600 | U800 | U1000 U800 Multi | U1000 Multi 3.3.4 Installation of the unit DANGER The user must use the appropriate necessary PPE. To install the unit proceed as follows: • Place the work platform (1, Figure 22) near the truck. Figure 22 - Platform positioning rev.03... - Page 26 Refrigeration unit Series Uno INSTALLATION MANUAL U600 | U800 | U1000 U800 Multi | U1000 Multi Move the unit (2, Figure 23), hooked to the lifting device, towards the opening (3) created on the • truck. Figure 23 - Positioning the unit rev.03...
- Page 27 Refrigeration unit Series Uno INSTALLATION MANUAL U600 | U800 | U1000 U800 Multi | U1000 Multi Insert the M14x160 mounting bolts through the load cell roller wall. • Open the upper grid (4, Figure 24) of the unit and rotate the electrical panel (5) to access the •...
- Page 28 Refrigeration unit Series Uno INSTALLATION MANUAL U600 | U800 | U1000 U800 Multi | U1000 Multi Unhook the lifting tool from the unit. • Attach the electric connection pipe (6, Figure 26) to the truck cold room, on the left under the unit, •...
-
Page 29: U800 Multi | U1000 Multi
Refrigeration unit Series Uno INSTALLATION MANUAL U600 | U800 | U1000 U800 Multi | U1000 Multi 3.4 U800 Multi | U1000 Multi 3.4.1 Installation layout Figure 27- Side view Evaporator 1 Diesel fuel return rubber pipe Ø 6 mm [1/4"] Evaporator 2 Diesel fuel pump rubber pipe Ø... -
Page 30: Preparing The Cold Room
Refrigeration unit Series Uno INSTALLATION MANUAL U600 | U800 | U1000 U800 Multi | U1000 Multi 3.4.2 Preparing the cold room Dimensions in mm [in]. Vista A View A Figure 28 - Preparing cold room U800 Multi | U1000 Multi Hole for passage of pipes and wiring Cold room ceiling rev.03... -
Page 31: Evaporator Installation
Refrigeration unit Series Uno INSTALLATION MANUAL U600 | U800 | U1000 U800 Multi | U1000 Multi 3.4.3 Evaporator installation DANGER Evaporators contain nitrogen under pressure. Before installation, release the nitrogen as described in this paragraph. To install the evaporator proceed as follows: •... -
Page 32: Positioning The Evaporators
Refrigeration unit Series Uno INSTALLATION MANUAL U600 | U800 | U1000 U800 Multi | U1000 Multi 3.4.3.1 Positioning the evaporators 120 mm [4.72 in] 60 mm [2.36 in] B - B A - A Figure 30 - Positioning the evaporators rev.03... -
Page 33: Evaporator Connection
Refrigeration unit Series Uno INSTALLATION MANUAL U600 | U800 | U1000 U800 Multi | U1000 Multi 3.4.4 Evaporator connection NOTE Use copper pipes. Flanges and O-rings are supplied with the refrigeration unit. NOTE It is recommended the use of bulk rolled refrigeration pipes and pipe benders to reduce fittings and solder joints where applicable. - Page 34 Refrigeration unit Series Uno INSTALLATION MANUAL U600 | U800 | U1000 U800 Multi | U1000 Multi rev.03...
-
Page 35: Evaporator Connection Example For U800 Multi
Refrigeration unit Series Uno INSTALLATION MANUAL U600 | U800 | U1000 U800 Multi | U1000 Multi 3.4.4.1 Evaporator connection example for U800 Multi Ø2 8 Ø2 2 Defrosting line Ø12 mm [1/2"] Suction line Ø28 mm [1" 1/8] Liquid line Ø10 mm [3/8"] 2 fans evaporator 2 fans evaporator Ø1 2... -
Page 36: Evaporator Connection Example For U1000 Multi
Refrigeration unit Series Uno INSTALLATION MANUAL U600 | U800 | U1000 U800 Multi | U1000 Multi 3.4.4.2 Evaporator connection example for U1000 Multi Defrosting line Ø12 mm [1/2"] Suction line Ø28 mm [1" 1/8] Liquid line Ø10 mm [3/8"] 3 fans evaporator 3 fans evaporator Ø1 2 Ø1 0... -
Page 37: Drain Hoses Installation
Refrigeration unit Series Uno INSTALLATION MANUAL U600 | U800 | U1000 U800 Multi | U1000 Multi 3.4.5 Drain hoses installation NOTE For proper drainage, the drain hose must slope down continuously from the evaporators to the wall drains with no kinks or droop. NOTE It is recommended routing each individual drain hose directly out of the cold storage to allow faster water drainage. -
Page 38: Installation Of The In-Cab Controller (Hmi)
Refrigeration unit Series Uno INSTALLATION MANUAL U600 | U800 | U1000 U800 Multi | U1000 Multi 3.5 Installation of the in-cab controller (HMI) Figure 34 - DIN Version Figure 35 - Articulated support version rev.03... -
Page 39: Diesel Fuel Pump Installation
Refrigeration unit Series Uno INSTALLATION MANUAL U600 | U800 | U1000 U800 Multi | U1000 Multi 3.6 Diesel fuel pump installation To install the diesel fuel pump, proceed as follows: Apply hydrocarbon-resistant sealant to points (A, Figure 36) of the fittings. •... - Page 40 Refrigeration unit Series Uno INSTALLATION MANUAL U600 | U800 | U1000 U800 Multi | U1000 Multi Figure 37 - Diesel fuel pump installation layout Diesel fuel pump pipe Ø 8 mm [5/16"] Fuel pick-up pipe Fuse Fuel pick-up pipe filter Card connection cable guard fuse Diesel fuel tank Diesel fuel pump...
-
Page 41: Installing The Battery
Refrigeration unit Series Uno INSTALLATION MANUAL U600 | U800 | U1000 U800 Multi | U1000 Multi 3.7 Installing the battery 3.7.1 Installing the battery Box BATTERY (NOT INCLUDED IN THE KIT HH screw 6x16 Battery locking bracket Flat washer 6x12 Battery holder box with relay brackets HH screw 10x40 Battery holder cover... -
Page 42: Battery Connections
Refrigeration unit Series Uno INSTALLATION MANUAL U600 | U800 | U1000 U800 Multi | U1000 Multi 3.7.2 Battery connections Figure 38 - Battery connections Battery Maximum system guard fuse (200 A) Alternator Display HMI fuse (10 A) Starter motor NOTE All harnesses and battery cables should be neatly routed and secured with provided clamps... -
Page 43: System Leak Check And Vacuum
Refrigeration unit Series Uno INSTALLATION MANUAL U600 | U800 | U1000 U800 Multi | U1000 Multi 3.8 System Leak Check and Vacuum The vacuum is created by closing the shut-off valves of the unit and connecting the pressure gauge • manifold to the copper lines. -
Page 44: Final Checks
Refrigeration unit Series Uno INSTALLATION MANUAL U600 | U800 | U1000 U800 Multi | U1000 Multi 3.9 Final checks Before delivering the truck to the customer, it is necessary to carry out the following checks: • Correct fixing of all the mechanical units Visually inspect the unit for the following: Loose or improperly fitting bolts, •... -
Page 45: Appendix
Refrigeration unit Series Uno INSTALLATION MANUAL U600 | U800 | U1000 U800 Multi | U1000 Multi 4 APPENDIX 4.1 Cooling diagram - single temperature version rev.03... -
Page 46: Key
Refrigeration unit Series Uno INSTALLATION MANUAL U600 | U800 | U1000 U800 Multi | U1000 Multi 4.1.1 Key Parts added to the specific version Parts in addition to the Road mode + External power supply mode version Copper pipes Flexible hose ØAA 28 mm [1.10 in] Anti vibrating... -
Page 47: Cooling Diagram - Multi Temperature Version
Refrigeration unit Series Uno INSTALLATION MANUAL U600 | U800 | U1000 U800 Multi | U1000 Multi 4.2 Cooling diagram - Multi temperature version rev.03... -
Page 48: Key
Refrigeration unit Series Uno INSTALLATION MANUAL U600 | U800 | U1000 U800 Multi | U1000 Multi 4.2.1 Key Parts added to the specific version Parts in addition to the Road mode + External power supply mode version Copper pipes Flexible hose ØAA 28 mm [1.10 in] Anti vibrating... -
Page 49: Wiring Diagram
Refrigeration unit Series Uno INSTALLATION MANUAL U600 | U800 | U1000 U800 Multi | U1000 Multi 4.3 Wiring diagram rev.03... - Page 50 Refrigeration unit Series Uno INSTALLATION MANUAL U600 | U800 | U1000 U800 Multi | U1000 Multi rev.03...
- Page 51 Refrigeration unit Series Uno INSTALLATION MANUAL U600 | U800 | U1000 U800 Multi | U1000 Multi Colour Table CODE COLOUR WHITE BLACK BROWN ORANGE YELLOW BLUE GREEN rev.03...
- Page 52 Refrigeration unit Series Uno INSTALLATION MANUAL U600 | U800 | U1000 U800 Multi | U1000 Multi Single temperature drive based layout. rev.03...
-
Page 53: Component Key
Refrigeration unit Series Uno INSTALLATION MANUAL U600 | U800 | U1000 U800 Multi | U1000 Multi 4.3.1 Component key Air Resistor Ambient temperature probe Bypass solenoid valve Cold room door microswitch Solenoid valve cooling cycle 1 Solenoid valve cooling cycle 2 Air switch Engine fan Discharge temperature... - Page 54 Refrigeration unit Series Uno INSTALLATION MANUAL U600 | U800 | U1000 U800 Multi | U1000 Multi SAP2 Evaporator input temperature 2 Accelerator Compressor motor circuit breaker Compressor temperature switch Alternator Activator Water level switch Water temperature probe Water thermostat Compressor Partialisation Solenoid Valve Three-way solenoid valve 4.3.2 Fuse key Fuse...
- Page 55 Refrigeration unit Series Uno INSTALLATION MANUAL U600 | U800 | U1000 U800 Multi | U1000 Multi Zanotti S.p.A. M. L. King, 30 46020 Pegognaga (MN) Italy Tax Code/VAT No. 0185670203 T. +39 0376 5551 F. +39 0376 536554 info@zanotti.com www.zanotti.com rev.03...
Need help?
Do you have a question about the ZANOTTI Uno Series and is the answer not in the manual?
Questions and answers