Advertisement
Available languages
Available languages
Quick Links
Montageanleitung
D
Kopffreie Dunstabzugshauben
Installation Instructions
GB
Inclined Cooker hoods
NEG-Novex Großhandelsgesellschaft für Elektro- und Haustechnik GmbH, Chenover Str. 5, D-67117 Limburgerhof
Mod. No.:
CH 99060 S A
CH 99060 W A
CH 99090 S A
CH 99090 W A
SY-103E12A-E9-C55-L52-600
SY-103E12A-E9-C55-L52-900
Advertisement

Related Manuals for Respekta CH 99060 S A


Summary of Contents for Respekta CH 99060 S A
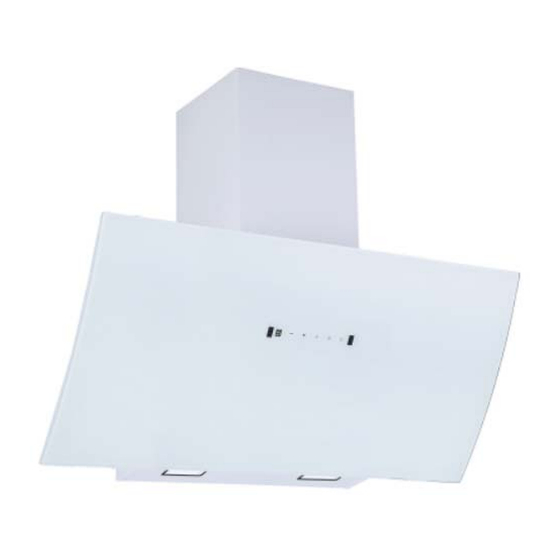
- Page 1 Mod. No.: Montageanleitung Kopffreie Dunstabzugshauben Installation Instructions Inclined Cooker hoods CH 99060 S A CH 99060 W A CH 99090 S A CH 99090 W A SY-103E12A-E9-C55-L52-600 SY-103E12A-E9-C55-L52-900 NEG-Novex Großhandelsgesellschaft für Elektro- und Haustechnik GmbH, Chenover Str. 5, D-67117 Limburgerhof...
- Page 2 Deutsch Montageanleitung Dunstabzugshaube Zubehör Liste Bezeichnung Abbildung Anzahl Äusserer Kaminschacht a) und innerer Kaminschacht b) Oberer Kamin Montagebügel Stabilisierungs- und Montageplatte für den unteren Kaminschacht Wanddübel φ8 ST4×40mm Schrauben (2 für oberen Kamin Montagebügel, 2 für untere Kamin Montageplatte) ST4×30mm Schrauben (2 für Hauben Aufhängung, 2 für Hauben Sicherung)
- Page 3 Inhaltsverzeichnis: Seite Montage der Ventilklappen Montage der Haube für 2 - 3 Umluftbetrieb Montage der Haube für Abluftbetrieb Stellen Sie vorerst die Stromzufuhr sicher. Diese muss von einer Fachperson eingerichtet werden. Achtung! Vor der Montage der Haube die Ventilklappen wie nachstehend beschrieben einsetzen: Montage der Ventilklappen: (V-Klappe) Falls die Ventilklappen nicht werkseitig montiert sind: •...
- Page 4 9. Drücken Sie den Kaminschacht fest an die Wand und markieren Sie mit Bleistift die Abb. d) zwei Bohrlöcher durch die Löcher in der Kamin Montageplatte (Abb. d) 10. Entfernen Sie den Kaminschacht von der Haube 11. Bohren Sie mit einem 8mm Steinbohrer zwei 40mm tiefe Löcher an den markierten Stellen in die Wand.
- Page 5 Montage der Haube für Abluftbetrieb: Achtung! Unbedingt das Kapitel 11. "Installation" der Bedienungsanleitung Abb. k) beachten. Die Mauerdurchführung muss für einen 150mm Abluftschlau bemessen sein. Für die Montage der Haube im Abluftbetrieb montieren Sie die diese wie unter obigem Kapitel: "Montage der Haube für Umluftbetrieb:" beschrieben , jedoch ohne Montage der Kohlefilter.
- Page 6 Englisch Installation Instruction Cooker hoods Accessory List Item Picture Number Lower chimney a) and upper chimney b) Upper chimney bracket Lower chimney stabilizer- and fixing bar Wall plug φ8 Screw ST4×40mm (2 for upper chimney mounting bracket, 2 for lower cimney mounting plate) Screw ST4×30mm (2 pcs for hood...
- Page 7 Content: Page Mounting the V-Flap Installation of the hood for 2 - 3 recirculation mode Mounting the hood for exhaust air operation Before beginning, make sure the power supply is secure. This must be set up by a specialist. Attention! Before installing the hood, insert the V-Flaps as described below: Montage der Ventilklappen: If the valve flaps are not factory-mounted: •...
- Page 8 9. Firmly press the chimney shaft against the wall and mark with pencil the two drill holes through the holes in the chimney stabilize- and mounting plate. (Fig. d) Fig . d) 10. Remove the chimney from the hood. 11. Drill two 40mm deep holes into the wall at the marked locations using an 8mm masonry drill.
- Page 9 Mounting the hood for exhaust air operation: Attention! Be sure to observe chapter 11. "Installation" of user's manual. Fig. k) The wall duct must be dimensioned for a 150 mm exhaust hose. (Drill hole about 155mm). To mount the hood in exhaust air mode, mount it as described in the above chapter: "Mounting the hood for recirculation mode:"...
Need help?
Do you have a question about the CH 99060 S A and is the answer not in the manual?
Questions and answers