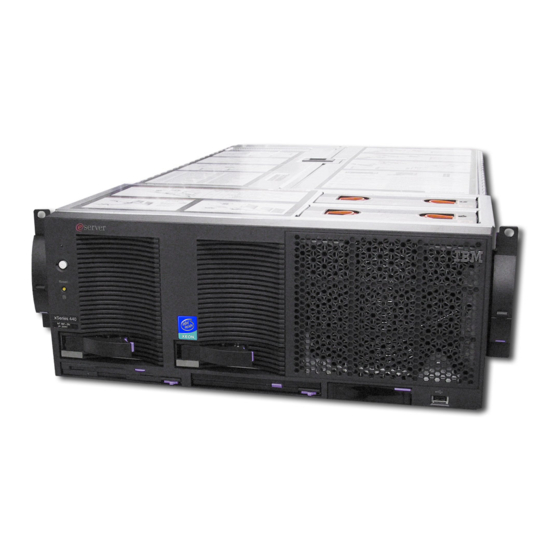
IBM eServer xSeries 440 Installation Manual
Hide thumbs
Also See for eServer xSeries 440:
- Installation manual (98 pages) ,
- User manual (84 pages) ,
- Troubleshooting manual (74 pages)
Table of Contents
Advertisement
Quick Links
Advertisement
Table of Contents

Related Manuals for IBM eServer xSeries 440


Summary of Contents for IBM eServer xSeries 440
- Page 1 xSeries 440 Installation Guide SC32-P013-40...
- Page 2 53 and Appendix B, “Notices” on page 65. First Edition (April 2002) © Copyright International Business Machines Corporation 2002. All rights reserved. US Government Users Restricted Rights – Use, duplication or disclosure restricted by GSA ADP Schedule Contract with IBM Corp.
-
Page 3: Table Of Contents
POST beep code descriptions ....39 ServerGuide startup problems ....40 © Copyright IBM Corp. 2002... - Page 4 Calling for service ..... . . 54 IBM Statement of Limited Warranty Z125-4753-06 8/2000 ..55 Part 1 - General Terms .
-
Page 5: Safety
Vor der Installation dieses Produkts die Sicherheitshinweise lesen. Prima di installare questo prodotto, leggere le Informazioni sulla Sicurezza Les sikkerhetsinformasjonen (Safety Information) før du installerer dette produktet. Antes de instalar este produto, leia as Informações sobre Segurança. © Copyright IBM Corp. 2002... - Page 6 Antes de instalar este producto lea la información de seguridad. Läs säkerhetsinformationen innan du installerar den här produkten. Statement 1: DANGER Electrical current from power, telephone, and communication cables is hazardous. To avoid a shock hazard: v Do not connect or disconnect any cables or perform installation, maintenance, or reconfiguration of this product during an electrical storm.
- Page 7 Statement 2: CAUTION: When replacing the lithium battery, use only IBM Part Number 33F8354 or an equivalent type battery recommended by the manufacturer. If your system has a module containing a lithium battery, replace it only with the same module type made by the same manufacturer.
- Page 8 Statement 4: ≥32 kg (70.5 lbs) ≥55 kg (121.2 lbs) ≥18 kg (39.7 lbs) CAUTION: Use safe practices when lifting. Statement 5: CAUTION: The power control button on the device and the power switch on the power supply do not turn off the electrical current supplied to the device. The device also might have more than one power cord.
- Page 9 Statement 8: CAUTION: Never remove the cover on a power supply or any part that has the following label attached. Hazardous voltage, current, and energy levels are present inside any component that has this label attached. There are no serviceable parts inside these components.
- Page 10 xSeries 440: Installation Guide...
-
Page 11: Chapter 1. Introduction
ID Label 1. Enterprise X-Architecture is an IBM design blueprint that takes full advantage of existing IBM technologies to build powerful, scalable and reliable Intel processor-based servers. For more information about IBM Enterprise X-Architecture, refer to http://www.ibm.com/pc/us/eserver/xseries/xarchitecture/enterprise/index.html. -
Page 12: Features And Specifications
Features and specifications The following table provides a summary of the features and specifications for your xSeries 440. Microprocessor: Power supply: Acoustical noise emissions: v Sound power, idling: 6.2 bel Supports up to 8 microprocessors Two hot-swap power supplies (550 maximum (depending on your configuration) watts at 110 V ac or 1050 watts at... -
Page 13: Notices And Statements Used In This Book
Notices and statements used in this book The caution and danger statements used in this book also appear in the multilingual Safety Information book provided on the IBM xSeries Documentation CD. Each caution and danger statement is numbered for easy reference to the corresponding statement in the safety book. -
Page 14: Handling Static-Sensitive Devices
Handling static-sensitive devices Attention: Static electricity can damage electronic devices and your system. To avoid damage, keep static-sensitive devices in their static-protective package until you are ready to install them. To reduce the possibility of electrostatic discharge, observe the following precautions: v Limit your movement. -
Page 15: Major Components Of The Xseries 440 Server
Major components of the xSeries 440 server The following illustration shows the locations of major components in your server. Note: The illustrations in this document might differ slightly from your hardware. Shipping bracket DIMM SMP baffle access doors Fan 4 Heat-sink Expansion Cover... - Page 16 xSeries 440: Installation Guide...
-
Page 17: Chapter 2. Installing Options
(SMP) Expansion Modules, and DIMMs; properly cable your server; and prepare your server for installation into a rack. For more detailed information, refer to the Option Installation Guide on the IBM xSeries Documentation CD. Opening the cover... -
Page 18: Pci And Pci-X Adapters
PCI and PCI-X adapters This section provides information about the PCI-X expansion slots on the I/O board, and peripheral component interconnect (PCI) adapters. The following illustration shows the location of the PCI-X expansion slots on the I/O board. Note: The illustrations in this document might differ slightly from your hardware. PCI and PCI-X adapter considerations Before you install adapters, review the following: v Locate the documentation that comes with the adapter and follow those... -
Page 19: Installing Adapters
v Your server supports six hot-plug 64-bit adapters in the expansion slots located on the PCI-X board. Note: You can add up to 12 additional PCI-X slots to your server by connecting your server to a remote expansion enclosure. For more information about the expansion enclosure and how to connect your server to it, refer to the documentation that comes with your expansion enclosure. - Page 20 IBM at http://www.ibm.com/. Adapter retention Adapter guide latch PCI-X divider Attention Power 3. Refer to the documentation that comes with your adapter for any cabling instructions. Note: Route adapter cables before you install the adapter. 4. Set any jumpers or switches as described by the adapter manufacturer.
-
Page 21: Cabling A Serveraid Adapter
Cabling a ServeRAID adapter You can install an optional IBM ServeRAID adapter in your server to control the internal hot-swap hard disk drives and external hard disk drives. Refer to your ServeRAID adapter option documentation for complete instructions on installing a ServeRAID adapter in your server and for additional information on ServeRAID adapters. - Page 22 7. Locate the connector on the opposite end of the SCSI cable and connect it to the SCSI backplane connector. Front of server SCSI backplane connector 8. Reinstall fans 3 and 4. 9. If you have other options to install or remove, do so now. 10.
-
Page 23: Smp Expansion Module
SMP Expansion Module The SMP Expansion Module contains the XceL4 system cache, DIMMs, microprocessors, and voltage regulator modules (VRMs) needed to run your server. In this section, you will find the information needed to remove and install the SMP Expansion Module and DIMMs. SMP Expansion Module considerations: v For your server to operate properly, there must be a minimum of one SMP module installed. -
Page 24: Removing An Smp Expansion Module And Cover
Removing an SMP Expansion Module and cover While installing options, you might need to remove one or both of the SMP Expansion Modules. This section describes how to properly remove an SMP Expansion Module from the server and how to remove the cover from the module. Complete the following steps to remove an SMP Expansion Module from the server: 1. - Page 25 b. Remove the blue thumbscrews holding the EMC shield to the server. EMC shields Thumbscrews For use with one For use with two SMP Module SMP Modules c. Remove the EMC shield from the rear of the server. Note: The illustrations in this document might differ slightly from your hardware. Scalability Cables EMC Shield...
- Page 26 Note: The illustrations in this document might differ slightly from your hardware. Latch Locking levers Finger relief Handle 7. Being careful not to damage the components on the center plane, use the handle and the finger relief on the SMP Expansion Module cover to lift the SMP Expansion Module out of the server.
- Page 27 c. Using the locking levers, lift the front edge of the cover off the SMP Module. d. Lift the cover off the SMP Expansion Module. Chapter 2. Installing options...
-
Page 28: Dimms
Memory technology. However in the future, IBM might also support the hot-swap feature of the Active Memory technology. Be sure to check the IBM support web site occasionally to ensure that you have the most current levels of system software installed. -
Page 29: Installing Dimms
Start the Configuration/Setup Utility program and select Save Settings. Refer to the User’s Guide on the IBM xSeries Documentation CD for additional information. v You can configure your server to use Memory Mirroring and Memory Scrubbing. - Page 30 6. Install the DIMM: DIMM Retaining clip a. Open the retaining clip on each end of the DIMM connector. Turn the DIMM so that the pins align correctly with the connector. Attention: To avoid breaking the retaining clips or damaging the DIMM connectors, open and close the clips gently.
-
Page 31: Reinstalling An Smp Expansion Module And Cover
Reinstalling an SMP Expansion Module and cover After installing options in the SMP Expansion Module, you will need to reinstall the SMP Expansion Module cover and reinstall the SMP Expansion Module in the server. Complete the following steps to reinstall the SMP Expansion Module cover: 1. - Page 32 e. Lift slightly on the locking levers and rotate them back until they stop. Note: The illustrations in this document might differ slightly from your hardware. Locking levers Handle 2. Install the SMP Expansion Module into the server. Locking levers Center plane Handle a.
- Page 33 d. Rotate the SMP Expansion Module locking levers forward until the SMP Expansion Module is securely fastened in place. Refer to the following illustration. Note: The illustrations in this document might differ slightly from your hardware. Center plane Locking levers Cover Handle Chapter 2.
-
Page 34: Completing The Installation
Completing the installation 1. Put the right side of the cover in place first, and then put the left side in place. Press down to latch the two halves of the cover in place. 2. Install the server in the rack. Refer to the Rack Installation Instructions that came with your server for detailed information on how to install the server in a rack. -
Page 35: Working With Cables
3. When possible, separate data and power cables. (For more information on cable routing, see the cabling instructions for your xSeries 440 server on the World Wide Web at http://www.ibm.com/pc/support). 4. Do not secure cables too tightly. Overtightening can cause internal damage to the cables. -
Page 36: Connecting Cables
Connecting cables This section describes how to connect cables to the SMP Expansion Port, system power connectors, RXE Expansion Port, SCSI port, USB port, video port, auxiliary pointing device, Ethernet port, and RXE Management port. When instructed, refer to the appropriate documentation for more details. For details about the locations and functions of all of the ports, indicators, and connectors refer to “Server controls and indicators”... -
Page 37: Scsi Cabling
SCSI cabling: Your server has one SCSI port located on the back of the server. Use this port to connect the server to an optional SCSI device such as the IBM FAStT series of extended enclosures. For detailed information about this option and how to connect it to your server, refer to the documentation that comes with the option. - Page 38 xSeries 440: Installation Guide...
-
Page 39: Chapter 3. Configuring Your Server
™ The ServerGuide CD includes software setup and installation tools that are specifically designed for IBM xSeries 440 servers. You can use this CD during the initial installation of your server to configure the server hardware and to simplify your operating system installation. The ServerGuide CD also contains a collection of application programs, which you can install after your server is up and running. -
Page 40: Using The Configuration/Setup Utility Program
3. Follow the instructions that appear on the screen. For more information about using the Configuration/Setup Utility program, see the section on the Configuration/Setup Utility program in the User’s Guide on the IBM Documentation CD. Using the SCSISelect utility program... -
Page 41: Using The Serverguide Cd
(NOS). Note: If the ServerGuide CD does not start, see ″ServerGuide problems″ on IBM Documentation CD. 1. Insert the Setup and Installation CD, and restart the server. -
Page 42: Using The Serveraid Configuration Programs
For information about cabling, configuring, and using the Remote Supervisor Adapter to manage the server remotely, see the User’s Guide and the Remote Supervisor Adapter User’s Guide on the IBM Documentation CD. Using the ServeRAID configuration programs A ServeRAID adapter enables you to use multiple physical SCSI hard-disk drives as logical drives, operating as a disk array. -
Page 43: Chapter 4. Server Power, Controls, And Options
The device also might have more than one power cord. To remove all electrical current from the device, ensure that all power cords are disconnected from the power source. © Copyright IBM Corp. 2002... -
Page 44: Standby Mode
2. Press the power-control button on the front of the server. This will put the server in Standby mode. 3. Disconnect the server from the power source. Note: After you turn off the server, wait at least 5 seconds before you turn on the server again. -
Page 45: Server Controls And Indicators
Server controls and indicators The following section identifies the controls and indicators on the front and rear of your server. Front view Hard disk drive activity light (green) Hard disk drive error light (amber) Power-on light Power button Reset button USB port Power supply latch... - Page 46 CD eject button: Push this button to release a CD from the drive. CD-ROM drive activity light: When this light is on, it indicates that the CD-ROM drive is in use. Diskette drive eject button: Push this button to release a diskette drive from the server.
-
Page 47: Rear View
Rear view System power connectors (1 and 2): The system power cords are connected to these two connectors to provide power to the system. RXE Expansion Port B: Use this port to connect the server to a remote I/O enclosure when two SMP Expansion Modules are installed. Auxiliary pointing device connector: Signal cables for a mouse, trackball, or other pointing device are connected to the auxiliary pointing device connector. - Page 48 v ASM interconnect port - Signal cables for managing expansion module resources are connected to this port. v Ethernet link light: This green light, located on the right of the Ethernet port, goes on when there is an active link connection on the Ethernet controller for the Ethernet port.
-
Page 49: Chapter 5. Solving Problems
If you cannot locate and correct the problem using the information in this section, refer to the Troubleshooting Guide on the IBM xSeries Documentation CD for more information. Diagnostic tools overview... -
Page 50: Serverguide Startup Problems
Solving problems ServerGuide startup problems Look for the symptom in the left column of the chart. Probable solutions to the problem are in the right column. Table 1. ServerGuide startup problems Setup Suggested action v Ensure that the system is a supported server with a startable (bootable) CD-ROM drive. Setup and Installation v If the startup (boot) sequence settings have been altered, be sure the CD-ROM is first CD will not start. -
Page 51: Troubleshooting Charts
BIOS code installed. Refer to the Troubleshooting Guide on the IBM xSeries Documentation CD for more detailed information about testing the system. If you have run the diagnostic test programs or if running the tests does not reveal the problem, call for service. - Page 52 2. You installed the necessary device drivers for the applications. The monitor works when you Some IBM monitors have their own self-tests. If you suspect a problem with your turn on the system, but goes monitor, refer to the information that comes with the monitor for adjusting and blank when you start some testing instructions.
- Page 53 1. To prevent diskette drive read/write errors, be sure the distance between monitors and diskette drives is at least 76 mm (3 in.). 2. Non-IBM monitor cables might cause unpredictable problems. 3. An enhanced monitor cable with additional shielding is available for the 9521 and 9527 monitors.
-
Page 54: Light Path Diagnostics Feature Overview
Solving problems Table 2. Troubleshooting charts (continued) Device Suggested action Serial port Verify that: 1. Each port is assigned a unique address by the Configuration/Setup Utility The number of serial ports program and none of the serial ports are disabled. identified by the operating 2. - Page 55 Solving problems Important: You have up to 12 hours to use the Light Path Diagnostic LEDs after ac power has been removed from the server. After 12 hours, you must power-on the server again to be able to use the Light Path Diagnostic LEDs to help locate system errors.
-
Page 56: Identifying Problems Using The Light Path Diagnostics
Press and hold the switch until you locate the lit LED next to the defective microprocessor. Follow the instructions in the Option Installation Guide on the IBM Documentation CD to remove and replace the microprocessor. -
Page 57: Light Path Diagnostics Table
2. If a microprocessor failure LED is on, make sure the microprocessor is installed correctly. (See the Option Installation Guide on the IBM xSeries Documentation CD for installation instructions). If the problem remains, have the system serviced. - Page 58 Solving problems Table 3. Light Path Diagnostics (continued) Lit LED on diagnostics panel Cause Action An error occurred on a PCI bus. 1. Check the error log for additional information. 2. If you cannot isolate the failing adapter from the information in the error log, try to determine the failing adapter by removing one adapter at a time from PCI bus A (PCI-X slots 1 and 2) and restarting the...
-
Page 59: Chapter 6. Getting Help And Service
(LANs). You can call the IBM Automated Fax System 24 hours a day, 7 days a week. Follow the recorded instructions, and the requested information will be sent to your fax machine. -
Page 60: Using The Documentation And Diagnostic Programs
README files and online help, that comes with the operating system or application program. Most IBM server products come with a set of diagnostic programs that you can use to help you identify hardware problems. See the troubleshooting information in your IBM documentation for instructions on using the diagnostic programs. -
Page 61: Telephone Numbers
If you travel with your server product or relocate it to a country where your server machine type is sold and serviced by IBM or by IBM resellers who are authorized to perform warranty service, International Warranty Service is available for your server product. -
Page 62: Purchasing Additional Services
Purchasing additional services During and after the warranty period, you can purchase additional services, such as support for IBM and non-IBM hardware, operating systems, and application programs; network setup and configuration; upgraded or extended hardware repair services; and custom installations. Service availability and service name might vary by country or region. -
Page 63: Appendix A. Warranty Information
Installation and configuration of machine code or licensed internal code that is designated as customer installable. If you do not register your server with IBM, you might be required to present proof of purchase to obtain warranty service. Before you call for service... -
Page 64: Calling For Service
messages and error codes. The information that comes with your server also describes the diagnostic tests that you can perform. If you suspect a software problem, refer to the information for the operating system or application program. Calling for service Please have the following information ready: v Machine type, model, and serial number v Description of the problem... -
Page 65: Ibm Statement Of Limited Warranty Z125-4753-06 8/2000
Country-unique Terms. The terms of Part 2 replace or modify those of Part 1. The warranties provided by IBM in this Statement of Limited Warranty apply only to Machines you purchase for your use, and not for resale, from IBM or your reseller. The term “Machine” means an IBM machine, its features, conversions, upgrades, elements, or accessories, or any combination of them. - Page 66 IBM or your reseller of changes in a Machine’s location. IBM is responsible for loss of, or damage to, your Machine while it is 1) in IBM’s possession or 2) in transit in those cases where IBM is responsible for the transportation charges.
-
Page 67: Part 2 - Country-Unique Terms
MAY NOT APPLY TO YOU. Governing Law Both you and IBM consent to the application of the laws of the country in which you acquired the Machine to govern, interpret, and enforce all of your and IBM’s rights, duties, and obligations arising from, or relating in any manner to, the subject matter of this Agreement, without regard to conflict of law principles. - Page 68 Trade Practices Act 1974 or other similar legislation and are only limited to the extent permitted by the applicable legislation. Limitation of Liability: The following is added to this Section: Where IBM is in breach of a condition or warranty implied by the Trade Practices Act 1974 or other similar legislation, IBM’s liability is limited to the repair or replacement of the goods...
- Page 69 2. as to any other actual damage arising in any situation involving nonperformance by IBM pursuant to, or in any way related to the subject of this Statement of Limited Warranty, IBM’s liability will be limited to the charge paid by you for the individual Machine that is the subject of the claim.
- Page 70 Machine in any of those countries from either (1) an IBM reseller approved to perform warranty service or (2) from IBM. If you purchase an IBM Personal Computer Machine in Albania, Armenia, Belarus, Bosnia...
- Page 71 Limitation of Liability: The following replaces the second sentence of the first paragraph of this Section:In such instances, regardless of the basis on which you are entitled to claim damages from IBM, IBM is liable for no more than: (items 1 and 2 unchanged).
- Page 72 IBM pursuant to, or in any way related to the subject matter of this Statement of Warranty, IBM’s liability, will be limited to the total amount you paid for the Machine that is the subject of the claim.
- Page 73 Services Act 1982. Applicability of suppliers and resellers (unchanged). The following is added to the end of this Section:IBM’s entire liability and your sole remedy, whether in contract or in tort, in respect of any default shall be limited to damages.
- Page 74 xSeries 440: Installation Guide...
-
Page 75: Appendix B. Notices
Web sites. The materials at those Web sites are not part of the materials for this IBM product, and use of those Web sites is at your own risk. IBM may use or distribute any of the information you supply in any way it believes appropriate without incurring any obligation to you. -
Page 76: Trademarks
XpandOnDemand OS/2 WARP xSeries Lotus and Domino are trademarks of Lotus Development Corporation and/or IBM Corporation in the United States, other countries, or both. Intel, Celeron, MMX, LANDesk, Pentium, Pentium II Xeon, Pentium III Xeon, and Xeon are trademarks of Intel Corporation in the United States, other countries, or both. -
Page 77: Electronic Emission Notices
Properly shielded and grounded cables and connectors must be used in order to meet FCC emission limits. Properly shielded and grounded cables and connectors must be used in order to meet FCC emission limits.IBM is not responsible for any radio or television interference caused by using other than recommended cables and connectors or by using other than recommended cables and connectors or by unauthorized changes or modifications to this equipment. -
Page 78: Australia And New Zealand Class A Statement
IBM cannot accept responsibility for any failure to satisfy the protection requirements resulting from a nonrecommended modification of the product, including the fitting of non-IBM option cards. This product has been tested and found to comply with the limits for Class A Information Technology Equipment according to CISPR 22/European Standard EN 55022. -
Page 79: Japanese Voluntary Control Council For Interference (Vcci) Statement
Japanese Voluntary Control Council for Interference (VCCI) statement Power cords For your safety, IBM provides a power cord with a grounded attachment plug to use with this IBM product. To avoid electrical shock, always use the power cord and plug with a properly grounded outlet. - Page 80 IBM power cord part Used in these countries and regions number 14F0033 Antigua, Bahrain, Brunei, Channel Islands, China (Hong Kong S.A.R.), Cyprus, Dubai, Fiji, Ghana, India, Iraq, Ireland, Kenya, Kuwait, Malawi, Malaysia, Malta, Nepal, Nigeria, Polynesia, Qatar, Sierra Leone, Singapore, Tanzania, Uganda, United Kingdom,...
-
Page 81: Index
Class A notice 67 notes, important 66 environment notices air temperature 2 electronic emission 67 humidity 2 FCC, Class A 67 expansion slots 2 location 8 type 8 operating system controlling remotely 31 © Copyright IBM Corp. 2002... - Page 82 operating system (continued) serial port installing 31 problem 44 option ServeRAID problem 43 configuration program 29, 32 options ServeRAID adapter installing 7 cabling 11 ServerGuide CDs 29, 31 startup problems 40 service summary 49 slots See expansion slots 8 expansion slots 8 SMP Expansion Module 13 pointing device reinstalling the cover 21...
Need help?
Do you have a question about the eServer xSeries 440 and is the answer not in the manual?
Questions and answers