Table of Contents
Advertisement
Quick Links
Advertisement
Table of Contents

Related Manuals for IBM x3100


Summary of Contents for IBM x3100
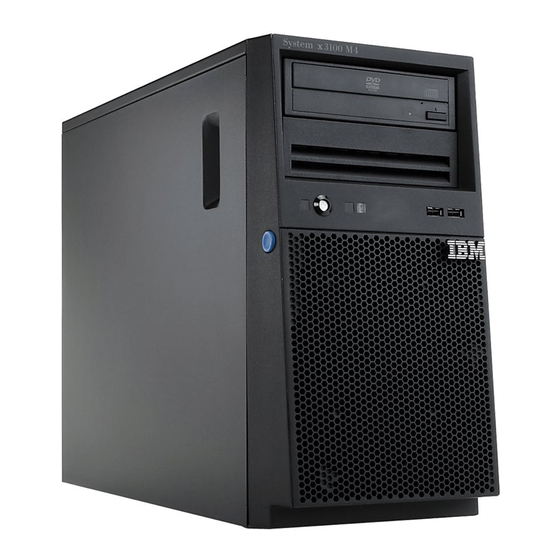
- Page 1 System x3100 Type 4348 User’s Guide...
- Page 3 System x3100 Type 4348 User’s Guide...
- Page 4 Note: Before using this information and the product it supports, read the general information in “Notices,” on page 47, and the Warranty and Support Information document on the IBM System x Documentation CD. First Edition (March 2008) © Copyright International Business Machines Corporation 2008. All rights reserved.
-
Page 5: Table Of Contents
Safety ......v Chapter 1. The System x3100 Type 4348 server ... . 1 Related documentation . - Page 6 Battery return program ..... . 50 Index ......53 System x3100 Type 4348: User’s Guide...
-
Page 7: Safety
Vor der Installation dieses Produkts die Sicherheitshinweise lesen. Prima di installare questo prodotto, leggere le Informazioni sulla Sicurezza. Les sikkerhetsinformasjonen (Safety Information) før du installerer dette produktet. Antes de instalar este produto, leia as Informações sobre Segurança. © Copyright IBM Corp. 2008... - Page 8 2. First, remove power cords from outlet. 3. Attach signal cables to connectors. 3. Remove signal cables from connectors. 4. Attach power cords to outlet. 4. Remove all cables from devices. 5. Turn device ON. System x3100 Type 4348: User’s Guide...
- Page 9 Statement 2: CAUTION: When replacing the lithium battery, use only IBM Part Number 33F8354 or an equivalent type battery recommended by the manufacturer. If your system has a module containing a lithium battery, replace it only with the same module type made by the same manufacturer.
- Page 10 The device also might have more than one power cord. To remove all electrical current from the device, ensure that all power cords are disconnected from the power source. viii System x3100 Type 4348: User’s Guide...
- Page 11 Statement 8: CAUTION: Never remove the cover on a power supply or any part that has the following label attached. Hazardous voltage, current, and energy levels are present inside any component that has this label attached. There are no serviceable parts inside these components.
- Page 12 For example, if a caution statement is labeled “Statement 1”, translations for that caution statement are in the IBM Safety Information document under “Statement 1”. Be sure to read all caution and danger statements in this documentation before you perform the procedures. Read any additional safety information that comes with the server or optional device before you install the device.
-
Page 13: Chapter 1. The System X3100 Type 4348 Server
Chapter 1. The System x3100 Type 4348 server ® The IBM System x3100 Type 4348 server is a high-performance server. It is ideally suited for networking environments that require superior microprocessor performance, improved systems management, and flexible memory and data management. -
Page 14: Related Documentation
Safety Information This document is in PDF on the IBM System x Documentation CD. It contains translated caution and danger statements. Each caution and danger statement that appears in the documentation has a number that you can use to locate the corresponding statement in your language in the Safety Information document. -
Page 15: Notices And Statements In This Document
Notices and statements in this document The caution and danger statements in this document are also in the multilingual Safety Information document, which is on the IBM System x Documentation CD. Each statement is numbered for reference to the corresponding statement in your language in the Safety Information document. -
Page 16: Features And Specifications
Actual sound-pressure levels in a given location might exceed the average values stated because of room reflections and other nearby noise sources. The declared sound-power levels indicate an upper limit, below which a large number of computers will operate. System x3100 Type 4348: User’s Guide... -
Page 17: What Your Server Offers
The server comes with an System Diagnostics CD, which you can use to diagnose problems. v IBM Director IBM Director is a workgroup-hardware-management tool that you can use to centrally manage System x and xSeries servers. For more information, see the IBM xSeries Systems Management Web page at http://www.ibm.com/systems/ management/, which presents an overview of IBM Systems Management and IBM Director. - Page 18 Upgradeable microcode for POST, BIOS, and read-only memory (ROM) resident code, locally or over a LAN ® v Wake on LAN capability 1. Service availability will vary by country. Response time varies; may exclude holidays. System x3100 Type 4348: User’s Guide...
-
Page 19: Server Controls, Leds, And Power
LED itself has failed. When this LED is blinking, it indicates that the system is in the ACPI s5 system status. Chapter 1. The System x3100 Type 4348 server... -
Page 20: Rear View
230 volts ac) based on your power requirements before you turn on the server. AC power LED When this green LED is lit, it indicates that the server is connected to an ac power source. System x3100 Type 4348: User’s Guide... -
Page 21: Server Power Features
Note: When 4 GB or more of memory (physical or logical) is installed, some memory is reserved for various system resources and is unavailable to the Chapter 1. The System x3100 Type 4348 server... -
Page 22: Turning Off The Server
The server can turn itself off as an automatic response to a critical system failure. v You can turn off the server through a request from the service processor. System x3100 Type 4348: User’s Guide... -
Page 23: Chapter 2. Installing Optional Devices
DVD drive Power supply Hard disk drive Filler panels Drive cage DIMM System board (Optional) diskette drive Air baffle Front adapter retention bracket Bezel Cover © Copyright IBM Corp. 2008... -
Page 24: System-Board Internal Connectors
The following illustration shows the internal connectors on the system board. Front control panel connector Main power (ATX 12V) connector Microprocessor SATA 1 SATA 3 SATA 2 Microprocessor SATA 0 Front Microprocessor panel USBs power Internal USB (tape drive) Battery System x3100 Type 4348: User’s Guide... -
Page 25: System-Board Jumpers
System-board jumpers The following illustration shows the jumpers on the system board. BIOS recovery jumper (JP2) Boot block jumper (JP3) Clear CMOS jumper (JP1) System-board external connectors The following illustration shows the external input/output connectors on the system board. Video connector Parallel connector Serial (COM1) connector... -
Page 26: System-Board Leds
The following illustration shows the system-board connectors for user-installable options. DIMM 1 DIMM 2 DIMM 3 DIMM 4 Slot 1, PCI Express x8 (x4) Slot 2, PCI Express x8 Slot 3, PCI (32-bit/33MHz) Slot 4, PCI (32-bit/33MHz) System x3100 Type 4348: User’s Guide... -
Page 27: Installation Guidelines
When you are finished working on the server, reinstall all safety shields, guards, labels, and ground wires. v For a list of supported optional devices for the server, see http://www.ibm.com/ servers/eserver/serverproven/compat//us/. System reliability guidelines To help ensure proper cooling and system reliability, make sure that the following... -
Page 28: Handling Static-Sensitive Devices
Do not place the device on the server cover or on a metal surface. v Take additional care when handling devices during cold weather. Heating reduces indoor humidity and increases static electricity. System x3100 Type 4348: User’s Guide... -
Page 29: Removing The Side Cover
Removing the side cover To remove the server side cover, complete the following steps: 1. Read the safety information that begins on page v and the “Installation guidelines” on page 15. 2. Turn off the server and all attached devices (see “Turning off the server” on page 10);... -
Page 30: Removing The Bezel
Press the bezel release tab, and then pull the bottom of the bezel away from the server to disengage the top bezel tabs from the server, and set the bezel aside. Bezel release tab For instructions for replacing the bezel, see “Installing the bezel” on page 32. System x3100 Type 4348: User’s Guide... -
Page 31: Installing A Memory Module
These DIMMs must be compatible with the latest PC2-5300, 667 MHz or PC2-6400 800 MHz, SDRAM unbuffered DIMM specification. For a list of supported DIMMs for your server, see http://www.ibm.com/servers/eserver/ serverproven/compat/us/. v The DIMM options that are available for the server are 512 MB, 1 GB, and 2 GB. - Page 32 1. Locate the DIMM connectors on the system board. Determine the connectors into which you will install the DIMMs. DIMM 1 LED DIMM 2 LED DIMM 3 LED DIMM 4 LED DIMM 1 DIMM 2 DIMM 3 DIMM 4 System x3100 Type 4348: User’s Guide...
- Page 33 Attention: To avoid breaking the retaining clips or damaging the DIMM connectors, open and close the clips gently. 2. Open the retaining clips and, if necessary, remove any existing DIMM. 3. Touch the static-protective package that contains the DIMM to any unpainted metal surface on the server.
-
Page 34: Installing A Drive
DIMMs, and two 5.25-inch devices. v External tape drives, DVD-ROM, and DVD/RW drives are examples of removable-media drives. You can install removable-media drives in bays 1, 2, and 3 only. System x3100 Type 4348: User’s Guide... -
Page 35: Installing A Dvd Drive
For a complete list of supported optional devices for the server, see http://www.ibm.com/support/. Installing a DVD drive To install a DVD drive in bay 1 or 2, complete the following steps: 1. - Page 36 Store the filler panel and EMC shield in a safe place. Release tab EMC shield Drive retainer clip Note: If you are installing a drive that contains a laser, observe the following safety precaution. System x3100 Type 4348: User’s Guide...
- Page 37 Statement 3 CAUTION: When laser products (such as CD-ROMs, DVD drives, fiber optic devices, or transmitters) are installed, note the following: v Do not remove the covers. Removing the covers of the laser product could result in exposure to hazardous laser radiation. There are no serviceable parts inside the device.
-
Page 38: Installing An Optional Tape Drive
Read the documentation that comes with the drive for cabling instructions. v Route the cable before you install the drive. Do not block the airflow from the fan. v The server supports two SATA hard disk drives. System x3100 Type 4348: User’s Guide... - Page 39 Note: Each Serial ATA drive comes with a cable. If you install an additional Serial ATA drive, you will need an additional cable. To install a SATA hard disk drive in bay 4 or 5, complete the following steps: 1. Read the safety information that begins on page v and the “Installation guidelines”...
-
Page 40: Power And Signal Cables For Internal Drives
Serial ATA drive, you will need an additional cable. – SCSI: A SCSI cable connects SCSI devices to an optional SCSI controller. For more information about connecting SCSI devices, see the SCSI documentation. System x3100 Type 4348: User’s Guide... -
Page 41: Installing An Adapter
PCI Express slot 1, PCI Express slot 2, system-board integrated drive electronics (IDE) or SCSI devices, and then PCI slots 3 and 4. v For a list of supported optional devices for the server, see http://www.ibm.com/ servers/eserver/serverproven/compat/us/. To install an adapter, complete the following steps: 1. - Page 42 If you are installing an optional SCSI adapter, see “Cabling an optional SCSI adapter” on page 31 for additional information. If you have other devices to install or remove, do so now. Otherwise, go to “Completing the installation” on page 31. System x3100 Type 4348: User’s Guide...
-
Page 43: Cabling An Optional Scsi Adapter
Cabling an optional SCSI adapter You can install an optional SCSI adapter in the server to control an internal tape drive. You can also cable a SCSI adapter to external hard disk drives. See the SCSI adapter documentation for complete instructions for installing a SCSI adapter in the server and for additional information about SCSI adapters. -
Page 44: Installing The Bezel
1. Insert the two alignment tabs at the top of the bezel into the bezel retention slots at the top of the chassis. Bezel retention slots Bezel alignment tabs 2. Push the bottom of the bezel toward the server until the bezel snaps into place. System x3100 Type 4348: User’s Guide... -
Page 45: Installing The Side Cover
Installing the side cover Note: You might find it easier to lay the server on its side to replace the side cover. To replace the side cover, complete the following steps: 1. Make sure that all cables, adapters, and other components are installed and seated correctly and that you have not left loose tools or parts inside the server. -
Page 46: Connecting The Cables
Power-supply error LED Power-supply voltage switch AC power LED Video connector Parallel connector Serial connector Ethernet activity LED USB 4 connector Ethernet USB 3 connector Ethernet speed indication LED USB 1 connector USB 2 connector System x3100 Type 4348: User’s Guide... -
Page 47: Updating The Server Configuration
Updating the server configuration When you start the server for the first time after you add or remove a device, you might receive a message that the configuration has changed. The Configuration/Setup Utility program starts automatically so that you can save the new configuration settings. - Page 48 System x3100 Type 4348: User’s Guide...
-
Page 49: Chapter 3. Configuring The Server
IBM Director IBM Director is a workgroup-hardware-management tool that you can use to centrally manage System x and xSeries servers. If you plan to use IBM Director to manage the server, you can download the CD image at http://www.ibm.com/ systems/management/director/downloads.html. -
Page 50: Starting The Configuration/Setup Utility Program
This choice is on the full Configuration/Setup Utility menu only. – Remote Console Redirection Select this choice to enable and configure serial remote video and keyboard redirection. – MAC Address Select this choice to view the planar Ethernet MAC address. System x3100 Type 4348: User’s Guide... - Page 51 Note: This choice is available only if at least one Preboot eXecution Environment (PXE) option, read-only memory (ROM), starts during POST. – Video Select this choice to view the video information. v Date and Time Select this choice to set the date and time in the server, in 24-hour format (hour:minute:second).
-
Page 52: Passwords
Technology. Enabled is the default. Attention: Do not make changes in the Advanced Processor Control option unless you are directed to do so by an IBM authorized service representative. v Error Logs Select this choice to view or clear error logs. -
Page 53: Erasing A Lost Or Forgotten Password (Clearing Cmos)
Remove the battery from the server and then reinstall it. See the Problem Determination and Service Guide on the IBM System x Documentation CD for instructions for removing the battery. v Change the pin position of the clear CMOS (password override) jumper on the system board to bypass the power-on password and administrator password check (see “Erasing a lost or forgotten password (clearing CMOS)”). -
Page 54: Using The Serverguide Setup And Installation Cd
Using the ServerGuide Setup and Installation CD The ServerGuide Setup and Installation CD contains a setup and installation program that is designed for the IBM server. The ServerGuide program detects the server model and optional hardware devices that are installed and uses that information during setup to configure the hardware. -
Page 55: Serverguide Features
When you use the ServerGuide Setup and Installation CD, you do not need setup diskettes. You can use the CD to configure any supported IBM server model. The setup program provides a list of tasks that are required to set up your server model. -
Page 56: Typical Operating-System Installation
IBM Support Web site. Note: Changes are made periodically to the IBM Web site. The actual procedure might vary slightly from what is described in this document. 1. Go to http://www.ibm.com/systems/support/. -
Page 57: Enabling The Intel Gigabit Ethernet Boot Agent Program
Connection Software CD that comes with the server. To find updated information about configuring the controller, complete the following steps. Note: Changes are made periodically to the IBM Web site. The actual procedure might vary slightly from what is described in this document. - Page 58 System x3100 Type 4348: User’s Guide...
-
Page 59: Appendix. Notices
Web sites. The materials at those Web sites are not part of the materials for this IBM product, and use of those Web sites is at your own risk. IBM may use or distribute any of the information you supply in any way it believes appropriate without incurring any obligation to you. -
Page 60: Important Notes
Maximum internal hard disk drive capacities assume the replacement of any standard hard disk drives and population of all hard disk drive bays with the largest currently supported drives available from IBM. System x3100 Type 4348: User’s Guide... -
Page 61: Product Recycling And Disposal
IBM makes no representations or warranties with respect to non-IBM products. Support (if any) for the non-IBM products is provided by the third party, not IBM. Some software may differ from its retail version (if available), and may not include user manuals or all program functionality. -
Page 62: Battery Return Program
United States, go to http://www.ibm.com/ibm/environment/ products/index.shtml or contact your local waste disposal facility. In the United States, IBM has established a return process for reuse, recycling, or proper disposal of used IBM sealed lead acid, nickel cadmium, nickel metal hydride, and battery packs from IBM equipment. - Page 63 For proper collection and treatment, contact your local IBM representative. For California: Perchlorate material – special handling may apply. See http://www.dtsc.ca.gov/hazardouswaste/perchlorate/.
- Page 64 System x3100 Type 4348: User’s Guide...
-
Page 65: Index
22 heat output 4 hot-swap drive, specifications 4 danger statements 3 data rate, Ethernet 45 DIMM connector IBM Configuration/Setup Utility program installing memory 20 menu choices 38 locations 20 starting 38 DIMM retaining clips 21 © Copyright IBM Corp. 2008... - Page 66 40 status LEDs 7 lost of forgotten 41 system error LED 7 setting 39 system reliability 15 using 40 system specifications 4 passwords resetting 41 PCI configuration 39, 40 PCI expansion slots 4 System x3100 Type 4348: User’s Guide...
- Page 67 22 temperature 4 trademarks 47 using Boot Menu program 44 IBM Configuration/Setup Utility program 37 passwords 39, 40 video 4 video controller 4 voltage for power supply setting 9 Web site compatible options 15 ServerGuide 43 weight 4...
- Page 68 System x3100 Type 4348: User’s Guide...
- Page 70 Part Number: 44W2351 Printed in USA (1P) P/N: 44W2351...
Need help?
Do you have a question about the x3100 and is the answer not in the manual?
Questions and answers