Focus Ergofocus Gas Installation & User's Instructions
Hide thumbs
Also See for Ergofocus Gas:
- Design installation & operating manual (24 pages) ,
- Installation, servicing & user instructions (48 pages)
Table of Contents
Advertisement
Quick Links
Approved according to :
ANSI Z21.50
CSA 2.22
This document was packed with the appliance.
KEEP THESE INSTRUCTIONS FOR FUTURE USE
CREATE BEYOND CONVENTION
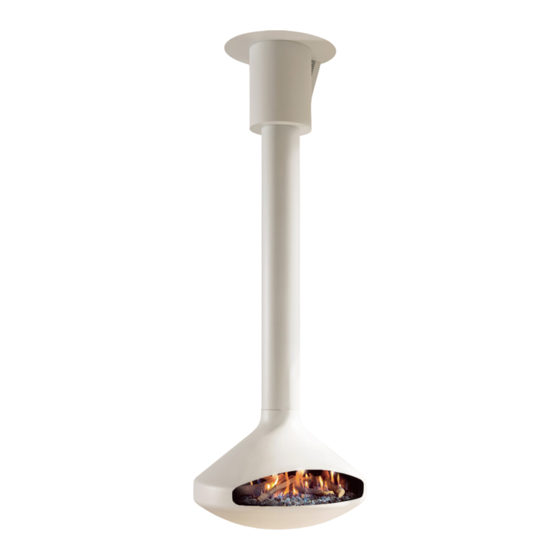
ERGOFOCUS GAS
____
Installation & User instructions
WARNING
FIRE OR EXPLOSION
Failure to adhere to safety warnings precisely may result in
severe injury, loss of life, or damage to property.
NEVER store or use gasoline or any other flammable
vapors and liquids near this appliance or any other similar
devices.
WHAT TO DO IF YOU DETECT GAS ?
• DO NOT attempt to activate any device.
• DO NOT manipulate electrical switches and DON'T use
telephones within your premises.
• Evacuate the building immediately.
• Promptly contact your gas supplier using a neighbor's
phone. Follow the gas supplier's instructions. If you cannot
reach your gas supplier, contact the fire department
without delay.
- Installation and maintenance should be carried out by a
qualified installer, service agency, or the gas supplier.
INSTALLER:
Please leave this manual with the unit.
CONSUMER:
Retain this manual for future reference
Advertisement
Table of Contents

Related Manuals for Focus Ergofocus Gas


Summary of Contents for Focus Ergofocus Gas
- Page 1 CREATE BEYOND CONVENTION ERGOFOCUS GAS ____ Installation & User instructions WARNING FIRE OR EXPLOSION Failure to adhere to safety warnings precisely may result in severe injury, loss of life, or damage to property. NEVER store or use gasoline or any other flammable vapors and liquids near this appliance or any other similar devices.
-
Page 3: Table Of Contents
OF CONTENTS INTRODUCTION Please thoroughly read this entire manual before installing and using your Focus fireplace. Failure to follow instructions may lead to property damage, bodily injury, or even death. Improper GENERAL INFORMATION installation of this room heater may result in a house fire. To... -
Page 4: General Information
GENERAL INFORMATION IMPORTANT SAFETY WARNING This appliance must be installed as an OEM installation in manufactured homes (USA only), or an aftermarket permanently located, or a mobile home, where not prohibited by local codes. Installation must adhere to the Manufacturer’s instructions and comply with the Manufactured Home Construction and Safety Standard, Title 24 CFR, Part 3280, in the United States. -
Page 5: Included Parts, Materials And Required Tools For Installation
INCLUDED PARTS, MATERIALS AND REQUIRED TOOLS FOR INSTALLATION • The appliance and its designated components include the firebox, suspension plate, steel pipe, insulated stainless steel conduit, focus kit (comprising a heat-protective glove, mounting gloves, and a can of touch-up paint), and insulating washers. -
Page 6: Detailed Plan
GENERAL INFORMATION DETAILED PLAN ’’ 13/32 (Ø 950 mm) 100° ’’ (Ø 324 mm) ’’ 19/32 (Ø 650 mm) ’’ (Ø 219 mm) ’’ (740 mm) Sch 1... -
Page 7: Adjustable Suspension Plate
GENERAL INFORMATION ADJUSTABLE SUSPENSION PLATE Ø 13" (Ø 324 mm) 0 ≤ ß ≤ 12/12 (0 ≤ ß ≤ 45°) ’’ (435 mm) Ø 9 ’’ (Ø231 mm) Sch 2... -
Page 8: Safety Clearance Distances From Combustible Materials
GENERAL INFORMATION SAFETY CLEARANCE DISTANCES FROM COMBUSTIBLE MATERIALS Approved for combustible floor Sch 3 IMPORTANT Manufacturer specifications: • Maintain a minimum distance of 4’’ (100 mm) from non-combustible walls to ensure adequate ventilation. For optimal wall preservation, exclusively utilize mineral paint; if using other paints, adhere to the specified clearances. •... -
Page 9: Installation Instructions
The support of the anchor plate (roof structure, slab, etc.) must be sized in congruence with the fireplace static and dynamic charges. The size calculation for the support is not the responsibility of focus or its affiliates. It is your responsibility to consult with an engineer... -
Page 10: Connector
Installing the Focus fireplace through a wall or partition constructed of combustible materials is forbidden. FRESH AIR INTAKE : For optimal performance, Focus recommends a fresh air intake in the room, ideally positioned below the fire. We suggest using Deflect-O A0684 semi-rigid aluminum duct. The minimum size for the fresh air intake is:... -
Page 11: Junction Sleeve Detail
Screws do not sit flush when installed. Fig 4 NOTE: Junction sleeves are supplied only when the room’s floor-to-ceiling height necessitates multiple focus pipes in separate sections. A junction sleeve may not be included for ceiling heights of 10 feet 7 inches (3200 mm) or less. -
Page 12: Installation Of The Suspension Plate
INSTALLATION INSTRUCTIONS INSTALLATION OF THE SUSPENSION PLATE The Focus Adjustable Suspension Plate ETL is specifically crafted for use on rafters or structures with a pitch ranging from zero to forty-five degrees. The dimensions are as follows: • Inside Diameter: 8 inches (200 mm). - Page 13 INSTALLATION INSTRUCTIONS Fig 7 Fig 8...
- Page 14 INSTALLATION INSTRUCTIONS Assemble Support Collar: • Position the support collar between the mounting bars. • Securely fasten the bolts using the provided nuts and lock washers. Mount the Assembly: • Attach this assembled unit to the ceiling or roof at the designated location.
- Page 15 INSTALLATION INSTRUCTIONS Reinstall Drum into Support Collar: • Place the drum back into the support collar. • Using a level, confirm the alignment, and securely tighten the cramping screws according to the following pattern: • • • Note: Screws are not intended to sit flush with the support collar. 10.
-
Page 16: Installation Of The Appliance
INSTALLATION INSTRUCTIONS INSTALLATION OF THE APPLIANCE Gas line... - Page 17 INSTALLATION INSTRUCTIONS Gas line Gas line Inverted Required collar The final component must be adjustable 9 screws M8 Gas line Welding of the duct...
- Page 18 INSTALLATION INSTRUCTIONS 2 nuts M5 5 screws FXC M5x12 n°08 Gas line The marking below the duct should be positioned at the front of the fireplace...
- Page 19 INSTALLATION INSTRUCTIONS n°13 3 nuts M8 Gas line Gas line Tightening torque = 42 ft.lb = 57 N.m Tightening torque = 54 ft.lb = 73 N.m...
- Page 20 INSTALLATION INSTRUCTIONS FLEXIBLE STAINLESS STEEL CONNECTION DETAIL Strip the pipe Cut the tube Tighten the fitting to Install the nut and seal the connection symmetrical half-rings Test the installation and protect the stripped part with self-adhesive tape n°24 4 screws FXC M5x12 Tightening torque = 54 ft.lb = 73 N.m...
- Page 21 INSTALLATION INSTRUCTIONS maxi 3/8’’ 1000 mm maxi 2 nuts M5 n°08 Gas supply (not supplied) Tightening torque = 54 ft.lb = 73 N.m 5 screws FXC M5x12...
-
Page 22: Gas Connexion
INSTALLATION INSTRUCTIONS GAS CONNECTION • Correct Sizing and Routing: Ensure the gas supply line is sized and installed correctly, following the guidelines stipulated in the latest edition of the National Fuel Gas Code, NFPA 54 (USA), or CAN/CSA-B149.1 (Canada). • Material Specifications: Never use galvanized or plastic pipes for the gas supply line, unless explicitly specified for gas use. -
Page 23: Testing Before Commissioning
INSTALLATION INSTRUCTIONS e fuite de gaz depuis l’al TESTING BEFORE COMMISIONING To carry out these operations, you must first remove the burner cover and gas connection cover as described in steps 9 and 10 on page 18. A. LEAK TEST Leak test Switch on and check that there are no gas leaks from the supply to the burner. - Page 24 INSTALLATION INSTRUCTIONS B. PURGE PROCEDURE Fig 15 Fig 16 Keep valve depressed. Set the knob to MAN. Fig 17 Fig 18 Hold the valve down and use a lighter to check for gas at the When pilot is lit, release valve. Turn knob back to ON position. pilot.
-
Page 25: Commissioning The Appliance
INSTALLATION INSTRUCTIONS COMMISSIONING THE APPLIANCE When the appliance is used for the first time, the coatings on the various parts may smoke. It is therefore advisable to ventilate the room for at least one hour before using the unit for the first time. A. - Page 26 INSTALLATION INSTRUCTIONS 1. Take off the burner. 5 screws FXC M5x12 1-2. Remove the plate from 1-1. Remove the screws from the burner cover the burner 4 screws TBHC M5x8 1-5. Remove 4 screws from the burner 1-6. Put out the burner of fireplace 1-3. Close the gas supply valve 1-4.
- Page 27 INSTALLATION INSTRUCTIONS 2. Measuring the Burner Pressure : The image below illustrates the two pressure measuring tappings present on the control. Each tapping is accompanied by an arrow for clarity. The first arrow, pointing outward from the control, represents the burner pressure. The second arrow indicates the gas supply pressure, pointing inward towards the control.
- Page 28 Hot while in operation. Do not touch. L’appareil Severe burns may result. Keep children, clothing, Ne pas toucher l furniture, gasoline and other liquids having Surveiller les e INSTALLATION INSTRUCTIONS flammable vapors away. Keep burner and control meubles, l’esse compartment clean. See installation and operating des vapeurs in instructions accompanying appliance.
- Page 29 INSTALLATION INSTRUCTIONS 6. Reinstall the burner. 6-1. Installing the fireplace burner 4 screws TBHC M5x8 6-3. Connect the gas inlet hose gas inlet hose 6-4. Open gas supply valve 6-2. Tighten the 4 burner screws 5 screws FXC M5x12 6-5. Installing the burner base 6-6.
-
Page 30: Arrangement Of The Ceramic Logs
INSTALLATION INSTRUCTIONS ARRANGEMENT OF THE CERAMIC LOGS Only the ceramics supplied with this appliance should be used. The placement of ceramics should be done only according to the instructions on the following pages. Spare parts are available from your dealer but should only be installed by a qualified installer. IDENTIFICATION OF INSTALLATION KIT PARTS : Black vermiculite Small black pebbles... - Page 31 INSTALLATION INSTRUCTIONS log 1 log 2 Scatter the grey mini chips making sure that no grey chips enter the Pilot area. log 3 log 4 log 5 log 6...
-
Page 32: Briefing The Customer
INSTALLATION INSTRUCTIONS log 7 log 8 log 9 Scatter black vermiculites, black small pebbles. The layout is now complete. Ensure that the Pilot area is still left clear, and check the correct lighting of the Pilot and that the Pilot cross lights to the main burner smoothly. -
Page 33: User Instructions
USER INSTRUCTIONS BATTERY TYPE Remote control model number Simultaneously press the . The remote control model is displayed. Receiver : 4 x 1,5V “AA”, R6 size. Remote control : 2 x 1,5V “AAA” (Alkaline only). Disabling functions : Install the batteries. All icons will be displayed and blinking. FLUE SPILLAGE MONITORING SYSTEM When the icons are blinking, press and hold the corresponding function button for 10 seconds. -
Page 34: Manual Control
USER INSTRUCTIONS MANUAL CONTROL Fig 27 A. SETTING FAHRENHEIT OR CELSIUS C. CHILD PROOF To change between °C and °F, press To activate press buttons buttons simultaneously. simultaneously. displayed and the handset is rendered inoperable, except NOTE: Choosing °F results in a 12 hour for the off function. - Page 35 USER INSTRUCTIONS Handset One-Button Operation TO TURN OFF FIRE (Default Setting) Handset · · Press button until two short beeps · · Press button to turn OFF. and a blinking series of lines confirms the start sequence has begun; release NOTE: A new ignition is possible after button.
- Page 36 USER INSTRUCTIONS F. COUNTDOWN TIMER H. THERMOSTATIC MODE ON/SETTING: 1. Press and hold button until Press button. displayed, preset displayed, and hour flashes. temperature displayed briefly, and then 2. To select hour press button. room temperature displayed. 3. To confirm press button.
- Page 37 USER INSTRUCTIONS Default settings: NOTE: Either continue to PROGRAM 2 and set on and off times On time (Thermostatic) Temperature: 21 °C (70 °F) or stop programming at this point, and PROGRAM 2 Off time Temperature: “ ” (pilot flame only) remains deactivated.
-
Page 38: Manual Switch-Off
USER INSTRUCTIONS MANUAL SWITCH-OFF When the appliance needs to be switched off manually, for example if the remote control has been lost or the batteries are flat, close the gas shut-off valve located under the fireplace (see picture below). APPLIANCE MAINTENANCE SHUT-OFF VALVE SHUT-OFF VALVE... -
Page 39: Servicing Instructions
Injector LPG (Stereomatic Marking - 400). • Control Valve (Mertik GV60). • Full Control Remote Symax. For ordering replacement parts, please contact the Focus North American exclusive importer: distributor of french design 30 Log Bridge Road Building 300 – Suite 303... -
Page 40: Warranty
USER INSTRUCTIONS WARRANTY All our Focus models come with a warranty covering any defects in design, construction, or manufacture. This warranty ensures proper functionality for a period of 2 years from the date of order. It is important to note that our product guarantees are valid only when our fireplaces have been installed in accordance with all local building codes and meticulous adherence to the technical specifications outlined in our Plan Study, installation, maintenance, and user manuals. -
Page 41: Appendix
APPENDIX MERTIK FAULT FINDING CHART FUNCTION POSSIBLE CAUSE REMEDY Transmitter batteries low. Replace transmitter batteries. HANDSET START: Replace receiver batteries with 1.5V “AA” quality Press both buttons Receiver batteries low. alkaline batteries. to start ignition (IGN) sequence. Beep will occur each second. Learn new code (reset). - Page 42 APPENDIX FUNCTION POSSIBLE CAUSE REMEDY Check connection between cable & IGNelectrode. Ignition components not operating properly. See wiring diagram, p. 45. Check IGN-electrode spark gap. See wiring diagram, p. 45. Check IGN-electrode. See wiring diagram, p. 45. Check IGN-cable for damage. See wiring diagram, p.
- Page 43 APPENDIX FUNCTION POSSIBLE CAUSE REMEDY Check connection of cable to receiver and Pilot lit. TC- and SW-cable reversed. interrupter. See figure 29. Magnet unit not operating properly. Replace gas valve or (magnet unit). Short between interrupter and SW-cable. Check connection to interrupter. No gas (magnet unit drops after 30 second Check gas supply.
- Page 44 APPENDIX FUNCTION POSSIBLE CAUSE REMEDY Turn manual knob to “ON” position (positive Main burner is lit. Manual knob in “MAN” position. latch is required). Too much draft at pilot (poor flame Main burner stays lit. Check installation. impingement of thermo-couple). Magnet unit drops Replace receiver batteries with 1.5V “AA”...
-
Page 45: Wiring Diagram
APPENDIX WIRING DIAGRAM Fig 30... - Page 46 NOTE...
- Page 47 NOTE...
- Page 48 CREATE BEYOND CONVENTION V. 2.3 - March 2024...
Need help?
Do you have a question about the Ergofocus Gas and is the answer not in the manual?
Questions and answers