Table of Contents
Advertisement
Available languages
Available languages
Advertisement
Chapters
Table of Contents

Related Manuals for Hisense AP0621CR1W


Summary of Contents for Hisense AP0621CR1W
-
Page 2: Table Of Contents
TABLE OF CONTENTS IDENTIFICATION OF PARTS · · · · · · · · · · · · · · · · · · · · · · AIR CONDITIONER SAFETY · · · · · · · · · · · · · · · · · · · · · · 3 INSTALLATION REQUIREMENTS ·... -
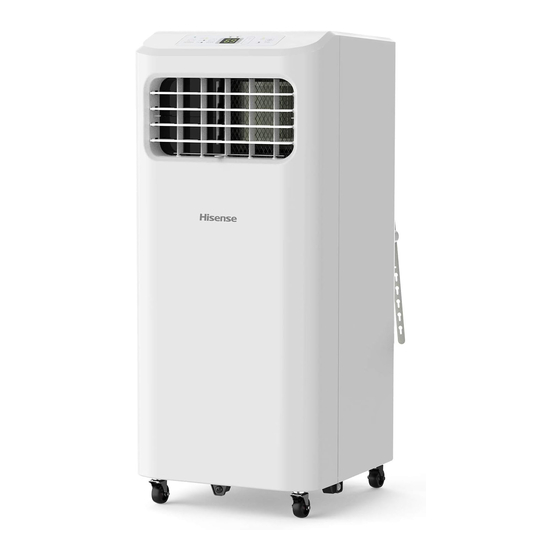
Page 3: Identification Of Parts
.. -
Page 4: Air Conditioner Safety
AIR CONDITIONER SAFETY Your safety and the safety of others is very important. We have provided many important safety messages in this manual and on your appliance. Always read and obey all safety messages. This i s the safety alert symbol. This symbol alerts you to potential hazards that can kill or hurt you and others. -
Page 5: Installation Requirements
1-=i• 1-=i•... -
Page 6: Electrical Requirements
Electrical Requirements WARNING Wiring requirement 115 V (103.5 min. to 126.5 max.) Minimum 13 A time-delay fuse or circuit breaker Power Supply Cord Electrical Shock Hazard Plug i n to a grounded 3 prong outlet. Do not remove ground prong. Do not use an adapter. -
Page 7: Installation Instructions
WARNING The length of the exhaust hose i s specially designed according to the specification of the product. Do not replace, extend, or otherwise modify the hose. Vertical Sliding Window Horizontal Sliding Window 20" �cm) NOTE: • For best performance, allow at least 20 in of air space on all sides of the unit for good air circulation. •... -
Page 8: Window Vent Panel And Extensions
Window Vent Panel And Extensions The window i n stallation kit allows you to i n stall the air conditioner i n most vertical-sliding windows 18" to 50" wide, or horizontal sliding windows from 18" to 50" tall. Fig. �h 18"... -
Page 9: Lnstall The Portable Air Conditioner
lnstall The Portable Air Conditioner Instan Exhaust Hose and Adaptar Window lnstallation 1. Roll the air conditioner to selected location. see "Location Your window i n stallation kit has been designed to fit most Requirements" i n page 4. standard vertical and horizontal window applications. Roll the air conditioner to selected location. - Page 10 Foam not included Foam not included...
-
Page 11: Lnstallation In Horizontal Sliding Windows
Screw I C ) lnsert the screw i n the hole i n Align the tabs on the window exhaust window exhaust adapter with the slots i n the vent panel. adapter prevent the lnsert the into the window exhaust adapter window exhaust adapter opening i n the vent panel. -
Page 12: Portable Air Conditioner Use
lnsert the screw i n the hole i n window exhaust adapter prevent the window exhaust adapter from sliding out of the vent opening. lnsert the window exhaust adapter into the opening in the vent panel. i� lnsert Align the tabs on the window exhaust with the slots i n the vent panel. -
Page 13: Starting Your Portable Air Conditioner
Starting Your Portable Air Conditioner ' , . � COOL HIGH � � � • � FAN. POWER MODE NOTE: The symbols may be different from these models, but the functions are similar. Dry-Dries the room. The air conditioner automatically Power On or Off selectsthe temperature. -
Page 14: Using The Remate Control
'�... - Page 15 C)C)
-
Page 17: Portable Air Conditioner Care
PORTABLE AIR CONDITIONER CARE Cleaning the Air Filter Draining the Air Conditioner A. Primary drain cover B. Primary drain plug A. Evaporator air i n take filter panel door 1. Press ON/OFF to turn off the air conditioner. WARNING 2. Open the filter panel door on the back of the air conditioner and remove. -
Page 18: Troubleshooting
TROUBLESHOOTING Befare calling far service, please try the suggestions below. (listen for click; Reset button will latch and remain in) to to resume operation. lf the power cord fails to reset, contacta Air conditioner will not operate service technician. NOTE: A damaged power supply cord must be replaced with a new power supply cord obtained from the product manufacturer WARNING... - Page 19 TABLA DE CONTENIDOS IDENTIFICACIÓN DE LAS PARTES · · · · · · · · · · · · · · · · · · · · SEGURIDAD DEL AIRE ACONDICIONADO · · · · · · · · · · · · · REQUISITOS PARA LA INSTALACIÓN .
-
Page 21: Seguridad Del Aire Acondicionado
SEGURIDAD DEL AIRE ACONDICIONADO Su seguridad y la seguridad de otros son muy importantes. Hemos proporcionado mensajes de seguridad i m portantes en este manual en el electrodoméstico. Lea siga siempre todos l o s mensajes de seguridad. Este es el símbolo de alerta de seguridad. Este símbolo l o alerta sobre un peligro potencial que puede matarlo o herirlo a usted a otros. -
Page 22: Requisitos Para La Instalación
-· -·... -
Page 23: Requisitos Eléctricos
Requisitos eléctricos ADVERTENCIA Requisitos para el cableado 115 V (103.5 mín. a 126.5 máx.) Fusible con retraso de mínimo 13 A o disyuntor Cable de alimentación Peligro de descarga eléctrica Conéctelo a un tomacorriente de 3 patas con conexión a tierra. No quite la terminal a tierra. -
Page 24: Instrucciones Para La Instalación
ADVERTENCIA La longitud de la manguera de escape está diseñada especialmente según la especificación del producto. reemplace, extienda ni modifique la manguera. Instalación en ventana corrediza vertical Instalación en ventana corrediza horizontal NOTAS: • Para un mejor rendimiento, deje al menos un espacio de 20 pulgadas en los laterales de la unidad para que el aire circule bien. -
Page 25: Panel De Ventilación De La Ventana Y Extensiones
Panel de ventilación de la ventana extensiones El kit de i n stalación de la ventana le permite i n stalar el aire acondicionado en ventanas verticales de 18" a 50" de ancho o para ventanas horizontales de 18" 50" de altura. -
Page 26: Instalación Del Aire Acondicionado Portátil
Instalación del aire acondicionado portátil Instalación de la manguera de escape y del adaptador Instalación en la ventana El kit de i n stalación para la ventana ha sido diseñado para 1. Mueva el aire acondicionado a la ubicación seleccionada. adaptarse a ventanas estándares verticales horizontales. -
Page 27: Instalación En Ventanas Corredizas Verticales
espuma aislante no incluida espuma aislante no incluida... -
Page 28: Instalación En Ventanas Corredizas Horizontales
Insertar Inserte el tornillo en el orificio del Alinee las solapas en el difusor con difusor para evitar que el difusor las ranuras en el panel de se deslice fuera de la abertura ventilación. Inserte el difusor en la de ventilación. abertura del panel de ventilación. -
Page 29: Uso Del Aire Acondicionado Portátil
I n serte el tornillo en el orificio del difusor para evitar que el difusor se deslice fuera de l a abertura de ventilación. Inserte el difusor en l a abertura del panel de ventilación y deslícelo para fijarlo en el l u gar. l e =) Insertar Alinee l a s solapas en el difusor con... -
Page 30: Inicio Del Aire Acondicionado Portátil
Inicio del aire acondicionado portátil , , � TIMER SLEEP COOL HIGH � � � POWER MODE NOTA: los símbolos pueden ser diferentes de estos modelos pero las funciones son similares. Dry: Seca la habitación. El aire acondicionado selecciona Encendido o Apagado automáticamente la temperatura. - Page 31 ..
- Page 32 C)C)
-
Page 34: Cuidado Del Aire Acondicionado Portátil
CUIDADO DEL AIRE ACONDICIONADO PORTÁTIL Desagüe del aire acondicionado Limpieza del filtro del aire Cobertor de desagüe principal Puerta del panel de entrada de aire del evaporador B. Tapón de desagüe principal 1. Presione el botón ENCENDIDO/APAGADO para apagar el AADVERTENCIA aire acondicionado. -
Page 35: Solución De Problemas
SOLUCIÓN DE PROBLEMAS Antes de llamar al servicio, i n tente las siguientes sugerencias. NOTA: Se debe reemplazar el cable de alimentación dañado por un cable nuevo, que se obtiene del fabricante; no se debe El aire acondicionado no funciona reparar. - Page 36 4179338-01...
Need help?
Do you have a question about the AP0621CR1W and is the answer not in the manual?
Questions and answers
I purchased two Hisense Portable Air Conditioners (Model AP0621CR1W) both of which are supposed to have the "Drain-free operation" feature. I cannot find mention of this feature in your User or Instllation Manuales. Can you tell me how this works and what do I have to do to maintain this feature?
Does the coolant in this portable AC ever need to be added too? It is not cooling the air at all.
What is error code E5?
Why does current temp keep flashing