
Related Manuals for PHP Heat Wagon LVF90A


Summary of Contents for PHP Heat Wagon LVF90A
- Page 1 SERVICE MANUAL Oil Fired Heaters Low Pressure High Pressure Indirect Fired CD70112 Version 4...
- Page 3 Preface Thank you for your purchase of the Oil Fired Heater Service Manual. The manual covers the three types of oil fired heaters: low pressure, high pres- sure and indirect. If you are not sure what type of heater you have refer to the “Definitions of Oil Fired Heater Types”.
-
Page 4: Table Of Contents
Table of Contents General Information Safety precautions .........6 Definitions of Oil Fired Heater Types . - Page 5 Table of Contents Low Pressure Service (continued) Wiring Diagrams Desa ........108-109 National Riverside/Mr Heater .
-
Page 6: Safety Precautions
Safety Precautions These precautions are in addition to those stated in the owner’s manual by the manufacturer of the heater. Ventilation Always provide adequate ventilation to ensure a sufficient supply of fresh air. Allow at least 3 square feet of opening per 100,000 btu of heater output. For example: a 50,000 btu heater would require at least 1-1/2 square feet of open- ing to supply enough fresh air for safe operation. -
Page 7: Definitions Of Oil Fired Heater Types
Defining Oil Fired Heaters This book is about oil fired torpedo heaters. Low Pressure Low pressure heaters operate with an air pump which consists of a rotor and vanes. Operating pressure rarely goes above 9.0 PSI. High Pressure High pressure oil heaters use a mechanical gear type fuel pump driven by the motor to reach a high level of pressure. -
Page 8: Low Pressure
Desa ® International Low Pressure Models 30,000 30,000 35,000 40,000 50,000 55,000 60,000 70,000 Models 100,000 110,000 115,000 150,000 155,000 165,000 200,000 Brands Master ® Reddy ® Remington ® Co-op ® Amoco ® Desa ® Dayton ® Sears ® John Deere ®... -
Page 9: National Riverside/Mr Heater
National Riverside ® /Mr. Heater ® Low Pressure Brands All Pro ® Stone ® Universal ® All of the above brand and product names are Trademarks or Registered Trademarks of their respective companies. -
Page 10: Toro
Toro ® Low Pressure Old Style New Style Brands Champion ® Little Champ ® Century ® Toro ® Porta Heat ® Lawn Boy ® Red Line ® Green Line ® Central Tractor ® Ford ® Guardian ® ® Jim Dandy ®... -
Page 11: Pinnacle
Pinnacle ® Low Pressure Brands Pro-Temp Heat-Hog Dayton/Grainger All of the above brand and product names are Trademarks or Registered Trademarks of their respective companies. -
Page 12: High Pressure
Desa ® International High Pressure B350 and B600 National Riverside ® High Pressure K350 and K650 Toro ® High Pressure CH120 CH155 CH230... -
Page 13: Heat Wagon
Desa ® International Indirect Fired 160IF and 280IF Heat Wagon Indirect Fired LVF90A HVF180A HVF300A... -
Page 14: Tools Required
Preparation/Tools Required Low Pressure Oil Heaters have many small parts: Start by making a clean work area. This will give you an area to layout the disassembled parts. Gather the tools required before work is started. You will need the following: 1/4" and 5/16"... - Page 15 The ignition system consists of a transformer or electronic igniter and a spark plug. The transformer increases the input voltage to a much greater potential, which causes an arc to jump between the electrodes of the spark plug. This arc will ignite the fuel and air mixture with in the combustion chamber.
- Page 16 How It Works If you understand how this heater operates, you will be able to service and maintain it. The principle is simple. No oil pump is needed. The oil is sup- plied by a siphon system. Air pressure is used for the siphon., therefore it is important to maintain proper air pressure adjustment.
-
Page 17: Component Description And Operation
Component Description and Operation 12 o'clock Fig. 1 (E) Mount screw (Pump body ring) (A) Back of Motor (B) Pump Body Ring (G) .003 to .005 Gap (C) Rotor (F) Rotor Insert (D) Blade or Vane (H) Large Gap 6 o'clock Air Pump The heater's air pump consists of a rotor (c) with four carbon blades (d) rotating inside a pump body(b). - Page 18 FIG. 3 Nozzle As mentioned previously, the purpose of the air pump is to compress air and deliver it to the nozzle. The compressed air, as it travels through the nozzle, creates a negative pressure and lifts the fuel from the fuel tank. The fuel from the fuel tank and the compressed air are mixed at the nozzle which results in a very fine mist of fuel being sprayed into the combustion chamber.
- Page 19 Motors FIG. 5.1 FIG. 5.2 The motors used on the low pressure heaters are fractional horsepower motors ranging from 1/35 HP on the smallest heaters to 1/4 HP on the largest heaters. The motors used can be grouped into two categories.
- Page 20 Solid State Relay (Applicable models use 097061-01 Solid State Relay) The solid state relay is used to de-energize the start winding on split-phase motors. As mentioned in the Motor Section, remember that split-phase motors have both an auxiliary (start) and a main (run) winding.
- Page 21 Hot Surface Ignition Heaters (HSI) On hot surface ignition (HSI) heaters the ignition control board (ICB) is what controls the entire heater electronically. There is no reset button and no motor start relay, with exception to some older HSI models. The ICB takes care of those components internally.
- Page 22 Glowbar (cont.) Installation 1. Unplug the heater from the 120 volt source. 2. Remove the two wires for the existing glowbar from the pc board mounted inside the access panel. 3. Disconnect the air line and fuel line from the fittings on the nozzle adapter or burner head.
- Page 23 Electric Igniter (Transformer) (Applicable models use 079870-01 or 102482-01 Electronic Igniter) The electronic igniter operates on 120V60 Hz. It delivers approximately 15,000 volts average to the spark plug causing the kerosene sprayed from the nozzle assembly to ignite. The igniter operates on a pulse basis. The igniter has no internal service parts and must be replaced when found defective.
- Page 24 Toro Spark Plug The spark plug must be positioned all the way in against the housing; line up the red line of the spark plug with the casting line on the burner. Gap the spark plug to .062"(FIG. 9). If plug is fouled, clean or replace. Test spark plug by removing top cover, remove air gauge plug, loosen setscrew and remove spark plug from the burner.
- Page 25 MAINTENANCE PROCEDURES Air Compressor Servicing The air compressor is built to very close tolerances and is susceptible to exces- sive moisture accumulation. Handle all parts with care and keep them clean and dry. Dirt, oil, water and other foreign material will interfere with proper operation of the compressor.
- Page 26 F. Using a new air-filter housing gasket between housing halves and new/clean output filter, install outer housing to inner housing and secure with the five (5) remaining. Be certain gasket is properly installed around the perimeter and in center section. Air leakage from the HIGH PRESSURE (left) side will result in lower air pressure readings.
- Page 27 No or low air pressure may be caused by a missing "O" ring check that O-Ring is in place. FIG. 14 *Two (2) styles of Back Plates and Inner Housing Halves were used at time of pro- duction. Determine which style the heater involved contains to insure proper Assembly and Operation.
- Page 28 Toro Fuel Tube Dimensions* Upper Fuel Lower fuel tube must be a Tube replacement item ordered from PHP, as its length will affect pick Fuel Filter up tube length. Excessive length will cause the tube to kink and block fuel flow.
- Page 29 Nozzle Servicing Accumulation of dirt from fuel and carbon from the compressor vanes will eventually fill up the passages in the nozzle, resulting in reduction of fuel and air flow. Pressure will gradually increase giving improper fuel-air mixture causing excess odor and smoke. To clean the nozzle, usually compressed air is sufficient.Caution: Safety glass- es should be worn.
- Page 30 Toro Nozzle Adjustment Nozzle adjustments may be necessary to alter the spray pattern-to-spark-plug relationship, due to changes in climate, oil, altitude, or after cleaning. If the heater operates properly there is no reason to change the factory setting. However, if the unit starts sluggishly in cold weather, make the following adjustments.
- Page 31 Transformer Test Three styles of transformers have been used in the Low Pressure Heaters. Prior to 1986 an enclosed style was used and mounted as shown in FIG. 21. Since 1986 an open style transformer has been used it is shown FIG. 22 and mounts through the same two mounting bracket holes as the enclosed style transformer.
- Page 32 Motor Test 1. Remove motor from heater or disconnect motor wires from their connection points for testing with 115 volt power supply direct. FIG. 23 2. Wire Motor (Shaded Pole) Connect wires as illustrated (FIG. 23). Plug in test cord. Motor should come up to White Motor...
- Page 33 Motor Relay Test Conduct "Split-Phase" motor test, if motor is good, connect it into heater. Check the wiring of unit, plug in the heater. If motor works, the relay is okay. If motor fails to turn or turns to slow, the relay should be replaced. Surface marked Note: Present style motor start relays which "TOP"...
- Page 34 2. To test for a flame "OUT" condition, disconnect jumper lead connection and separate the terminals (They must not touch anything.) Plug unit in, neon light should come on and stay on and in 20 to 35 seconds the circuit breaker should trip.
- Page 35 Pinnacle Components Most components listed earlier in this manual are also found in Pinnacle heaters. There are, however, a couple of other components that are worth mentioning that are found mostly in Pinnacle heaters and not any other brands. Circuit Board Pinnacle heaters are equipped with a circuit board.
- Page 36 L.B. White Components & Maintenance (45,000 & 75,000 BTU) Fuel Tank Flush every 200 hours of operation or as needed. Air Intake Filter (Figure 1) WASH AND DRY WITH SOAP AND WATER EVERY 500 HOURS OF OPERATION, OR AS NEEDED. •...
- Page 37 Fan Blades (Figure 3) CLEAN EVERY SEASON OR AS NEEDED • Remove upper shell (See Air Intake Filter) • Use M6 Allen wrench to loosen set screw which holds fan blade to motor shaft • Slip fan blade off motor shaft •...
- Page 38 Spark Plug (Figure 5) CLEAN AND REGAP EVERY 600 HOURS OF OPERATION OR REPLACE AS NEEDED. • Remove upper shell (See Air Intake Filter) • Remove fan (See Fan Blades) • Remove ignitor wire from spark plug • Remove spark plug from burner head using medium Phillips screwdriver •...
- Page 39 Photocell (Figure 7 & 8) CLEAN PHOTOCELL ANNUALLY OR AS NEEDED. (For Model CP045AK only) • Remove upper shell (See Air Intake Filter) • Remove fan (See Fan Blades) • Remove photocell from its mounting bracket • Clean photocell lens with cotton swab TO REPLACE: Remove side cover near power switch •...
- Page 40 Pump Pressure Adjustment (Figure 9) • Start heater • Allow motor to reach full speed • Adjust pressure (using flat blade screwdriver) • Turn relief valve clockwise to increase pressure • Turn relief valve counterclockwise to decrease pressure • Set pump pressure to correct pressure for each model •...
- Page 41 L.B. White Components & Maintenance (125,000-210,000 BTU) Nozzle (Figure 1 & 2) CLEAN NOZZLE AS NEEDED (For Models CP125BK and CP170BK only) • Remove upper shell (See Air Intake Filter) • Remove fan blade (See Fan Blades) • Remove fuel and air line hoses from burner head •...
- Page 42 L.B. White Components & Maintenance (125,000-210,000 BTU) Spark Plug (Figure 3 & 4) CLEAN AND REGAP EVERY 600 HOURS OF OPERATION OR REPLACE AS NEEDED. CLEAN AND REGAP EVERY 600 HOURS OF OPERATION OR REPLACE AS NEEDED. (For Models CP125BK and CP170BK only) •...
- Page 43 L.B. White Components & Maintenance (125,000-210,000 BTU) Fuel Filter (Figure 6) CLEAN OR REPLACE TWICE PER HEATING SEASON OR AS NEEDED. PUMP PRESSURE ADJUSTMENT - Remove side cover screws using medium Phillips screwdriver - Disconnect switch wires from power switch and remove side cover - Pull fuel line off fuel filter neck - Turn fuel filter clockwise 90 degrees and pull to remove...
- Page 44 Enerco Maintenance & Storage WARNING. To prevent personal injury, unplug the heater from the wall outlet before servicing. For maximum efficiency and trouble-free service, make the following periodic mainte- nance, cleaning and inspections. Daily Schedule 1. GENERAL. Make general visual inspection of heater for loose or damaged parts. Check nuts and bolts to insure against looseness caused by vibration or rough handling.
- Page 45 worn when using compressed air. 3. AIR AND FUEL LINES. If the air or fuel lines are removed during cleaning, be sure all connections are tight before operating unit. 4. AIR PRESSURE SETTING. The air pressure has been properly set at the factory. If the air pressure is out of adjustment, it will most likely be caused by dirty air filters, a partially plugged nozzle, an air leak in the system or improperly set pressure.
-
Page 46: Desa
Desa ® International Troubleshooting, Repair Procedures Start by visually checking all parts. (Cleaning the heater will help in uncov- ering trouble spots.) Make sure all parts are present. Power Cord. Check power cord for continuity and shorts (with ohm meter). Make sure cord is equipped with a grounded plug. - Page 47 Test Procedure 1. Check Spark Plug for Proper Gap See Heater Performance Specifications FIG. 29 "Spark Plug Gap" for proper gap. Reset gap with feeler gauge. 2. Defective Transformer or Electronic Igniter Connect the transformer or electronic igniter to a properly gapped spark plug. Establish a good ground between the spark plug and heater.
- Page 48 A. Resistance Test 1. Unplug the heater from the 120 volt source. 2. Remove the two wires from the ICB board that are labeled "Igniter." 3. Set your Ohm meter to the 0 – 200 scale. 4. Connect the leads from the Ohm meter to the two wires on the glowbar. 5.
- Page 49 5. Check For Restricted Fuel Flow Remove the burner head from heater. Using a socket wrench, carefully remove the nozzle from burner head. (Be extremely careful not to scratch or score the face of the nozzle). FIG. 33 A. Seal Leak Remove the rubber seal washer from stem of nozzle and discard.
- Page 50 D.Fuel Filter Restriction The fuel filter should be inspected and cleaned. The filters are located in the fuel line either at tank location, in the copper or aluminum tubing or in line with the fuel line at access cover. Inline Filter Pick up tube FIG.
- Page 51 OBSERVED FAULT Motor Does Not Run or Runs at Slow Speeds. Spark is Observed at Plug Rotate Fan by Hand to Determine if Fan Rotates Easily Fan is Difficult to Rotate Fan Rotates Easily by Hand 1. Broken rotor or blades 5.
- Page 52 Test Procedure 1. Broken Rotor or Blades Disassemble the end cover filter and end pump cover from rear of motor. Visually inspect the rotor and blades for breakage. Make sure that the rotor and blades are free of any type of lubricant. Rotor and blades must be clean and dry for proper operation (FIG.
- Page 53 5. Open Motor Windings A. Shaded Pole Motors—Motors without Relay: (30,000, 35,000 & 50,000) With the heater disconnected from AC plug, connect he ohmmeter on the RX1 scale to the wires coming from motor. On smaller heaters, the leads from the motor should indicate a resistance of 6 to 8 ohms.
- Page 54 Motor Resistance Chart Part No. Crosses To Red to White Black to White Main+/- 7% Auxiliary +/- 7% 078894-01 M51415-01 11.2 M23107-3 097300-02 078894-06 4.14-5.06 097127-06 097134-01 097134-02 097300-01 M51131-01 097308-02 M50882-01 16.7 078894-02 097130-01 097130-02 097308-01 097308-04 097126-01 2.76 9.09 079210-01 079994-01...
- Page 55 6. Defective Motor Start Relay or Solid State Relay Motor Start Relay: Prepare a jumper wire approxi- mately 8" long with a male quick disconnect terminal at one end and a test probe at the other end. Disconnect the black wire coming from the motor that is connected to the "S"...
- Page 56 9. Low Voltage In certain circumstances, a heater may operate correctly when being tested in the service shop, but the customer complains that it does not start at times on the job site. It is important that the customer is made aware that if the heater is operated on an incorrectly sized extension cord or a low voltage outlet, the heater's motor will not start due to low voltage.
- Page 57 OBSERVED FAULT Heater Does Not Start/Motor and Transformer/Igniter Do Not Operate Possible Causes External to Heater Possible Causes Internal to Heater 1. Check for broken or frayed 1. Check that reset button on wires on cord safety control is fully depressed 2.
- Page 58 Possible Causes Internal To Heater Test Procedure 1. Check that Reset Button on Safety Control is fully depressed. Visually inspect the black reset button on safety control(FIG. 47) The FIG. 47 button must be fully depressed in for oper ation. 2.
- Page 59 (5) Hot Surface Ignition Control Board Troubleshooting Voltage Test 1. Unplug the heater from the 120 volt source. 2. Remove the access cover on the side of the heater to reveal the Ignition Control Board. 3. Disconnect the two wires from the terminals marked "igniter" and the two wires marked "motor."...
- Page 60 OBSERVED FAULT Heater Ignites and Burns; However, Safety Control Trips and Heater Shuts Off Safety Control Trips within the Safety Control Trips After Several First Minute of Operation Minutes of Operation 1. Defective Safety Control 4. Dirty Photocell 2. Defective Photocell 5.
- Page 61 Test Procedure FIG. 52 1. Defective Safety Control (M50671-03) Make sure unit is disconnected from AC source. Disconnect the blue wiring coming from safety control that is connected to blue wire at photocell (connection is made in smaller wire nut connection)(FIG.
- Page 62 2A. Testing Photocell using HA1170 Tester 1. Unplug the heater from the 120 volt source. 2. Disconnect photocell leads from Ignition Control Board (ICB.) 3. Connect a multi-meter to the two leads on the photocell. 4. Set multi-meter to Ohms, on the 1xRK scale. 5.
- Page 63 3. Loose Wire Nut Connection Physically check that all electrical connections are secure and making electrical contact. 4. Dirty Photocell-See Step 2C above 5. Check for Proper Pump Pressure Install HA1180 Pressure Gauge or equivalent to rear of air filter housing. Start heater and adjust air pressure to specified pressure.
- Page 64 B. Filter Blocked-On certain models, a drop-in fuel filter is located in the copper or aluminum line that attaches to the fuel fitting on the back side of the burner head. Lift the filter out of the copper or aluminum fuel line and clean, if necessary.
- Page 65 OBSERVED FAULT Frequent Plug Fouling/ Delayed Ignition 1. Spark plug too close to spray pattern of nozzle 2. Wrong fuel 1. Spark Plug Too Close to Spray Pattern of Nozzle It may be necessary in some cases to move the spark plug back from spray pattern of nozzle.
-
Page 66: National Riverside
National Riverside Specific Troubleshooting Guide If the General Troubleshooting Guide does not resolve the problem, specific guidance for each heater model or group of models is given here. To use this section find the specific heater model of interest and follow the guidance and troubleshooting charts which are appropriate. - Page 67 OBSERVED FAULT Motor Starts, Unit Will Not Ignite No Spark Observed Spark is Observed 1. Improper spark plug gap 4. Improper pump pressure 2. Faulty transformer 5. Restricted fuel flow due to A. Seal leak 3. Faulty spark plug/ignition electrode (cracked) B.
- Page 68 Correction Procedure Improper Spark Plug Gap Check gap at tip of electrodes for .050/.055 (1.3-1.4 mm) inch spark plug gap. Reset gap as required. Note: If feeler gauge is not available, set plug gap to thickness of a dime. FIG. 73 Faulty Transformer Connect the transformer lead to a new spark plug.
- Page 69 Restricted Fuel Flow Remove the burner head from heater. Using a socket wrench, carefully remove the nozzle from burner head. (Be extremely careful not to scratch or score the face of the nozzle.) 5A. Inspect the rubber "O Ring" seal on the stem of nozzle. Replace if worn or damaged.
- Page 70 OBSERVED FAULT Motor Does Not Run or Runs at Slow Speeds. Spark is Observed at Plug Spark is Observed No Spark is Observed Rotate Fan by Hand 7. Low voltage to heater to Determine if Fan Rotates Easily 8. Bad safety control 1.
- Page 71 Correction Procedure Broken Rotor or Blades Disassemble the end cover filter and end pump cover from rear of motor. Visually inspect the rotor and blades for breakage. Make sure that the rotor and blades are free of any type of lubricant. Rotor and blades must be clean and dry for proper operation.
- Page 72 Faulty Relay (100,000 and 150,000 BTU/hr Heaters) Prepare a jumper wire approximately 8" long with a male quick disconnect terminal at one end and a test probe at the other end. Disconnect the black wire coming from the motor that is connected to the "S"...
- Page 73 OBSERVED FAULT Motor Does Not Start (Motor & Transformer Do Not Operate Possible Causes External to Heater Possible Causes Internal to Heater 1. Broken or frayed wires on cord 3. Faulty high limit switch 2. Faulty in-line thermostat 4. Reset button on safety control not fully depressed 5.
- Page 74 Correction Procedure Broken or Frayed Wires on Cord – Inspect all wires on power cord. Check for any broken or frayed wires. Check for continuity between male prongs of power cord to safety control. If continuity does not exist, replace the power cord. Faulty In-Line Thermostat –...
- Page 75 OBSERVED FAULT Heater Ignites and Burns; However, Safety Control Trips and Heater Shuts Off Safety Control Trips Out Within First Safety Control Trips Out After Minute of Operation Several Minutes of Operation 1. Faulty safety control/printed 3. Dirty photocell circuit board 4.
- Page 76 Test Procedure Faulty Safety Control/Printed Circuit Board Physically check that all electrical connections are secure and making electrical contact. Disconnect the blue and white wires connected to PHOTOCELL connections on printed circuit board. Fabricate a jumper wire with two spade connections and place where blue and white wires were removed.
- Page 77 Restriced Air Flow Remove the burner head from heater. Using a socket wrench, carefully remove the nozzle from burner head. (Be extremely careful not to scratch or score the face of nozzle.) 5A. Inspect the rubber "O-Ring" seal washer on the stem of nozzle. Replace if weak or damaged.
- Page 78 OBSERVED FAULT Frequent Plug Fouling or Delayed Ignition 1. Spark plug or electrode location 2. Wrong fuel 3. Worn out nozzle...
- Page 79 Correction Procedure 1. Spark Plug or Electrode Location It may be necessary in some cases to move the spark plug back from spray pattern of nozzle. The best method is to shim the plug back by placing standard spark plug washer under the flat of the plug at threaded area.
-
Page 80: Mr. Heater
Mr. Heater Diagnostic Safety Shutdown and Troubleshooting These instructions are applicable for MH75KT / HS75KT, MH125KT / HS125KT, MH175KT / HS175KT, and MH210KT / HS210KT. This heater is equipped with a diagnostic control board and flashing LED error indicator. This flashing LED signals when there is a malfunction of a monitored component. - Page 81 LED 1 flash Causes: System Lockout (High limit switch Open Circuit) Solutions: 1) Make sure heater is cooled off, press reset switch and retry. LED gives 2 flashes Causes: System Lockout (Sparks, calling for flame, but no or slow motor operation) Solutions: 1) Check wiring to motor (per wiring schematic in manual).
- Page 82 LED gives 3 flashes Causes: System Lockout (No Spark) Solutions: 1) Check wiring to igniter (per wiring schematic in manual). 2) Check gap between electrode probes (2.3 - 3 mm). 3) Still no spark, replace igniter assembly. 4) Replace oil flame control assembly. LED gives 4 flashes Causes: System Lockout (Abnormal Motor Operation - Motor overheats or Stops)
- Page 83 LED gives 6 flashes Causes: System Lockout (Unable to Detect Flame) Solutions: 1) Check wiring to Cad Cell (per wiring schematic in manual). 2) Clean Cad Cell photo cell. a) Slide Cad Cell out of Cad Cell holder. b) Push the photo cell out of the white rubber Cad Cell housing by pushing on the blue and white wires.
- Page 84 Abnormal motor operation, Motor overheats and stops (LED gives 4 flashes) Causes: 1. Broken Rotor or Blades 2. Improper Rotor Clearance 3. Oversized Rotor 4. Low Voltage to Heater 5. Defective Oil Flame Control Assembly Solutions: 1. Broken Rotor or Blades Disassemble the end cover filter and end pump cover from rear of motor.
- Page 85 No heater operation when connected to power source LED gives 5 flashes Note: Make sure that the thermostat is turned up and calling for heat. Causes: 1. Check that reset button on Safety Control is fully depressed 2. Check wiring connections at the reset button 3.
- Page 86 Heater ignites but Main PCB Assembly shuts heater off after a short period of time. (LED gives 6 flashes) Causes: 1. Dirty or faulty Cad Cell (photocell) 2. Oil Flame Control Assembly Solutions: 1. Dirty or faulty Cad Cell (photocell) Defective Photocell inspects the lens of the photocell for soot/dirt, etc.
-
Page 87: Toro
Toro Troubleshooting SERVICE TROUBLE SHOOTING The first step in problem solving is TROUBLE SHOOTING. To assist the tech- nician, the following troubleshooting chart should be referenced as an aid in locating the source of the problem. Problem Possible Cause Remedy Pulsating 1. - Page 88 Problem Possible Cause Remedy Cannot adjust 1. Air leak. 1. A) Check air line, replace if air pressure necessary. No "O" ring between filter body & compressor plate. Filter gasket not in place. 2. Air line fitting or filter 2. Tighten body loose 3.
-
Page 89: Pinnacle
Pinnacle Specific Troubleshooting Guide To use the troubleshooting section, look up the symptom you observe for the possible causes. This section is based on the Pro-Temp, Heat Hog and Dayton models manufactured by Pinnacle Products International. Symptoms: 1. Heater ignites but Main PCB Assembly shuts heater off after a short period of time. - Page 90 Intake filter should be removed and washed with soap and water every 500 hours of operation, or as needed. Be sure that filter is completely dry prior to putting back in filter cover. Remove screws along side of heater using medi- um Phillips screwdriver.
- Page 91 8. Check wiring connections Check the wiring diagrams to make sure the heater is wired properly. Also check to see if the wires are tight and not loose. 9. Bad PCB Assembly Bypass the photocell to check the PCB for proper operation. Remove the photocell wires from the board.
- Page 92 4. Dirty Fuel Filter It is suggested you clean or replace fuel filter twice per heating season or as needed. To take fuel filter out turn counterclockwise 90 degrees, pull and move. Wash fuel filter with clean kerosene and compressed air and replace in tank.
- Page 93 Fan does not operate when heater is plugged in and Power Switch is in the “ON” position. The lamp is flickering or the lamp remains steady. Causes: 1. Thermostat is set too low 2. Broken electrical connection between Circuit Board and motor Solutions: 1.
- Page 94 Heater does not turn on and the lamp is not lit. Causes: 1. Temperature limit sensor has over-heated. 2. No Electrical power 3. Fuse Blown 4. Improper electrical connection between Temperature Limit Sensor and Circuit Board. Solutions: 1. Temperature limit sensor has over-heated. Push Power Switch to “OFF”...
-
Page 95: White
L.B. White Troubleshooting, Repair Procedures Heater ignites but MAIN PCB assembly shuts heater off after a short peri- od of time. (Indicator Lamp is flickering and room temp. display indicates “E1”) Causes: 1. Wrong pump pressure 2. Dirty Air Output, Air Intake or Lint Filter 3. - Page 96 Heater will not ignite but motor runs for a short period of time. (Indicator Lamp is flickering and room temp. display indicates “E1”) Causes: 1. No fuel in tank 2. Wrong pump pressure 3. Carbon deposits on spark plug and/or improper gap 4.
-
Page 97: Desa
DESA International Specifications Model # Output Rating, BTU/hr 50,000 55,000 70,000 Type of Fuel Kerosene or Kerosene or Kerosene or #1 Fuel Oil #1 Fuel Oil #1 Fuel Oil Fuel Consumption, gal/hr Air Pump Pressure (PSI) Fuel Tank Capacity, gals. Electrical Requirements 120V, 60 Hz 120V, 60 Hz... - Page 98 DESA International Specifications Model # B100 B110 B150 Output Rating, BTU/hr 100,000 110,000 150,000 Type of Fuel Kerosene or Kerosene or Kerosene or #1 Fuel Oil #1 Fuel Oil #1 Fuel Oil Fuel Consumption, gal/hr 1.10 Air Pump Pressure (PSI) Fuel Tank Capacity, gals.
- Page 99 Hot Surface Ignition Model Specifications Model # R35D R55A REM35C REM40 REM55A REM60 RM60 Output Rating, BTU/hr 35,000 40,000 55,000 60,000 Type of Fuel Kerosene or Kerosene or Kerosene or Kerosene or #1 Fuel Oil #1 Fuel Oil #1 Fuel Oil #1 Fuel Oil Fuel Consumption, gal/hr .3 Air Pump Pressure (PSI) Fuel Tank Capacity, gals.
- Page 100 Hot Surface Ignition Model Specifications Model # R70D R110B R115 REM150 R70DT R110BT REM115 RM115 Output Rating, BTU/hr 70,000 110,000 115,000 150,000 Type of Fuel Kerosene or Kerosene or Kerosene or Kerosene or #1 Fuel Oil #1 Fuel Oil #1 Fuel Oil #1 Fuel Oil Fuel Consumption, gal/hr .5 Air Pump Pressure (PSI) Fuel Tank Capacity, gals.
- Page 101 Hot Surface Ignition Model Specifications Model # R155B R165AT R200A REM155B RM155 Output Rating, BTU/hr 155,000 165,000 200,000 Type of Fuel Kerosene or Kerosene or Kerosene or #1 Fuel Oil #1 Fuel Oil #1 Fuel Oil Fuel Consumption, gal/hr 1.1 Air Pump Pressure (PSI) Fuel Tank Capacity, gals.
-
Page 102: National Riverside/Mr Heater
National Riverside Specifications Model # Input Rating, BTU/hr 50,000 100,000 150,000 Type of Fuel Kerosene or Kerosene or Kerosene or #1 Fuel Oil #1 Fuel Oil #1 Fuel Oil Fuel Consumption, gal/hr 1.15 Air Supply Pressure, psig. 4.25 5.25 Fuel Tank Capacity, gals. Electrical Input 115V, 60 Hz, 115V, 60 Hz,... -
Page 103: Mr. Heater
Mr. Heater Specifications Model 75KT 125KT 175KT 210KT Burn Rate 50,000 75,000 125,000 175,000 210,000 Fuel Rate 0.37 0.55 0.96 Gal/Hr Electrical Input 115V, 60Hz 115V, 60Hz 115V, 60Hz 115V, 60Hz 115V, 60Hz Line Protection10 amps 10 amps 20 amps 20 amps 20 amps Pressure... - Page 104 Toro Specifications Model # CH55 CH100 CH150 Output (BTU’s/HR) 55,000 100,000 150,000 Tank Capacity U.S. Gallons Designed Fuel Oil Kerosene or Kerosene or Kerosene or #1 Fuel Oil #1 Fuel Oil #1 Fuel Oil Electrical 115V, 60Hz 115V, 60Hz 115V, 60Hz Approx.
- Page 105 Toro Specifications Model # CH220 CH225 Output 40,000 60,000 220,000 175,000- (BTU’s/HR) 225,000 Tank Capacity U.S. Gallons Designed Fuel Oil Kerosene or Kerosene or Kerosene or Kerosene or #1 Fuel Oil #1 Fuel Oil #1 Fuel Oil #1 Fuel Oil Electrical 115V 60Hz 115V 60Hz...
-
Page 106: Pinnacle
Pinnacle Specifications Model PT 45-KFA PT 70T-KFA PT125T-KFA PT175T-KFA PTH215T-KFA Rating BTU/Hr 45,000 70,000 125,000 175,000 215,000 Fuel Rate 0.35 0.53 0.95 1.33 1.63 Gal/Hr Fuel Tank 5.0 gallons 5.0 gallons 10.0 gallons 13.0 gallons 13.0 gallons Capacity Pump Pressure 3.0 Volt/Hz 120V/60Hz 120V/60Hz 120V/60Hz 120V/60Hz... - Page 107 L.B. White Specifications Model CP045AK CP075AK CP125BK CP170BK CP210BK Rating BTU/Hr 45,000 75,000 125,000 170,000 210,000 Fuel Rate 0.35 0.57 0.95 Gal/Hr Pump Pressure 2.8 Volt/Hz 120V/60Hz 120V/60Hz 120V/60Hz 120V/60Hz 120V/60Hz Amps Phase Single Single Single Single Single Size (LxWxH) 32”x12”x17” 32”x12”x17” 38”x23”x24” 45”x24”x26” 43”x24”x26” Weight (Lbs)
- Page 108 Desa ® International Wiring Diagrams FIG. 68 70,000 - 150,000 BTU Heaters - Heaters equipped with Solid State Relay FIG. 70 55,000 BTu Model (R55A Model Only)
-
Page 109: Desa
Desa ® International Wiring Diagrams FIG. 71 35,000, 40,000, 50,000, 55,000, 60,000, 70,000, 110,000 115,000, 150,000 155,000, 165,000 BTU Models FIG. 72 200,000 BTU Model... -
Page 110: National Riverside/Mr Heater
National Riverside Wiring Diagrams FIG. 75 Model K50 FIG. 77 Model K100/K150 Round Shell... - Page 111 National Riverside Wiring Diagrams FIG. 76 Octagon heater with thermostat Model K100/K150 Octagon heater without thermostat Model K100/K150...
-
Page 112: Mr. Heater
Mr. Heater/Heat Star Wiring Diagram HS Series... - Page 113 Mr. Heater/Heat Star Wiring Diagram 2009 to Present Models: HS50K HS75KT HS125KT HS175KT HS210KT Enerco heaters with round style filter cover...
- Page 114 Mr. Heater/Heat Star Wiring Diagram 2005 to Present Models: HS/MH/TS50K HS/MH/TS75KT HS/MH/TS125KT HS/MH/TS175KT HS/MH/TS210KT Enerco heaters with rectangular style filter cover...
-
Page 115: Toro
Toro Wiring Diagrams 40/55,000 BTU 1983-1991 100/150,000 BTU 1986-1991 If no motor start relay, connect motor hot wire to terminal #1 on board. -
Page 116: Pinnacle
Pinnacle Wiring Diagram... -
Page 117: White
L.B. White Wiring Diagrams... - Page 118 L.B. White Wiring Diagram...
-
Page 119: Theory Of Operation
High Pressure Theory of Operation When the thermostat is turned up power is sent to the flame/safety control and to the fan switch. This brings power to the motor relay and the trans- former. The transformer raises the voltage to a high level and sends the high voltage to a spark plug or electrode(s). -
Page 120: Component Description And Operation
Component Description and Operation Fuel Pump The fuel pump draws fuel from the fuel tank and pressurizes it to a high level. Pump pressures vary by manufacturer and model, but typically fall into a range of 80 to 160 pounds per square inch, or PSI. The pump is driven by the heater motor. - Page 121 solenoid valve, transformer and motor. If flame is not detected within approx- imately 45 seconds, power is removed from the solenoid valve and the trans- former. Depending on the temperature of the fan switch, the heater will then run a cool down phase or totally shut down. Photocell The photocell contains a light sensitive cell and is aimed thru an opening in the combustion chamber to detect the presence of flame.
- Page 122 Spark plug or electrode(s) The high voltage sent by the transformer is received by the spark plug or elec- trode(s) and jumps across the gap to ignite the fuel spray. Consult the owner’s manual of your heater for the recommended gap or position. Thermostat The setting of the thermostat decides whether power is sent to the safety/flame control.
-
Page 123: Troubleshooting
High Pressure Troubleshooting To use the troubleshooting section, look up the symptom you observe for the possible causes. This section is based on the Master brand models B350 and B600 manufactured by Desa. Other brands and models may differ somewhat, but the troubleshooting and tests are applicable in most cases. - Page 124 2. Fuel pump seized. Unplug the heater and remove the top shell to access the fan blade. Standing behind the heater, attempt to turn the fan blade clockwise by hand. If the fan blade is difficult to turn, rock the fan blade back and forth (clockwise and counterclockwise) to loosen the pump.
- Page 125 6. Dirty or worn nozzle. 7. Drawing air in on fuel inlet line of pump. 8. Defective fuel pump. Solutions: 1. Defective transformer. If no spark is observed at the spark plug or electrode(s) check that the hot and neutral wires to the transformer are properly connected. Check to make sure the transformer output wire is connected to the spark plug or electrode(s).
- Page 126 5. Dirty fuel filter. Inspect the fuel filter and clean or replace as needed. If your heater has a can- ister type filter remember to fill the canister with fuel before re-attaching the filter. This will help prime the fuel pump. 6.
- Page 127 a cleaner be necessary, use an alcohol based cleaner that will dry completely without leaving an oil residue. If the photocell is clean and this symptom continues, remove the photocell for testing. Place a flashlight or lamp shining directly at the photocell eye. Set a multimeter to read ohms and connect the two multimeter probes to the two photocell wires.
- Page 128 Heater ignites, but combustion is poor or uneven. Causes: 1. Incorrect pump pressure. 2. Dirty or worn nozzle. 3. Dirty fuel filter. 4. Spark plug or electrode(s) not gapped or positioned properly. 5. Weak spark output from transformer. 6. Fuel contaminated by water or impurities. Solutions: 1.
- Page 129 Solutions: 1. Flame/safety control reset button is tripped. Check to see if the flame/safety control reset button is tripped. If your heater is equipped with a thermostat, turn the thermostat up to its highest setting and press the reset button. If pressing the reset button does not power up the heater, either the thermostat or flame/safety control is defective.
- Page 130 Solutions: 1. Pump pressure too high. Use a high pressure fuel gauge attached to the pump’s gauge port to check the pump pressure. Use the pump’s pressure adjustment if the pressure is higher than the manufacturer’s recommended setting. 2. Incorrect fuel. Only use fuels recommended by the specific manufacturer of the heater.
-
Page 131: Desa
DESA High Pressure Specifications Model# B350 B600 Output Rating (BTU/Hr) 350,000 600,000 Fuel Use only kerosene or No. 1 fuel oil Fuel Tank Capacity (U.S. Gallons) Fuel Consumption (Gallons Per Hour) Electric Requirements 120V/60Hz 120V/60Hz Amperage (Normal Run) 11.5 Motor RPM 1725 1725 Fuel Pump Pressure (PSI) -
Page 132: Specifications
National Riverside High Pressure Specifications Model K350 K650 Input Rating BTU/hr 350,000 650,000 Type of Fuel Kerosene or #1 Fuel Oil Fuel Consumption GPH Pump Pressure PSIG Fuel Tank Capacity Gals. Electric Input 115V, 60Hz, 1Ø Amperage Minimum Operating 100V 100V Motor RPM 1725... -
Page 133: Heat Wagon
Heat Wagon High Pressure Specifications Model DF400 DF600 Input Rating BTU/hr 400,000 600,000 Type of Fuel Kerosene or #1 Fuel Oil Fuel Consumption GPH 2.83 4.32 Pump Pressure PSIG Fuel Tank Capacity Gals. 35.7 35.7 Electric Input 120V, 60Hz, 1Ø Amperage 11.1 Minimum Operating... -
Page 134: Desa
Desa ® International Wiring Diagrams (High Pressure) B350 and B600 Models... -
Page 135: National Riverside
National Riverside Wiring Diagrams K350FA and K650FA Models... -
Page 136: Toro
Toro Wiring Diagrams Toro Air Scoop Heater 320,000 BTU Heater 650,000 BTU Heater... -
Page 137: Heat Wagon
Heat Wagon Wiring Diagrams DF400 SN 276000201 through 276000400 DF400 SN 276000401 and Beyond... - Page 138 Heat Wagon Wiring Diagrams DF600 SN 276000201 through 276000400...
- Page 139 Heat Wagon Wiring Diagrams DF600 SN 277000401 and Beyond...
-
Page 140: Theory Of Operation
Indirect Oil Theory of Operation The indirect oil theory of operation may differ slightly from one manufacturer or model to another. The following describes what steps a typical indirect oil heater will go thru during operation. If a more detailed description of opera- tion is needed, consult the owner’s manual of your particular heater. - Page 141 solenoid valve and the purge and ignition cycles will begin. Once ignition is established the thermostat will cycle the heater on and off as needed. If lock out occurs the reset button will trip. Some heaters need a thirty second wait before the reset will function again.
-
Page 142: Component Description And Operation
Indirect Heater Component Description and Operation Most indirect heaters are high pressure and therefore share most of their com- ponents with the high pressure heaters. Please read the “High Pressure Oil Component and Description” section on pages 100-102 if you are not already familiar with high pressure oil components. - Page 143 Air Proving Switch The air proving switch is wired between the control board and the fuel sole- noid valve. Power for the fuel solenoid valve must pass thru the switch. The switch is normally “open”. Air from the turning fan blade must close the switch to “prove”...
-
Page 144: Set Up
Set Up of Indirect Heaters The proper set-up of indirect oil fired heaters is one of the most important and usually overlooked aspects of utilizing indirect oil fired heaters. Proper set-up can help eliminate nuisance shut downs and untimely service calls. The most important set up requirements are the voltage to the heater, the proper manufacturer’s required fuel(s), and the proper ducting of the heated air and/or the flue gases. - Page 145 Indirect Heater Flue Pipe Sizing Chart CAPACITY OF TYPE B DOUBLE-WALL VENTS SERVING A SINGLE DRAFT HOOD-HEATER x 1000 BTU'S VENT DIAMETER, D,INCHES TOTAL LATERAL VENT LENGTH, HEIGHT, , H H , L L , FEET FEET...
-
Page 146: Troubleshooting
Indirect Oil Troubleshooting Symptoms: Motor and transformer do not operate. Page 146. Motor does not start, but spark is present. Page 147. Motor runs, spark is present, but there is no fuel spray. Page 148. Motor runs, fuel sprays, but no spark is observed. Page 150. Motor runs, fuel sprays, spark is present, but heater will not ignite. - Page 147 3. Thermostat is defective or not turned up to call for heat. Turn the thermo- stat up to the highest possible setting and try to start the heater. Next set a multi-meter to measure voltage coming out of the thermostat. If approximate- ly 120 volts is not measured, the thermostat is defective.
- Page 148 4. Fuel pump seized. With the heater unplugged, stand behind the heater and attempt to turn the fan blade clockwise by hand. If the fan blade is difficult to turn, undo the connection between the motor shaft and the pump shaft. Attempt turning the fan blade again.
- Page 149 3. Solenoid valve is defective. Use a multi-meter set to measure volts. Check for approximately 120 volts at the ends of the two wires that carry voltage to the solenoid valve. If proper voltage is read, try cleaning the valve if it is dirty. If the valve will not open fully to allow fuel spray, the solenoid valve is defec- tive.
- Page 150 Motor runs, fuel sprays, but no spark is observed Causes: 1. Electrodes damaged or gapped incorrectly. 2. Transformer defective. 3. Control board defective. Solutions: 1. Electrodes damaged or gapped incorrectly. Inspect the electrode tips for melting. Make sure there are no cracks in the porcelain insulation. Check the electrodes with the manufacturer’s specifications for gapping and spacing.
- Page 151 the pump pressure to the manufacturer’s specifications. 2. Electrodes damaged or gapped incorrectly. Inspect the electrode tips for melting. Make sure there are no cracks in the porcelain insulation. Check the electrodes with the manufacturers specifications for gapping and spacing. Adjust or replace the electrodes as needed.
- Page 152 the photocell or borrow a known functioning photocell from an identical heater. 2. Control board is defective. If the heater’s spray and spark are correct, the photocell and control board must work together to recognize the combustion flame has become established. Therefore if a new photocell does not correct this symptom, the control board is defective.
- Page 153 and the overheat thermostat is still hot. Place the multi-meter probes on the two male terminals of the safety thermostat. If the multi-meter reads infinity (no continuity) the safety thermostat is defective. Remember that if the heater is over firing due to high pump pressure, worn nozzle, or is improperly duct- ed or vented, the safety thermostat will heat enough to shut the heater off.
- Page 154 6. Whirl disk dirty or mis-aligned. 7. Ducting is improper. 8. Venting is improper. 9. Fuel contains water or contaminants. Solutions: 1. Fuel pump pressure is incorrect. The output pressure of the fuel pump can be checked by placing a high pressure fuel gauge into the gauge port of the fuel pump.
- Page 155 Heater ignites but flame is excessive Causes: 1. Fuel pump pressure is too high. 2. Nozzle is worn. 3. Incorrect fuel. Solutions: 1. Fuel pump pressure is too high. Attach a high pressure fuel gauge to the fuel pump and check the pump pressure. Adjust the pressure to the manufac- turer’s specifications with the adjustment on the fuel pump.
-
Page 156: Heat Wagon
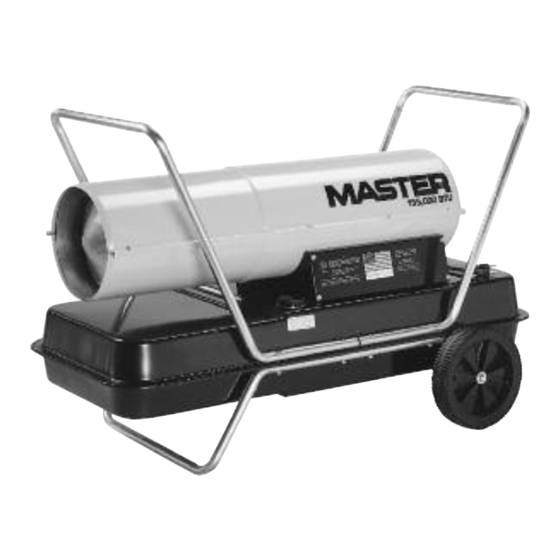
Heat Wagon Indirect Heater Specifications Model # LVF90A HVF180A HVF300A Output Rating, BTU/hr 90,000 180,000 290,000 Type of Fuel Kerosene or Kerosene or Kerosene or #1 Fuel Oil #1 Fuel Oil #1 Fuel Oil Fuel Consumption, (Gal/hr) 0.68 1.29 2.06 Efficiency (%) 80.0 87.1... -
Page 157: Desa
Desa Indirect Heater Specifications Model 160-IF 280-IF Output Rating (Btu/Hr) 158,000 278,000 Fuel Use only kerosene, #1/#2 diesel/fuel oil, JET A or JP-8 fuels* Fuel Tank Capacity (gal) Fuel Consumption, (Gal/hr) 1.27 2.22 Pump Pressure (psi) Electric Requirements 120 V/60 HZ 120 V/60 HZ Amperage (Normal Run) Motor RPM... -
Page 158: Heat Wagon
Heat Wagon Wiring Diagrams Heat Wagon LVF90A Heat Wagon HVF180A HVF300A... -
Page 159: Desa
Desa Wiring Diagrams Desa 160_IF 280-IF... -
Page 160: Extension Cord Guidelines
Extension Cord Guidelines Connect heater to a standard electrical outlet (120V/60Hz) to operate. For safety, all heaters have a three-prong, grounded power cord. Plug power cord of heater into threeprong, grounded extension cord. Extension cord must be at least six feet long. Make sure you use extension cord large enough to carry the voltage the heater requires. - Page 161 This manual was written by: Brad Lundgren Chris Moore Danny Murphy Marc Smith Sean Treece...
- Page 162 800.362.6951 Toll free fax 800.255.7985 342 North 400 East Valparaiso, IN 46383 www.phpdistribution.com...
Need help?
Do you have a question about the Heat Wagon LVF90A and is the answer not in the manual?
Questions and answers