Table of Contents
Advertisement
Quick Links
RED-D-ARC
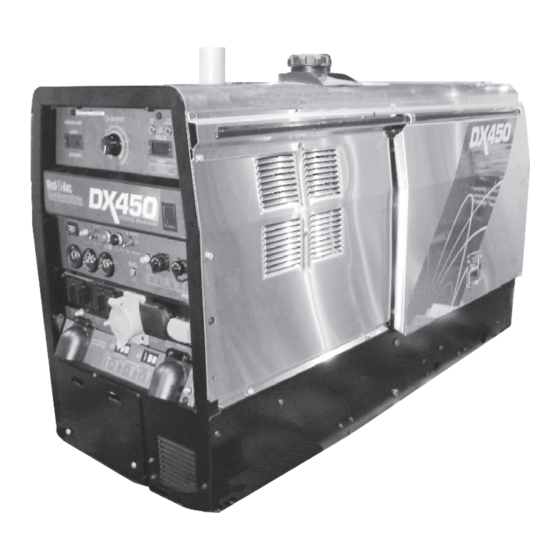
DX450
For use with machines having Code Numbers:
11512, 11561, 11788, 11908, 12087,
12245, 12300, 12301
SERVICE MANUAL
SVM196-A
| Issue D ate 14-Oct
© Lincoln Global, Inc. All Rights Reserved.
NOTE: This manual will cover most of the troubleshooting and repair
procedures for the code numbers listed. Some variances may exist when
troubleshooting/repairing later code numbers.
Advertisement
Chapters
Table of Contents
Troubleshooting

Related Manuals for Lincoln Electric RED-D-ARC DX450


Summary of Contents for Lincoln Electric RED-D-ARC DX450
- Page 1 NOTE: This manual will cover most of the troubleshooting and repair procedures for the code numbers listed. Some variances may exist when troubleshooting/repairing later code numbers. RED-D-ARC DX450 For use with machines having Code Numbers: 11512, 11561, 11788, 11908, 12087, 12245, 12300, 12301 SERVICE MANUAL SVM196-A...
- Page 2 Miami, Florida 33135 or CSA Standard W117.2-1974. A Free copy of “Arc Welding Safety” booklet E205 is available from the Lincoln Electric Company, 22801 St. Clair Avenue, Cleveland, Ohio 44117-1199. BE SURE THAT ALL INSTALLATION, OPERATION, MAINTENANCE AND REPAIR PROCEDURES ARE PERFORMED ONLY BY QUALIFIED INDIVIDUALS.
- Page 3 SAFETY ELECTRIC SHOCK can kill. ARC RAYS can burn. 3.a. The electrode and work (or ground) circuits 4.a. Use a shield with the proper filter and cover are electrically “hot” when the welder is on. plates to protect your eyes from sparks and Do not touch these “hot”...
- Page 4 SAFETY WELDING and CUTTING CYLINDER may explode SPARKS can if damaged. cause fire or explosion. 7.a. Use only compressed cylinders 6.a. Remove fire hazards from the welding area. containing the correct shielding gas for the If this is not possible, cover them to prevent process used and properly operating the welding sparks from starting a fire.
- Page 5 SAFETY PRÉCAUTIONS DE SÛRETÉ 6. Eloigner les matériaux inflammables ou les recouvrir afin de prévenir tout risque dʼincendie dû aux étincelles. Pour votre propre protection lire et observer toutes les instructions 7. Quand on ne soude pas, poser la pince à une endroit isolé de et les précautions de sûreté...
- Page 6 (89/336/EEC). It was manufactured in conformity with a national standard that implements a harmonized standard: EN 60974-10 Electromagnetic Compatibility (EMC) Product Standard for Arc Welding Equipment. It is for use with other Lincoln Electric equipment. It is designed for industrial and professional use. Introduction All electrical equipment generates small amounts of electromagnetic emission.
- Page 7 SAFETY Electromagnetic Compatibility (EMC) The size of the surrounding area to be considered will depend on the structure of the building and other activities that are taking place. The surrounding area may extend beyond the boundaries of the premises. Methods of Reducing Emissions Mains Supply Welding equipment should be connected to the mains supply according to the manufacturerʼs recommen- dations.
- Page 8 - MASTER TABLE OF CONTENTS FOR ALL SECTIONS - RETURN TO MAIN MENU Page Safety ................i-iv Installation .
-
Page 9: Table Of Contents
Connection of Lincoln Electric Wire Feeders ........ - Page 10 INSTALLATION TECHNICAL SPECIFICATIONS - DX450 (K2712-1) INPUT - DIESEL ENGINE Make/Model Description Speed (RPM) Displacement Starting Capacities cu. in. (ltrs.) System 4 cylinder 148.5(2.4) 12VDC Battery & Fuel: 20 gal. 35.4 HP High Idle 1880 starter (75 L) KUBOTA 1800 RPM Bore x Stroke inch (mm) (Group 34;...
-
Page 11: Installation
INSTALLATION FIGURE A.1 WARNING (VRD)-VOLTAGE REDUCTION DEVICE SWITCH IS LOCATED IN THIS AREA. Do not attempt to use this equipment until you have thoroughly read the engine manufacturerʼs manual supplied with your welder. It includes important safety precautions, detailed engine start- ing, operating and maintenance instructions, and parts lists. -
Page 12: High Altitude Operation
INSTALLATION WARNING 1. Design capacity of trailer vs. weight of Lincoln equipment and likely additional attachments. • Lift only with equipment of ade- 2. Proper support of, and attachment to, the base of the welding quate lifting capacity. equipment so there will be no undue stress to the framework. 3. -
Page 13: Fuel
INSTALLATION FUEL The standard muffler included with this welder does not USE DIESEL FUEL ONLY- qualify as a spark arrester. When required by local reg- ulations, a suitable spark arrester, such as the K903-1 Low Sulphur fuel or ultra low sulphur fuel in USA and must be installed and properly maintained. -
Page 14: Electrical Connections
INSTALLATION ELECTRICAL CONNECTIONS WELDING OUTPUT CABLES With the engine off connect the electrode and work cables to the output studs. The welding process dic- MACHINE GROUNDING tates the polarity of the electrode cable. These con- Because this portable engine driven welder creates its nections should be checked periodically and tightened own power, it is not necessary to connect its frame to with a 3/4"(19mm) wrench. -
Page 15: Standby Power Connections
INSTALLATION STANDBY POWER CONNECTIONS AUXILIARY POWER RECEPTACLES The DX450 is suitable for temporary, standby or emer- Start the engine and set the “IDLER” control switch to the gency power using the engine manufacturerʼs recom- “High Idle” mode. Voltage is now correct at the receptacles mended maintenance schedule. - Page 16 INSTALLATION CONNECTION OF DX450 TO PREMISES WIRING HUBBELL CS6365C WARNING • Only a licensed, certified, trained electrician should install the machine to a premises or residential elec- trical system. Be certain that: • The installation complies with the National Electrical Code and all other applicable electrical codes. •...
-
Page 17: Connection Of Lincoln Electric Wire Feeders
INSTALLATION CONNECTION OF LINCOLN ELECTRIC 4. Control Cable Model: WIRE FEEDERS • Connect Control Cable between Engine Welder and Feeder. Connection of LN-7 or LN-8 to the DX450 • Set "WELD TERMINALS" switch 1. Shut the welder off. "REMOTELY CONTROLLED"... - Page 18 INSTALLATION A-10 A-10 WARNING Spool Gun (K487-25) and Cobramatic to DX450 • Shut the welder off. Connection of the LN-25 to the DX450 Shut off welder before making any electrical con- • Connect per instructions on the appropriate connec- nections. tion diagram in Section F of the Operatorʼs manual.
- Page 19 TABLE OF CONTENTS - OPERATION SECTION Operation ................B-1 Safety Precautions .
-
Page 20: Operation
OPERATION SAFETY PRECAUTIONS • Add oil (if necessary) to bring the level up to the full mark. Do not overfill. Close engine door. WARNING • Check radiator for proper coolant level. (Fill if nec- essary). • See Engine Ownerʼs Manual for specific oil and Do not attempt to use this equipment until you coolant recommendations. - Page 21 OPERATION FIGURE B.1 1 1 1 1 WELDING CONTROLS (Figure B.1) When in the TOUCH START TIG mode and when 1. OUTPUT CONTROL- an Amptrol is connected to the 3-Pin Connector, the The OUTPUT dial is used OUTPUT dial is used to set the maximum current to preset the output voltage or current as displayed range of the CURRENT CONTROL of the Amptrol.
- Page 22 OPERATION 4. ARC CONTROL 10. WIRE FEEDER VOLTMETER SWITCH: - The ARC CONTROL dial is active in the CV-WIRE, CC-STICK and DOWNHILL PIPE modes, Matches the polarity of the wire feeder voltmeter to and has different functions in these modes. This control is the polarity of the electrode.
-
Page 23: Engine Controls
OPERATION ENGINE CONTROLS: 18. ELECTRIC FUEL GAUGE- The electric fuel gauge 12. RUN/STOP SWITCH gives accurate and reliable indication as to how much fuel is in the fuel tank. -RUN position energizes the engine prior to starting. STOP position stops the engine. The oil pressure inter- 19. -
Page 24: Constant Current (Stick) Welding
OPERATION force) during stick welding to adjust for a soft or crisp arc. NOTE: If the unit fails to start turn Run/Stop switch Increasing the number from -10(soft) to +10(crisp) to off and repeat step 3 through step 7 after increases the short circuit current and prevents sticking waiting 30 seconds. -
Page 25: Tig Welding
OPERATION When in the TOUCH START TIG mode and when a The OUTPUT CONTROL dial adjusts the full output range Amptrol is connected to the 6-Pin connector the OUT- for pipe welding. PUT CONTROL dial is used to set the maximum cur- rent range of the current control of the Amptrol. -
Page 26: Wire Welding-Cv
OPERATION This will keep the "Solid State" contactor open and provide a rent to the desired level for the gouging electrode being "cold" electrode until the Amptrol or Arc Start Switch is pressed. used according to the ratings in the following Table B.4. When using the TIG Module, the OUTPUT CONTROL on the DX450 is used to set the maximum range of the CURRENT TABLE B.4... - Page 27 TABLE OF CONTENTS - ACCESSORIES SECTION Accessories ................C-1 Factory Installed Equipment .
- Page 28 ACCESSORIES FIELD INSTALLED OPTIONS / TIG OPTIONS ACCESSORIES K1783-9 Pro -Torch® PTA-26V TIG Torch Air Cooled 200 amp torch (2 piece) equipped with valve for gas flow control. 25 ft. (7.6m) length. K903-1 SPARK ARRESTOR - Includes a heavy gage steel, approved spark arrestor, clamp and adapter for mounting to KP509 Magnum Parts Kit for PTA-26V TIG Torch Magnum Parts Kit provides all the torch accessories you...
- Page 29 TABLE OF CONTENTS - MAINTENANCE SECTION Maintenance ................D-1 Service Instructions .
-
Page 30: Maintenance
MAINTENANCE Service Instructions Service Instructions Single- and Two-Stage Engine Air Cleaners Single- and Two-Stage Engine Air Cleaners Inspect the New Filter for Damage Inspect the New Filter for Damage Remove the Filter Remove the Filter Inspect the new filter carefully, paying attention to Unfasten or unlatch the the inside of the open end, which is the service cover. -
Page 31: Safety Precautions
MAINTENANCE SAFETY PRECAUTIONS Read the Safety Precautions in the front of this manual and in the Engine Ownerʼs Manual before WARNING working on this machine. • Have qualified personnel do all maintenance Keep all equipment safety guards, covers, and and troubleshooting work. devices in position and in good repair. -
Page 32: Engine Oil Change
MAINTENANCE ENGINE OIL CHANGE OIL FILTER CHANGE Drain the engine oil while the engine is warm to assure • Drain the oil. rapid and complete draining. It is recommended that each time the oil is changed the oil filter be changed as •... -
Page 33: Cooling System
MAINTENANCE FUEL: COOLING SYSTEM Diesel Fuel Only - Low Sulphur Fuel WARNING or Ultra Low Sulphur Fuel in U.S.A. and CANADA only. HOT COOLANT can burn skin. At the end of each dayʼs use, refill the fuel tank to min- imize moisture condensation and dirt contamination in •... -
Page 34: Fuel Filter
MAINTENANCE CLEANING THE BATTERY FUEL FILTER Keep the battery clean by wiping it with a damp cloth 1. Check the fuel filter and fuel pre-filter for water accu- when dirty. If the terminals appear corroded, discon- mulation or sediment. nect the battery cables and wash the terminals with an ammonia solution or a solution of 1/4 pound (0.1113 2. -
Page 35: Welder / Generator Maintenance
MAINTENANCE WELDER / GENERATOR GFCI MODULE TESTING AND RESETTING MAINTENANCE PROCEDURE The GFCI module should be properly tested at least STORAGE: Store in clean, dry protected areas. once every month or whenever it is tripped. To proper- ly test and reset the GFCI module: CLEANING: Blow out the generator and controls peri- •... -
Page 36: Major Component Location
MAINTENANCE 1. Casefront & Control Panel Assembly 2. Output Panel Assembly 3. Power Module Panel Assembly 4. Generator & Rotor Assembly 5. Base, Fuel Tank & Battery Assembly 6. Engine Assembly 7. Case Back & Radiator Assembly 8. Case Cover FIGURE D.1 - MAJOR COMPONENT LOCATION DX450... - Page 37 TABLE OF CONTENTS-THEORY OF OPERATION SECTION Theory of Operation ..............E-1 General Description, Battery, Starter, Engine, Rotor, Stator, Engine Protection .
- Page 38 THEORY OF OPERATION FIGURE E.2 - GENERAL DESCRIPTION, BATTERY, ENGINE, ROTOR, STATOR & ENGINE CONTROL CHOPPER MODULE WORK TERMINAL THREE-PHASE RECTIFIER IGBT CHOKE ELECTRODE TERMINAL 80 VDC SHUNT STATOR VRD FEEDBACK VOLTAGE REDUCTION SIGNAL GLOW PLUG SWITCH SWITCH (OFF) GLOW PLUGS WELD LIGHTS CONTROL...
- Page 39 THEORY OF OPERATION FIGURE E.3 - WINDINGS, RECTIFIER, CHOPPER MODULE & FEEDBACK CHOPPER MODULE WORK TERMINAL THREE-PHASE RECTIFIER IGBT CHOKE ELECTRODE TERMINAL 80 VDC SHUNT STATOR VRD FEEDBACK VOLTAGE REDUCTION GLOW PLUG SIGNAL SWITCH SWITCH (OFF) GLOW PLUGS WELD LIGHTS CONTROL MECHANICAL ROTOR...
- Page 40 THEORY OF OPERATION FIGURE E.4 - WELD CONTROL BOARD & VRD CHOPPER MODULE WORK TERMINAL THREE-PHASE RECTIFIER IGBT CHOKE ELECTRODE TERMINAL 80 VDC SHUNT STATOR VRD FEEDBACK VOLTAGE REDUCTION SIGNAL GLOW PLUG SWITCH SWITCH (OFF) GLOW PLUGS WELD LIGHTS CONTROL MECHANICAL ROTOR BOARD...
- Page 41 THEORY OF OPERATION FIGURE E.5 - IGBT OPERATION INSULATED GATE BIPOLAR TRANSISTOR (IGBT) OPERATION An IGBT is a type of transistor. IGBTs are semicon- Drawing B shows the IGBT in an active mode. When ductors well suited for high frequency switching and the gate signal, a positive DC voltage relative to the high current applications.
- Page 42 THEORY OF OPERATION FIGURE E.6 - TYPICAL IGBT OUTPUTS MINIMUM OUTPUT (Dwell or Off Time) MAXIMUM OUTPUT (Dwell or Off Time) PULSE WIDTH MODULATION The term PULSE WIDTH MODULATION is used to The positive portion of the signal represents one IGBT describe how much time is devoted to conduction in group conducting for 2 microsecond.
- Page 43 THEORY OF OPERATION CHOPPER TECHNOLOGY FUNDAMENTALS The new era of welding machines such as the Hence the name “Chopper.” The biggest advantage® Vantage® 500, employ a technology whereby a DC of chopper technology is the high-speed control of the arc, similar to the inverter machines. A block diagram source is turned on and off (chopped up) at high speed, then smoothed through an inductor to control an arc.
- Page 44 NOTES DX450...
- Page 45 TABLE OF CONTENTS - TROUBLESHOOTING AND REPAIR Troubleshooting and Repair ............. .F-1 How to Use Troubleshooting Guide .
-
Page 46: How To Use Troubleshooting Guide
HOW TO USE TROUBLESHOOTING GUIDE WARNING Service and Repair should only be performed by Lincoln Electric Factory Trained Personnel. Unauthorized repairs performed on this equipment may result in danger to the technician and machine operator and will invalidate your factory warranty. For your safety and to avoid Electrical Shock, please observe all safety notes and precautions detailed throughout this manual. -
Page 47: Pc Board Troubleshooting Procedures
Do not touch electrically hot parts. - If you return a PC board to The Lincoln Electric Company for credit, it must be in the static-shielding bag. This will prevent further damage and allow prop- CAUTION er failure analysis. - Page 48 Perform the Stator Voltage Test. CAUTION If for any reason you do not understand the test procedures or are unable to perform the tests/repairs safely, contact the Lincoln Electric Service Department for technical troubleshooting assistance before you proceed. Call 1-888-935-3877. DX450...
- Page 49 The WELD CONTROL board may be faulty. CAUTION If for any reason you do not understand the test procedures or are unable to perform the tests/repairs safely, contact the Lincoln Electric Service Department for technical troubleshooting assistance before you proceed. Call 1-888-935-3877. DX450...
- Page 50 Perform the Stator Voltage Test. CAUTION If for any reason you do not understand the test procedures or are unable to perform the tests/repairs safely, contact the Lincoln Electric Service Department for technical troubleshooting assistance before you proceed. Call 1-888-935-3877. DX450...
- Page 51 Weld Control Feedback Test. CAUTION If for any reason you do not understand the test procedures or are unable to perform the tests/repairs safely, contact the Lincoln Electric Service Department for technical troubleshooting assistance before you proceed. Call 1-888-935-3877. DX450...
- Page 52 Replace the Control P.C. Board. CAUTION If for any reason you do not understand the test procedures or are unable to perform the tests/repairs safely, contact the Lincoln Electric Service Department for technical troubleshooting assistance before you proceed. Call 1-888-935-3877. DX450...
- Page 53 RPM. See ENGINE MANUAL. CAUTION If for any reason you do not understand the test procedures or are unable to perform the tests/repairs safely, contact the Lincoln Electric Service Department for technical troubleshooting assistance before you proceed. Call 1-888-935-3877. DX450...
- Page 54 Replace the Weld Control P.C. Board. CAUTION If for any reason you do not understand the test procedures or are unable to perform the tests/repairs safely, contact the Lincoln Electric Service Department for technical troubleshooting assistance before you proceed. Call 1-888-935-3877. DX450...
- Page 55 See the Remote Receptacle Resistance Test. CAUTION If for any reason you do not understand the test procedures or are unable to perform the tests/repairs safely, contact the Lincoln Electric Service Department for technical troubleshooting assistance before you proceed. Call 1-888-935-3877. DX450...
- Page 56 The Weld Control P.C. Board may be faulty. CAUTION If for any reason you do not understand the test procedures or are unable to perform the tests/repairs safely, contact the Lincoln Electric Service Department for technical troubleshooting assistance before you proceed. Call 1-888-935-3877. DX450...
- Page 57 The wire feeder may be defective. CAUTION If for any reason you do not understand the test procedures or are unable to perform the tests/repairs safely, contact the Lincoln Electric Service Department for technical troubleshooting assistance before you proceed. Call 1-888-935-3877. DX450...
- Page 58 CAUTION If for any reason you do not understand the test procedures or are unable to perform the tests/repairs safely, contact the Lincoln Electric Service Department for technical troubleshooting assistance before you proceed. Call 1-888-935-3877. DX450...
- Page 59 Check the oil level. CAUTION If for any reason you do not understand the test procedures or are unable to perform the tests/repairs safely, contact the Lincoln Electric Service Department for technical troubleshooting assistance before you proceed. Call 1-888-935-3877. DX450...
- Page 60 Perform the Engine Control Unit Test. CAUTION If for any reason you do not understand the test procedures or are unable to perform the tests/repairs safely, contact the Lincoln Electric Service Department for technical troubleshooting assistance before you proceed. Call 1-888-935-3877. DX450...
- Page 61 Perform the Engine Control Unit Test. CAUTION If for any reason you do not understand the test procedures or are unable to perform the tests/repairs safely, contact the Lincoln Electric Service Department for technical troubleshooting assistance before you proceed. Call 1-888-935-3877. DX450...
- Page 62 Weld Control Board. See Wiring Diagram. CAUTION If for any reason you do not understand the test procedures or are unable to perform the tests/repairs safely, contact the Lincoln Electric Service Department for technical troubleshooting assistance before you proceed. Call 1-888-935-3877. DX450...
- Page 63 The Weld Control P.C. Board may be defective. CAUTION If for any reason you do not understand the test procedures or are unable to perform the tests/repairs safely, contact the Lincoln Electric Service Department for technical troubleshooting assistance before you proceed. Call 1-888-935-3877. DX450...
- Page 64 CAUTION If for any reason you do not understand the test procedures or are unable to perform the tests/repairs safely, contact the Lincoln Electric Service Department for technical troubleshooting assistance before you proceed. Call 1-888-935-3877. DX450...
- Page 65 CAUTION If for any reason you do not understand the test procedures or are unable to perform the tests/repairs safely, contact the Lincoln Electric Service Department for technical troubleshooting assistance before you proceed. Call 1-888-935-3877. DX450...
- Page 66 NOTES F-22 F-22 DX450...
-
Page 67: Case Cover Removal And Replacement Procedure
CASE COVER REMOVAL AND REPLACEMENT PROCEDURE WARNING Service and repair should only be performed by Lincoln Electric factory trained personnel. Unauthorized repairs performed on this equipment may result in danger to the technician or machine operator and will invalidate your factory warranty. For your safety and to avoid electrical shock, please observe all safety notes and precautions detailed throughout this manual. - Page 68 TROUBLESHOOTING AND REPAIR F-24 F-24 CASE COVER REMOVAL AND REPLACEMENT PROCEDURE (continued) FIGURE F.1 – CASE REMOVAL Roof Lift Bale Seal Fuel Tank Seal Fuel Tank Cap Left Case Side Battery Drawer Right Side Service Access Door TEST PROCEDURE Right Case Side 1.
- Page 69 TROUBLESHOOTING AND REPAIR F-25 F-25 CASE COVER REMOVAL AND REPLACEMENT PROCEDURE (continued) REASSEMBLY PROCEDURE 1. Install components in reverse order of removal. 2. Be sure components align correctly. 3. Reconnect battery and replace battery door. DX450...
- Page 70 NOTES F-26 F-26 DX450...
-
Page 71: Chopper Module Capacitor Discharge Procedure
CHOPPER MODULE CAPACITOR DISCHARGE PROCEDURE WARNING Service and repair should only be performed by Lincoln Electric factory trained personnel. Unauthorized repairs performed on this equipment may result in danger to the technician or machine operator and will invalidate your factory warranty. For your safety and to avoid electrical shock, please observe all safety notes and precautions detailed throughout this manual. - Page 72 TROUBLESHOOTING AND REPAIR F-28 F-28 CHOPPER MODULE CAPACITOR DISCHARGE PROCEDURE (continued) FIGURE F.2 - CHOPPER MODULE CAPACITOR TERMINAL DISCHARGE INSULATED WARNING GLOVES NEVER USE A SHORTING STRAP TO DIS- CHARGE CAPACITORS. If the Lincoln recom- ELE TRI SHO K can kill. mended resistor, or an equivalent resistor is used, •...
-
Page 73: Engine Alternator Test
ENGINE ALTERNATOR TEST WARNING Service and repair should only be performed by Lincoln Electric factory trained personnel. Unauthorized repairs performed on this equipment may result in danger to the technician or machine operator and will invalidate your factory warranty. For your safety and to avoid electrical shock, please observe all safety notes and precautions detailed throughout this manual. - Page 74 TROUBLESHOOTING AND REPAIR F-30 F-30 ENGINE ALTERNATOR TEST (continued) TEST PROCEDURE 8. With the engine running and the RUN/STOP 1. Turn the engine off. switch in the “RUN” position, check the voltage 2. Open the engine access door and check the at Lead 232I.
-
Page 75: Engine Control Unit Test
ENGINE CONTROL UNIT TEST WARNING Service and repair should only be performed by Lincoln Electric factory trained personnel. Unauthorized repairs performed on this equipment may result in danger to the technician or machine operator and will invalidate your factory warranty. For your safety and to avoid electrical shock, please observe all safety notes and precautions detailed throughout this manual. - Page 76 TROUBLESHOOTING AND REPAIR F-32 F-32 ENGINE CONTROL UNIT TEST (continued) FIGURE F.3 - ENGINE CONTROL UNIT LOCATION ENGINE CONTROL UNIT TEST PROCEDURE 5. If any of the test results are not correct, further Case Cover Removal 1. Perform checking of the associated wiring and compo- Procedure.
- Page 77 TROUBLESHOOTING AND REPAIR F-33 F-33 ENGINE CONTROL UNIT TEST (continued) TABLE F.1 - ENGINE CONTROL UNIT VOLTAGES (Continued on Next Page) Function Pin Numbers Expected Conditions Comments Readings Hour Meter 6GV to 0 VDC Switch in Run Engine Running 1GV (Chassis) Position O Ohms.
- Page 78 TROUBLESHOOTING AND REPAIR F-34 F-34 ENGINE CONTROL UNIT TEST (continued) TABLE F.1 - CONTINUED Speed Sense 20GV to 12 VDC Switch in Run Engine Running 5P (Chassis) Position Speed Sense 17GV to 5 VDC Switch in Run Engine Running 5P (Chassis) Position Water 13GV to...
- Page 79 TROUBLESHOOTING AND REPAIR F-35 F-35 ENGINE CONTROL UNIT TEST (continued) FIGURE F.4 – TEST POINT & PIN LOCATION 9 17 25 34 34GV 17GV 16GV 15GV 31GV 13GV 20GV 12GV 28GV 19GV 27GV 18GV 26GV 1 10 18 26 ENGINE CONTROL UNIT DX450...
- Page 80 NOTES F-36 F-36 DX450...
-
Page 81: Brush And Slip Ring Service Procedure
BRUSH AND SLIP RING SERVICE PROCEDURE WARNING Service and repair should only be performed by Lincoln Electric factory trained personnel. Unauthorized repairs performed on this equipment may result in danger to the technician or machine operator and will invalidate your factory warranty. For your safety and to avoid electrical shock, please observe all safety notes and precautions detailed throughout this manual. - Page 82 TROUBLESHOOTING AND REPAIR F-38 F-38 BRUSH AND SLIP RING SERVICE PROCEDURE (continued) FIGURE F.5 - BRUSH & SLIP RING LOCATIONS BRUSHES SLIP RINGS #200A #200B #201 TEST PROCEDURE 7. If there is any evidence that the brushes may have been sticking in the brush holders, a Case Cover Removal...
- Page 83 ROTOR RESISTANCE AND GROUND TEST (STATIC) WARNING Service and repair should only be performed by Lincoln Electric factory trained personnel. Unauthorized repairs performed on this equipment may result in danger to the technician or machine operator and will invalidate your factory warranty. For your safety and to avoid electrical shock, please observe all safety notes and precautions detailed throughout this manual.
- Page 84 TROUBLESHOOTING AND REPAIR F-40 F-40 ROTOR RESISTANCE AND GROUND TEST (STATIC) (continued) FIGURE F.6 – ROTOR BRUSH LEADS BRUSHES SLIP RINGS #200A #200B #201 TEST PROCEDURE 5. Measure the resistance to ground. Place one 1. Turn the engine off. meter probe on either of the slip rings. Place 2.
-
Page 85: Rotor Resistance And Ground Test (Dynamic
(Also referred to as flying resistance test) WARNING Service and repair should only be performed by Lincoln Electric factory trained personnel. Unauthorized repairs performed on this equipment may result in danger to the technician or machine operator and will invalidate your factory warranty. For your safety and to avoid electrical shock, please observe all safety notes and precautions detailed throughout this manual. - Page 86 TROUBLESHOOTING AND REPAIR F-42 F-42 ROTOR RESISTANCE AND GROUND TEST (DYNAMIC) (continued) TEST PROCEDURE This test requires that the brushes and slip rings 5. Shut off engine, and move one of the ohmme- are clean, in good condition, and are properly seat- ter leads to a good clean chassis ground.
-
Page 87: Rotor Voltage Test
ROTOR VOLTAGE TEST WARNING Service and repair should only be performed by Lincoln Electric factory trained personnel. Unauthorized repairs performed on this equipment may result in danger to the technician or machine operator and will invalidate your factory warranty. For your safety and to avoid electrical shock, please observe all safety notes and precautions detailed throughout this manual. - Page 88 TROUBLESHOOTING AND REPAIR F-44 F-44 ROTOR VOLTAGE TEST (continued) FIGURE F.7. – LEAD LOCATIONS BRUSHES SLIP RINGS #200A #200B #201 TEST PROCEDURE 7. Perform the Rotor Resistance and Ground 1. Perform the Case Cover Removal procedure. Test and the Flashing Voltage Test. 2.
- Page 89 TROUBLESHOOTING AND REPAIR F-45 F-45 ROTOR VOLTAGE TEST (continued) Note: The field bridge rectifier and field capacitor 10. If the meter reading indicates battery voltage, about 12 to 14 VDC, the rotor may be open, or may appear to function normally when test- the brushes may be faulty or not making prop- ed independently, but may malfunction when er contact with the slip rings.
- Page 90 NOTES F-46 F-46 DX450...
-
Page 91: Flashing Voltage Test
(Engine Not Running) WARNING Service and repair should only be performed by Lincoln Electric factory trained personnel. Unauthorized repairs performed on this equipment may result in danger to the technician or machine operator and will invalidate your factory warranty. For your safety and to avoid electrical shock, please observe all safety notes and precautions detailed throughout this manual. - Page 92 TROUBLESHOOTING AND REPAIR F-48 F-48 FLASHING VOLTAGE TEST (continued) TEST PROCEDURE 12. Refer to the Wiring Diagram. Pull plug P-J2 1. Perform the Case Cover Removal from the Control PC board and inspect each terminal. Make sure that all terminals both on Procedure.
-
Page 93: Stator Voltage Test
STATOR VOLTAGE TESTS WARNING Service and repair should only be performed by Lincoln Electric factory trained personnel. Unauthorized repairs performed on this equipment may result in danger to the technician or machine operator and will invalidate your factory warranty. For your safety and to avoid electrical shock, please observe all safety notes and precautions detailed throughout this manual. - Page 94 TROUBLESHOOTING AND REPAIR F-50 F-50 STATOR VOLTAGE TESTS (continued) FIGURE F.8 – RECEPTACLE LEAD LOCATIONS (TYPICAL) GROUND AMPHENOL 1 CONTACTOR CONTROL 120 VAC FOR WIRE FEEDER REMOTE 40 VAC FOR WIRE FEEDER CONTROL 21 WORK SENSE 2 TIMES THRU FERRITE LEADS 75A, 76A, &...
- Page 95 TROUBLESHOOTING AND REPAIR F-51 F-51 STATOR VOLTAGE TESTS (continued) To test the 240 VAC winding (3-phase): To test the 120 VAC wire feeder supply: NOTE: The wire feeder AC voltage supply tests 1. Connect the meter probes to leads 4A and 3B where they connect to the 240 VAC receptacle, require that the meter probes be inserted or insert the meter probes into the receptacle.
- Page 96 TROUBLESHOOTING AND REPAIR F-52 F-52 STATOR VOLTAGE TESTS (continued) To test the 42 VAC wire feeder winding: To test the three-phase weld winding: 1. Connect the voltmeter probes to pins “I” (lead 1. Locate weld winding leads W1/W6, W2/W3, 41A) and “K” (lead #42A) of the 14 pin and W4/W5 where they connect to the three- Amphenol.
-
Page 97: Output Rectifier Bridge Test
OUTPUT RECTIFIER BRIDGE TEST WARNING Service and repair should only be performed by Lincoln Electric factory trained personnel. Unauthorized repairs performed on this equipment may result in danger to the technician or machine operator and will invalidate your factory warranty. For your safety and to avoid electrical shock, please observe all safety notes and precautions detailed throughout this manual. - Page 98 TROUBLESHOOTING AND REPAIR F-54 F-54 OUTPUT RECTIFIER BRIDGE TEST (continued) FIGURE F.10 TEST PROCEDURE 5. Mark the leads connected to the positive and 1. Turn the engine off. negative terminals of the output bridge rectifier 2. Perform the Case Cover Removal proce- to assure that they can be reconnected prop- dure.
- Page 99 TROUBLESHOOTING AND REPAIR F-55 F-55 OUTPUT RECTIFIER BRIDGE TEST (continued) NOTE: A digital Ohmmeter is not recommended 7. Check for grounds by placing one of the ohm- meter probes on a clean, unpainted metal sur- for this test. A typical digital Ohmmeter face of the machine.
- Page 100 TROUBLESHOOTING AND REPAIR F-56 F-56 TABLE F.2 – DIODE TEST TABLE Test Instrument Diode Bias (+) Lead (-) Lead and Expected Test Result DC(+) FORWARD BIAS (Low Resistance) DC(+) FORWARD BIAS (Low Resistance) DC(+) FORWARD BIAS (Low Resistance) DC(-) FORWARD BIAS (Low Resistance) DC(-) FORWARD BIAS...
-
Page 101: Chopper Module Function Test
CHOPPER MODULE FUNCTION TEST WARNING Service and repair should only be performed by Lincoln Electric factory trained personnel. Unauthorized repairs performed on this equipment may result in danger to the technician or machine operator and will invalidate your factory warranty. For your safety and to avoid electrical shock, please observe all safety notes and precautions detailed throughout this manual. - Page 102 TROUBLESHOOTING AND REPAIR F-58 F-58 CHOPPER MODULE FUNCTION TEST (continued) FIGURE F.12 – CHOPPER MODULE CONNECTIONS TEST PROCEDURE 9. If the correct voltage is present at terminals 1. Perform B1- to B2+ and B4- to B5+ of the chopper mod- Case Cover Removal...
- Page 103 TROUBLESHOOTING AND REPAIR F-59 F-59 CHOPPER MODULE FUNCTION TEST (continued) TEST PROCEDURE (CONTINUED) 13. If about 58 VDC is present at chopper module 16. If the 20 kHz signal is present, the chopper terminals B2+ to B3-, and B5+ to B6-, but not module is defective.
- Page 104 NOTES F-60 F-60 DX450...
-
Page 105: Chopper Module Resistance Test
CHOPPER MODULE RESISTANCE TEST WARNING Service and repair should only be performed by Lincoln Electric factory trained personnel. Unauthorized repairs performed on this equipment may result in danger to the technician or machine operator and will invalidate your factory warranty. For your safety and to avoid electrical shock, please observe all safety notes and precautions detailed throughout this manual. - Page 106 TROUBLESHOOTING AND REPAIR F-62 F-62 CHOPPER MODULE RESISTANCE TEST (continued) TEST PROCEDURE 4. Use a digital Ohmmeter to test the module per 1. Perform Table F.3. Case Cover Removal 5. Reconnect all leads. Procedure. 2. Perform the Chopper Module Capacitor 6.
- Page 107 TROUBLESHOOTING AND REPAIR F-63 F-63 CHOPPER MODULE RESISTANCE TEST (continued) Table F.3 OHMMETER OHMMETER READING Diode Bias (+) Lead (-) Lead and Expected Test Result 6K to 9K 6K to 9K 200k or higher 400k or higher 200k or higher 400k or higher 6K to 9K 6K to 9K...
- Page 108 NOTES F-64 F-64 DX450...
-
Page 109: Weld Control Board Pwm Gate Signal Test
WELD CONTROL BOARD PWM GATE SIGNAL TEST WARNING Service and repair should only be performed by Lincoln Electric factory trained personnel. Unauthorized repairs performed on this equipment may result in danger to the technician or machine operator and will invalidate your factory warranty. For your safety and to avoid electrical shock, please observe all safety notes and precautions detailed throughout this manual. - Page 110 TROUBLESHOOTING AND REPAIR F-66 F-66 WELD CONTROL BOARD PWM GATE SIGNAL TEST (continued) TEST PROCEDURE 1. Perform the Case Cover Removal 14. If the 80 to 100 VDC supply voltage is pre- sent at the weld control PC board, but there is no PWM gate signal, check the voltage Procedure.
- Page 111 TROUBLESHOOTING AND REPAIR F-67 F-67 WELD CONTROL BOARD PWM GATE SIGNAL TEST (continued FIGURE F.13 – WELD CONTROL BOARD & PLUGS PLUG P1 LEAD #4 LEAD #2 PLUG P3 LEAD #13 LEAD #25 LEAD #14 LEAD #23 DX450...
- Page 112 NOTES F-68 F-68 DX450...
-
Page 113: Weld Control Feedback Test
WELD CONTROL FEEDBACK TEST WARNING Service and repair should only be performed by Lincoln Electric factory trained personnel. Unauthorized repairs performed on this equipment may result in danger to the technician or machine operator and will invalidate your factory warranty. For your safety and to avoid electrical shock, please observe all safety notes and precautions detailed throughout this manual. - Page 114 TROUBLESHOOTING AND REPAIR F-70 F-70 WELD CONTROL FEEDBACK TEST (continued) TEST PROCEDURE 9. If the readings differ significantly, continue 1. Place the idle switch in the “HIGH IDLE” posi- with this procedure tion. 10. Turn off the engine and release the load from 2.
- Page 115 TROUBLESHOOTING AND REPAIR F-71 F-71 WELD CONTROL FEEDBACK TEST (continued) 16. If the voltage readings are different, check the 20. To calculate the correct millivolt signal for a wiring and connections between the welding given load, you divide the number of amps terminals and the control PC board.
- Page 116 TROUBLESHOOTING AND REPAIR F-72 F-72 WELD CONTROL FEEDBACK TEST (continued) FIGURE F.14 – WELD CONTROL BOARD & PLUGS PLUG P3 LEAD 208C LEAD #208C PLUG P6 Lead #206S Lead #204S DX450...
-
Page 117: Control Potentiometer And Mode Switch Resistance Test
CONTROL POTENTIOMETER AND MODE SWITCH RESISTANCE TEST WARNING Service and repair should only be performed by Lincoln Electric factory trained personnel. Unauthorized repairs performed on this equipment may result in danger to the technician or machine operator and will invalidate your factory warranty. For your safety and to avoid electrical shock, please observe all safety notes and precautions detailed throughout this manual. - Page 118 TROUBLESHOOTING AND REPAIR F-74 F-74 CONTROL POTENTIOMETER AND MODE SWITCH RESISTANCE TEST (continued) TEST PROCEDURE 1. Turn the engine off 7. If the resistance is lower than 500k Ohms, replace the potentiometer and mode switch 2. Perform Case Cover Removal Procedure. plug and lead assembly, or replace the defec- 3.
- Page 119 TROUBLESHOOTING AND REPAIR F-75 F-75 CONTROL POTENTIOMETER AND MODE RESISTANCE TEST (continued) TABLE F.4 POT/MODE SWITCH RESISTANCE TEST MODE SWITCH OHMMETER SETTING CONNECTION CC-STICK P7-9 (#214) TO P7-14 (#218) 500K or Higher CC-STICK 500K or Higher P7-9 (#214) TO P7-15 (#220) CC-STICK 500K or Higher P7-9 (#214) TO P7-16 (#222)
- Page 120 TROUBLESHOOTING AND REPAIR F-76 F-76 CONTROL POTENTIOMETER AND MODE RESISTANCE TEST (continued) FIGURE F.15 – WELD CONTROL BOARD PLUG P7 LEAD #75 LEAD #279 LEAD #278 LEAD #76 LEAD #77 LEAD #277 LEAD #214 LEAD #222 LEAD #220 LEAD #218 DX450...
-
Page 121: Remote Receptacle Resistance Test
REMOTE RECEPTACLE RESISTANCE TEST WARNING Service and repair should only be performed by Lincoln Electric factory trained personnel. Unauthorized repairs performed on this equipment may result in danger to the technician or machine operator and will invalidate your factory warranty. For your safety and to avoid electrical shock, please observe all safety notes and precautions detailed throughout this manual. - Page 122 TROUBLESHOOTING AND REPAIR F-78 F-78 REMOTE RECEPTACLE RESISTANCE TEST (continued) FIGURE F.16 AMPHENOL 1 TEST PROCEDURE 1. Turn the machine off. 7. If the resistance values are found to be too low, due to contaminated electrical components in 2. Perform the amphenol harness assembly, try removing Case Cover...
- Page 123 TROUBLESHOOTING AND REPAIR F-79 F-79 REMOTE RECEPTACLE RESISTANCE TEST (continued) FIGURE F.17 – WELD CONTROL BOARD & PLUG PLUG P1 LEAD #4 LEAD #2 LEAD #75 LEAD #76 LEAD #77 DX450...
- Page 124 TROUBLESHOOTING AND REPAIR F-80 F-80 REMOTE RECEPTACLE RESISTANCE TEST (continued) TABLE - F.5 AMPHENOL RESISTANCE TEST OHMMETER WELDING TERMINAL OHMMETER READING CONNECTION SWITCH SETTING PIN “G” (#75B) to PIN “Å” (#32) 500K or Higher PIN “G” (#75B) to PIN “B” (GND-A) 500K or Higher PIN “G”...
- Page 125 TROUBLESHOOTING AND REPAIR F-81 F-81 REMOTE RECEPTACLE RESISTANCE TEST (continued) TABLE F.6 – CONTINUITY TEST FROM 14-PIN AMPHENOL TO PLUG P1 Plug P1 14-Pin Amphenol Expected Reading Pin 4 (#2) Pin C (#2) 0 Ohms Pin 3 (#4) Pin D (#4) 0 Ohms Pin 10 (#75) Pin G (#75)
- Page 126 TROUBLESHOOTING AND REPAIR F-82 F-82 NORMAL OPEN CIRCUIT VOLTAGE WAVEFORM (115VAC SUPPLY) HIGH IDLE - NO LOAD 16.6 ms 0 volts This is the typical auxiliary output voltage generated from a properly operating machine. Note that each vertical division represents 50 volts and that each horizontal division rep- resents 5 milliseconds in time.
- Page 127 TROUBLESHOOTING AND REPAIR F-83 F-83 NORMAL WELDING OPEN CIRCUIT VOLTAGE MAX CONTROL POT - HIGH IDLE - NO LOAD 0 volts This is the typical DC open circuit out- put voltage generated from a properly operating machine. Note that each vertical division represents 50 volts and that each horizontal division rep- resents 5 milliseconds in time.
- Page 128 TROUBLESHOOTING AND REPAIR F-84 F-84 NORMAL CIRCUIT VOLTAGE WAVEFORM CONSTANT CURRENT MACHINE LOADED TO 300 AMPS AT 27 VOLTS 0 volts This is the typical DC output voltage generated from a properly operating machine. Note that each vertical divi- sion represents 20 volts and that each horizontal division represents 1 millisecond in time.
- Page 129 TROUBLESHOOTING AND REPAIR F-85 F-85 NORMAL OPEN CIRCUIT VOLTAGE WAVEFORM (WIRE CV TAP) MAX CONTROL POT - HIGH IDLE - NO LOAD 0 volts This is the typical DC open circuit out- put voltage generated from a properly operating machine. Note that each vertical division represents 50 volts and that each horizontal division rep- resents 5 milliseconds in time.
- Page 130 TROUBLESHOOTING AND REPAIR F-86 F-86 NORMAL CIRCUIT VOLTAGE WAVEFORM (WIRE CV) MACHINE LOADED TO 300 AMPS AT 28 VOLTS 0 volts This is the typical DC voltage gener- ated from a properly operating machine. Note that each vertical divi- sion represents 20 volts and that each horizontal division represents 1 millisecond in time.
-
Page 131: Output Rectifier Bridge And Choke Removal And Replacement
OUTPUT RECTIFIER BRIDGE AND CHOKE REMOVAL AND REPLACEMENT WARNING Service and repair should only be performed by Lincoln Electric factory trained personnel. Unauthorized repairs performed on this equipment may result in danger to the technician or machine operator and will invalidate your factory warranty. For your safety and to avoid electrical shock, please observe all safety notes and precautions detailed throughout this manual. - Page 132 TROUBLESHOOTING AND REPAIR F-88 F-88 OUTPUT RECTIFIER BRIDGE AND CHOKE REMOVAL AND REPLACEMENT (continued) REMOVAL PROCEDURE Removing the Output Choke 1. Remove the heavy leads from the choke. 1. Turn the engine off. Carefully mark the leads for accurate re-con- 2.
- Page 133 TROUBLESHOOTING AND REPAIR F-89 F-89 OUTPUT RECTIFIER BRIDGE AND CHOKE REMOVAL AND REPLACEMENT (continued) Replacing the Output Rectifier 1. Place the Output Rectifier into the machine so 5. Reconnect all of the leads and plugs that that its mounting studs fit into the holes in the were disconnected during the removal proce- bracket.
- Page 134 NOTES F-90 F-90 DX450...
-
Page 135: Chopper Module Removal And Replacement
CHOPPER MODULE REMOVAL AND REPLACEMENT WARNING Service and repair should only be performed by Lincoln Electric factory trained personnel. Unauthorized repairs performed on this equipment may result in danger to the technician or machine operator and will invalidate your factory warranty. For your safety and to avoid electrical shock, please observe all safety notes and precautions detailed throughout this manual. - Page 136 TROUBLESHOOTING AND REPAIR F-92 F-92 CHOPPER MODULE REMOVAL AND REPLACEMENT (continued) FIGURE F.18 – MODULE LEAD LOCATIONS REMOVAL PROCEDURE 1. Turn the engine off. 2. Perform the Case Cover Removal Procedure. 7. Remove the Power Module assembly from the machine. 3.
- Page 137 TROUBLESHOOTING AND REPAIR F-93 F-93 CHOPPER MODULE REMOVAL AND REPLACEMENT (continued) REPLACEMENT 1. Mount the heat sink to the brackets on the 4. Replace any cable ties cut at disassembly. vertical baffle with the three 3/8” screws. Mount the plastic strip with the top two 5.
- Page 138 NOTES F-94 F-94 DX450...
-
Page 139: Stator/Rotor Removal And Replacement
STATOR/ROTOR REMOVAL AND REPLACEMENT PROCEDURE WARNING Service and repair should only be performed by Lincoln Electric factory trained personnel. Unauthorized repairs performed on this equipment may result in danger to the technician or machine operator and will invalidate your factory warranty. For your safety and to avoid electrical shock, please observe all safety notes and precautions detailed throughout this manual. - Page 140 TROUBLESHOOTING AND REPAIR F-96 F-96 STATOR/ROTOR REMOVAL AND REPLACEMENT PROCEDURE (continued) FIGURE F.19 – FUEL TANK REMOVAL LEADS #229 AND #5J PLUG FUEL LINES U-BOLTS (2) PROCEDURE 5. Turn the fuel off at the shutoff valve. Remove 1. Turn the engine off. and plug the fuel return line.
- Page 141 TROUBLESHOOTING AND REPAIR F-97 F-97 STATOR/ROTOR REMOVAL AND REPLACEMENT PROCEDURE (continued) FIGURE F.20 – CALLOUTS & TEST POINTS #200 200A #201A- FILTER FIELD DIODE CAPACITOR RECTIFIER BRIDGE PROCEDURE 11. Label and remove leads 5H, 200, 200A, 6A, 9. Disconnect plug J30 at the right front side. 201A, 5H from the field bridge rectifier.
- Page 142 TROUBLESHOOTING AND REPAIR F-98 F-98 STATOR/ROTOR REMOVAL AND REPLACEMENT PROCEDURE (continued) FIGURE F.21 - BRUSH HOLDER LEAD REMOVAL #200A #200B #201 PROCEDURE 12. Label and remove brush leads #201(-) and 14. Using a 3/8” wrench, remove the brush holder #200B(+) from the brush holder assembly. assembly.
- Page 143 TROUBLESHOOTING AND REPAIR F-99 F-99 STATOR/ROTOR REMOVAL AND REPLACEMENT PROCEDURE (continued) FIGURE F.22 - LOCATIONS 296A VRD SWITCH (VEIWED FROM REAR OF SWITCH) 277 279 19GV FUEL GND-A 5L 5M GROUND SCREW CIRCUIT BREAKER DIODE BRIDGE NOTE: This lead must be wound three turns clock- 16.
- Page 144 TROUBLESHOOTING AND REPAIR F-100 F-100 STATOR/ROTOR REMOVAL AND REPLACEMENT PROCEDURE (continued) FIGURE F.23 - BASE BASE In steps 21 - 25, the lift frame weldment, fuel tank 23. With a 3/8” wrench, remove the nuts, lock supports, and fan baffle are removed as a unit. washers, and flat washers from the two studs See Figure F.23.
- Page 145 TROUBLESHOOTING AND REPAIR F-101 F-101 STATOR/ROTOR REMOVAL AND REPLACEMENT PROCEDURE (continued) FIGURE F.24 - WASHER AND NUT LOCATIONS TOLERANCE RING BEARING BOLTS (4) FAN NUT STATOR REMOVAL PROCEDURE 5. Using a 1/2” wrench, remove the two nuts, lock 1. Using a 1/2” wrench, remove the four-fan blade washers, and carriage bolts holding the gener- mounting bolts and lock washers.
- Page 146 TROUBLESHOOTING AND REPAIR F-102 F-102 STATOR/ROTOR REMOVAL AND REPLACEMENT PROCEDURE (continued) FIGURE F.25 - RING & DISC COUPLING CLAMP RING COUPLING DISC ROTOR ROTOR REMOVAL PROCEDURE REASSEMBLY NOTES 1. Support the rotor with a hoist. Reassemble the rotor and stator to the DX-450 by carefully retracing the disassembly procedure steps in reverse order.
- Page 147 TROUBLESHOOTING AND REPAIR F-103 F-103 STATOR/ROTOR REMOVAL AND REPLACEMENT PROCEDURE (continued) Replacing the Rotor and Stator 5. Insert the screws with lock washers and evenly 1. Whenever the rotor and stator are separated, it tighten to a torque of 17 to 19 Ft-Lbs. is highly recommended that a new bearing and tolerance ring be installed when the rotor and stator are reassembled.
-
Page 148: Retest After Repair
TROUBLESHOOTING AND REPAIR F-104 F-104 RETEST AFTER REPAIR Retest a machine: • If it is rejected under test for any reason that requires you to remove any mechanical part which could affect the machineʼs electrical characteristics. • If you repair or replace any electrical components. ENGINE OUTPUT Mode No Load RPM... - Page 149 NOTES F-105 F-105 DX450...
- Page 150 TABLE OF CONTENTS - DIAGRAM SECTION Electrical Diagrams ..............G-1 Wiring Diagram .
- Page 151 G6260PRINT NOTE: This diagram is for reference only. It may not be accurate for all machines covered by this manual. The wiring diagram specific to your code is pasted inside one of the enclosure panels of your machine. Red-D-Arc DX450...
- Page 152 TO OTHER PARTIES OR USED FOR ANY PURPOSE WITHOUT THE EXPRESS WRITTEN PERMISSION OF LINCOLN GLOBAL, INC. MANUFACTURING TOLERANCE PER E2056 SCALE: CONTROL: CLEVELAND EQUIPMENT TYPE: RED-D-ARC DX450 UNLESS OTHERWISE SPECIFIED TOLERANCE: PAGE ___ OF ___ ON 2 PLACE DECIMALS IS ± .02 in. ( ± 0.5 mm) NONE DRAWN BY: Maglietta ON 3 PLACE DECIMALS IS ±...
- Page 153 PINS JUMPERED TO SELECT MACHINE J4-2 MACHINE / V BATTERY J1-5 J1-6 J1-7 J1-8 MACHINE MACH SEL 2 J1-7 J1-13 J1-13 J1-12 RED-D-ARC DX450 J4-3 FRAME MODE J2-7 BATTERY POSITIVE BLINK (PULLED LOW AND HIGH J4-4 MACH SEL 3 LOGIC IN LOOKBACK TO FLASH...
- Page 154 ELECTRICAL DIAGRAMS SCHEMATIC - WELD CONTROL PC BOARD - SHEET 1 NOTE: This diagram is for reference only. It may not be accurate for all machines covered by this manual. Red-D-Arc DX450...
- Page 155 ELECTRICAL DIAGRAMS SCHEMATIC - WELD CONTROL PC BOARD - SHEET 2 NOTE: This diagram is for reference only. It may not be accurate for all machines covered by this manual. Red-D-Arc DX450...
- Page 156 ELECTRICAL DIAGRAMS SCHEMATIC - WELD CONTROL PC BOARD - SHEET 3 NOTE: This diagram is for reference only. It may not be accurate for all machines covered by this manual. Red-D-Arc DX450...
- Page 157 ELECTRICAL DIAGRAMS SCHEMATIC - WELD CONTROL PC BOARD - SHEET 4 NOTE: This diagram is for reference only. It may not be accurate for all machines covered by this manual. Red-D-Arc DX450...
- Page 158 ELECTRICAL DIAGRAMS SCHEMATIC - WELD CONTROL PC BOARD - SHEET 5 NOTE: This diagram is for reference only. It may not be accurate for all machines covered by this manual. Red-D-Arc DX450...
Need help?
Do you have a question about the RED-D-ARC DX450 and is the answer not in the manual?
Questions and answers