
Related Manuals for Olmo OW-P08HS115WF


Summary of Contents for Olmo OW-P08HS115WF
- Page 1 TTW AIR CONDITIONER USER’S MANUAL MULTI-STEP SPEED ELECTRONIC CONTROL Models: OW-P08HS115WF OW-P08AC115WF OW-P12AC115WF OW-P12AC230WF OW-P12HS230WF OW-P14AC230WF OW-P14HS230WF...
- Page 2 IN-WALL TYPE AIR CONDITIONER Owner’s Manual IMPORTANT NOTE: TTW Series Before using your air conditioner, please read North America Products this manual carefully and keep it for future reference.
-
Page 3: Table Of Contents
CONTENTS Safety precautions Installation instructions What is in the box Before you get started Install your product Operation instructions Get to know your AC Get to know the features Cleaning & maintenance Troubleshooting... -
Page 4: Safety Precautions
Safety Precautions Must read the warning message. Inside you will find many helpful hints on how to use and maintain To prevent injury to the user or other people and property your air conditioner properly. Just a little preventive care on your damage, the following instructions must be followed. - Page 5 WARNING Plug in power plug properly. Otherwise, it may cause electric shock Unplug the unit if strange sounds, smell, or smoke or fire due to excess heat generation. Do not operate or stop the unit comes from it. It may cause fire and electric shock. by inserting or pulling out the power plug.It may cause electric shock Do not use the socket if it is loose or damaged.
- Page 6 CAUTION unless they have been given super vision or instruction Hold the plug by the head of the power plug when taking concerning use of the appliance by a person responsible for it out. It may cause electric shock and damage. Turn off the their safety.
- Page 7 Operation of Current Device The power supply cord contains a current device that senses damage to the power cord. To test your power supply cord do the following: Plug in the Air Conditioner. The power supply cord will have TWO buttons on the plug head. Press the TEST button, you will notice a click as the RESET button pops out.
- Page 8 WARNING Electrical Information For Your Safety The complete electical rating of your new room air conditioner Do not store or use gasoline or other flammable vapors and is stated on the serial plate. Refer to the rating when checking liquids in the vicinity of this or any other appliance. the electrical requirements.
- Page 9 CAUTION: Risk of fire flammable materials IMPORTANT NOTE: Read this manual carefully before installing or operating your new appliance unit. Make sure to save this manual for future reference. Explanation of symbols displayed on the unit CAUTION This symbol shows that the operation manual should be read carefully. This symbol shows that a service personnel should be handling this equipment with CAUTION reference to the installation manual.
- Page 10 Flammable Refrigerant R32 is used within appliance. -When maintaining or disposing the appliance, the refrigerant (R32) shall be recovered properly, shall not discharge to air directly. -Compliance with national gas regulations shall be observed. -Keep ventilation openings clear of obstruction. -The appliance shall be stored so as to prevent mechanical damage from occurring.
- Page 11 1. Transport of equipment containing flammable refrigerants See transport regulations. 2. Marking of equipment using signs See local regulations. 3. Disposal of equipment using flammable refrigerants See national regulations. 4. Storage of equipment/appliances The storage of equipment should be in accordance with the manufacturer's instructions. 5.
- Page 12 6)No ignition sources No person carrying out work in relation to a refrigerating system which involves exposing any pipe work that contains or has contained flammable refrigerant shall use any sources of ignition in such a manner that it may lead to the risk of fire or explosion. All possible ignition sources, including cigarette smoking, should be kept sufficiently far away from the site of installation, repairing, removing and disposal, during which flammable refrigerant can possibly be released to the surrounding space.
- Page 13 2)Particular attention shall be paid to the following to ensure that by working on electrical components, the casing is not altered in such a way that the level of protection is affected. Check for damage to cables, excessive number of connections, terminals not made to original specification, damage to seals, incorrect fitting of glands, etc.
- Page 14 11. Removal and evacuation When breaking into the refrigerant circuit to make repairs—or for any other purpose - conventional procedures shall be used. However, for flammable refrigerants it is important that best practice be followed, since flammability is a consideration. The following procedure shall be adhered to: -Safely remove refrigerant following local and national regulations;...
- Page 15 a)Become familiar with the equipment and its operation. b)Isolate system electrically. c)Before attempting the procedure ensure that: mechanical handling equipment is available, if required, for handling refrigerant cylinders; all personal protective equipment is available and being used correctly; the recovery process is supervised at all times by a competent person;...
-
Page 16: What Is In The Box
What is in the Box. Package content Air Conditioner Unit Trim Frame (top & bottom legs)*2 Trim Frame (side legs)*2 Wall Sleeve (purchase separately) Aluminum Grille Plastic Grille (1/8"x4-1/2"x14-1/2") Centering/Support Blocks(Blue)*4 (4-1/2"x3-1/2"x1-1/2") Tapered Spacer Block(Blue)*2 (7/8"x1-1/8"x17") Stuffer-seal*1 (1"x1-1/2"x84") Seal*2 (1"x1-1/2"x14") Seal*2 (1"x3/4"x14") Seal*2 (1"x3/8"x14") Seal*2 (1"x3/8"x25") -
Page 17: Before You Get Started
Confirm the size of the wall sleeve according to your depths. Please install according to hole in the wall, identify the wall-sleeve brand for your the depth. installation, from the chart below. • OW-P08HS115WF Over 51cm • OW-P08AC115WF (20") • OW-P12AC115WF... - Page 18 Complete the installation of Wall Sleeve. Preparations before unit installation Install the wall sleeve and make grounding connection Remove old Air Conditioner from wall sleeve and prepare wall If there is no ground wire installation hole, please drill a 1/8 clearance sleeve(if any).
- Page 19 Installation of Aluminum Grille. Installation of new grille provided with unit NOTE We have a new design for the rear grille (two rear air intakes) to improve the performance of the product. Please be sure to use the aluminum grille we provide for installation to achieve the best performance of the product. Most decorative exterior grilles may be left in place as long as the proper interior air direction grille is installed.
-
Page 20: Install Your Product 1
Install your product. Installation overview NOTE Illustrations in this manual are for explanatory purposes. The actual shape of your indoor unit may be slightly different. The actual shape shall prevail. IMPORTANT If you have difficulty with mounting the grill to Save these instructions for local inspectors the sleeve, follow the instructions for direct use. - Page 21 Guide to installation installation guide NOTE Complete the first installation step according to the wall cover installation guide (page 8) and aluminum grid installation guide (page 9) . Guide to installation before embedding the product into the wall Don't forget to place the Tear the Seal(NO.13) paper from the Cut the Seal(NO.12) plastic grille(NO.6) in the...
- Page 22 You can install aluminum grille first. installation guide NOTE The previous directions are the preferable way to mount the new Aluminum Grill. The units performance is slightly better and the possibility of draughts is reduced. As a last resort, direct mounting of the grille to the unit can be considered (the installation tutorial follows). The Aluminum Grille must be installed prior to inserting the unit into the sleeve.
- Page 23 Finally, do some cosmetic work on your product. installation guide Step 2 Step 1 Step 3 Do some cosmetic work. The installation is complete. Step 1: Assemble the Trim Step 2: Install the Long Step 3: Slide the frame, seal Congratulations on the installation, but Frame(NO.2) by inserting Stuffer-seal(NO.9) between...
-
Page 24: Get To Know Your Ac
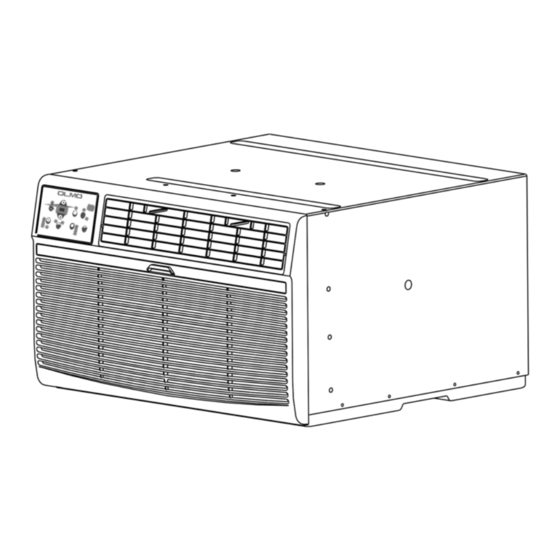
Get to know your AC. AC unit overview Components of the product Adjust the Air Direction Center handles Air Direction Levers Status display and Display Filter handshandle Front Intake Grille Air directional louvers control air flow direction.Your air conditioner has the 4-way directional system described below.The louvers will allow you to direct the air flow Up or Horizontal, and Left or Right throughout the room as needed.Use the center... -
Page 25: Get To Know The Features
Get to know the features. ELECTRONIC CONTROL OPERATING INSTRUCTIONS NOTE Before you begin, thoroughly familiarize yourself with the control panel as shown below and all its functions, then follow the symbol for the functions you desire. The unit can be controlled by the unit control alone or with the remote. This control panel is based on the typical model. - Page 26 ELECTRONIC CONTROL OPERATING INSTRUCTIONS 2. TO CHANGE TEMPERATURE SETTING: 1. TO TURN UNIT ON OR OFF: Press POWER button to turn unit on or off. Press UP/DOWN buttonto change temperature setting. NOTE: The unit will initiate automatically NOTE: Press or hold either UP or DOWN button until the desired temperature is seen on the Energy Saver function under Cool, Dry, the display.
- Page 27 ELECTRONIC CONTROL OPERATING INSTRUCTIONS 8. TO SELECT THE OPERATING MODE: To choose operating mode, press Mode button.Each time you press the button, a mode is selected in a sequence that goes from Auto, Cool, Dry, heat(cooling only models without) and Fan. The indicator light beside will be illuminated and remained on once the mode is selected. The unit will initiate automatically the Energy Saver function under Cool, Dry, Auto(only Auto-Cooling and Auto-Fan) modes.
- Page 28 ELECTRONIC CONTROL OPERATING INSTRUCTIONS 9. TIMER: AUTO START/STOP FEATURE: 10. DISPLAY: When the unit is on or off, first press Timer button, Error codes: the TIMER ON indicator light illuminates. It indicates Displays AS-Room temperature sensor error-Unplug the the Auto Start program is initiated. unit and plug it back in.
- Page 29 One more thing Additional Notes Your AC may look Additional things Normal Sounds / a little different. you should know. Sound Performance All the illustrations in this manual are Now that you have mastered the operating High Pitched Chatter for explanation purpose only. Your air procedure, here are more features in your High efficiency compressors may have a conditioner may be slightly different.
-
Page 30: Cleaning & Maintenance 3
Cleaning & maintenance How to clean & change your filter. Check the air filter at least once a month to see if cleaning is necessary. Air Filter Cleaning Energy Saving Note The air filter should be checked at In order to reach the maximum energy least once a month to see if cleaning saving and comfort, it is recommended is necessary. - Page 31 TROUBLESHOOTING Problem Solving Before calling for service, review this list. It may save your time and expense. This list includes common occurrences that are not the result of defective workman-ship or materials in this appliance. Problem Solution Wall plug disconnected. Push plug firmly into wall outlet. House fuse blown or circuit breaker tripped.
- Page 32 Problem Solving Problem Solution Dirty air filter- air restricted. Clean air filter. Refer to Care and Cleaning section. Temperature is set too High, set temperature to a Lower setting. Air conditioner cooling, but room Air directional louvers positioned improperly. Position louvers for better air distribution. is too warm- NO ice forming on Front of units is blocked by drapes, blinds, furniture, etc.
- Page 34 OLMO-(TTW) 16120300001339 20231230...
Need help?
Do you have a question about the OW-P08HS115WF and is the answer not in the manual?
Questions and answers
At what height should the OLMO 8000btu hear/cool be mounted?