Table of Contents
Advertisement
Available languages
Available languages
Quick Links
USA office: Fontana
AUS office: Truganina
GBR office: Ipswich
If you're having difficulty, our friendly
customer team is always here to help.
FRA office: Saint Vigor d'Ymonville
USA:cs.us@costway.com
AUS:cs.au@costway.com
GBR:cs.uk@costway.com
FRA:cs.f r @costway.com
Gril à Gaz
NP11463SL
THIS INSTRUCTION BOOKLET CONTAINS IMPORTANT SAFETY INFORMATION. PLEASE READ AND KEEP FOR FUTURE REFERENCE.
Gas Grill
Advertisement
Table of Contents

Related Manuals for Costway NP11463SL


Summary of Contents for Costway NP11463SL
- Page 1 GBR office: Ipswich FRA office: Saint Vigor d'Ymonville USA:cs.us@costway.com If you're having difficulty, our friendly AUS:cs.au@costway.com customer team is always here to help. GBR:cs.uk@costway.com THIS INSTRUCTION BOOKLET CONTAINS IMPORTANT SAFETY INFORMATION. PLEASE READ AND KEEP FOR FUTURE REFERENCE. FRA:cs.f r @costway.com...
- Page 2 Before You Start Please read all instructions carefully. Retain instructions for future reference. Separate and count all parts and hardware. Read through each step carefully and follow the proper order. We recommend that, where possible, all items are assembled near to the area in which they will be placed in use, to avoid moving the product unnecessarily once assembled.
-
Page 3: Grill Operation
● This instruction manual contains important information necessary for proper assembly and safe use of the appliance. DANGER ● Read and follow all warnings and instructions before assembling and using the appliance. Follow all warnings and instructions when If you smell gas: using the appliance. -
Page 4: After Grilling
For Your Safety After Grilling Step 1 Always burn grill for 10-15 minutes to burn off food residues Dear Valued Customer, after use. Step 2 Thank you for purchasing this new barbecue grill purchase! You’ve Wait until the grill is completely cooled before closing lid. made the right choice. -
Page 5: Safe Locations For Use Of This Outdoor Grill
5.Do not leave a lit grill unattended. 20.A Statement: 1) Do not store a spare LP gas cylinder under or near this 6.Keep children and pets away from the grill at all times. appliance. 7.Do not use the grill in high winds. 2) Never fill the cylinder beyond 80 percent full;... - Page 6 ● Always confirm that this grill is not positioned under the overhang DANGER – Gas Safety of a house, a garage or other structure before lighting it. An Liquid propane (LP) gas is flammable and hazardous overhang will serve to deflect flare-ups and radiated heat into the if handled improperly.
-
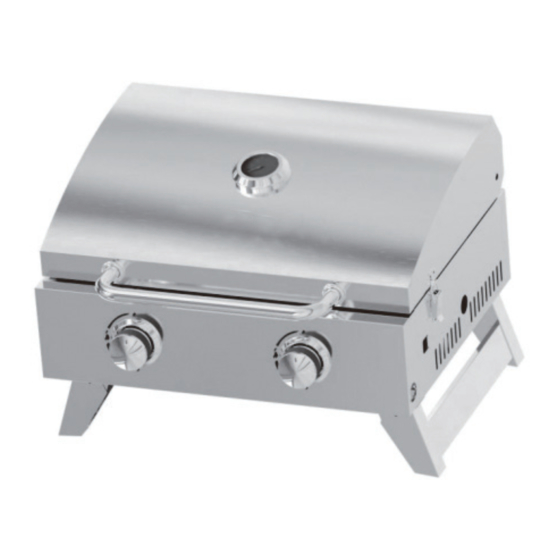
Page 7: Part List
GENERAL INFORMATION Serial# Part name 1.A propane gas cylinder is required for operation. Grill Body 2.This gas grill is NOT intended for commercial use. Flame Tamer 3.Don't obstruct the ventilation opening of the cylinder enclosure. Cooking Grate Left Leg Part list Right Leg Grease Tray M5*12 Screw... - Page 8 Fit the flame tamer(2) into grill body(1) as shown in the picture. Place grease tray under the grill body as shown in the picture. Insert the temperature gauge(9) into the lid hole, insert the butterfly nut(8) into the thermometer screw, and twist the butterfly nut clockwise to secure it.
-
Page 9: Installing With Gas Supply System
INSTALLING WITH GAS SUPPLY SYSTEM Finish! Information on the importance of properly locating the burner with respect to the orifice and instructions on how to verify the proper installation: When assemble burner, the hem side should be facing up Burner through the front panel hole to assemble Noted the nozzle is inserted into the furnace head, otherwise, the furnace head will not fit. -
Page 10: Operating Your Grill
“Keep the fuel supply hose away from any heated surface(s).” Connect gas cylinder When cooking with oil or grease, have a type BC or ABC fire extinguisher readily available. ● The propane gas supply cylinder to be used must be constructed In the event of an oil or grease fire do not attempt to extinguish with and marked in accordance with the Specifications for LP-gas water. -
Page 11: Checking For Leaks
Lighting Your Grill DANGER: A fire causing death or serious injury may occur if the following is not DANGER: followed exactly: Failure to open lid while igniting the grill’s burners or not waiting five minutes to allow gas to clear if the grill does not light, ●... - Page 12 Using the Lighting Stick to light the burners Flare-ups: 1. Insert a match into the end of the lighting stick Out of adjustment: Noisy hard blue and light it. flames – too much air. 2. Once lit, place the flame through the cooking FIG.
-
Page 13: Care And Maintenance
Care and Maintenance Inside surfaces If the inside surface of the grill lid has the appearance of peeling paint, baked- on grease has turned to carbon and is flaking off. IMPORTANT Clean thoroughly with a strong solution of detergent and hot water. Always allow to completely cool off before covering your grill to Rinse with water and allow it to completely dry. -
Page 14: Troubleshooting
Prevention Troubleshooting Problem Possible Cause /Cure Grease buildup. Clean grill. Flare-up. Prevention Problem Possible Cause Trim fat from meat /Cure Excessive fat in meat. before grilling. Check if propane Burner will Adjust (lower) No gas flow. not light cylinder is empty. Excessive cooking temperature. - Page 15 ● Ce manuel d'instructions contient des informations importantes nécessaires au montage correct et à l'utilisation en toute sécurité de DANGER l'appareil. ● Lisez et suivez tous les avertissements et instructions avant Si vous sentez du gaz : d'assembler et d'utiliser l'appareil.Suivez tous les avertissements et 1.
-
Page 16: Pour Votre Sécurité
Pour Votre Sécurité Après la Grillade Étape 1 Brûlez toujours le gril pendant 10 à 15 minutes pour brûler Très cher client, les résidus alimentaires après utilisation. Merci d'avoir acheté ce nouveau barbecue ! Vous avez fait le bon Étape 2 Attendez que le gril soit complètement refroidi avant de choix. - Page 17 5. Ne laissez pas un gril allumé sans surveillance. 20.Une déclaration : 1) Ne rangez pas de bouteille de gaz GPL de rechange sous 6. Gardez les enfants et les animaux éloignés du gril à tout moment. ou à proximité de cet appareil. 7.
- Page 18 ● Vérifiez toujours que ce gril n'est pas positionné sous le surplomb DANGER – Sécurité de Gaz d'une maison, d'un garage ou d'une autre structure avant de l'allumer. Un surplomb servira à dévier les flammes et la chaleur Le gaz propane liquide (LP) est inflammable et dangereux rayonnée vers la structure elle-même, ce qui pourrait provoquer un s’il est manipulé...
-
Page 19: Liste Des Pièces
Numéro de série# Nom de la pièce Qté TUBE VENTURI Corps de Gril Tamiseur de Flammes BUSE DE SOUPAPE Grille de Cuisson Pied Gauche INFORMATIONS GÉNÉRALES Pied Droit 1. Une bouteille de gaz propane est nécessaire pour le fonctionnement. Bac à Graisse 2. - Page 20 Installez le coupe-flamme (2) dans le corps du gril (1), Placez le bac à graisse sous le corps du gril comme indiqué sur comme indiqué ci-dessous : l'image. Insérez la jauge de température (9) dans le trou du couvercle, insérez l'écrou papillon (8) dans la vis du thermomètre et tournez l'écrou papillon dans le sens des aiguilles d'une montre pour le fixer.
- Page 21 INSTALLATION AVEC SYSTÈME D'ALIMENTATION EN GAZ Terminé ! Informations sur l'importance de bien localiser le brûleur par rapport à l'orifice et instructions pour vérifier la bonne installation : Lorsque vous assemblez le brûleur, le côté ourlet doit être orienté vers le haut. Brûleur à...
-
Page 22: Fonctionnement De Votre Gril
Fonctionnement de Votre Gril « Gardez le tuyau d'alimentation en carburant éloigné de toute surface chauffée. » Lorsque vous cuisinez avec de l'huile ou de la graisse, ayez à portée PRUDENCE : de main un extincteur de type BC ou ABC. Utilisez uniquement le régulateur fourni. -
Page 23: Vérification Des Fuites
Vérification des Fuites 1. Raccordement de la cartouche de gaz. Placez soigneusement le filetage de la cartouche sur le filetage de 1. Assurez-vous que le bouton de commande est en position « OFF ». la valve du gril, vérifiez que les deux filetages sont bien assortis, puis tournez soigneusement la cartouche de gaz dans le sens 2. - Page 24 2. Ouvrez le gaz au niveau du robinet du réservoir. Poussées : 3. Ouvrez le couvercle lors de l'éclairage. Normal : Flammes bleues douces avec des pointes jaunes entre 2,5 et 5 cm (1 à 4. Poussez et tournez la commande du brûleur sélectionné sur « 2 pouces) de hauteur.
-
Page 25: Entretien Et Maintenance
Entretien et Maintenance Surfaces intérieures Si la surface intérieure du couvercle du gril présente l'apparence d'une peinture écaillée, la graisse cuite s'est transformée en IMPORTANT carbone et s'écaille. Nettoyez soigneusement avec une solution Laissez toujours refroidir complètement avant de recouvrir votre gril forte de détergent et d'eau chaude. -
Page 26: Dépannage
Prévention Dépannage Problème Cause Possible /Guérison Accumulation de graisse. Nettoyez la grille. Flambée. Prévention Problème Cause Possible Excès de graisse dans la Retirez le gras de /Guérison viande. la viande avant de la griller. Vérifiez si la Le brûleur bouteille de propane Aucun débit de gaz. -
Page 27: Données Techniques
Données Techniques Entrée : Total 20 000 BTU (10 000 BTU X 2) Return / Damage Claim Instructions DO NOT discard the box / original packaging. In case a return is required, the item must be returned in original box. Without this your return will not be accepted.
Need help?
Do you have a question about the NP11463SL and is the answer not in the manual?
Questions and answers