Advertisement
Quick Links
EN
With your inspiring rating, COSTWAY will be more consistent to offer you EASY
SHOPPING EXPERIENCE, GOOD PRODUCTS and EFFICIENT SERVICE!
DE
Mit Ihrer inspirierenden Bewertung wird COSTWAY konsistenter sein, um Ihnen EIN
SCHÖNES EINKAUFSERLEBNIS, GUTE PRODUKTE und EFFIZIENTEN SERVICE zu
bieten!
FR
Avec votre évaluation inspirante, COSTWAY continuera à fournir une EXPÉRIENCE
D'ACHAT PRATIQUE, des PRODUITS DE QUALITÉ et un SERVICE EFFICACE !
ES
Con su calificación inspiradora, COSTWAY será más consistente para ofrecerle
EXPERIENCIA DE COMPRA FÁCIL, BUENOS PRODUCTOS y SERVICIO EFICIENTE.
IT
Con la tua valutazione incoraggiante, COSTWAY sarà più coerente per offrirti ESPE-
RIENZA DI ACQUISTO FACILE, BUONI PRODOTTI e SERVIZIO EFFICIENTE!
PL
US office: Fontana
UK office: Ipswich
DE office: Hamburg
FR office: Saint Vigor d'Ymonville
PL
THIS INSTRUCTION BOOKLET CONTAINS IMPORTANT SAFETY INFORMATION. PLEASE READ AND KEEP FOR FUTURE REFERENCE.
USER'S MANUAL
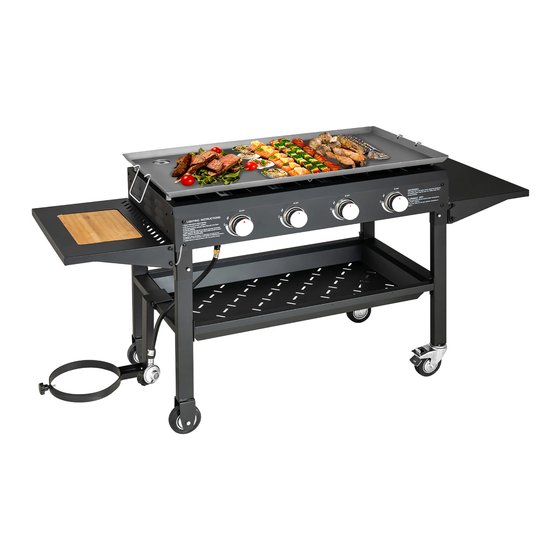
BBQ Propane Gas Grill
OP70907
Advertisement

Subscribe to Our Youtube Channel
Related Manuals for Costway OP70907


Summary of Contents for Costway OP70907
- Page 1 With your inspiring rating, COSTWAY will be more consistent to offer you EASY SHOPPING EXPERIENCE, GOOD PRODUCTS and EFFICIENT SERVICE! Mit Ihrer inspirierenden Bewertung wird COSTWAY konsistenter sein, um Ihnen EIN SCHÖNES EINKAUFSERLEBNIS, GUTE PRODUKTE und EFFIZIENTEN SERVICE zu bieten! Avec votre évaluation inspirante, COSTWAY continuera à...
-
Page 2: For Your Safety
For your safety DANGER: If you smell gas: 1. DO NOT store or use gasoline, or any flammable vapors and liquids within 25ft(8m) of the grill. Shut off gas to the appliance. 2. When cooking with oil/grease, do not allow the oil/grease to exceed 350°F(177°C), DO Extinguish any open flame. - Page 3 CAUTION: DANGER: 1. This grill is for use with propane gas only (propane gas cylinder not included) Liquid propane gas is flammable and hazardous if handled improperly. Know its 2. Never attempt to attach this grill to the self-contained propane system of a camper characteristics before using any propane product.
-
Page 4: Parts & Hardware List
Parts & Hardware List Parts & Hardware List Grill body Holder base (Included burner) Caster 2PCS Bottom plate (With brake) Caster Grip pan 2PCS (No brake) Handle Barbecue grill 3PCS Side table(L) Oil cup hook Waste oil cup Side table(R) Heat deflector 4PCS Fixing knob... - Page 5 Additional choice for griddle M6X12 16PCS M6X65 Griddle M6X20 3PCS M6X20 8PCS Oil guide pipe Griddle ’s handle...
- Page 6 Preparation Assembly Instructions Before beginning assembly, make sure all parts are present. Compare parts with STEP1 packaged contents list and diagram above. If any parts are missing or damaged, do not attempt to assemble the products. Contact customer service for replacement Turn over the Grill body(#A) and assemble the 4 Casters(#B&#C) to the leg of grill, the 2 parts via e-mail Casters with brake(#B) should be in RH legs (longer ones).
- Page 7 STEP2 STEP3 Assemble the base plate (#J) to the leg with screws (#U). Screw 4 "Y" on the grill legs, and place the side table "E" on screws "Y".
- Page 8 STEP4 STEP5 Attach the Right side table(#F) on another side of grill with 4 Screws(#Y), Connect Cylinder holder(#H) and Holder base(#I) with Screw & nut (#V&#W), then hang it on the grill and use a Screw(#X) to fix it. Note: Please don’t forget to place the Fixing knob(#G). chopping block...
- Page 9 STEP6 STEP7 Install Handle(#L) to Grip pan(#K) and then insert to the back side of grill as the diagram Place the 4 Heat deflector(#O) on burners, please insert male side into grill first and then shows. push another side into grooves. Then hang the Oil cup hook(#M) through the hole on Grip pan(#K) first and fix Waste oil cup(#N) as shown in diagram.
- Page 10 STEP8 STEP9 Put the 3 grills (#D) on the grill one by one. If you want use the Griddle(#P), please remember to remove all 3 Barbecue grills(#D) and 4 heat deflectors (#O) first. Then you can place the Griddle(#P) and put the Oil guide pipe(#Q) as shown in diagram.
Need help?
Do you have a question about the OP70907 and is the answer not in the manual?
Questions and answers