Table of Contents
Advertisement
Quick Links
CONTENTS
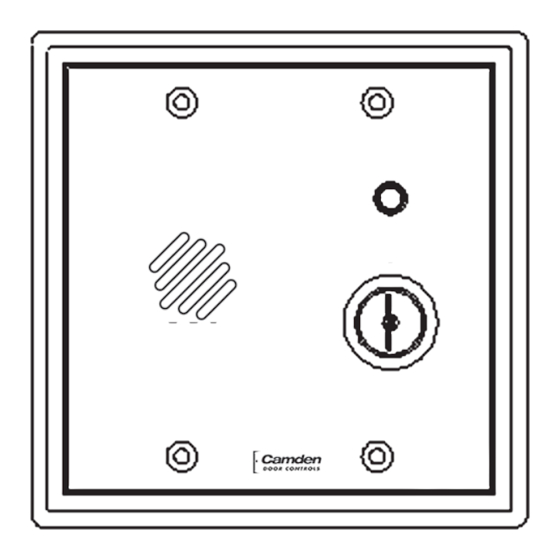
COMPONENT LOCATION DIAGRAM
OUTPUTS
• Remote LED - (located on TS-1)
Output for a remote Bi-color LED,
output follows LED on Face Plate.
• Door Status Relay - follows the Door
Contact Input, regardless of alarm or
bypass condition.
• Door Prop Alarm Relay - changes
state during a Door Prop
(Door Held) Alarm condition.
• Intrusion & Tamper Alarm Relay -
changes state during an Intrusion
or Tamper Alarm condition.
• Bypass/Key Switch Status Relay -
follows Bypass and Key inputs.
Output contacts change state when power
is lost.
1 Door Supervision (Part of Tamper circuit)
2 Voltage Sense Mode (Senses Lock Voltage as Valid User Input)
3 Shunt Contact Mode (Senses Dry Contact as Valid User Input)
4 Intrusion Detect Enable (Explained on reverse)
5 Shunt Recycle Enable (Explained on reverse)
6 RESERVED (Factory Diagnostic)
7 & 8 Shunt Delay Timer (Set same as Lock Time)
9 Extended Time
DESCRIPTION
The CX-DA400 provides complete monitoring of access control points by
offering you prop/door held open and intrusion/door forced open detection.
These alarms are designed to complement card reader and access control
systems and will interface with electronic locks, produce audible warnings
and reduce nuisance alarms by encouraging user compliance with access
control procedures.
OTHER FEATURES
• Shunt Recycle - See Step 3. Pg. 4
• Door Supervision - See Step 1. Pg. 3
CX-DA400
• Intrusion Detect - See Step 2. Pg. 3
JUMPER
Door Prop Alarm
Installation Instructions
• Loud Horn Volume - See Step 7. Pg. 5
• Extended Silent Time - See Step 4. Pg. 4
• Shunt Delay Timer - See Step 4 . Pg. 4
INPUTS
The inputs are located on Terminal Strip –1
and include:
• Dry Contact Shunt - a N/O or N/C Dry
Contact, selected using Shunt Contact
Mode Jumper 3. See Step 3. Pg. 4
• Voltage Sense - Monitors the power
wires on an electric lock (i.e.: Mag-lock or
Door Strike). Senses change in voltage
as valid user. See Step 3. Pg. 4
• Door Contact - a Closed Loop (N/C)
Dry Contact which opens when the
monitored door opens. See Step 1. Pg. 3
• Bypass - Connect to a N/O Dry Contact
from a remote location to bypass the
unit. See Step 7 Pg. 5
• Power - 12 to 24 VAC/DC @ 250 mA.
The terminals are not polarity sensitive.
See Step 5. Pg. 4
CONFIGURES
TS1-7&8 Door Input
TS1-3&4 Voltage Sense Input
TS1-1&2 Shunt Contact Input
Intrusion or Free Access selection
Shunt Recycle feature selection
Factory Use Only Leave Jumper OFF
Access Time prior to opening door
Select Ext. Silent Time 3-90 Min.
Select 96db or 103db
CX-DA400
Page 1 of 6
Advertisement
Table of Contents

Subscribe to Our Youtube Channel
Related Manuals for CAMDEN EXACT CX-DA400


Summary of Contents for CAMDEN EXACT CX-DA400
- Page 1 CX-DA400 Door Prop Alarm Installation Instructions CONTENTS DESCRIPTION The CX-DA400 provides complete monitoring of access control points by offering you prop/door held open and intrusion/door forced open detection. These alarms are designed to complement card reader and access control systems and will interface with electronic locks, produce audible warnings and reduce nuisance alarms by encouraging user compliance with access control procedures.
- Page 2 CX-DA400 Door Prop Alarm Installation Instructions TIMERS TAMPER CIRCUIT - Alarm is not reset with key. (CX-DA401 only) • Silent Time - “Open Door” Time - 0-2.5 min. in standard mode, • TAMPER SWITCH - Switch is located on stand-off under spring steel 3 - 90 min.
- Page 3 CM-324 Active Infrared “Hands-Free” Switch Installation Instructions CX-DA400 Door Prop Alarm Installation Instructions STEP BY STEP INSTRUCTIONS FOR EASY CONFIGURATION CX-DA400 THE DEFAULT SETUP IS FOR ACCESS CONTROLLED, AND EMERGENCY EXIT APPLICATIONS. Figure 1 • This unit may be connected to power and a closed-loop Door Input and be ready to work immediately for the • Tamper Alarm (cannot be reset or bypassed) Default application.
- Page 4 CX-DA400 Door Prop Alarm Installation Instructions • SILENT TIME SELECT begins when the door is opened by a valid user. (see Timer Setting Table on reverse) SHUNT INPUT A) Timer has two ranges selected with Jumper 9; EXPLAINED - This •...
- Page 5 CX-DA400 Door Prop Alarm Installation Instructions ADDITIONAL OUTPUT INFORMATION REMOTE LED • Each of the Output functions offers the availability to TS1 (5&6). of monitoring a Normally Open or a Normally Closed Dry contact. • Each contact’s state will change to follow the status of the monitored function.
- Page 6 CX-DA400 Door Prop Alarm Installation Instructions TECHNICAL DRAWING SEE DETAIL B DETAIL B SET TO #2 4 1 2 " [114mm] 3 3 8 " [86mm] 16 " [17mm] 1 1 16 " [27mm] 4 1 2 " [114mm] 2 7 16 " [62mm] 2 1 2 "...
Need help?
Do you have a question about the EXACT CX-DA400 and is the answer not in the manual?
Questions and answers