
Subscribe to Our Youtube Channel
Related Manuals for Eglo Tourbillion 100


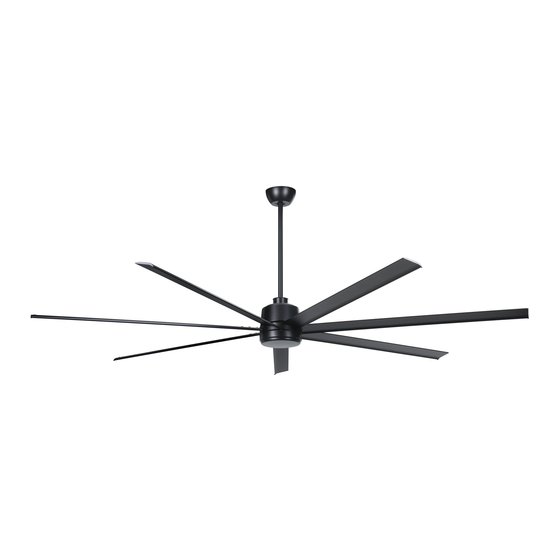
Summary of Contents for Eglo Tourbillion 100
- Page 1 Tourbillion 100" Ceiling Fan 20618601 Installation Manual 20618602 Use & Care Guide 20618604 Warranty Information TOURBILLION Ceiling Fan...
- Page 2 EGLO Lighting has a policy of continual product improvement and development, dimensions, hardware and designs may change to reflect this policy. EGLO reserves the right to discontinue or change product specifications & designs at any time without notice and without incurring obligations.
-
Page 3: Table Of Contents
WARRANTY CONDITIONS: ............................. 14 HOW TO MAKE A WARRANTY CLAIM: ........................14 Thank you for purchasing your new EGLO ceiling fan. To ensure a safe and successful installation, please make sure to read this manual, ensure it is on hand for your installer to refer to, and keep in a safe place for future reference. -
Page 4: For Your Safety
17. This fan is primarily designed for indoor use only. Some models may be able to be used in suitably covered outdoor areas, please refer to ‘Selecting A Location’ to check if this model is suitable. 18. EGLO lighting will not be liable for any advice given to the consumer from any of our suppliers or third parties, related or otherwise. i l e... -
Page 5: Specifications
Check that all parts are present before commencing assembly. Refer to Parts List. • If any parts are missing, carefully check the packaging for the missing parts, and if they cannot be located, contact EGLO for assistance contact EGLO for assistance before commencing assembly or installation. -
Page 6: Installing The Hanging Bracket
INSTALLING THE HANGING BRACKET: 1. Install the hanging bracket to the ceiling joist or timber support with the long installation Fig. 3 screws provided. Pass the screws through the slotted holes in the hanging bracket and secure to the ceiling. Refer to Fig. 3 Ensure that at least 38mm of the screw is threaded into the ceiling joist or timber support. -
Page 7: Wiring Connections
Working one blade holder at a time, align the holes in the blade holder with the Fig. 7 Hanger Bracket holes in the motor assembly, and attach using 3 screws and washers for each blade holder. Refer Fig. 8. Canopy Slide the blade, over the blade holder. -
Page 8: Operating Your Remote Control
OPERATING YOUR REMOTE CONTROL: 1. LED Indicator light 2. Turn the fan OFF 3. Fan speeds (1= Low, 5= High) 4. Timer control for the fan (1H= Fan stops after 1 Hour, 8H= Fan stops after 8 Hours) 5. Battery for transmitter (type: 12V/23A) 6. -
Page 9: Cleaning And Maintenance
Your fans natural movement can cause screws to loosen. Every 6 months, check that ALL screws are securely tightened with a screwdriver. All EGLO ventilation products should be cleaned regularly to insure against corrosion from salt, dust and moisture, both externally and internal (where allowed and possible). -
Page 10: Trouble Shooting Checklist
BALANCING KIT: A balancing kit may be required to balance the ceiling fan at some stage if it becomes unbalanced over time. NOISE: When it is quiet, especially at night, you may hear occasional small noises. Slight power fluctuations and frequency signals superimposed in the electricity for off-peak hot water control, may cause a change in fan motor noise. -
Page 11: Warranty Claims On Installed Products
Subject to “Your Consumer Rights“ outlined above, but otherwise to the maximum extent permitted by law, EGLO will not be liable for any consequential or indirect loss or damage suffered or incurred by you in relation to an EGLO product,including but not limited to loss of use, loss or damage for business interruption, or profits. -
Page 12: In-Home Warranty
1. The product is deemed to be a non-EGLO product. 2. There is nothing wrong with the EGLO product or to the extent that the failure is not a failure of the product to perform in accordance with its published features and specifications as reasonably determined by EGLO. -
Page 13: What Is Not Covered
15. The cost of renting, obtaining and using special access equipment (i.e. scaffoldings, scissor lifts, etc.) for accessing products installed at a height of greater than 3.0 metres. 16. Travel costs incurred by EGLO personnel or service agents travelling greater than 50 Km from an EGLO service agent base. Thepurchaser must meet these travel costs. -
Page 14: Warranty Conditions
HOW TO MAKE A WARRANTY CLAIM: For all warranty enquiries, please phone the EGLO Customer Care hotline directly on 1800 254 448, or email a completed claim form to warranty@eglolighting.com.au, along with proof of purchase & proof of electrical installation (including electrical contractor licence number). - Page 15 WARRANTY CLAIM FORM Warranty Claim No.: (EGLO Office Use Only) To help us assist you with your claim, please complete the enclosed warranty form in full. CUSTOMER DETAILS Name: Day�me Phone/Mobile: Email: ADDRESS WHERE PRODUCT IS INSTALLED Address: Suburb/Town: State:...
- Page 16 EGLO LIGHTING AUSTRALIA 5/339 Archerfield Road Richlands Queensland 4077 www.eglo.com.au TOURBILLION Ceiling Fan...
Need help?
Do you have a question about the Tourbillion 100 and is the answer not in the manual?
Questions and answers