Table of Contents
Advertisement
Quick Links
Installation Manual
Use & Care Guide
Warranty Information
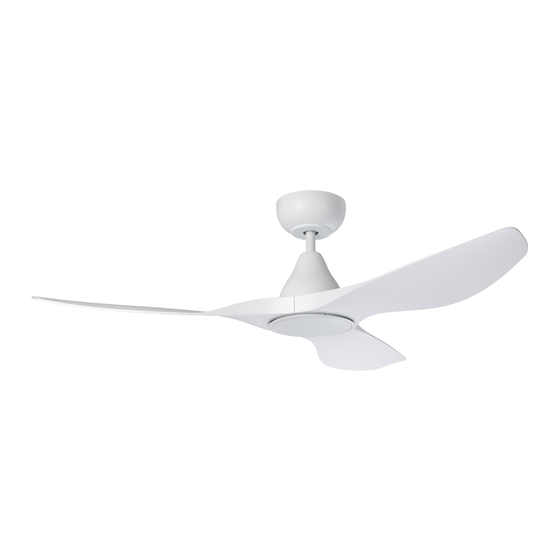
SURF Ceiling Fan
48": 20549601, 20549602, 20549616, 20549617
52": 20549801, 20549802, 20549816, 20549817
60": 20550101, 20550102, 20550116, 20550117
SURF Ceiling Fan & LED Light
48": 20549701, 20549702, 20549716, 20549717
52": 20549901, 20549902, 20549916, 20549917
60": 20550201, 20550202, 20550216, 20550217
Smart USB Module
205503 (sold separately)
SURF Ceiling Fan
Advertisement
Table of Contents

Related Manuals for Eglo SURF 20549701


Summary of Contents for Eglo SURF 20549701
- Page 1 SURF Ceiling Fan 48“: 20549601, 20549602, 20549616, 20549617 52“: 20549801, 20549802, 20549816, 20549817 60”: 20550101, 20550102, 20550116, 20550117 SURF Ceiling Fan & LED Light 48“: 20549701, 20549702, 20549716, 20549717 52“: 20549901, 20549902, 20549916, 20549917 Installation Manual 60”: 20550201, 20550202, 20550216, 20550217 Use &...
- Page 2 EGLO Lighting has a policy of continual product improvement and development, dimensions, hardware and designs may change to reflect this policy. EGLO reserves the right to discontinue or change product specifications & designs at any time without notice and without incurring obligations.
-
Page 3: Table Of Contents
WARRANTY CLAIM FORM: ..........................Thank you for purchasing your new EGLO ceiling fan. To ensure a safe and successful installation, please make sure to read this manual, ensure it is on hand for your installer to refer to, and keep in a safe place for future reference. -
Page 4: For Your Safety
10. Do NOT allow children to play with this appliance, and supervise children around electrical devises at all times. 11. Use ONLY the EGLO controller supplied with your fan, or a suitable EGLO controller designed specifically for your fan. Use of non-EGLO or solid-state dimmer type controllers can reduce speed and airflow, and can additionally damage your fan motor which cannot be repaired, and which will not be covered under warranty. -
Page 5: Parts List
PARTS LIST - FAN: Canopy Canopy Ring Downrod Motor Assembly Blade Shade (For with light model) ASSEMBLY KIT: Blade Screws & Washers x 10 Wood Screws & Washers x 2 REMOTE KIT: No-Light models: Light models: 1 x Remote control 1 x Remote control 1 x Wall Holder 1 x Wall Holder... -
Page 6: Selecting A Location
Image is for representation only, and does not represent the actual bracket. • Many EGLO fans are designed for indoor use, though they can also be installed in appropriately covered outdoor locations where the fan is fully undercover. This fan is not waterproof; when installed in outdoor areas, the ceiling fan must be installed in a location protected from water, wind, dust, and salt. -
Page 7: Wiring Connections
WIRING CONNECTIONS: WARNING: FOR YOUR SAFETY ALL ELECTRICAL CONNECTIONS MUST ONLY BE UNDERTAKEN BY A QUALIFIED AND LICENSED ELECTRICIAN. WARNING: For safe use of this fan, an all-pole disconnection MUST be incorporated into the fixed wiring in accordance with the wiring rules, as outlined in clause 7.12.2 of AS/NZS 60335-1 for meeting the minimum electrical safety of this standard. Please note warranty will be void if the installation is without a means for an all-pole disconnection incorporated in the fixed wiring in accordance with the wiring rules. -
Page 8: Code Learning Mode
CODE LEARNING MODE: The remote control has been pre-paired with the fan for your convenience, however should you ever need to replace the remote control or re-pair / re-sync if multiple fans are located within an area, follow these simple steps: SINGLE FAN INSTALLATION: Note: Blades must be attached or fan will not continue to operate. -
Page 9: Operating Your Remote Control (Light Models)
Your fans natural movement can cause screws to loosen. Every 6 months, check that ALL screws are securely tightened with a screwdriver. All EGLO ventilation products should be cleaned regularly to insure against corrosion from salt, dust and moisture, both externally and internal (where allowed and possible). -
Page 10: Installing And Setting Up Usb Module
You can also conveniently control your compatible EGLO ceiling fan remotely, or simply using your smart devices, with EGLO ‘my control’ Smart USB Module. Whether you are at home and simply don’t want to get off the couch, or on the opposite side of the world, you can operate your ceiling fan easily via your smart device. -
Page 11: Connecting My Control Devices
MAKING YOUR CEILING FAN SMART (continued): CONNECTING MY CONTROL DEVICES: Fig 9 Fig 10 Follow the table and steps below to pair your devices. 1. Press and hold the “8H” button on your remote control for 2 to 3 seconds or until you hear a "beep" sound. 2. -
Page 12: Troubleshooting
TROUBLE SHOOTING WARNING: CEILING FAN MUST BE SWITCHED OFF AND ISOLATED BEFORE COMMENCING ANY TROUBLE SHOOTING WOBBLE / BALANCE: Please note that all ceiling fans are not the same, even fans of the same model, some may move more or less than others. Movement of a few centimetres is quite acceptable, and does not suggest the fan will fall if installed correctly. -
Page 13: Warranty Claims On Installed Products
EGLO management in writing prior to commencing work. All claims are to be submitted to EGLO Warranty Department with a copy of the original purchase receipt, copy of receipt from installation (inc electrical contractor licence number), and completed EGLO warranty claims form. Incomplete submission will result in delays proces- sing your claim. -
Page 14: In-Home Warranty
1. The product is deemed to be a non-EGLO product. 2. There is nothing wrong with the EGLO product or to the extent that the failure is not a failure of the product to perform in accordance with its published features and specifications as reasonably determined by EGLO. -
Page 15: What Is Not Covered
8. Damages not caused by a fault in the EGLO product materials or workmanship. 9. Defect, damage or failure to an EGLO product resulting from any acts of God, including damages from lightning, power grid fluctuations, or power surges. -
Page 16: Warranty Conditions
HOW TO MAKE A WARRANTY CLAIM: For all warranty enquiries, please phone the EGLO Customer Care hotline directly on 1800 254 448, or email a completed claim form to warranty@eglolighting.com.au, along with proof of purchase & proof of electrical installation (including electrical contractor licence number). -
Page 17: Warranty Claim Form
WARRANTY CLAIM FORM Warranty Claim No.: (EGLO Office Use Only) To help us assist you with your claim, please complete the enclosed warranty form in full. CUSTOMER DETAILS Name: Day�me Phone/Mobile: Email: ADDRESS WHERE PRODUCT IS INSTALLED Address: Suburb/Town: State:... - Page 18 EGLO LIGHTING AUSTRALIA 5/339 Archerfield Road Richlands Queensland 4077 www.eglo.com.au SURF Ceiling Fan...
Need help?
Do you have a question about the SURF 20549701 and is the answer not in the manual?
Questions and answers