Garmin GPSMAP 168 Owner's Manual And Reference Manual
Sounder chartplotting receiver & depth-fi nder
Hide thumbs
Also See for GPSMAP 168:
- Owner's manual and reference manual (118 pages) ,
- Specifications (2 pages) ,
- Owner's manual and reference manual (123 pages)

Subscribe to Our Youtube Channel
Related Manuals for Garmin GPSMAP 168


Summary of Contents for Garmin GPSMAP 168
- Page 1 GPSMAP 168 Sounder chartplotting receiver & depth-fi nder owner’s manual reference guide 168 color cover.indd 1 11/18/2002, 3:32:50 PM...
-
Page 2: Introduction
GARMIN International, Inc. 1200 East 151 Street, Olathe, Kansas 66062, U.S.A. Tel. 913/397.8200 or 800/800.1020 Fax 913/397.8282 GARMIN (Europe) Ltd. Unit 5, The Quadrangle, Abbey Park Industrial Estate, Romsey, SO51 9AQ, U.K. Tel. 44/1794.519944 Fax 44/1794.519222 GARMIN Corporation No. 68, Jangshu 2 Road, Shijr, Taipei County, Taiwan Tel. - Page 3 Part Two is divided into sections that provide detailed references to the advanced features and operations of the GPSMAP 168 Sounder. This allows you to concentrate on a specifi c topic quickly and look up detailed information about the GPSMAP 168 Sounder.
-
Page 4: Warnings And Precautions
MAP DATA INFORMATION: One of the goals of GARMIN Use the GPSMAP 168 Sounder at your own risk. To reduce the risk of unsafe operation, carefully is to provide customers with the most complete and accurate review and understand all aspects of this Owner’ s Manual—and thoroughly practice operation using cartography that is available to us at a reasonable cost. -
Page 5: Software License Agreement
Software License Agreement AGREEMENT CAREFULLY. GARMIN grants you a limited license to use the software embedded in this device (the “Software”) in binary executable form in the normal operation of the product. Title, ownership rights and intellectual property rights in and to the Software remain in GARMIN. - Page 6 FCC Compliance Introduction The GPSMAP 168 Sounder complies with Part 15 of the FCC interference limits for Class B digital devices FOR HOME OR OFFICE USE. These limits are designed to provide reasonable protection FCC Compliance against harmful interference in a residential installation, and are more stringent than “outdoor” require- ments.
-
Page 7: Warranty And Serial Number
GARMIN retains the exclusive right to repair or replace the unit or software or offer a full refund of the purchase price at its sole discretion. SUCH REMEDY SHALL BE YOUR SOLE AND EXCLUSIVE REMEDY FOR ANY BREACH OF WARRANTY. -
Page 8: Capabilities
US state highways and local thoroughfares • 20 reversible routes with up to 30 waypoints each • Uploadable maps up to 2.5 Megabytes of data using GARMIN’ s MapSource PC products • Coordinates: Lat/Lon, UTM/UPS, Loran TD, plus 15 grids, including Maidenhead •... -
Page 9: Packing List
Before installing and getting started with your unit, please check to see that your package includes Introduction the following items. If any parts are missing, please contact your GARMIN dealer immediately. Standard Package: Packing List • GPSMAP 168 Sounder Unit •... -
Page 10: Table Of Contents
Introduction ......i-viii Going to a Destination ....56 Foreword . -
Page 11: How To" Index
GPSMAP 168 Sounder. Pan using the map arrow ........9, 25 Zoom in or out on the Map page . -
Page 12: Section One: Getting Started
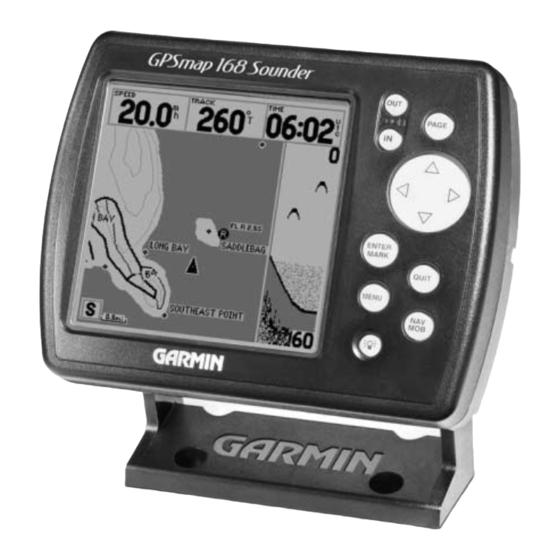
The IN Key Getting Started The IN key adjusts the map scale to display a smaller area with more detail. (Zooms in) The OUT Key Keypad Usage The OUT key adjusts the map scale to display a larger area with less detail. (Zooms out) The PAGE Key The PAGE key selects the main pages in sequence and returns display from a submenu page. - Page 13 Getting Started Before moving ahead into GPSMAP 168 features, you will need to learn basic operation. You can select and activate options and enter data to customize the GPSMAP 168 to fi t your requirements. You Selecting Options can use the ENTER/MARK key and ARROW KEYPAD to select options, enter names and numbers in data fi...
- Page 14 Naming a waypoint or placing any sort of data that has not been predefi ned requires the use of Getting Started both the ARROW KEYPAD and the ENTER/MARK key. To enter a name or number in a data fi eld: Entering Data 1.
- Page 15 GPSMAP 168 Sounder. Initializing the Receiver The fi rst time you power up your new GPSMAP 168 Sounder, the receiver must be given an opportunity to collect satellite data and establish its present position. To ensure proper initialization, the GPSMAP 168 Sounder is shipped from the factory in AutoLocate mode, which will allow the receiver to “fi...
- Page 16 If the unit switches to the Map Page or displays ‘2D’ or ‘3D Navigation’ during this process, it is not necessary to initialize the unit. The GPSMAP 168 Sounder will now begin searching for the appropriate satellites for your region Point to your approximate location and should acquire a fi...
- Page 17 3. Press the ENTER/MARK key to fi nish. the contrast slider. The GPSMAP 168 Sounder adjustable screen backlighting is controlled with the POWER key, and may be adjusted at any time from any page. The backlight can cycle through off, user-defi ned, and maximum backlight levels by repeatedly pressing the POWER key.
-
Page 18: Simulator Mode
To get a feel for how the options menus work, let’ s put the GPSMAP 168 Press UP or DOWN on the ARROW KEYPAD to move the backlighting Sounder into simulator mode. - Page 19 The Status Page is one of six main pages used in the GPSMAP 168 Sounder’ s system. The six main Getting Started pages are: the Status Page, Sonar Page, Map Page, Compass Page, Highway Page and Active Route Page. All six pages are linked together in a simple chain, which allows you to scroll through the pages in either direction using the PAGE and QUIT keys.
- Page 20 This Bearing will also give you an opportunity to see how the GPSMAP 168 Sounder’ s ARROW KEYPAD and ENTER/MARK key are used for data entry and changing the waypoint name and symbol.
- Page 21 Each of these techniques is described in the reference section of the manual and/or on your GPSMAP 168 Sounder Quick Reference Guide. You can choose from a list of 38 useful symbols.
- Page 22 For our simulated trip, you’re going to select a pre-programmed tour route using the fi rst method. Text entry for simulator position. This will also show how the MENU key is used throughout the GPSMAP 168 Sounder system to provide tab style options and functions. Let’ s start by changing the position to where the practice route is located.
- Page 23 Getting Started Let’s give it a try by activating the practice route stored in memory for navigation: 1. Press NAV/MOB. The options list will appear. (If we were selecting a single waypoint to navigate Simulated Tour to rather than a route, we could highlight the waypoint on the map, press NAV/MOB and then press ENTER/MARK.) 2.
- Page 24 You’ll now have a clearer picture of the route you are navigating. Keep in mind that whenever you do exceed the usable range of the built-in database or the optional MapSource data in use, the range Getting Started fi eld will display ‘overzoom’ or ‘NO MAP’ to indicate that you should exercise extreme caution using the map data.
- Page 25 The Sonar Page lets you use the GPSMAP 168 Sounder as a fi shfi nder. The top of the screen contains any of 27 selectable data fi eld options, while the middle of the page contains a right-to-left Getting Started moving sonar image of the water beneath your boat.
- Page 26 The left half shows a portion of the original picture at 1/2 depth scale. • 2X Zoom––Displays the 2X zoomed picture on the full GPSMAP 168 Sounder screen and does not 2X Zoom Normal show the original scale picture.
- Page 27 Now that we’re navigating to an actual destination, let’ s move on to the GPSMAP 168 Sounder Getting Started navigation pages by pressing the PAGE key. The GPSMAP 168 Sounder features two different navigation pages: Compass and Highway. The Compass/Highway Compass Page is fi...
- Page 28 When the GPSMAP 168 Sounder is in simulator mode, you can also adjust your speed and course from the Highway Page using the ARROW KEYPAD. As you head toward each waypoint in the tour route, try adjusting your boat speed and course to get a feel for how the highway works.
- Page 29 As you’ve seen, the primary pages provide status, map, and navigation information. The tour’ s last Tabs page is the Main Menu Page, which allows access to the GPSMAP 168 Sounder’ s waypoint, route and planning functions, various operational and navigation setup features, and celestial and tide data.
- Page 30 2. When the screen is blank, release the POWER key. The next section of the manual describes the pages and functions of the GPSMAP 168 Sounder in detail. If you are unable to locate a specifi c option or function, please refer to the index on pages 105-107.
-
Page 31: Section Two: Reference
When the receiver has collected data from the satellite and locked on, the number in the sky view will appear highlighted and the status bar will become dark. As soon as the GPSMAP 168 Sounder has collected the necessary data from the best satellites in Ready for use view to calculate a fi... -
Page 32: Status Page And Options
Receiver Status, Accuracy and DOP Reference Receiver status is indicated at the top fi eld of the page, with the current Accuracy and Dilution Of Precision (DOP) to the right of the sky view. DOP is an indication of satellite geometry quality measured Status Page on a scale of one to ten (lowest numbers the best, highest numbers the poorest). - Page 33 DGPS signal being received. If no optional DGPS receiver is used with the GPSMAP 168 Sounder, the ‘DGPS Rcvr’ fi eld will display ‘Off’ and the ‘DGPS SNR’ fi eld will be blank. The SNR will depend upon the mounting of your DGPS receiver and the distance from the DGPS transmitting station.
- Page 34 Pacifi c Ocean and one over the Atlantic Ocean. You must have a clear, unobstructed view of the sky for the GPSMAP 168 Sounder to be able to receive a WAAS signal. Even then, at times it may not be possible to receive a WAAS signal. For more information on the WAAS system, visit the Federal Aviation Administration web site at (gps.faa.gov).
-
Page 35: Map Page And Options
Map Page Reference The GPSMAP 168 Sounder’ s Map Page provides a comprehensive display of electronic cartography, plotting and navigational data. When using the unit with the optional MapSource software, the map Map Page display shows your boat on a digital chart, complete with geographic names, map items, navaids and a host of other chart features. - Page 36 When the ARROW KEYPAD is pressed, the GPSMAP 168 Sounder will enter cursor mode. In Reference cursor mode: • The cursor can be moved over the map display using the ARROW KEYPAD. Map Page Cursor • When the cursor nears the edge of the display, the map will scroll forward under the cursor. Keep in mind that the boat icon will move with the map scrolling and may go off the display screen (you may not be able to see your present position).
- Page 37 To hide the cursor and re-center your position on screen: Reference 1. Press the QUIT key. To select an on-screen waypoint or map item with the cursor: Map Page Cursor 1. Use the ARROW KEYPAD to move the cursor to the desired waypoint or map item (if there are several waypoints grouped closely together, zoom in for a closer view).
- Page 38 With MapSource Fishing HotSpots data loaded into the GPSMAP 168 Sounder, additional details are available when you highlight a point on the map within a Fishing Hot Spots coverage area. Fish- Reference ing Hot Spots data provides detailed information in tabbed format such as shoreline, depth contours,...
- Page 39 To view information about a waypoint: Reference 1. Use the ARROW KEYPAD to select a waypoint with the cursor and press ENTER/MARK. The Waypoint Review page will appear. If the waypoint is located on a map feature (road, intersection, Map Page Cursor city, lake, etc.), details about each map feature at that location will be displayed in a tabbed format behind the Waypoint Review Page.
- Page 40 The scale value represents the distance from one end of the scale bar to the other. Creating a New Map Waypoint The GPSMAP 168 Sounder’ s system has a built-in worldwide database to 20 mi, with more detailed coverage available through the use of the optional MapSource software. The GPSMAP 168 Sounder will display cartography as long as there is chart information available for the range you’ve selected.
- Page 41 Map Page Options Reference Many features of the GPSMAP 168 Sounder are menu driven. Each of the main pages have an options menu, allowing you to custom tailor the corresponding page to your preferences and/or select Map Page Options special features that specifi cally relate to that page. The data window, located at the top of the main pages (Except the Status Page and Active Route Page), provides a user-selectable layout of various types of useful data.
- Page 42 • Measure Distance— allows you to measure the bearing and distance between any two points on the map display. Reference To measure the BRG/DIS between two points: Map Page Options 1. Highlight the ‘Measure Distance’ option and press ENTER/MARK. An on-screen pointer will appear on the map display at your present position with ‘ENT REF’...
-
Page 43: Map Page Confi Guration
• Resize Map— enables width adjustment of the Map and Sonar/Flasher split screen. This option is only available when the unit is in ‘Show Sonar’ or ‘Show Flasher’ mode. You may adjust the size of the Reference Sonar/Flasher window anywhere from 1/3 to 1/2 width of the right half of the Map Page. To resize the Map Page split screen: Map Page Options 1. - Page 44 To change a map setup feature: Reference 1. From the Map Page menu, highlight ‘Confi gure Map’ and press ENTER/MARK. 2. Move LEFT or RIGHT on the ARROW KEYPAD to highlight the desired tab, then UP or DOWN on the ARROW KEYPAD to highlight to the setting you want to change and press ENTER/MARK. Map Page Options 3.
- Page 45 Waypoints Tab— Waypoints, Active Route Reference Text and Zoom settngs, see the description on page 33 for details. Points Tab— Spot Soundings, Tide Stations. Services, Navaids Map Page Options Text and Zoom settings, see the description on page 33 for details. Nav Line Tab Heading Line—...
- Page 46 Map Setup Menu Options Reference From the map setup page, you can access the following menu options: • Restore Defaults— restores settings back to factory settings for the tab highlighted. Map Page Options • Restore All Map Defaults— restores settings back to factory settings for all tabs. •...
- Page 47 To change the page layout: Reference 1. From the menu, use the ARROW KEYPAD to highlight the ‘Setup Page Layout’ option and press ENTER/MARK. Map Page Options 2. Move up or down on the ARROW KEYPAD to highlight to the desired setting and press ENTER/MARK.
- Page 48 Data Field Options continued Reference • TO COURSE – Distance to desired track • TRACK – Current compass heading Map Page Options • TRIP ODOM – Trip Odometer • TTL AVG SPEED – Total average speed • TTL TRIP TIMER – Total travel time of trip, stopped and moving •...
-
Page 49: Sonar Page And Options
Sonar Page Reference The Sonar Page is where your GPSMAP 168 Sounder becomes a powerful fi shfi nder/fl asher. The top of the screen contains data fi elds which can display any of 27 selectable data fi eld options, while the Adjustment Bar below the data fi... - Page 50 2. With the ARROW KEYPAD, move UP or DOWN and place the pointer or adjustment bar at the desired setting or range. Reference 3. To change ‘View’ to ‘Auto’ or ‘Line’ to ‘Off’, hold UP or DOWN on the ARROW KEYPAD until the adjustment bar reaches the top or bottom of the scale, release, then press once more in the Sonar Page same direction.
- Page 51 Sonar Page Options Reference The GPSMAP 168 Sounder’ s Sonar Page features a menu page that provides access to additional functions and to layout and data fi eld options. Sonar Page Options To display the Sonar Page options: 1. Press MENU.
- Page 52 • Show/Hide Depth Line— adds the ‘Depth Line’ selection to the Adjustment Bar and a horizontal depth line across the display which is used to measure the depth of underwater objects. The depth of Reference the line will appear in a box on the right side of the line. To activate/deactivate the Depth Line from the Sonar Page: Sonar Page Options 1.
-
Page 53: Sonar Page Confi Guration
‘Medium’, ‘Slow’ or ‘Pause’. background information will be displayed. If you are using the GPSMAP 168 Sounder on the portable case battery power, slowing Same as above with target depth attached. the scroll rate will help to conserve your battery. - Page 54 • Scale— controls the depth ‘Scale’ displayed vertically along the right side of the chart. The depth ‘Scale’ can be confi gured to display four different ways: as an ‘Overlay’, in the ‘Corners’, Reference with ‘Basic’ or ‘No Scale’. • Noise Reject— helps fi lter unwanted noise from the chart. The ‘Noise Reject’ tool can be Sonar Tab Options turned ‘Off’, set to ‘Auto’...
- Page 55 To calibrate the water speed: Reference 1. From the ‘Sonar’ tab, use the ARROW KEYPAD to highlight ‘Calibrate Water Speed’ and press ENTER/MARK. 2. Bring the boat to a cruising speed. Both the top ground and uncalibrated water speeds will be Sonar Tab Options shown at the bottom of the calibration window.
-
Page 56: Compass Page And Options
The GPSMAP 168 Sounder’ s Compass Page features a menu page that provides access to layout and data fi eld options. The data window, located at the top of the page, provides a user-selectable layout Huge (2 Rows) Option of various types of useful data. -
Page 57: Highway Page And Options
Desired Track Line Current Position The GPSMAP 168 Sounder’ s Highway options page allows you to defi ne the data fi elds and select which waypoints are displayed on screen. The data window, located at the top of the page, provides a user-selectable layout of various types of useful data. -
Page 58: Active Route Page
Data Field Points Whenever you have activated a route in the GPSMAP 168 Sounder’ s system, the Active Route page will show each waypoint of the active route, along with various, user-selectable types of data. For additional details on the Active Route Page, see page 68. -
Page 59: Waypoints
Creating and Using Waypoints Reference The GARMIN GPSMAP 168 Sounder stores up to 500 alphanumeric waypoints with a user-defi ned icon and depth available for each waypoint. Waypoints can be created using three basic methods: Creating Waypoints • ENTER/MARK key– used primarily for marking your present position, the ENTER/MARK key also provides options that allow you to select a map position or map item from the map display. - Page 60 ENTER/MARK key. If you select an item on the map, like a city, the GPSMAP 168 Sounder will use the text or name shown on the cartography as the default name. When selecting a map item, the option ‘Create Waypoint’ will appear in addition to a description of that point and its distance and bearing from your current position.
-
Page 61: Reviewing And Editing
Creating Waypoints By Text Entry Reference Waypoints may also be created by manually entering position coordinates through the ‘Waypt’ tab on the main menu page. Creating and Editing Waypoints To create a new waypoint by manually entering its coordinates: 1. Press MENU twice to display the main menu page. 2. -
Page 62: Editing Waypoints
To access the Waypoint Edit page: Reference 1. Press MENU twice, highlight the ‘Waypt’ tab, and then highlight a waypoint from the ‘By Name’, ‘Nearest’, or ‘Proximity’ waypoint lists. Press ENTER/MARK to display the Waypoint Edit page. Editing Waypoints To change the waypoint name: 1. -
Page 63: Waypoint List
Waypoint Submenus Reference The GPSMAP 168 Sounder’ s Main Menu Page features three waypoint submenu tabs, ‘By Name’, ‘Nearest’, and ‘Proximity’, that let you manage a large number of waypoints quickly and effi ciently. The Waypoint Options submenu tabs also provide a continuously updated nearest waypoints list and a proximity waypoint alarm function that can be used to defi... - Page 64 To display the waypoint menu options: Reference 1. Using the ARROW KEYPAD, highlight the ‘By Name’ tab and press the MENU key. To scroll through and review the waypoint list: Waypoint Options 1. With the ARROW KEYPAD, highlight the ‘Waypt’ tab from the Main Menu Page and then highlight ‘By Name’.
-
Page 65: Nearest And Proximity
Nearest Waypoint List Reference The second waypoint submenu list available from the ‘Waypt’ tab is the ‘Nearest’ list, which shows the ten nearest waypoints that are within 100 miles of your present position. The nearest waypoints Nearest/Proximity are continuously updated to your present position, and provide quick access to the closest points of Waypoint Lists safety in emergency situations. - Page 66 The following options are available from the ‘Proximity’ submenu of the ‘Waypt’ tab: Reference • Add Waypoint— adds a waypoint to the proximity list from the waypoint list. • Clear Alarm— removes selected waypoint from proximity list. Proximity Waypoints • Clear All— removes all waypoints from proximity list. To display the proximity waypoint menu options: 1.
-
Page 67: Going To A Destination
4. Use the ARROW KEYPAD to highlight the ‘OK’ prompt and press ENTER/MARK to confi rm. Going to a Destination Using the NAV/MOB key, the GPSMAP 168 Sounder provides four ways to navigate to a destina- tion: Go To Waypoint, Follow Track (TracBack), MOB (Man OverBoard), and Follow Route navigation. - Page 68 (roads, rivers, cities, navaids, etc.), or a new map point (non-map item). If you are selecting a map item as the ‘Go To’ destination, the GPSMAP 168 Sounder will automatically use the name of the map item, but the point will not be stored in the waypoint list. See page 49 for creating waypoints using map items.
-
Page 69: Tracback
TracBack Navigation (Follow Track) Reference The second method of navigating to a destination is by using the TracBack feature. The TracBack function allows you to retrace your path using the track log automatically stored in the receiver’ s TracBack Navigation memory, which will eliminate the need to store waypoints along the way. - Page 70 ENTER/MARK. Total Default Once a TracBack has been activated, the GPSMAP 168 Sounder will take the track log currently number Track stored in memory and divide it into segments called ‘legs’. Up to 30 temporary ‘turns’ will be created...
-
Page 71: Mob
Reference The GPSMAP 168 Sounder’ s Man OverBoard function (MOB) lets you simultaneously mark and set a course to a position for quick response to emergency situations. MOB: To activate the MOB function: Man OverBoard 1. Press and hold the NAV/MOB key or press the NAV/MOB key twice. -
Page 72: Routes
Routes Reference The last way to navigate to a destination is to create a user-defi ned route. The GARMIN GPSMAP 168 Sounder system lets you create and store up to 20 reversible routes, with up to 30 waypoints Creating Routes each. - Page 73 To create a route graphically from the Route Review page: Reference 1. Press the MENU key twice to display the Main Menu page. Use the ARROW KEYPAD to highlight the ‘Route’ tab, then press the MENU key to display the route options page. Creating Routes 2.
-
Page 74: Reviewing And Editing
Route List Page Reference The GPSMAP 168 Sounder’ s Route List page displays all the routes currently stored in memory, along with a descriptive name for each route. Once a route has been created, it can be activated and Route List Page used for navigation with the NAV/MOB key. - Page 75 Route Review Page Reference Once you have created a route, the Route Review Page allows you to review and modify the route displayed. Route Review Page To get to the Route Review Page: 1. Press MENU twice to display the Main Menu, then highlight the ‘Route’ tab. Route 2.
- Page 76 Edit on Map— this option allows you to review and modify the route displayed through a pop-up Reference window menu for each point (waypoint or map item) on a map page. You may also use the cursor to insert a new route point on a route leg, and review the waypoint or map item. To edit the route on the map: Editing Routes 1.
- Page 77 The GPSMAP 168 Sounder’ s ‘Edit on Map’ mode also allows you to insert a new route waypoint Reference in any route leg using the map cursor. To insert a new point between two existing route waypoints: Editing Routes 1. Use the ARROW KEYPAD to select the leg you want to insert the new waypoint in (the route line will highlight and change to a dotted line when the leg is selected) and press ENTER/MARK.
- Page 78 Invert— The Invert function will reverse the route you choose. This option is available from both the Reference Route Review and Active Route Pages. To invert a route: Editing Routes 1. From the Route Review or Active Route page, press MENU. 2.
-
Page 79: Active Route Page
Active Route Page Reference Whenever you have activated a route in the GPSMAP 168 Sounder system, the Active Route Page shows each point (waypoint or map item) of the active route, with the point name, distance and choice Active Route Page of Course, ETA, Fuel to point, Leg Distance, Leg Fuel, Leg Time, Sunrise and Sunset at point location, or Time To point for each point from your present position. -
Page 80: Main Menu Page
“tab” format. The Main Menu Main Menu Tabs Page is available from any page in the GPSMAP 168 Sounder’ s system, and is accessed through the MENU key. -
Page 81: Track Tab
• Sonar— sets up Sonar Page features, speeds and calibrations See pages 42-44. Reference • Systm— defi nes beeper and simulator, restores setup, and displays software version. • Units— defi nes position format, datum, heading, and distance and speed units. Main Menu: •... -
Page 82: Main Menu
• Interval— defi nes the frequency at which the track plot is recorded. Three interval settings are Reference available: Time— records track plot based on a user-defi ned time interval. Main Menu: Resolution— records track plot based upon a user-defi ned variance from your course over Track Tab ground. -
Page 83: Trip, Time And Pages Tabs
Trip Tab— displays Trip Odometer, Moving Average speed, Total Average speed, Maximum Speed, Reference Stopped Time, Moving Time, Total Time, and Odometer. You may reset the data by choosing from ‘Reset Trip’, ‘Reset Odometer’, ‘Reset Max Spd (speed)’, or ‘Reset All’ and pressing ENTER/MARK. Main Menu: Time Tab—... -
Page 84: System Tab
The following options are available by pressing MENU from the ‘Systm’ tab: • Restore GARMIN Setup— restores all settings to GARMIN’ s original setup values for the entire unit. • Software Version— displays the unit’ s software, basemap version and serial number. -
Page 85: Units Tab
If you are using a map or chart in conjunction with your • UTM/UPS— Universal Transverse Mercator / Universal Polar Stereographic grids GPS, make sure the settings under the ‘Units’ tab of the GPSMAP 168 Sounder match that of the map or chart. This • British Grid • Dutch Grid •... - Page 86 • Heading— lets you select the reference used in calculating heading information. You can select from Reference ‘Auto Mag Var’, ‘True’, ‘Grid’ and ‘User Mag Var’. ‘Auto Mag Var’ provides magnetic north heading references which are automatically determined from your current position. ‘True’ provides headings based upon a true north reference.
-
Page 87: Communication Tab
2. Use the ARROW KEYPAD to select the desired setting and press ENTER/MARK. To select a transfer mode: 1. Use the ARROW KEYPAD to select ‘GARMIN Data Transfer’ in the ‘Serial Data Format’ fi eld. 2. Highlight the ‘Transfer Mode’ fi eld and press ENTER/MARK. - Page 88 If ‘GARMIN DGPS’ or ‘RTCM In/NMEA Out’ format is selected, additional fi elds are provided to Reference control a GARMIN differential beacon receiver directly from your GPSMAP 168. You may have the unit automatically scan for the DGPS beacon signal or you can enter the beacon frequency and bit rate on Main Menu: the unit and the information will be used to tune the beacon receiver.
-
Page 89: Alarm Tab
The DGPS beacon transmitters are operated by the U.S. Coast Guard (or similar government agency Reference in other countries), which is responsible for their accuracy and maintenance. For DGPS transmitter problems or to fi nd the most updated list of frequencies and coverage areas, contact your local USCG, Main Menu: or see their web site at http://www.navcen.uscg.mil/. -
Page 90: Alarm Tab
To set an alarm: Reference 1. Use the ARROW KEYPAD to highlight the fi eld to the right of the alarm name you wish activate and press ENTER/MARK. Main Menu: 2. Change the mode to ‘On’ (Distance or Time for the ‘Arrival’ alarm) and press ENTER/MARK. Alarm Tab 3. -
Page 91: Celestial Tab
Celes (Celestial) Tab— displays celestial data for sun and moon rise/set, moon phase, and Reference approximate skyview location of the sun and moon. The moon phase will display the current visible portion of the moon as a light color. You may display this data for your current position, a position Main Menu: from the map, or a waypoint location. -
Page 92: Tides Tab
Tide Tab— shows a graphical chart which displays tide station information in a 24 hour span starting Reference at midnight station time. You can choose from different dates and over 3000 tide stations around the USA coastline, Alaska, Hawaii, western Canada and several of the Caribbean islands. Main Menu: The top of the page displays the tide station being referenced, below that the date. - Page 93 The name of the Tide Station nearest to your current location will appear in the ‘For’ fi eld. You Reference must be within 100 miles of a tide station for a station name to be displayed. If you are not within this range, a message “Search For Stations.”...
-
Page 94: Appendix A: Loran Td
Loran TD System Appendix A Loran C is a radio navigation aid operated and maintained in the United States by the United States Coast Guard. The name LORAN is an acronym for “LOng RAnge Navigation.” The Loran system covers Loran TD the entire United States and the U.S. - Page 95 When inputting Loran coordinates, you must have the correct chain number, secondary Appendix A station identifi ers (fi rst and second), and proper map datum available for the TD coordinates you input into the GPS unit. For better position accuracy, navigate to the Loran point, then re-mark the point with a GPS unit in LAT/LON format.
-
Page 96: Appendix B: Time Offsets
The chart below gives an approximate UTC (Universal Time Coordinate) time offset for the various Appendix B longitudinal zones. Check with local charts for more detailed information. If you are in daylight savings time, add one hour to the offset. Time Offsets Longitudinal Zone Offset... -
Page 97: Appendix C: Messages
Memory (RAM) Failed Unit Needs Repair— Internal problem with the unit. Alarm Voltage Set Too Low Set to 10.0V— Voltage range must be Contact your dealer or GARMIN Customer Service (pg. iv) to have the unit between 10.0 and 16.0 volts. Adjust setting. - Page 98 Sonar Failed Unit Needs Repair— Internal problem with the unit. Contact for new entries. your dealer or GARMIN Customer Service (page. iv) to have the unit serviced. Track Already Exists: <track name>— You have entered a saved track name that already exists in memory. Modify the track name or delete the previous track name.
-
Page 99: Appendix D: Map Datums
Adindan Adindan- Ethiopia, Mali, Senegal, Sudan Djakarta Djakarta (Batavia)- Sumatra Island (Indonesia) Appendix D Afgooye Afgooye- Somalia Dos 1968 Dos 1968- Gizo Island AIN EL ABD ‘70 AIN EL ANBD 1970- Bahrain Island, Saudi (New Georgia Islands) Arabia Map Datums Dutch Dutch Anna 1 Ast ‘65... - Page 100 Nhrwn Masirah Nahrwn- Masirah Island (Oman) Liberia 1964 Liberia 1964- Liberia Appendix D Nhrwn Saudi A Nahrwn- Saudi Arabia Luzon Mindanao Luzon- Mindanao Island Nhrwn United A Nahrwn- United Arab Emirates Luzon Philippine Luzon- Philippines (excluding Mindanao Isl.) Obsrvtorio ‘66 Observatorio 1966- Corvo and Flores Islands Map Datums (Azores)
-
Page 101: Appendix E: Navigation Terms
Altitude— Height above mean sea level (MSL). Appendix E Avg Speed— The average of all second-by-second speed readings since last reset. Bearing (BRG)— The compass direction from your present position to a destination waypoint. Navigation Terms Course— The desired course between the active ‘from’ and ‘to’ waypoints. Distance (Dist)—... - Page 102 Off Course— The distance you are off a desired course in either direction, left or right. Also referred Appendix E to as ‘cross-track error’ or ‘course error’. Speed— The current velocity at which you are travelling, relative to a ground position. Also referred Navigation Terms to as ‘ground speed’.
-
Page 103: Appendix F: Specifi Cations
Cold: Approx. 45 seconds AutoLocate: Approx. 5 minutes Update Rate: 1/second, continuous Position Accuracy: 15 meters (49 feet) RMS; 1-5 meters (3-15 feet) RMS with optional GARMIN DGPS receiver Velocity: 0.1 knot RMS steady state Dynamics: 6g's Sounder Power: 150 watts (RMS), 1200 watts (peak to peak) -
Page 104: Appendix G: Installation
3. Once the GPSMAP 168 Sounder unit has been installed, connect the cable to the antenna connector shortened to ease installation. If the BNC connector is on the back of the display unit. - Page 105 2. Mark and drill the four mounting holes for the fastener you are using. 3. Fasten the bracket to the surface using the appropriate fastener. 4. Insert the GPSMAP 168 Sounder into the mounting bracket. The bracket is designed for a tight fi t to provide additional support when swiveling the unit.
- Page 106 Connecting the Power/Data Appendix G The power/data cable connects the GPSMAP 168 Sounder to a 10-18 volt DC system and provides interface capabilities for connecting external devices. The color code in the diagram below indicates the Wiring and appropriate harness connections. Replacement fuse is a AGC/3AG - 2 Amp fuse.
- Page 107 Included in the package is a 20° cone angle, temperature sensing, transom mount transducer. This Wide cone angle transducer provides good all-around performance. Listed below are a variety of optional transducers and accessories which are available from your local dealer or GARMIN: • 200 kHz, 20°, plastic, transom mount, depth only Narrow cone angle •...
- Page 108 Proper transducer installation is key to getting the best performance from your new unit. If the transducer lead is too short, extension cables are available from your GARMIN dealer. DO NOT cut the Appendix G transducer lead or any part of the transducer cable, as this will void your warranty. The cable cannot be spliced and connected to any existing (GARMIN or non-GARMIN) transducer cables.
- Page 109 To avoid drilling a hole to mount a thru-hull transducer, a transom mount transducer may be used with epoxy inside a boat (“shoot-thru-hull” installation). For a transducer to be mounted inside the hull Appendix G (shoot-thru, not thru-hull), the boat must be fi berglass, no core (contact your boat manufacturer if you are unsure).
- Page 110 Trolling Motor Installation Appendix G Included in theTrolling Motor transducer kit you should have: 1. Worm Gear Clamp Mounting the Transducer 2. Cable Ties 3. Transducer Mounting the Transducer: 1. Loosen the Worm Gear Clamp until the end of the band is clear of the worm gear. 2.
- Page 111 Testing the Installation Press the POWER button and the GPSMAP 168 Sounder should power on. If the unit fails to power on, verify that the wiring adapter is seated properly in the back of the unit, the Red and Black wires are connected to the correct polarity, and that the 2-Amp fuse is installed and not blown.
- Page 112 Suction Cup Transducer and a mount for the GPSMAP 168 Sounder. GPSMAP 168 Sounder Portable Use the two square eyelets located by the handle to secure the GPSMAP 168 Sounder Portable Case to the boat. The case is water resistant but is not designed to fl oat in the event it should go overboard.
- Page 113 GPSMAP 168 Sounder Portable Batteries The GPSMAP 168 Sounder Portable comes with a D-Cell battery pack. Eight D-Cell Alkaline batter- ies will provide approximately 20 hours of continuous operation. You have the option of purchasing a 12-Volt rechargeable Gel Cell battery for the portable case from a third-party vendor. The maximum size of the Gel Cell should not exceed 4”H x 2.5”W x 6”L.
-
Page 114: Appendix H: Understanding Sonar
That is brief description of how your GPSMAP 168 Sounder operates. Let’ s take a look at how this This fi sh is currently in a Dead Zone and is not detected by data can help you to improve your fi... -
Page 115: Transducer Coverage
The area covered by the transmitted sound waves is determined by the cone angle of the transducer and the water depth. Using GARMIN’ s standard 20° transducer, the coverage is approximately 1/3 of the water depth. As shown is Example 1, the coverage area at a 30-foot depth is approximately a 10-foot Transducer Coverage diameter circle. - Page 116 Understanding the Chart Appendix H It is important to understand that the unit does not display a 3-D representation of the underwater environment. The unit can display multiple things at the same time, but can not determine where the return originated– only when it was received. Understanding the Chart Example 2 provides a look at the underwater world from a top view, and relates that view to what would be displayed on the chart.
- Page 117 Whiteline Appendix H The GPSMAP 168 Sounder can help you to determine if the bottom is hard or soft. When the sonar soundwaves are refl ected back by the bottom, a hard bottom will return a stronger signal than a soft bottom. The stronger bottom return, the wider the bottom layer is displayed. The unit uses the Understanding the Chart whiteline function to make this bottom layer information easier to distinguish.
- Page 118 Appendix H One of the unique features offered by GARMIN is See-Thru technology. See-Thru technology allows the GPSMAP 168 Sounder to see through thermoclines and helps locate fi sh where they live; and fi sh love the thermocline. Understanding the Chart A rough defi...
-
Page 119: Appendix I: Advanced Nmea Setup
NMEA Interface If you are going to interface the GPSMAP 168 Sounder with another piece of equipment such as a Appendix I radar or autopilot the unit has to be set to output NMEA data. The NMEA data can be customized to shorten the update time from the unit. -
Page 120: Appendix J: Index
Appendix J Accessories ........viii, 96 Data Entry ..........2-3 Accuracy ..........21 Index Data Fields, Changing ......36-37 Accuracy Circle ........34 Data Transfer .........76 Active Route Page ......47, 68 Date/Time ........20, 72 Active Route Page Options .....68 Datum, Map .......74, 88-89 Gain ..........39 Adjustment Bar ......14, 38-39 Daylight Savings Time ......72 Go To Waypoint ......54,56-57... - Page 121 Layout ...........35-36 Registration ..........ii NMEA Output Formats ....76,95 Loran TD ........83-84 Remember Settings ........43 Noise Reject ...........43 Restore GARMIN Setup .......73 Route List Page ........63 Magnetic Variation ......75 Route Review Page .........64 Odometers, Trip ........72 Main Menu ........69-82 Off Course Alarm ........78 Routes ..........61-68...
- Page 122 Routes- Inverting ........67 Symbols, Waypoint ....10, 13, 48-51 Appendix J Routes- Naming ........64 System Mode .........73 Routes- Plan Route .........67 Index Routes- Removing Points ....65,66 Table of Contents ........x Routes- Reviewing Points ....64,65 Temperature ..........75 WAAS..........23 Thermoclines ......14, 38, 107 Warnings..........iii Satellite Sky View .......5, 20 Tide Charts ........81-82...
- Page 123 © 2000 - 2002 GARMIN Corporation GARMIN International, Inc. 1200 East 151 Street, Olathe, Kansas 66062, U.S.A. GARMIN (Europe) Ltd. Unit 5, The Quadrangle, Abbey Park Industrial Estate, Romsey, SO51 9AQ, U.K. GARMIN Corporation No. 68, Jangshu 2 Road, Shijr, Taipei County, Taiwan www.garmin.com...
Need help?
Do you have a question about the GPSMAP 168 and is the answer not in the manual?
Questions and answers