
Subscribe to Our Youtube Channel
Related Manuals for Archos 605 H WiFi


Summary of Contents for Archos 605 H WiFi
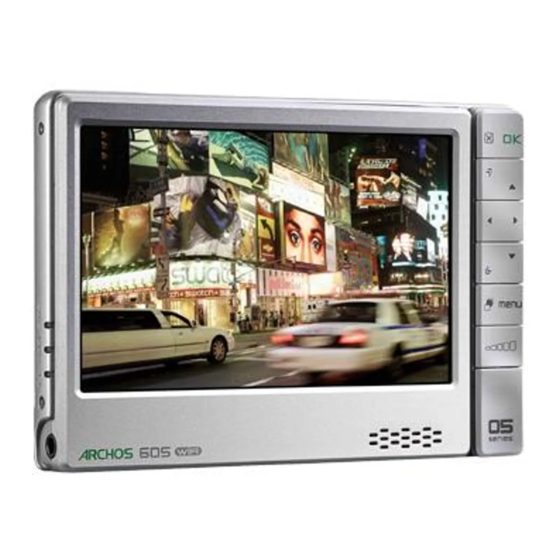
- Page 1 Annex No.5 1 of 79 Page User Manual (User Manual ARCHOS 605 H WiFi – v.2.0) ARCHOS 605 H WiFi...
- Page 2 Please visit www.archos.com/manuals to download the latest version of this manual. Dear Customer, Thank you for choosing this ARCHOS product. We hope that you will enjoy using it and that it will give you entire satisfaction for many years to come.
-
Page 3: Table Of Contents
ARCHoS dESCRIPTIoN ........ - Page 4 9. OPTIOnal funCTIOnalITIes ..........66 9.1 ARCHoS ACCESSoRIES ........66 9.2 ARCHoS PLUG-INS .
-
Page 5: Introduction
If you do not plan on using the ARCHOS for an extended period of time, you should turn it off completely, so that there is absolutely no battery usage. See “Power”... - Page 6 (playing/transferring files) Video display indicator: • the light is on when the image of the ARCHOS is displayed on a TV (see button). CoNNECToRS On the left side of the device:...
-
Page 7: First Time Usage: Charging The Battery
• Your ARCHOS is equipped with a leg stand, located on the back of the device. • Carefully pull it out, and it will allow your ARCHOS to stand by itself on a flat, stable surface. MEMoRy CARd SLoT (depending on model) -
Page 8: Turning The Archos On/Off
V2.0 TurnIng The arChOs On/Off ARCHOS 605 WiFi • Press and hold the button to turn your ARCHOS on/off. See ARCHOS Description . • The LED indicator, next to the button, lights up when the device is on. usIng The arChOs InTerfaCe INTERfACE dESCRIPTIoN Status bar •... - Page 9 (depending on model) USING THE ToUCHSCREEN Your ARCHOS is equipped with a touchscreen. Below is a description of the main tactile screen areas and a few tips on how to use the touchscreen. In order to avoid damaging the screen surface, you should use only the in- cluded stylus or your fingernail.
- Page 10 GEN 5 MANUAL INTRodUCTIoN > P. 9 V2.0 • In the Web browser and the PDF viewer, you can scroll up and down by tapping on the page and dragging it up or down (be careful however not to tap on a link!). USING THE bUTToNS The navigation buttons are located on the right side of the device: Exit button (Escape / Back / Stop)
-
Page 11: Changing The Language
Close the screen to exit and go back to the Home screen. PrOduCT Care Your ARCHOS is an electronic product that needs to be treated with care: • Do not subject it to unnecessary shock or vibration. •... -
Page 12: Playing Video
“Thumbnail” (see: Video Playback Menu Items). bRoWSING THRoUGH yoUR MEMoRy CARd’S VIdEoS (Depending on model) If you have inserted a memory card into the ARCHOS (see: Memory Card Slot ), • select the line “ SD/MMC card ”, in the first screen of the “... -
Page 13: Video Playback
GEN 5 MANUAL PLAyING VIdEo > P. 12 V2.0 VIdEo bRoWSER MENU ITEMS “Info” displays a message box with information about the highlighted video file. “File Management” “ Rename ”: allows you to change the name of the highlighted video file using the virtual keyboard. - Page 14 GEN 5 MANUAL PLAyING VIdEo > P. 13 V2.0 VIdEo PLAybACk ToUCHSCREEN CoNTRoLS • To pause/resume the video, tap on the Pause / Play icon (see n° 5 in the previous screen). • To display the menu overlay again, tap once anywhere on the screen. To make it disappear again, wait for a few seconds or tap on the Tab icon , in the top left corner (see n°...
- Page 15 DVR Station Gen 5, Mini Dock or Battery Dock: see Optional Functionalities ). Full Screen “ ”: enlarges the picture to fill the screen. In order to fit the ARCHOS’ screen, your device might need to cut small parts of the image, most likely at the top and bottom. “ Maximized ”: enlarges the picture to fill the screen, considering the image is...
-
Page 16: Video Player Settings
GEN 5 MANUAL PLAyING VIdEo > P. 15 V2.0 1.3 VIdeO Player seTTIngs • In the Video mode, you can access the Video Player settings screen by using the Settings “ ” menu item • Use the left/right arrows to select a different setting for a parameter. “PlayMode”, “Repeat &... -
Page 17: Putting Videos Onto Your Archos
To learn how to connect/disconnect the ARCHOS from your computer, see the Transferring Files section. CREATING CoMPATIbLE VIdEo fILES WITH yoUR CoMPUTER If some of your videos don’t play on your ARCHOS, you may need to transcode them to a compatible format: •... -
Page 18: Recording Video
MANUAL PLAyING VIdEo > P. 17 V2.0 purchase the Cinema plug-in from the ARCHOS website (www.archos.com). The same is also true for video podcasts in the H.264 format. In this case, purchase the Video Podcast plug-in. 1.5 reCOrdIng VIdeO •... -
Page 19: Playing Music
(Artist, Album, Genre, etc.) if your music files contain these song information tags. • When new music is copied to the ARCHOS, the Music Library will be updated automatically. • If some of your music files do not contain information tags, they will... - Page 20 V2.0 bRoWSING THRoUGH yoUR MEMoRy CARd’S SoNGS (Depending on model) • If you have inserted a memory card into the ARCHOS (see: Memory Card Slot ), SD/MMC card select the line “ ”, in the initial Music Library view. •...
-
Page 21: Music Playback
GEN 5 MANUAL PLAyING MUSIC > P. 20 V2.0 2.2 MusIC PlaybaCk • Use the scroll bar to browse through the list of audio tracks. • To play a song, highlight the corresponding file and open it. MUSIC PLAybACk SCREEN 1. Exit icon 2. - Page 22 MUSIC PLAybACk MENU ITEMS “Info” displays a message box with information about the current music file. “ARCHOS home screen” allows you to go back to the Home screen, and browse your hard drive or view your photos while listening to music.
-
Page 23: Music Player Settings
GEN 5 MANUAL PLAyING MUSIC > P. 22 V2.0 “Set rating” allows you to give a rating to the current song (1-5) or to remove the rating (none). “Settings” you can choose to display the Music Player settings screen (see next section) or the “... - Page 24 This will be repeated indefi- nitely. plays the songs of the current folder ran- “Shuffle” domly. plays all the songs of your ARCHOS one “Normal” “All” after the other, and then stops. plays all the songs of your ARCHOS one “Repeat”...
-
Page 25: Playlists
A playlist is a list of audio tracks that the music player will automatically play one after the other. • On your ARCHOS, you can play, create and edit as many playlists as you want. • In the ARCHOS Browser, playlists are the files with the icon. - Page 26 GEN 5 MANUAL PLAyING MUSIC > P. 25 V2.0 “Playlist” Clear “ ”: clears the current playlist. Shuffle “ ”: randomly shuffles the order of the songs in the current playlist. “Save playlist” Save Playlists “ ”: saves the current playlist to the folder.
-
Page 27: Putting Music Onto Your Archos
Player 10 or higher* ( tab) to synchronize ® your computer’s music files with the ARCHOS. See Putting Files onto the ARCHOS to learn more about how to transfer your computer’s music files with Windows Media Player. ® * For best performance, we recommend that users update to Windows Media ®... -
Page 28: Recording Analogue Audio
® 2.6 reCOrdIng analOgue audIO • With the optional DVR Station Gen 5 or DVR Travel Adapter (avail- able at www.archos.com), your ARCHOS will be able to record audio from most any standard line level analogue audio source. • See: Optional Functionalities . -
Page 29: Playing Your Pc's Shared Music
V2.0 2.7 PlayIng yOur PC’s shared MusIC • When connected to your home WiFi network, your ARCHOS gives you the possibility to play, directly on your device, shared music stored in your PC’s Windows Media® Library. • For this to work, you will need a WiFi connection and Windows Media®... -
Page 30: Viewing Photos
THRoUGH yoUR MEMoRy CARd’S PHoToS (Depending on model) • If you have inserted a memory card into the ARCHOS (see: Memory Card Slot ), SD/MMC card select the line “ ”, in the first screen of the Photo mode. -
Page 31: Photo Viewer
GEN 5 MANUAL VIEWING PHoToS > P. 30 V2.0 PHoTo bRoWSER MENU ITEMS* “Info” displays a message box with information about the highlighted picture. “Delete” allows you to delete the highlighted picture. A confirmation screen will pop “Start slideshow” starts a slideshow from the highlighted image. - Page 32 GEN 5 MANUAL VIEWING PHoToS > P. 31 V2.0 PHoTo VIEWER ToUCHSCREEN CoNTRoLS • To display the menu overlay again, tap once anywhere on the screen. To make it dis- appear again, wait for a few seconds or tap on the Tab icon , in the top left corner.
-
Page 33: Photo Viewer Settings
“ ” menu item will appear, allowing you to pause the slideshow. “Set as wallpaper” defines the current picture as your ARCHOS’ background image. “Settings” will display the Photo viewer settings screen (see next section). “Zoom” use the slider to magnify/demagnify the current picture. -
Page 34: Playing A Slideshow
”: displays the entire picture in its original format. Full Screen “ ”: enlarges the picture to fill the screen. In order to fit the ARCHOS’ screen, your device might need to cut small parts of the image, most likely at the top and bottom. -
Page 35: Putting Photos Onto Your Archos
Player 10 or higher* ( tab) to synchronize ® your computer’s pictures with the ARCHOS. See Putting Files onto the ARCHOS to learn more about how to transfer your computer’s pictures with Windows Media Player. ® * For best performance, we recommend that users update to Windows Media ®... -
Page 36: Using The File Browser
THRoUGH yoUR MEMoRy CARd’S fILES (Depending on model) • If you have inserted a memory card into the ARCHOS (see: Memory Card Slot ), SD/MMC card select the line “ ”, in the first screen of the File browser. - Page 37 GEN 5 MANUAL USING THE fILE bRoWSER > P. 36 V2.0 • To jump between the left and right panels, tap on , or tap directly on the panel that you want to highlight. • To execute a menu item’s function, simply tap on its icon. In order to display a text description of the icon, tap on the menu word.
-
Page 38: Using The Virtual Keyboard
GEN 5 MANUAL USING THE fILE bRoWSER > P. 37 V2.0 “File Management” Rename “ ”: allows you to change the name of the highlighted file or folder us- ing the virtual keyboard. See: Using the Virtual Keyboard . Delete “... -
Page 39: Using The File Browser While Listening To Music
Alt/Alt Gr key (depending on model) 4.3 usIng The fIle brOwser whIle lIsTenIng TO MusIC You can browse your files while listening to music: ARCHOS home screen • Choose the “ ” menu item while playing a song. Files •... -
Page 40: Browsing Other Computers On The Network
Using the ARCHOS double browser, you will be able to play media files or transfer any file from a networked computer onto your device. You can also transfer files from your device onto a computer’s write-enabled shared folder (see Copying and Moving Files... - Page 41 GEN 5 MANUAL USING THE fILE bRoWSER > P. 40 V2.0 Pdf ToUCHSCREEN CoNTRoLS • To follow a link, highlight the link (red outline) and tap again. • To display the menu overlay while viewing a PDF document, tap once in the bot- tom right corner of the screen.
- Page 42 GEN 5 MANUAL USING THE fILE bRoWSER > P. 41 V2.0 Pdf REAdER MENU ITEMS “Hide text overlay” will hide all overlaid graphics (status bar, menu items, etc.) to only show the PDF document. “Zoom in” magnifies the document. “Zoom out”...
-
Page 43: Connecting To A Wifi Network
CoNNECTING To A WIfI NETWoRk > P. 42 V2.0 COnneCTIng TO a wIfI neTwOrk Your ARCHOS can connect to a variety of wireless networks. You will find below the procedure to connect to these different WiFi networks. 5.1 wIfI COnneCTIOn PrOCedure ENAbLING WIfI Enable WiFi From the Home screen, select the “... -
Page 44: Wifi Network Configuration
5.2 wIfI neTwOrk COnfIguraTIOn In order to connect to a wireless network, the ARCHOS will need some specific in- formation about the network. Your device will automatically pick up certain pieces of information that it needs from the WiFi hot spot. - Page 45 When you have finished entering all the information, tap on the “ Connect ” button, and your ARCHOS will connect to this network, provided the signal is strong enough. PRoTECTEd NETWoRkS ( WEP, WPA oR WPA2 kEy ) • Protected networks require an en- cryption key to connect.
- Page 46 When you have finished entering all the information, use the “ ” button, and your ARCHOS will connect to this network, provided the signal is strong enough. Filtered networks: If your network manager allows only specific devices to connect to the network (known as MAC address filtering), you can supply the network manager with the MAC address of your ARCHOS.
-
Page 47: The Wifi Features
If the time and date are not correctly set, you might not be able to access cer- tain web pages (See: “Clock” settings). If you choose to set the clock automat- ically when the ARCHOS connects to a WiFi network, you will need to select your Country and City/Zone (see: “Language (and Region)” Settings). - Page 48 GEN 5 MANUAL THE WIfI fEATURES > P. 47 V2.0 • The Web browser features ‘tabbed browsing’. You can have several pages opened at the same time. They will appear in the tabs area, in the upper left corner of the screen.
-
Page 49: Playing Your Pc's Shared Media Files
Active X controls may not work in this special version of the Web Browser. 6.2 PlayIng yOur PC’s shared MedIa fIles • When connected to your home WiFi network, your ARCHOS gives you the possi- bility to watch, directly on your device, shared media files (videos, music or pho- tos) stored in your PC’s Windows Media® Library. - Page 50 * If you cannot install Windows Media Player 11 or higher, it is possible to ac- ® cess and stream your PC’s files from the ARCHOS File Browser. See Browsing Other Computers on the Network. SETTING WINdoWS MEdIA PLAyER’S SHARING oPTIoNS ®...
- Page 51 ARCHOS (see next section). PLAyING yoUR SHAREd MEdIA fILES oN THE ARCHoS Your PC needs to be connected to the same WiFi network as the one the ARCHOS will connect to. You also need to have configured Windows Media® Player’s sharing op- tions (see the previous section).
-
Page 52: The Archos Content Portal
ARCHOS, without even using a computer. • Or, if your ARCHOS is connected to the optional DVR Station Gen 5 you will be able to select your internet media content directly from your television. -
Page 53: Transferring Files
The Synchronize button in Windows Media® Player is a one way ‘sync’ button. It will add video, music and photo files to your ARCHOS. If will give you the possibility to have the same digital media on your ARCHOS as you have in your Windows Media® Player media... -
Page 54: Disconnecting
Pictures folder of your ARCHOS. You cannot copy files larger that 2 GB to the ARCHOS due to the FAT32 file system constraints. For advanced users: in “PC Hard Drive” connection modes (mode 2 and 3), the maximum size is 2 GB for .AVI files and 4 GB for any other type of file. - Page 55 USB cable to avoid loss of data or freezing. • On your computer, right-click on the ARCHOS icon and select Safely Remove. • Wait until the ARCHOS icon disappears, and safely unplug the USB cable from your ARCHOS and/or computer.
-
Page 56: Main Settings
Home screen. When it is possible, use the up/down navigation buttons to scroll the screen up and down. 8.1 “sOund” seTTIngs This screen allows you to adjust the sound settings of your ARCHOS to your personal taste. - Page 57 “ Automatic ”: the built-in speaker automatically turns off when you plug in head- phones or connect your ARCHOS to the optional DVR Station Gen 5. “Audio Output” Analog Line-Out defines whether the audio signal is sent out via the “...
-
Page 58: Display" Settings
GEN 5 MANUAL MAIN SETTINGS > P. 57 V2.0 8.2 “dIsPlay” seTTIngs “LCd SETTINGS” “LCD Backlight” adjusts the level of backlight of the built-in screen. “Brightness/Contrast” use this button to adjust the display parameters of the built-in screen (contrast, brightness and gamma). you can also reset the LCD param- Reset eters to the default values (“... -
Page 59: Appearance" Settings
” becomes available when you set the “ ” PAL (Europe) parameter to “ ”. “TV Connection” when your ARCHOS is connected to the optional DVR Station Gen 5 (available Composite S-Video at www.archos.com), select the type of video output (“ ”, “ ” or “... -
Page 60: Language (And Region)" Settings
• This is where you can set the DVR Station’s IR emitter to communicate with your tuner. This will allow you to schedule recordings easily via the ARCHOS TV Program Guide (EPG). See the manual of the optional DVR Station Gen 5. -
Page 61: Clock" Settings
Automatic “ ”: select this parameter if you want to set the clock automatically when your ARCHOS is connected to a WiFi network. You will need to select your Language (and Region) ” settings screen (see: “Language (and location in the “... -
Page 62: Power" Settings
“Device Full Power Off” If you do not plan on using the ARCHOS for an extended period of time, use this button to completely turn off your device, so that there is absolutely no battery usage*. -
Page 63: Firmware And Plug-Ins" Settings
V2.0 “PoWER SUPPLy oPERATIoN” “Standby” the amount of time of user inactivity before the ARCHOS goes into Standby mode. the system will not go into Standby mode during a slideshow, audio/video play- back, audio/video recording, or USB connection. “Backlight Off”... -
Page 64: Updating The Firmware
UPdATE USING A CoMPUTER ( INTERNET CoNNECTIoN NEEdEd ) If you do not have access to a WiFi network, or if your ARCHOS is not WiFi-enabled, you can also update the firmware using a computer connected to the internet: On your PC, go to www.archos.com/firmware. -
Page 65: System" Settings
& WMP10 or higher. When set to this mode, the ARCHOS uses the Media Transfer Protocol (MTP). The ARCHOS will ask you if you want to charge it or con- nect it: choose to connect it. When connected to your computer, your ARCHOS will be locked. - Page 66 “ ” (erase all data, media files, licenses and settings) In the event that your ARCHOS freezes or does not respond anymore, try to reset it (see: Troubleshooting). If this does not work or if you cannot access the Repair and Formatting Tools,...
-
Page 67: Optional Functionalities
• record audio/video, directly on your ARCHOS, from most any standard audio/video source. MINI doCk When connected to your ARCHOS, the Mini Dock will allow you to: • display the image of the ARCHOS on your TV. • connect a compatible USB device to your ARCHOS (Mass storage or PTP). -
Page 68: Archos Plug-Ins
AAC music files (non-protected). WEb bRoWSER PLUG-IN A specially designed Internet browser for your ARCHOS that will allow you to surf the web on your ARCHOS. Supports websites with Flash™. 9.3 sChedulIng a TV reCOrdIng With the optional DVR Station Gen 5 connected to your home tuner (cable box, satellite receiver, digital tuner or VCR), you will be able to schedule recordings easily via the ARCHOS TV Program Guide (EPG). -
Page 69: Recording External Video Manually
This screen will allow you to adjust the recording sound volume (left/right ar- rows), or change various settings (scheduling and video parameters). Start You can now tell the ARCHOS to start recording from the video source (“ recording ” red icon/menu item). -
Page 70: Recording External Audio Manually
• You will mark a segment of your video file, and then you will tell the ARCHOS to delete everything except the marked segment or to delete the marked segment from... - Page 71 GEN 5 MANUAL oPTIoNAL fUNCTIoNALITIES > P. 70 V2.0 • Once finished, you will have the option to save the edit marks with the video or to write a new video file. If you save your file with edit marks, you can always go back and change your edits at another time.
- Page 72 GEN 5 MANUAL oPTIoNAL fUNCTIoNALITIES > P. 71 V2.0 Go to the beginning of the second undesired section (c), select the “ Insert a mark Start Mark ” menu item, and choose “ ”. Forward to the end of the second undesired section (d), select the “...
-
Page 73: Troubleshooting
V2.0 TrOubleshOOTIng reseTTIng yOur arChOs • In the event that your ARCHOS freezes or does not respond anymore, try to reset it: press the button for 15 seconds (the ARCHOS will shut down completely) and turn it on as usual. •... -
Page 74: Touchscreen Problems
GEN 5 MANUAL TRoUbLESHooTING > P. 73 V2.0 The system recovery mode gives you several options: “No” cancels the system recovery. “Repair Disk” attempts to repair the file structure on the hard drive. does not erase any data. “Format Disk” formats the hard drive. - Page 75 “ ” (erase all data, media files, licenses and settings) In the event that your ARCHOS freezes or does not respond anymore, try to reset it (see: Resetting your ARCHOS). If this does not work or if you cannot access the Repair and Formatting Tools,...
-
Page 76: Technical Specifications
• WMV (MP@ML, up to DVD resolution). • With optional software plug-ins (available for purchase at www.archos.com): Video Podcast plug-in: H.264 up to DVD resolution and AAC. Cinema Plug-in: MPEG-2 MP@ML up to 10 Mbps (up to DVD resolution) and AC3 stereo sound (5.1). - Page 77 SD Slot compatible with SD, mini SD and micro SD card (Only on the models that • feature a built-in flash memory). • 3.5 mm mini jack for headphones. • Docking connectors to connect DVR Station Gen 5 and other ARCHOS accessories. SPEAkERS • Built-in speaker PoWER SoURCE •...
- Page 78 Nevertheless, your LCD screen may have slight imperfections. This is not particular to the ARCHOS screen, but to all devices which have LCD screens regardless of the original manufacturer of the LCD. Each prod- uct vendor guarantees that his screen will contain no more than a certain number of defective pixels.
-
Page 79: Technical Support Information
• On our Website: see the frequently asked questions section on www.archos.com/faq • By asking our technical support team: visit www.archos.com/support for e-mail support. • U.S. & Canada: Call 877-300-8879 (toll free). All brands and product names are registered trademarks and the property of their respec- tive owners.
Need help?
Do you have a question about the 605 H WiFi and is the answer not in the manual?
Questions and answers