Archos Gmini 400 User Manual
Hide thumbs
Also See for Gmini 400:
- User manual (68 pages) ,
- User manual (72 pages) ,
- User manual (16 pages)
Table of Contents
Advertisement
English Language User Manual
• MPEG-4 Video Player
• MP3 & WMA Music Player
• Photo Viewer
• USB 2.0 Hard Disk
• Game player
User Manual for ARCHOS Gmini™ 400
Version 1.1
Please visit our website to download the most recent manual and software for this product.
Table of Contents
1
2
2.1
2.2
2.3
2.4
2.5
2.6
2.7
2.8
3
3.1
3.2
3.3
Artist, Album, Title ... ID3 Tags
3.4
3.5
3.6
4
4.1
4.2
4.3
4.4
5
5.1
5.2
5.3
5.4
6
6.1
6.2
6.3
6.4
7
8
8.1
8.2
1
2
®
®
6
8
8
8
8
9
9
9
10
10
11
11
12
13
13
14
15
16
16
17
17
18
19
19
20
21
22
24
24
24
25
25
26
27
27
28
Advertisement
Table of Contents

Related Manuals for Archos Gmini 400


Summary of Contents for Archos Gmini 400
-
Page 1: Table Of Contents
INTRO - Ports, Buttons and Connections INTRO - First Time Usage Plugging in the AC Adapter Turning on the Gmini 400 Shutting off the Gmini 400 and Battery saving features Changing the Language Foreign Character Sets Charging the Batteries Caring for the Gmini 400... - Page 2 VIDEO - Playing Video 15 Updating the Gmini 400 Firmware Operating System (OS) Setting a Bookmark The Resume Function Display Format Settings Playing Video Files from the Internet 16 Technical Support 10 VIDEO - Creating MPEG4 video files with your computer 17 Troubleshooting 17.1...
-
Page 3: Intro - Ports, Buttons And Connections
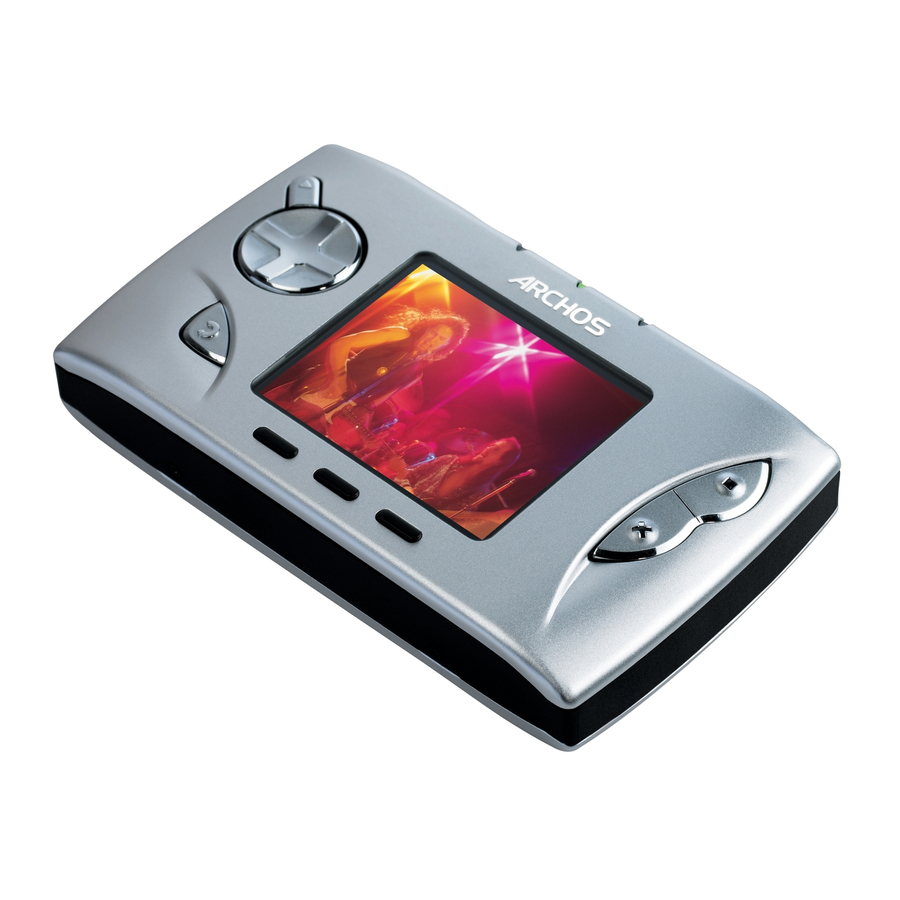
With this beautiful device in your pocket, you can enjoy digital music, digital photos, games, or digital video anytime and anywhere. We are sure that your Gmini 400 will give you years of listening and viewing enjoyment. Of course you can always use it as a regular portable hard This guide will explain to you the functions of the Gmini 400. -
Page 4: Intro - First Time Usage
Plugging in the AC Adapter • Use only the included ARCHOS charger/adapter. • • You may use the Archos Gmini 400 while its battery is charging, but it will then take longer before the battery is completely charged. Turning on the Gmini 400 •... -
Page 5: Changing The Language
The Gmini 400 is made with integrated batteries which are Changing the Language designed to last for the life of the Gmini 400. This means that you will The Gmini 400 interface can be set to English (default), French, German not have to change them. -
Page 6: Music - Playing Music Files
CD input that you plugged into on the back of your HiFi system. Press the beginning of the song. Play and then adjust the Gmini 400 volume (UP/DOWN buttons) in order Hold: Fast forward through the to supply your stereo system with a signal that is neither too weak nor song. -
Page 7: Artist, Album, Title
Gmini 400 hard disk without are present, the Gmini 400 will display them on the screen when it plays the ARCLibrary knowing about the new song. Thus, in order for your new... -
Page 8: The Resume Function
To order, you can click on Playlist (F1), then choose . You can open your computer with a text editor such your Gmini 400, you are only deleting the list and not the music itself. -
Page 9: Creating A Playlist
Creating a Playlist To create a Playlist, press the RIGHT button while you are in the Music browser. A second window will open on the right side to display the Playlist contents. You can now start adding songs to the current Playlist. In the left window, search for the songs you would like to add to your Playlist. -
Page 10: Music - Recording Music
Before the actual audio recording begins, there is a pre-recording screen which will allow you to adjust your recording settings. With the Gmini 400 series, you do not need a computer to create digital an analog line source (ex: HiFi system, Boombox, CD Player, etc) into a... -
Page 11: Where Is The Recording Saved
Record, you will set the default record location to this folder. Now, each time you use the AudioCorder icon to start a recording, your recording will The built-in microphone is located on the top of the Gmini 400 unit next be saved in the folder to the headphone jack. -
Page 12: Music - Using Windows ® Media Player
Gmini 400 as a connected music device. You can then easily copy your CD collection to your Gmini 400. WMP9 will encode each song into the WMA format (preferred compressed format of Windows ) and then store them on your Use the fast-reverse and fast- ®... -
Page 13: Copying Music To Your Gmini 400
ID3 tag information (See ® and create a folder on the root of your Gmini 400 using the name of the Artist as the folder name. Then it will take the Album name ID3 tag, and Copy Protected Music Downloads create a subfolder with that album as its name. -
Page 14: Games - Playing Mophun ® Games
® and re-download your purchased game free of charge. with your Gmini 400 is the full version of one of the game titles available You may notice that there is a folder on your Gmini 400 hard drive called Purchased games will install themselves into this folder. -
Page 15: Video - Playing Video
Browser but rather the Resume icon. This icon is highlighted information. when the Gmini 400 can resume the last played audio or video • Click the Options function button to set a bookmark, change the screen presentation. Long press to switch between built-in video and external... -
Page 16: Display Format Settings
The number of encoding and compression schemes currently used to basis. There are so many standards and formats that it is very possible formatted in “MPEG4” they may not play right away. The Gmini 400 series maximum size of 640 x 400 pixels (30 frames/second). The Gmini 400 will codecs (compression/decompression) other than the XviD and DivX™... -
Page 17: Installing The Pc Software
The standard version is the one best suited Devices Properties > Hardware > for your Gmini 400. If you do not use the standard version, uncheck the choose Audio Codecs, then click on bidirectional encoding in your DivX codec property page. -
Page 18: Using Mpg4 Translator
If for and 30 frames per second, this is beyond the maximum resolution that the Gmini 400 can play. Thus, the MPG4 Translator program will have to decrease the resolution. Choosing LCD for viewing on the built in LCD screen. Choosing the TV option will optimize the movie to keep the highest possible frame rate. -
Page 19: Photo - Viewing Photos
Rotate picture 90° left View next photo PHOTO - Viewing Photos The Gmini 400 series support the viewing of JPEG (.jpg) and Bitmap (.bmp) image formats. Progressive JPEG images are not supported. The Gmini 400 the built-in screen or on a television screen if you choose the View previous photo Rotate picture 90°... -
Page 20: Transferring Photos To Your Gmini 400
Slide the card in with its front side facing the back of the Gmini 400. When you insert the card, the Gmini 400 will recognize it and open up two browser windows. The left window will show the contents of your CompactFlash™... -
Page 21: Browser - Using The Browser
Info (directory) or Play the made, etc. Delete deleted, the Gmini 400 will ask “ ”. Use the ESC/STOP Go back to Move back and forth function keys to reply Yes or No. For folder, it will delete the entire between windows in the the main menu. -
Page 22: Using The Virtual Keyboard
Photo View: Left browser shows the memory card and right browser from your computer when it is connected to the Gmini 400. The computer the Gmini 400 hard disk. keyboard is much easier. Often times, however, you are not near your... -
Page 23: Connecting/Disconnecting The Gmini 400 To/From Your Pc
9.2. Once done, you will not need any special drivers or extensions. You simply plug the Note that when the Gmini 400 is connected to a computer, it will use Gmini 400 into your Macintosh as enumerated above, more energy than usual. - Page 24 Windows 2000 & Windows ® ® ® 2. Click on the icon to eject (unmount) the Gmini 400 from the computer and select the ‘Safely remove’ message. Windows XP & 2000 ® 3. There will be a message indicating that it is now safe to disconnect the Gmini 400.
-
Page 25: Settings
Reset button Readjusts all settings to their default values 14.2 Play Mode Settings If you would like the Gmini 400 to play through an entire folder of options, you can set these parameters in the PlayMode settings. 14.1 Sound Settings •... -
Page 26: Clock Settings
14.3 Clock Settings Play Mode The Gmini 400 has an internal real time clock. Gmini 400 is currently playing from a Playlist The time of day is shown on the top right of the screen in either 24 hour or 12 hour display mode. -
Page 27: Power Settings
Power on and the Backlight on makes using the Gmini 400 more Color scheme Allows you to choose what color you would like to have for the agreeable. -
Page 28: System Settings
ARCHOS website (www.archos. com). Updates to the Operating System include new features, feature are running the most recent version of the OS. Each time the Gmini 400 starts up, the OS version is displayed on the screen (example: OS Version and its version number at the Archos website (www.archos.com) under... -
Page 29: Technical Support
(depending on problem type). Customers on the website under Support: Product Returns. • There is an FAQ – Frequently Asked Questions section at the ARCHOS Website www.archos.com, Support: FAQ that can help answer many of your questions. -
Page 30: Troubleshooting
WWW.ARCHOS.COM Troubleshooting 17.1 USB Connection issues Problem: I cannot get my Gmini 400 to be recognized by the computer. Solutions: • United States & Canada Europe & Asia • drivers. ARCHOS Technology ARCHOS S.A. • If you installed the Windows 98SE driver on your Windows XP, 2000, ®... -
Page 31: Charging And Power Issues
Problem: The computer locks-up. • Answer: Most likely because you did not use the green ‘safely remove hardware’ icon in the system tray in order to remove the Gmini 400 from your computer. 17.5 File issues, corrupted data, formatting, and partitioning... - Page 32 ScanDisk or the DOS chkdsk (Check • • and you are sure you must reformat the Gmini 400 hard disk, then go to • the screen Setup > System and press and hold the Right function button for three seconds.
-
Page 33: Technical Specifications
The above exclusion may not apply to you. AV Connections Audio/video Multi-connect jack. Includes connections for audio IN employees or agents (collectively ARCHOS’ licensor) be liable to you for and audio/video OUT. any consequential, incidental or indirect damages (including damages Power source Non-removable internal Lithium-Ion battery pack. -
Page 34: Warnings And Safety Instructions
If this equipment does cause harmful interference on is the most noticeable. Archos guarantees that its Gmini 400 screen will have no to radio or television reception, which can be determined by turning the equipment more than 1 defective pixel (regardless if that pixel has one or more defective dots).
Need help?
Do you have a question about the Gmini 400 and is the answer not in the manual?
Questions and answers