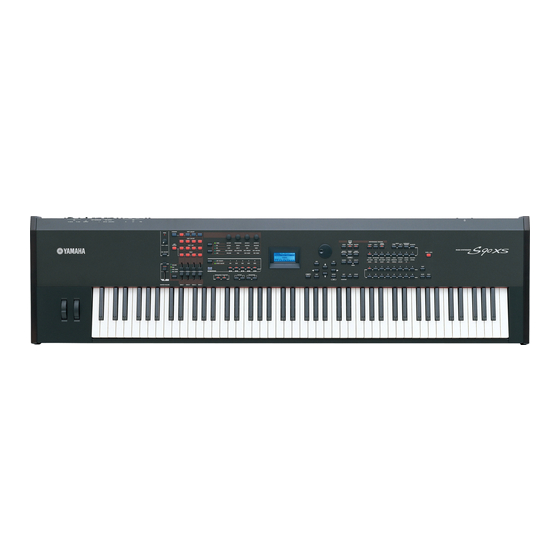
Yamaha S70XS Owner's Manual
Yamaha s70xs: user guide
Hide thumbs
Also See for S70XS:
- Reference manual (160 pages) ,
- Owner's manual (52 pages) ,
- Installation manual (7 pages)
Table of Contents
Advertisement
Advertisement
Chapters
Table of Contents

Related Manuals for Yamaha S70XS


Summary of Contents for Yamaha S70XS
- Page 1 Owner’s Manual...
-
Page 2: Special Message Section
SPECIFICATIONS SUBJECT TO CHANGE: The infor- mation contained in this manual is believed to be correct at the time of printing. However, Yamaha reserves the right to change or modify any of the specifications without notice or obligation to update existing units. -
Page 3: Important Safety Instructions
CAUTION RISK OF ELECTRIC SHOCK DO NOT OPEN CAUTION: TO REDUCE THE RISK OF ELECTRIC SHOCK. DO NOT REMOVE COVER (OR BACK). NO USER-SERVICEABLE PARTS INSIDE. REFER SERVICING TO QUALIFIED SERVICE PERSONNEL. The above warning is located on the rear of the unit. IMPORTANT SAFETY INSTRUCTIONS Read these instructions. - Page 4 If any liquid such as water seeps into the instrument, turn off the power immediately and unplug the power cord from the AC outlet. Then have the instrument inspected by qualified Yamaha service personnel. • Never insert or remove an electric plug with wet hands.
- Page 5 If you experience any hearing loss or ringing in the ears, consult a physician. Yamaha cannot be held responsible for damage caused by improper use or modifications to the instrument, or data that is lost or destroyed. Always turn the power off when the instrument is not in use.
-
Page 6: Welcome
A message from the S90 XS/S70 XS Development Team Thank you for purchasing the Yamaha S90 XS/S70 XS Music Synthesizer. We’re extremely proud to introduce the new S90 XS/S70 XS as the successor to the original S90 ES. Equipped with exceptionally high-quality musical instrument sounds and a real piano-feel response, this is truly the instrument of choice for musicians and players worldwide, whatever the genre. -
Page 7: S90 Xs/S70 Xs Main Features
The S90 XS/S70 XS features a sophisticated Balanced Hammer Keyboard (with Initial Touch/Aftertouch) which utilizes Yamaha’s long-standing know-how cultivated in its acoustic piano and synthesizer development. The 88-key model gives you full-scale piano performance, while the smaller 76-key model offers greater portability and ease in transporting. -
Page 8: About This Manual
• The illustrations and LCD screens as shown in this Owner’s Manual are for instructional purposes only, and may appear somewhat different from those on your instrument. • This product incorporates and bundles computer programs and contents in which Yamaha owns copyrights or with respect to which it has license to use others’ copyrights. -
Page 9: Table Of Contents
Welcome... 6 Accessories ... 6 About the accessory disk ... 6 S90 XS/S70 XS Main Features... 7 About this Manual... 8 Controls and Functions Top panel ... 10 Rear Panel ... 15 Setting Up Power Supply ... 16 Connecting speakers or headphones ... 16 Powering Up the System ... -
Page 10: Controls And Functions
Controls and Functions Top panel 1 Keyboard The S90 XS features a 88-key keyboard, while the S70 XS has 76 keys. All are equipped with a touch response feature (both initial touch and after touch). With initial touch, the instrument senses how strongly or softly you play the keys, and uses that playing strength to affect the sound in various ways, depending on the selected Voice. - Page 11 ¤ [PART ON/OFF] 1 – 4 buttons These buttons turn each Part on and off. In the Voice mode, only Part 1 is available and is always turned on. [ARP ON/OFF] button Turns the “Arp Switch” (a common parameter) on/off. When this button is turned on, the Arpeggio function is available.
-
Page 12: Function Buttons
Controls and Functions ! Knob Function buttons Pressing these buttons change the functions assigned to the four Knobs. The lamp next to the currently active parameters will light. In the Voice mode, the function of each Knob is applied to the current Voice;... -
Page 13: Cursor Buttons
E Cursor buttons The cursor buttons move the “cursor” around the LCD display screen, highlighting and selecting the various parameters. F [EXIT] button The menus and displays of the S90 XS/S70 XS are organized according to a hierarchical structure. Press this button to exit from the current display and return to the previous level in the hierarchy. - Page 14 Controls and Functions P Number [1] – [16] buttons Use of these buttons differs depending on the on/off status of the [PART], [MUTE] and [SOLO] buttons. The indicator lights if each button is turned on Mode Voice Play Keyboard transmit channel setting Normal Voice Edit Performance Play Keyboard transmit channel setting...
-
Page 15: Rear Panel
Rear Panel 1 P (Power switch) Press to turn power ON (O) or OFF (N). 2 AC IN socket Connects to the included power cord. Use only the AC power cord supplied with the S90 XS/S70 XS. 3 MIDI IN, OUT, and THRU terminals MIDI IN is for receiving control or performance data from another MIDI device, such as an external sequencer. -
Page 16: Setting Up
When connecting to an outlet, connect the adaptor’s ground lead to the ground screw. If you’re unsure how to connect, then contact your Yamaha dealer or service center (page 63). WARNING Use only the AC power cord supplied with the S90 XS/S70 XS. The... -
Page 17: Adjusting The Volume And The Brightness Of The Display
Adjusting the volume and the brightness of the display Adjust the volume levels of the S90 XS/S70 XS and the connected amplifier/speaker system. NOTE When connecting to a set of powered speakers or PA equipment, set the MASTER VOLUME to about 70%, then raise the volume of the powered speakers or PA equipment to the appropriate level. -
Page 18: Resetting The User Memory To The Initial Factory Settings
Setting Up Resetting the User Memory to the Initial Factory Settings The S90 XS/S70 XS has a Factory Set function for restoring your S90 XS/S70 XS’s memory to the factory default settings. This lets you restore the S90 XS/S70 XS’s default program, as well as its System and other settings. -
Page 19: Start Guide
USB device to the instrument. Of course, you can store your important data to the instrument; however, for best safe-keeping, Yamaha recommends that you back up all important data to a USB storage device. Creating original program sets Master mode... -
Page 20: Basic Instructions
Voices—the basic building blocks of the S90 XS/S70 XS Voices—created in the Voice mode—are the basic sonic building blocks for the other modes of this instrument. The Performance and Multi programs are made up of different Voices. This instrument features an exceptionally wide variety of preset Voices for playing in virtually any musical style. Try searching through the Voices to find your favorites. -
Page 21: Playing The Keyboard In The Voice Mode
Playing the Keyboard in the Voice mode In the Voice Play display (the top display of the Voice Mode), you can select and play a single Voice. The Voices of this instrument are divided into the following two types: Normal Voice Normal Voices are mainly pitched musical instrument- type sounds (piano, organ, guitar, etc.) that can be played over the range of the keyboard. -
Page 22: Using The Category Search Function
Playing the Keyboard in the Voice mode Using the Category Search function The Voices are conveniently divided into specific Categories, irrespective of their bank locations. The categories are divided based on the general instrument type or sound characteristics. The Category Search function gives you quick access to the sounds you want. -
Page 23: Changing The Tonal Qualities Of The Voice
Selecting a Voice from the Favorite Category Press the [FAVORITE] button in the Voice Play display. The list of Voices registered to the Favorite Category will be shown. Select the Voice with the Cursor [U]/[D] buttons or data dial. Press the [ENTER] button to actually call up the Voice. -
Page 24: Voice Editing
Playing the Keyboard in the Voice mode The Edit ( E ) Indicator When changing the value of the parameter in the Voice/ Performance/Multi Play or Edit display, the Edit Indicator will appear on the top right corner of the LCD. This gives a quick confirmation that the current Voice/Performance/ Multi has been modified but not yet stored. - Page 25 Move the cursor to “Effect” then press the [ENTER] button. The Voice Edit Effect display appears. NOTE When the Arpeggio/Effect Function is set to “EFFECT ON/ OFF,” the Voice Edit Effect display can be called up also by holding the [SHIFT] button and pressing the [INS] button simultaneously.
-
Page 26: Using The Arpeggio Function
Playing the Keyboard in the Voice mode Using the Arpeggio function The Arpeggio function automatically triggers preset arpeggio phrases, riffs, and rhythmic patterns according to the notes you play. It not only provides inspiration and full rhythmic passages over which you can perform, it gives you quality MIDI data you can use in creating songs, or fully formed backing parts to be used in your live performances. -
Page 27: Changing The Arpeggio Type
After finding the favorite pattern, press the [STORE] button to store the setting as a User Voice. Copying the Arpeggio Type to another Arpeggio part Follow the instruction to copy the Arpeggio Type assigned to the Arp 1 to the Arp 2 – 5. Select “ARP SELECT”... -
Page 28: Creating A New Performance By Using Your Favorite Voice (Performance Creator)
Creating a New Performance by Using Your Favorite This instrument features a convenient Performance Creator function which lets you create a new Performance by using favorite Voices you’ve found in the Voice mode. This function lets you copy parameter settings associated with the Voice (such as Effects) to the Performance—allowing you to quickly and easily come up with precisely the sound you want. -
Page 29: Split-Playing Two Different Voices With Your Left And Right Hands
Split—Playing two different Voices with your left and right hands This section shows you how to create a Performance in which the keyboard is divided into two sections—the left- hand section and the right-hand. The lowest note of the right-hand section is referred to as the “Split Point.” By creating such a Performance, you can play a bass part with your left hand, and a piano part with your right, for example. -
Page 30: Drum Assign-Layering A Drum Part With The Current Voice
Creating a New Performance by Using Your Favorite Voice (Performance Creator) Drum Assign—Layering a drum Part with the current Voice This section explains how to create a Performance in which you can trigger a drum pattern (via the Arpeggio function) in addition to the current Voice. Select a Voice in the Voice mode. -
Page 31: Assigning A Name To The Performance
Find your favorite pattern by changing the Main Category/Sub Category/Type with the data dial. You can change the pattern of the Arp 2 – 5 via the same operation. To change the Arpeggio from among the five types, use the Function button. Turn “ARP SELECT” on by pressing the Arpeggio/Effect Function button then press the Function button. -
Page 32: Playing The Keyboard In The Performance Mode
Playing the Keyboard in the Performance Mode Selecting a Performance Selecting a Performance is done in basically the same way as selecting a Voice. The Category Search function is available also in the Performance Play mode. Note that the S90 XS/S70 XS has no Preset Performances and provides only three User Banks. -
Page 33: Singing With A Connected Microphone
Singing with a Connected Microphone By connecting a microphone to the MIC INPUT jack (combo jack) located on the rear panel of this instrument, you can enjoy singing along with your own performance. You can also apply the built-in Effects to this signal input via the MIC INPUT jack, including the distinctive Vocoder Effect. -
Page 34: Recording/Playing Back With A Usb Storage Device (Audio Record/Play Mode)
Recording/Playing Back with a USB Storage Device The Audio Record/Play mode lets you record your keyboard performance as audio data. The recorded audio data will be saved as an audio file to the root directory of the external USB storage device or internal flash memory, allowing you to play back the audio file from the specified storage. -
Page 35: Playing Back The Recording
Press the [ENTER] button when the “Save Audio Rec file?” message appears. Your performance is saved as an audio file to the root directory of the USB storage device. Completing the save operation calls up the Audio Play display. Recording/Playing Back with a USB Storage Device (Audio Record/Play Mode) Playing back the recording Now that you’ve recorded the audio of your keyboard performance, try playing back the file. -
Page 36: Using A Connected Computer
For details, refer to “Setting Up” on page 16. Download the USB-MIDI Driver from our website. After clicking the Download button, extract the compressed file. http://www.global.yamaha.com/download/usb_midi/ NOTE Information on system requirements is also available at the above web site. NOTE The USB-MIDI Driver may be revised and updated without prior notice. - Page 37 Precautions when using the USB TO HOST terminal You must observe the following points when connecting the S90 XS/S70 XS to your computer via the USB TO HOST connector. Failure to do so can cause the instrument and/or the computer to hang up (freeze), possibly causing corruption or loss of data.
-
Page 38: Using As A Multi-Timbral Tone Generator (Multi Mode)
S90 XS/ S70 XS) to USB Port 1. When connecting via USB, enter the checkmark to “Yamaha S90 XS (S70 XS)-1” or “Yamaha S90 XS (S70 XS) Port1.” Enter the MIDI data to each track of the DAW on the computer. -
Page 39: Digital Performer
Pull down the [Options] menu and select [Control Surfaces] to call up the Control Surface window. Click the [+] button, select “Mackie Control,” then set the Input Port to “Yamaha S90 XS (S70 XS)-2” and set the Output Port to “Yamaha S90 XS (S70 XS)-2.” Digital Performer... -
Page 40: Editing More Detailed Parameters Of The Voice
XS/S70 XS Editor via the same operations as that any other VST Instrument. Using as a stand-alone editor In addition, Yamaha provides a stand-alone version of the S90 XS/S70 XS Editor which works as a client of the host Studio Manager. Studio Manager V2 is a cross-platform... -
Page 41: Playing The Keyboard Along With Playback Of The Midi File
Playing the Keyboard Along with Playback of the MIDI File The Multi mode/Sequence Play mode should be used when you want to play the keyboard along with playback of the MIDI file. This instrument is equipped with a 16-track sequencer for playback, allowing you to play back MIDI data of up to 16 tracks. - Page 42 Playing the Keyboard Along with Playback of the MIDI File Press the [EXIT] button a number of times to go back to the Sequence Play mode. Audio file selection can be done via the same operation. Move the cursor to the Chain Step 003 by using the cursor buttons then select “end”...
-
Page 43: Using As A Master Keyboard (Master Mode)
Using as a Master Keyboard (Master Mode) The Master mode lets you: • Create and store up to 128 programs, each containing a Voice, a Performance or a Multi, and of which can be instantly called up for use. • Assign up to four separate Zones in each Master program for use as a master keyboard. You can use the Master mode to memorize the settings you use most often including the information on which mode is used, and call up these settings instantly anytime you need them with a single button press. - Page 44 Using as a Master Keyboard (Master Mode) Press the [EDIT] button. The Master Edit Select display appears. Select “Common” then press the [ENTER] button. The Common Edit display appears. Select “Zone Sw” then press the [ENTER] button. The Common Zone Switch display appears. Set “Zone Switch”...
-
Page 45: Making Global System Settings (Utility Mode)
Making Global System Settings (Utility Mode) In the Utility mode, you can set parameters that apply to the entire system of this instrument. To enter the Utility mode, press the [UTILITY] button. Pressing the [EXIT] button returns to the original display. This section describes some useful functions in the Utility mode. -
Page 46: Panel Lock
Making Global System Settings (Utility Mode) Changing the panel lock settings Panel Lock Determines the buttons which are “locked” or become unavailable when pressing the [PANEL LOCK] button on the panel. When the check mark is removed from the check box, the corresponding button is available even if Panel Lock is turned on. -
Page 47: Saving/Loading Data (File Mode)
Saving/Loading Data (File Mode) In the File mode, you can save/load the data such as Voice and Performance created on this instrument. To enter the File mode, press the [FILE] button. This section explains how to save/load all the data on the user memory of this instrument as an “All” file (extension: X2A). Saving the settings to a USB storage device Connect a USB storage device to the USB TO... -
Page 48: Loading The Settings From A Usb Storage Device
Saving/Loading Data (File Mode) Loading the settings from a USB storage device Connect a USB storage device to the USB TO DEVICE terminal of this instrument. Press the [FILE] button to enter the File mode. The File Select display appears. Select “Load”... -
Page 49: Usb Storage Devices
(battery or external power supply) types can be used. Before purchasing USB storage devices, please consult your Yamaha dealer, or an authorized Yamaha distributor (see list at end of the Owner’s Manual) for advice, or see the following web page: http://www.yamahasynth.com/... -
Page 50: Appendix
Appendix LCD Indication All data is initialized upon power-on. Continue? Are you sure? Assign Vocoder Voice to Part 1. Continue? Assign Vocoder Voice. Continue? Audio Rec stopped due to lack of memory space. Bad disk or memory. Bulk data protected. Can't execute. - Page 51 LCD Indication Load All. Are you sure? Confirms whether you want to load the “All” or not in the File mode. Load Seq Chain file. Are you sure? Confirms whether you want to load the “Seq Chain file” or not in the File mode. MIDI buffer full.
-
Page 52: Troubleshooting
The following table provides troubleshooting hints and page references for some common problems. You may solve your problem by executing the Factory Set (page 18) after backing up your data to an external storage device. If the problem persists, then contact your Yamaha dealer or service center (page 63). No Sound ... - Page 53 Are the parameter settings such as Element Switch, Part Switch, Note Limit and Velocity Limit appropriate? [VOICE] [EDIT] [MUTE] (lighting) Number [9] – [16] buttons [PERFORM] [PART ON/OFF] [PERFORM] [EDIT] Part selection Play Mode Note Limit Lo/Hi [PERFORM] ...
- Page 54 Troubleshooting Playback continues without stopping When the [ARP ON/OFF] button is turned on, press it so that its lamp is turned off. In Sequence Play Mode, press the [START/STOP] button. When the click (metronome) sound continues, hold down the [SHIFT] button and press the [START/STOP] button to stop the sound.
- Page 55 Wrong pitch or unexpected pitch Is the Tune parameter in the Utility mode set to a value other than “0”? [UTILITY] General Tune Is the Note Shift parameter in the Utility mode set to a value other than “0”? [UTILITY] ...
-
Page 56: Voice Mode
Troubleshooting Cannot start the Arpeggio Check whether the [ARP ON/OFF] button is turned on or off. Is the MIDI Sync parameter set to auto or internal (using internal clock)? [UTILITY] MIDI MIDI sync Have you selected a User Arpeggio type (with no User Data)? To use the User Arpeggios, the User Arpeggio data created in the MOTIF XS must be loaded to the S90 XS/S70 XS. - Page 57 MIDI bulk data transmission/reception does not work properly Is the Receive Bulk parameter set to off? Set the Receive Bulk parameter to on. [UTILITY] [MIDI] Receive Bulk If the data was saved with the Bulk Dump function of the S90 XS/S70 XS, you need to set the Device Number to the same number before Bulk Dump transmission.
-
Page 58: Specifications
Note on source code distribution For three years after the final factory shipment, you may request from Yamaha the source code for any portions of the product which are licensed under the GNU General Public License by writing to the following address: DE Group, DMI Marketing Department. -
Page 59: Index
Arp 1 – 5 ... 26 Arp 1 – 5 Type ... 26 [ARP ON/OFF] ... 26 ARP SELECT... 27 Arp Select ... 26 Arpeggio... 26 Arpeggio Type... 26 Arpeggio/Effect Function button... 27 Audio data (Recording) ... 34 [AUDIO REC/PLAY] ... 34 Audio Record/Play mode... - Page 60 Index Owner’s Manual CD-ROM ... 8 [PANEL LOCK] ... 46 Panel Lock ... 46 [PART SELECT] ... 32 PDF documentation ... 8 Performance ... 32 Performance Creator ... 28 Performance mode ... 32 Playing back ... 35 Power on Mode... 45 Power Supply...
-
Page 61: Software License Agreement
SO AS TO PROCEED TO THE NEXT PAGE. 1. GRANT OF LICENSE AND COPYRIGHT Yamaha hereby grants you the right to use one copy of the software program(s) and data (“SOFTWARE”) accompanying this Agreement. The term SOFTWARE shall encompass any updates to the accompanying software and data. - Page 62 * This applies only to products distributed by YAMAHA CORPORATION OF AMERICA. COMPLIANCE INFORMATION STATEMENT (DECLARATION OF CONFORMITY PROCEDURE) Responsible Party : Yamaha Corporation of America Address : 6600 Orangethorpe Ave., Buena Park,...
- Page 63 For details of products, please contact your nearest Yamaha representative or the authorized distributor listed below. Pour plus de détails sur les produits, veuillez-vous adresser à Yamaha ou au distributeur le plus proche de vous figurant dans la liste suivante.
- Page 64 Yamaha Web Site (English only) http://www.yamahasynth.com/ Yamaha Manual Library http://www.yamaha.co.jp/manual/ U.R.G., Pro Audio & Digital Musical Instrument Division, Yamaha Corporation © 2009 Yamaha Corporation WR49520 909MWDH?.?-01C0 Printed in Japan...
Need help?
Do you have a question about the S70XS and is the answer not in the manual?
Questions and answers
I want to apply EQ (mid, high, low) (not Effects) to MIC input on my s90xs. There reference manual does not contain this information. Please help. Thanks.
The Yamaha S90XS does not provide direct EQ controls (mid, high, low) specifically for the MIC input. However, you can use the Master EQ to adjust overall EQ settings. To access the Master EQ:
1. Press [UTILITY].
2. Select “VOICE” > press [ENTER].
3. Select “MASTER EQ” > press [ENTER].
This gives access to a 5-band parametric EQ, where you can adjust frequency, gain, and Q (bandwidth). This EQ affects the entire output, including the MIC input signal if it is routed through the main mix.
This answer is automatically generated