
Related Manuals for Yamaha DGT7A


Summary of Contents for Yamaha DGT7A
- Page 1 Basic Operation Manual Manuel de base Handbuch “Grundlegende Bedienung” G EN E R A L...
- Page 2 If these corrective measures do not produce satisfactory results, please contact the local retailer authorized to distribute this type of product. If you can not locate the appropriate retailer, please contact Yamaha Corporation of America, Electronic Service Division, 6600 Orangethorpe Ave, Buena Park, CA 90620 The above statements apply ONLY to those products distributed by Yamaha Corporation of America or its subsidiaries.
-
Page 3: Special Message Section
SPECIFICATIONS SUBJECT TO CHANGE: The in- formation contained in this manual is believed to be correct at the time of printing. However, Yamaha reserves the right to change or modify any of the specifications without no- tice or obligation to update existing units. -
Page 4: Important Safety Instructions
Please make sure that benches are stable and any optional fixtures (where applicable) are well secured BEFORE using. Benches supplied by Yamaha are designed for seating only. No other uses are recommended. - Page 5 Mounting the Control Unit to the Disklavier GranTouch Installation du boîtier de commande sur le Disklavier GranTouch Montieren des Steuergerätes an das Disklavier GranTouch (1) Remove the four screws from the sides of the Control Unit. (2) Place the metal suspension bracket, included with the Disklavier GranTouch, over the Control Unit, then secure...
- Page 6 (4) Insert the control cable into the D-SUB connector on the back of the Control Unit, then securely tighten the two screws attached to the connector. Be sure to check the orientation of the D-SUB connector when inserting the cable. (5) Insert the CD control cable extending from the piano to the CD CONTROL...
- Page 7 Basic Operation Manual...
- Page 8 Before using your Disklavier GranTouch piano, please read this manual thoroughly and retain it for future reference. Trademarks & Copyright Yamaha, Disklavier, GranTouch, PianoSoft, PianoSoft . Plus, and PianoSoft . PlusAudio are trademarks of Yamaha Corporation. SmartKey, CueTIME, Disk Orchestra and You Are The Artist are trademarks of Yamaha Corporation or Yamaha Corporation of America.
- Page 9 Important Read the following before operating the Disklavier GranTouch. Warnings • Do not locate the Disklavier GranTouch in a place subject to excessive heat, low temperatures, or direct sunlight. This could be a fire hazard and may damage the finish and internal parts.
- Page 10 • Always remove the power plug from the AC outlet before cleaning the Disklavier GranTouch. Leaving the power plug connected presents a risk of electric shock. • Do not use benzene, thinner, cleaning detergent, or a chemical cloth to clean the Disklavier GranTouch.
-
Page 11: Table Of Contents
Table of Contents Chapter 1 Setting Up Your Disklavier GranTouch Items Supplied with the Disklavier GranTouch ... 1 Connecting the Control Unit ... 1 Connecting the Power Cable ... 2 Keyboard Cover (Fallboard) ... 2 Music Rest (DGT2A only) ... 3 Lid ... - Page 12 Chapter 10 Useful Functions for Learning Piano Canceling the Left-Hand or Right-Hand Piano Part ... 41 Operating the Pedals Yourself ... 42 Using the Built-in Metronome ... 42 Playback with the Metronome ... 43 Chapter 11 More Playing Features Canceling Keyboard Movement ... 44 Playing the Keyboard with an Ensemble Voice ...
-
Page 13: Chapter 1 Setting Up Your Disklavier Grantouch
CONTROL connector on the rear panel of the Control Unit. ☛ <DGT2A> See also the Asssembly Guide. <DGT7A> Refer to step (4) in “Mounting the Control Unit to the Disklavier GranTouch” at the front of this manual. CD control cable... -
Page 14: Connecting The Power Cable
Important: Make sure that the voltage of the AC wall outlet matches that marked on the Disklavier’s Serial No. plate. DGT2A AC inlet Rear leg Power cable DGT7A AC inlet Power cable Keyboard Cover (Fallboard) Opening the Keyboard Cover Using both hands, carefully raise the keyboard cover until it rests on the piano body. -
Page 15: Music Rest (Dgt2A Only)
Music Rest (DGT2A only*) * The DGT7A features a standard grand piano music rest. Setting the Music Rest Carefully raise the music rest. Pull out the two supports at the bottom rear of the music rest. Push the music rest back a little so that it rests on the supports. -
Page 16: Using The Remote Control
Using the Remote Control The Disklavier GranTouch is equipped with a remote control which allows convenient control from almost anywhere in the room. Installing Batteries in the Remote Control Before the remote control can be used, the two batteries supplied with the Disklavier GranTouch must be installed. -
Page 17: Basic Disklavier Grantouch Terminology
Voice The sounds produced by a tone generator expressing various instruments. Yamaha XG is an extension of the GM (General MIDI) format. With greater polyphony, more voice, and effects, it improves song compatibility between MIDI devices. When a song in the Yamaha XG... -
Page 18: Chapter 2 Names Of Parts And Their Functions
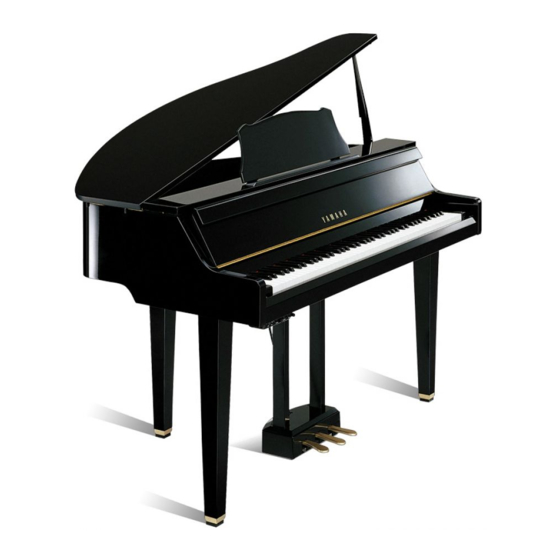
– REV•FWD VOLUME – SONG SELECT PLAY PAUSE STOP REMOTE CONTROL TRANSMITTER PPR-100 Remote Control Prop Music Rest Music Rest Keyboard Flap Keyboard Cover Keyboard Cover Control Unit Control Box Connectors Underside DGT7A AC Inlet Power cable Prop Control Unit... -
Page 19: Control Box
Lights when the MAINS switch is set to on. VOLUME knob Used to adjust the volume level of the digital piano and internal XG tone generator. Underside Connectors DGT2A DGT7A AUX IN L/L+R, R Used to connect external audio equipment. VOLUME HEADPHONES REVERB... -
Page 20: Pedals
Pedals Shift pedal Softens the piano sound. Sostenuto pedal Sustains the notes that are being played at that time even after you release the keys. Subsequently played notes are not affected. Sustain pedal Sustains notes even after you relase the keys, producing a richer, fuller sound. - Page 21 Remote control sensor When using the remote control, point it toward this sensor. Display (LCD) Shows various information. DRIVE indicator Indicates the selected disk. [SELECT] buttons Used to select a disk. Toggles the floppy disk, CD, and Memory Disks (0 ~ 9 and A ~ F). CD drive Insert a PianoSoft .
-
Page 22: Control Unit - Rear Panel
Control Unit — Rear Panel TO HOST CD CONTROL Used to connect the line from the piano. AUDIO/ANALOG MIDI IN Used to connect audio equipment such as an external CD changer. TO HOST (serial port) Used to connect the Disklavier GranTouch with a personal computer. -
Page 23: Remote Control
Remote Control RECORD PART SELECT SEARCH DRIVE REPEAT TRANSPOSE – TEMPO – REV•FWD VOLUME – SONG SELECT PLAY PAUSE STOP PPR-102E [RECORD] button Used to engage the Record Standby mode before recording starts. Number keypad* Used for direct song selection and to enter a start time for song playback. -
Page 24: Chapter 3 Disks Used With The Disklavier Grantouch
Chapter 3 Disks Used with the Disklavier GranTouch Three types of disks are used with the Disklavier GranTouch: floppy disks, CDs, and internal Memory Disks. Floppy Disks Besides PianoSoft and PianoSoft . Plus song disks, the Disklavier GranTouch can play back songs stored on 3.5-inch MS-DOS 720 Kbyte format 2DD floppy disks and MS-DOS 1.44 Mbyte format 2HD floppy disks. -
Page 25: Compact Discs
Compact Discs You can enjoy listening to PianoSoft . PlusAudio —Yamaha’s audio/MIDI CD made especially for use with Disklavier pianos. Besides PianoSoft . PlusAudio, the Disklavier GranTouch can also play back standard audio CDs sold on the market as well as audio/MIDI CDs of other companies. -
Page 26: Memory Disks
Inserting & Removing CDs Press the CD eject button so that the CD tray pops out about 1 cm, and then carefully pull it out as far as it will go. To insert a CD, place the CD on the tray and gently press down on it so that the center of the CD is clamped in place. -
Page 27: Chapter 4 Turning On/Off Your Disklavier Grantouch
Chapter 4 Turning On/Off Your Disklavier GranTouch This chapter describes how to turn on and off your Disklavier GranTouch and how to set the internal calendar. Turning your Disklavier GranTouch on/off is a basic and very important procedure. Always be sure to follow the procedure described below when you turn on or off your Disklavier GranTouch. -
Page 28: Setting The Internal Calendar
Setting the Internal Calendar The Disklavier GranTouch has an internal calendar that can be set from 1/1/1985 00:00:00 to 12/31/2084 23:59:59. Set the calendar accurately so that the Disklavier GranTouch displays the correct current time during Stop mode. Setting the correct time is also important for engaging timer-controlled programs (see Chapter 3 “Timer Play”... -
Page 29: Chapter 5 Playing The Disklavier Grantouch Digital Piano
Inserting a headphone plug into one of the HEADPHONES jacks turns off the internal speakers, so you can play in private without disturbing others. Using the optional Yamaha HPE-170 headphones is recommended. Since two pairs of headphones can be connected to the Control Box, another person can listen to your playing or play along in a duet. -
Page 30: Playing With A Reverb Effect
Playing with a Reverb Effect A piano sounds differently depending on the size of the room in which it is played. These room reverberations are referred to as “reverb” in this manual. The Disklavier GranTouch’s reverb effects can simulate chamber and hall acoustics. For example, you can add spaciousness to the piano sound to simulate the sound of a piano playing in a concert hall. -
Page 31: Chapter 6 Display (Lcd) And Drive Indicator
Chapter 6 Display (LCD) and DRIVE Indicator Various information is shown in the display (LCD: Liquid Crystal Display) and DRIVE indicator on the Control Unit. This chapter describes some of the frequently displayed indications. DRIVE Indicator The DRIVE indicator lets you know which disk is selected. - Page 32 (half pedal) Type of CD Software The Disklavier GranTouch can play back CDs such as Yamaha PianoSoft . PlusAudio CDs, audio/ MIDI CDs of other companies, and standard audio CDs. When you select a CD for playback, the type of CD software is displayed.
- Page 33 Previous/Next Display Indications The arrows that appear on the far right of a display indicate that there is a relevant display before or after the current one. You can go to the previous or next display using the [<] [>] buttons.
-
Page 34: Chapter 7 Basic Playback
Piano parts Ensemble parts Internal XG Tone Generator Playing Back a CD Yamaha PianoSoft . PlusAudio and Other Audio/MIDI CDs PianoSoft . PlusAudio (and audio/MIDI CDs of other companies) contain data recorded in two channels: Analog MIDI and audio. When you play back a PianoSoft . PlusAudio, the... -
Page 35: Specifying A Disk
Standard Audio CDs Standard CDs contain two audio channels (R and L). Both are output via the built-in speakers as a CD stereo system would. Note: You can also connect an external CD changer to the AUDIO/ANALOG MIDI IN connector on the Amplifier and play back multiple audio CDs on the Disklavier GranTouch. -
Page 36: Starting Playback
Starting Playback Specify a disk. Press [PLAY/PAUSE]. PLAY/PAUSE The PLAY/PAUSE indicator lights and song No.1 starts playing. The Disklavier GranTouch plays the piano parts, actually moving the keys up and down, and the internal XG tone generator plays the instrumental parts. The time display starts counting up and the velocity meters show the velocity of the piano part notes currently being played, as... -
Page 37: Selecting Songs With The Control Unit
Selecting Songs with the Control Unit Press [SONG SELECT the next song. Press [SONG SELECT the previous song. SONG SELECT/REV • FWD To select other songs on the disk, press and hold down [SONG SELECT [SONG SELECT ] until the number of the desired song appears. -
Page 38: Fast Preview & Review
To select a song numbered 10 and above, enter the first digit, then within 2 seconds, enter the second digit. SEARCH Remote Control SEARCH Remote Control To select song number 12 for example, press [1], then [2]. If a song number higher than that of the last song on the disk is entered, the last song on the disk is selected. -
Page 39: Fast Forward & Reverse
Fast Forward & Reverse In Pause mode, fast forward and reverse allow you to quickly locate a desired position in a song. Fast Forward and Reverse search faster than preview and review and the piano does not play. Reverse can also be used to return a song to the beginning, ready to play again. -
Page 40: Adjusting The Volume
Adjusting the Playback Volume Y ou can adjust volume with the Control Unit or with the remote control as descr ibed below. Since all piano songs are recorded at the maximum volume level of 0, volume can be decreased down to –10, the softest volume at which the piano can play. -
Page 41: Balancing The Ensemble Volume (Tg Master Balance)
Balancing the Ensemble Volume (TG Master Balance) When playing back Ensemble songs, it is useful to be able to balance the volume levels of the digital piano and Ensemble voices. In other words, the volume of the XG tone generator should not be too loud or too quiet compared to the Disklavier GranTouch digital piano. -
Page 42: Balancing The Cd Volume (Cd Master Balance)
Balancing the CD Volume (CD Master Balance) Before playing back PianoSoft . PlusAudio and other audio/MIDI CDs, it is a good idea to first balance the volume levels of the MIDI piano and Audio parts. Once you adjust the volume using the CD Master Balance function, you can use the [VOLUME] buttons on the remote control to conveniently increase or decrease the overall volume in a... -
Page 43: Changing The Tempo
Changing the Tempo You can speed up or slow down the playback tempo. Slowing down the playback tempo can be useful when practicing a difficult piano part. These tempo settings remain in effect until recording is started, the disk is ejected, or the Disklavier GranTouch is turned off. -
Page 44: Adjusting The Pitch Of Audio Cds
Adjusting the Pitch of Audio CDs Y ou can temporar ily adjust the pitch of an audio CD for your listening pleasure. Pitch adjustments are effective until the CD is ejected or the Disklavier GranTouch is turned off. Note: This function cannot be used to adjust the pitch of external audio CDs connected to the AUX IN connector. -
Page 45: Repeat Playback
Chapter 8 Repeat Playback This chapter describes various repeat playback functions that you may want to use for entertainment and study purposes. You can repeatedly play back songs or specific passages within a song. Note: All Repeat Playback functions are set using the remote control only. (They cannot be set with the Control Unit.) All Song, Single Song, Random Repeat There are three Repeat modes (ALL, RPT, RND) as described below. -
Page 46: Segment A~B Repeat
Segment A~B Repeat In Segment A~B Repeat, playback is repeated between two specified points in a song: point A and point B. This function is useful when practicing or memorizing a difficult section of a song. Once specified, points A and B are saved until the disk is ejected or the Disklavier GranTouch is turned off. -
Page 47: Segment A~ (Return & Pause) Repeat
Segment A~ (Return & Pause) Repeat In Segment A~ Repeat, playback can be repeatedly restarted from a specified point in a song. This is similar to Segment A~B Repeat except that only point A is specified. Like Segment A~B Repeat, this function is useful for practicing. -
Page 48: Starting Playback From A Specified Point (Search)
Starting Playback from a Specified Point (Search) Playback can be started from a specified point in a song. Instead of using fast forward or preview, you can use this function to go directly to a desired point within a song. If the current song uses the minutes and seconds time format, you specify the point in minutes and seconds. -
Page 49: Chapter 9 Auto Start & Space Playback
Chapter 9 Auto Start & Space Playback Auto Start enables you to set the Disklavier GranTouch to automatically begin playback of songs stored either on the Memory Disk or floppy disk. Used in conjunction with a clock timer, songs can be automatically played back at a specified time. -
Page 50: Timer-Controlled Playback
Timer-Controlled Playback By using the Auto Start function and a clock timer, you can set the Disklavier GranTouch to automatically begin playback at a specified time. Set the Auto Start function as described in “Setting Auto Start” on the previous page. Turn off the Control Unit and then connect the Disklavier GranTouch power cable to a clock timer as... -
Page 51: Setting Space Playback
Setting Space Playback This function allows you to specify the pause time between songs during Auto Start. Hold down [FUNC.] and press [STANDBY / ON]. FUNC. STANDBY The following display appears. Press [>] to position the c cursor next to the Space Play parameter, then use the [–/NO] and [+/YES] buttons to set the mode. -
Page 52: Space Playback
Space Playback Insert a song disk into the disk drive, as necessary. If you want to play back songs from the Memory Disk, make sure there is no floppy disk inserted in the disk drive. Press [PLAY/PAUSE]. The Disklavier GranTouch begins Space Playback. -
Page 53: Chapter 10 Useful Functions For Learning Piano
Chapter 10 Useful Functions for Learning Piano This chapter describes useful functions for piano study, such as practicing one hand while the Disklavier GranTouch plays the other, operating the pedals, and using the built-in metronome. Canceling the Left- Hand or Right-Hand Piano Part In L/R and Ensemble songs, the left-hand piano part is stored on track 1 (L) and the right-hand... -
Page 54: Operating The Pedals Yourself
Operating the Pedals Yourself During playback, the Disklavier GranTouch pedals play the pedal data that was recorded with the song. If, however, you want to practice your pedal playing, you can cancel pedal playback and play them yourself. The Pedal Cancel function is set in the Control Unit. -
Page 55: Playback With The Metronome
The following table shows the metronome parameters that can be set. Parameter Range Default 1 Click ON/OFF 2 Tempo 30 to 400 3 Time 1/4, 2/4, 3/4, Signature 4/4, 5/4, 6/4, 7/4, 8/4, 9/4 4 Volume 50 to 127 5 Pedal ON/OFF Count Use the [<] and [>] to position... -
Page 56: Chapter 11 More Playing Features
Chapter 11 More Playing Features This chapter describes a couple of other features for playing the Disklavier GranTouch digital piano: canceling keyboard movement and playing the keyboard with an Ensemble voice. Canceling Keyboard Movement Normally, when songs are played back on the Disklavier GranTouch, the piano keys move up and down as if they were being played by a performer. -
Page 57: Playing The Keyboard With An Ensemble Voice
Press [–/NO] to cancel keyboard movement; press [+/YES] to enable keyboard movement. –/NO +/YES Press [>] to return to the previous display. Playing the Keyboard with an Ensemble Voice The Disklavier GranTouch’s [VOICE] button lets you assign a voice from the internal XG tone generator to accompany the piano while you play. - Page 58 Press [>], then use the [–/NO] and [+/YES] buttons to select a bank. –/NO The bank number of the selected voice appears temporarily in place of the Vol parameter. The bank number automatically returns to 0 when the voice number is changed.
-
Page 59: Chapter 12 Advanced Ensemble Song Playback
Chapter 12 Advanced Ensemble Song Playback This chapter describes functions that will help you to better enjoy Ensemble song playback. These include tuning the digital piano and internal tone generator, playing the piano parts on the tone generator, displaying Ensemble voices, and selecting tracks for the piano parts. Tuning the Tone Generator (TG Master Tune) -
Page 60: Sounding The Piano Parts On The Tone Generator
Sounding the Piano Parts on the Tone Generator Normally, piano parts are played back by the piano. You can, however, change this so that the piano parts are also played by the internal XG tone generator or a MIDI instrument connected to the MIDI OUT connector. -
Page 61: Displaying Ensemble Voices
Displaying Ensemble Voices When an Ensemble song starts playing back, MIDI Program Change messages are sent to the internal XG tone generator. These Program Change messages tell the tone generator which voices to select for each ensemble track. During playback, you can display the voice assignments of each track and make changes. - Page 62 You can choose from the following options. Option Description The piano does not play. 01 - 16 The piano plays the specified track. The piano plays the smallest track that contains a piano group voice. Prg(all) The piano plays all tracks that contain a piano group voice.
-
Page 63: Chapter 13 Using The Aux Connectors
Chapter 13 Using the AUX Connectors You can connect the Disklavier GranTouch to external audio devices, such as speakers, a tape recorder or a CD player. AUX OUT You can output sound through external devices connected to the AUX OUT connectors on the underside of the piano. -
Page 64: Aux In
AUX IN You can also connect an external device such as a tone generator or synthesizer to the Disklavier GranTouch and play along with your favorite recording. HEADPHONE OUT AUX IN HEADPHONE OUT (LINE OUT) Note: If your music source has only one output (mono), connect it to the “L/L+R”... -
Page 65: Chapter 14 Using The Smartkey
Collection and You Are The Artist Note: SmartKey software and other SmartKey compatible software described above may not be available in some countries. Note: SmartKey, CueTIME, Disk Orchestra and You Are The Artist are trademarks of Yamaha Corporation or Yamaha Corporation of America. SmartKey... - Page 66 Additional, more complete arrangements like the built-in SmartKey demo are available on floppy disks, called SmartKey disks. (See your local Yamaha dealer for more information on these types of disks.) Insert the SmartKey disk into the disk drive of the Disklavier GranTouch.
-
Page 67: Cuetime Tm Software
CueTIME Software SmartKey compatible CueTIME software also uses the SmartKey features of your Disklavier GranTouch. CueTIME software consists of a disk and a music book, that contain beautifully arranged piano pieces and fully orchestrated background accompaniments on disk. Simply play the traditional piano piece as written at any speed or tempo on the piano keyboard and the accompanying prerecorded accompaniment on... -
Page 68: Guide Control
Turning off the “Prompt Repeat” option for CueTIME disks If you find the repeating key prompts distracting when performing your piece from the written music, you can turn off the “Prompt Repeat” function. The display always shows the next cue note if you happen to miss one in performing your piece. - Page 69 While holding the [ENTER] button, press either the “L” or “R” [PART] buttons to activate the “Guide” function for that part (note that the orange indicator lights). After performing this operation, the PART indicator show three conditions: State Indicator Play Steady green Part Cancel Blinking green...
- Page 70 Use the [–/NO] and [+/YES] buttons to select OFF. Press [FUNC.]. Press [PLAY/PAUSE] button and play the song. If you miss a note on the guided track, the display still shows a visual cue of the note you missed. Prompt Repeat Function The “Prompt Repeat”...
-
Page 71: Playback Considerations
Use the [–/NO] and [+/YES] buttons to select OFF. Press [FUNC.]. Press [PLAY/PAUSE] and play the song. If you miss a note on the guided track, the display still shows a visual cue of the note you missed. Playback Considerations Whenever the “Guide”... -
Page 72: Chapter 15 Internal Xg Tone Generator Voice & Drum Kit List
Chapter 15 Internal XG Tone Generator Voice & Drum Kit List The following table lists the basic voices for the internal XG tone generator. These voices are available on any XG compatible generator or synthesizer. ☛ For a complete listing of available voices, see the Appendix in the Advanced Operation Manual. Internal XG Tone Generator Basic Voice List Voice # Display Name Full Name... -
Page 73: Internal Xg Tone Generator Drum Kit List
Voice # Display Name Full Name Reed SprnoSax Soprano Sax Alto Sax Alto Sax TenorSax Tenor Sax BariSax Baritone Sax Oboe Oboe Eng.Horn English Horn Bassoon Bassoon Clarinet Clarinet Pipe Piccolo Piccolo Flute Flute Recorder Recorder PanFlute Pan Flute Bottle Bottle Blow Shakhchi Shakuhachi... - Page 74 P.O.Box 3, Hamamatsu, 430-8651 Japan Copyright © 2001 by Yamaha Corporation This document is printed on chlorine free (ECF) paper. XO136A0 4031010A Printed in Japan...
Need help?
Do you have a question about the DGT7A and is the answer not in the manual?
Questions and answers