Table of Contents
Advertisement
Quick Links
Advertisement
Table of Contents

Related Manuals for KoolMore KoolFryer KM-FDF40-NG


Summary of Contents for KoolMore KoolFryer KM-FDF40-NG
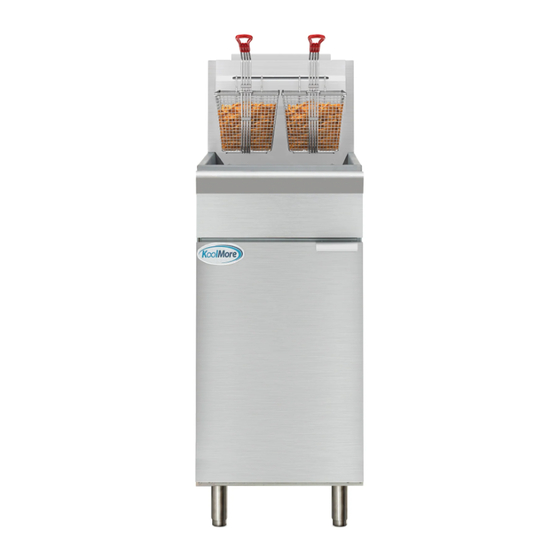
- Page 1 INSTALLATION MANUAL KoolMore KoolFryer Collection Commercial Floor Standing Fryer Models: KM-FDF40-NG | KM-FDF40-LP | KM-FDF50-NG | KM-FDF50-LP | KM-FDF75-NG | KM-FDF75-LP KM-FDF40-NG KM-FDF50-NG KM-FDF40-LP KM-FDF50-LP KM-FDF75-NG KM-FDF75-LP...
- Page 2 Stay informed with the latest information for your KoolMore KoolFryer Appliance. Scan the QR code above to access the most recent user manual on our website, which is constantly being updated and improved. If you need any assistance or have questions, our customer support team is here to help.
- Page 3 SAFETY/WARNING Your safety is our top priority. Before installing and using this equipment, please read and follow these important warnings and guidelines: • Flammable Materials: Do not store or use gasoline or any other flammable vapors or liquids near this equipment, or any other similar appliances. •...
- Page 4 PRODUCT PARAMETERS TABLE M odel No. KM - FDF40- KM - FDF50- KM - FDF75- NG/ LP NG/ LP NG/ LP Dimension 15.5" x 30.1" x 15.5" x 30.1" x 20.9" x 30.1" x (W D H) 47.0" 47.0" 47.0" Power 90,000 BTU 120,000 BTU...
-
Page 5: Installation
INSTALLATION Setup: • Remove all packaging material, tape, and protective plastic from the equipment. • Position the equipment at your desired location and height. • Attach the four (4) legs securely to the equipment. • Prior to use, ensure the equipment is clean and completely dry. •... -
Page 6: Flue Installation
▪ with a minimum 6” overhang surrounding the fryer. A make-up air style is suggested, with a built-in and tested fire protection system (e.g., Ansul™). ▪ The appliance’s electrical schematic diagram is located inside the door. Do not directly connect the fryer flue or exhaust to the ventilation hood. ▪... - Page 7 Codes and Standards: The fryer installation must adhere to all relevant national and local codes, regulations, and ordi- nances. A final inspection for building and fire protection compliance is necessary and should be approved before putting the new fryer into service. In the United States: Comply with state and local codes.
-
Page 8: Gas Pressure
▪ efficiently and safely without creating a potential fire hazard. ▪ No structural material on the fryer or its flue chimney including physical alterations should be made so it can be placed under an approved exhaust hood with fire protection. ▪... - Page 9 When test pressures exceed ½ PSI (3.45 kPa), the fryer and its individual shutoff valve must be disconnected from the gas supply piping system. When test pressures are ½ PSI (3.45 kPa) or less, the fryer must be isolated from the gas supply piping system by closing its individual shutoff valve.
-
Page 10: Before First Use
If you need to disconnect the restraining device for servicing or cleaning, remember to reconnect it before returning the appliance to its original position. LEVELING THE FRYER 1. Check the fryer's level by placing a "level" on top of it after connecting all gas components. Ensure that the fryer is level both front-to-back and side-to-side in its final installed position. -
Page 11: Operation
OPERATION Filling the Tank with Shortening WARNING: Solid shortening must NOT be used with fryers. Melting solid shortening will damage the tank and void your warranty 1. Ensure the drain valve is closed. 2. Fill the fryer tank with liquid shortening. 3. - Page 12 BASIC FRYING INSTRUCTIONS Set the desired temperature and allow shortening to heat up to that temperature. Fry items that are of similar size to ensure equal doneness. Drain or wipe dry raw or wet foods to minimize splatter when lowering into hot oil. Add fresh shortening as needed top maintain the shortening level between the recommended (embossed) minimum and maximum fill level (volume) lines.
-
Page 13: Troubleshooting
TROUBLE SHOOTING Overheating Shutdown If the shortening overheats, a high-temperature shutoff will turn off the gas valve and extinguish the pilot. Do not attempt to relight the pilot if the shortening temperature is above 300°F (149°C) after an overheating shutdown. Extended Shutdown Turn the thermostat knob to OFF. - Page 14 Problem Possible Causes No Heat - Thermostat dial not turned on. - Pilot not lit. - Gas supply not turned on. - Loose wire connections (call service). - Wire connections need cleaning (call service). - Faulty thermopile (call service). Insufficient or - Thermostat dial not set to desired Excessive Heat temperature.
-
Page 15: Maintenance
MAINTENANCE Gas Fryer Maintenance & Sanitation Calendar Daily Tasks: 1. Clean the fryer's exterior surfaces with a damp cloth using warm water and mild soap. Remove discolorations and grime using non-metallic scouring pads. 2. Empty the tank into an approved hot oil storage vessel while filtering the oil at about 275°F (135°C). - Page 16 1. Drain the tank as described under "Draining the Oil." 2. Flush out scraps and sediment using warm shortening and a tank brush. Drain thoroughly. 3. Close the drain valve and fill the tank with water. 4. Use a low-foaming cleaner/degreaser to clean the fry tank. Follow package instructions. 5.
-
Page 17: Limited Warranty
At its sole discretion, Koolmore Supply Inc. may decide to replace the product. In such an event, your replace- ment appliance will carry the warranty for the remaining term of the original unit's warranty period.
Need help?
Do you have a question about the KoolFryer KM-FDF40-NG and is the answer not in the manual?
Questions and answers