Table of Contents
Advertisement
Available languages
Available languages
Quick Links
MIDNIGHT SUN
Decken-Heizung & Lampe
Ceiling Heater & Lamp
Radiador y lámpara de techo
Radiateur de plafond et plafonnier
Stufa a soffitto e lampada
Plafondverwarming & Lamp
10035321 10035322 10035323
www.klarstein.com
Hinweis: Dieses Produkt ist nur für gut isolierte Räume
oder für den gelegentlichen Gebrauch geeignet.
Note: This product is only suitable for well insulated
spaces or occasional use.
Nota: Este producto está indicado únicamente en
lugares abrigados o para una utilización punctual.
Remarque : Ce produit ne peut être utilisé que dans
des locaux bien isolés ou de manière occasionnelle.
Advertencia: Questo prodotto è adatto solo per spazi
ben isolati o uso occasionale.
Advertisement
Chapters
Table of Contents

Related Manuals for Klarstein MIDNIGHT SUN


Summary of Contents for Klarstein MIDNIGHT SUN
- Page 1 MIDNIGHT SUN Decken-Heizung & Lampe Ceiling Heater & Lamp Radiador y lámpara de techo Radiateur de plafond et plafonnier Stufa a soffitto e lampada Plafondverwarming & Lamp 10035321 10035322 10035323 www.klarstein.com Hinweis: Dieses Produkt ist nur für gut isolierte Räume oder für den gelegentlichen Gebrauch geeignet.
-
Page 3: Table Of Contents
Sehr geehrter Kunde, wir gratulieren Ihnen zum Erwerb Ihres Gerätes. Lesen Sie die folgenden Hinweise sorgfältig durch und befolgen Sie diese, um möglichen Schäden vorzubeugen. Für Schäden, die durch Missachtung der Hinweise und unsachgemäßen Gebrauch entstehen, übernehmen wir keine Haftung. Scannen Sie den folgenden QR-Code, um Zugriff auf die aktuellste Bedienungsanleitung und weitere Informationen rund um das Produkt zu erhalten. -
Page 4: Technische Daten
TECHNISCHE DATEN Heizung Artikelnummer Abmessungen Leistung Nennspannung Stromversorgung 10035321 660 * 635 * 35 350 + 32 W 1,7 A 10035322 1085 * 635 * 35 600 + 36 W 3,0 A 230 V ~ 50 Hz 10035323 1285 * 635 * 35 800 + 40 W 3,6 A Fernbedienung... -
Page 5: Sicherheitshinweise
SICHERHEITSHINWEISE Warnsymbole WARNUNG Dieses Signalwort bezeichnet eine Gefährdung mit einem mittleren Risikograd, die, wenn sie nicht vermieden wird, zu schweren Verletzungen oder zum Tod führen kann. WARNUNG VOR ELEKTRISCHER SPANNUNG Dieses Symbol weist auf Gefahren für das Leben und die Gesundheit von Personen durch elektrische Spannung hin. - Page 6 Sicherheitshinweise Lesen Sie alle Sicherheitshinweise und alle Bedienungshinweise. Die Nichtbeachtung der Warnhinweise und Anweisungen kann zu einem Stromschlag, Brand und / oder schweren Verletzungen führen. Bewahren Sie alle Warn- und Sicherheitshinweise zum späteren Nachschlagen auf • Die Nichtbeachtung der Warnhinweise und Anweisungen kann zu einem Stromschlag, Brand und / oder schweren Verletzungen führen.
- Page 7 WARNUNG Verbrennungsgefahr! Einige Bestandteile dieses Geräts können sehr heiß werden und Verbrennungen verursachen. Besondere Vorsicht ist geboten, wenn Kinder und gebrechliche Personen anwesend sind. • Es ist gefährlich, das Gerät in der Nähe von Vorhängen und anderen brennbaren Materialien aufzustellen. •...
- Page 8 • Beachten Sie bei der Auswahl von Verlängerungen des Netzkabels die Leistungsaufnahme des Gerätes, die Kabellänge und den Verwendungszweck. Rollen Sie Verlängerungskabel vollständig ab. Vermeiden Sie elektrische Überlastungen. • Ziehen Sie vor Wartungs-, Pflege- oder Reparaturarbeiten am Gerät den Netzstecker aus der Netzsteckdose. Halten Sie dabei den Netzstecker fest. •...
-
Page 9: Lieferumfang
LIEFERUMFANG 1 x Heizung 2 x Aufhängung 1 x Thermostat & 4 x Schrauben 1 x Fernbedienung 4 x Dübel 1 x Bedienungsanleitung... -
Page 10: Geräteübersicht
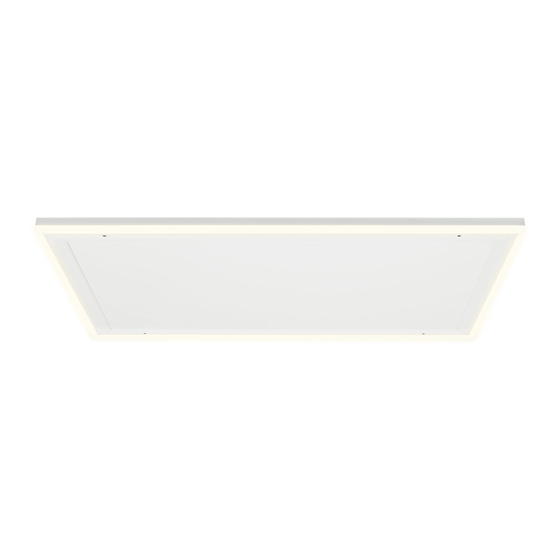
GERÄTEÜBERSICHT Vorderseite Rückseite Vordere Oberfläche LED-Umrandung Netzkabel LED-Netzeingang INSTALLATION Wichtige Hinweise • Die Montagearbeiten müssen von einem professionellen Elektriker durchgeführt werden! • LED-Eingangsleitungen müssen mit Schaltern verdrahtet werden, die die stromführenden Leitungen ungehindert unterbrechen können! • Trennen Sie vor der Montage und Verdrahtung alle Leitungen, die mit der LED-Eingangsleitung verdrahtet werden sollen, vom Stromnetz. - Page 11 Installation Bohren Sie vier Löcher an der Decke mit dem richtigen Abstand A und B. Verwenden Sie einen Bohrer mit dem richtigen Durchmesser, damit das Paneel nicht herunterfällt! Deckenaufhängung Paneel Größe (mm) Lochabstand der Schrauben (mm) 660 * 635 (oder ähnlich) A500*B100 mm 1085 * 635 (oder ähnlich) A500*B300 mm...
- Page 12 Schieben Sie zuerst den hinteren Rahmen des Paneels hinein. Führen Sie dann das andere Ende der Deckenaufhängung auf der anderen Seite ein. Ansicht nach abgeschlossener Montage...
-
Page 13: Set-Beschreibung Und Allgemeine Funktionen
SET-BESCHREIBUNG UND ALLGEMEINE FUNKTIONEN Jedes Set besteht aus zwei Teilen: • Einer Fernbedienung mit digitaler Anzeige, in der die Elektronik, die Bedienelemente und der eingebaute Raumtemperaturfühler untergebracht sind. • Einem Steckdosenempfänger, der das Signal der Fernbedienung empfangen und dekodieren kann. Fernbedienungsfunktionen Die Fernbedienung erfasst mit ihrem integrierten Sensor die Raumtemperatur und sendet ein Signal an den Steckdosenempfänger, um die Heizung bei sich... -
Page 14: Fernbedienung
FERNBEDIENUNG Lernen-Symbol Kindersicherung Modusanzeige Heizsymbol Batteriekapazität Raumtemperatur Modus ein/aus Eingestellte Temperatur Programmsymbol Datum/Wochentag Datum Sperren Auswahl des Ein/Aus Anzeigeformats Aufwärts Abwärts Favorisierte Temperatur Moduseinstellungen (FAV-Temperatur) Aktuelles Datum und Einstellung Uhrzeit einstellen... -
Page 15: Steckdosenempfänger
STECKDOSENEMPFÄNGER Optionaler Deaktivierungsschalter Kontrollleuchte Eingebauter Empfänger Steckdosenempfänger... -
Page 16: Bedienung Im Detail
BEDIENUNG IM DETAIL So koppeln Sie den Empfänger mit der Fernbedienung Schalten Sie das Gerät über den eingebauten Empfänger oder den Steckdosenempfänger und drücken Sie die Kontrollleuchte für 3 Sekunden, um sie blinken zu lassen. Drücken Sie dann gleichzeitig die Tasten °C / °F und MODE, um die Fernbedienung und den Empfänger zu koppeln, bis ein langer Piepton zu hören ist. -
Page 17: Programmieren Von Heizperioden
Tastensperre aktivieren und deaktivieren Halten Sie die Taste LOCK 3 Sekunden lang gedrückt, bis ein Schlosssymbol auf dem Display der Fernbedienung erscheint. Alle Tasten sind nun gesperrt. Um die Tastensperre zu beenden, halten Sie die Taste LOCK erneut 3 Sekunden lang gedrückt, bis das Schlosssymbol wieder vom Display verschwindet. - Page 18 5+2 oder 1...7 Programmiermodus Drücken Sie gleichzeitig die Tasten MODE und TIME, um den Programmiermodus 5+2 oder 1...7 auszuwählen. Programmiermodus 5+2 In diesem Modus können Sie für alle Wochentage (Montag-Freitag) und die Wochenendtage (Samstag-Sonntag) jeweils 4 Heizintervalle programmieren. Halten Sie im Modus 5+2 die Taste SET 3-5 Sekunden lang gedrückt, bis das Programmsymbol (1) und MON TUE WED THU FRI angezeigt werden, wobei das Symbol ON und das Zeitsymbol auf dem Bildschirm blinken.
- Page 19 Programmiermodus 1...7 In diesem Modus können Sie für jeden einzelnen Wochentag 2 Heizintervalle programmieren. Halten Sie im Modus 1...7 die Taste SET 3-5 Sekunden lang gedrückt, bis das Programmsymbol (1) und MON angezeigt werden, während ON und das Zeitsymbol auf dem Bildschirm blinken. Drücken Sie die Taste , um die Stunden der die Startzeit von Programm (1) in 1-Stunden-Schritten einzustellen.
- Page 20 Hinweise zur Programmierung • Die voreingestellte Startzeit ist 00:00, die voreingestellte Endzeit ist 00:00 und die voreingestellte Betriebstemperatur beträgt 15°C. • Wenn Sie die voreingestellte Ein- und Ausschaltzeit von 00:00 nicht anpassen, sind die Programmiereinstellungen ungültig. • Die Laufzeit von Programm (1) (2) (3) (4) sollte sich nicht überschneiden und die Endzeit jedes Programms muss nach der Startzeit liegen, andernfalls ist die Einstellung ungültig.
-
Page 21: Wichtige Hinweise Zur Bedienung
WICHTIGE HINWEISE ZUR BEDIENUNG • Alle Einstellungen müssen nach dem Batteriewechsel neu eingestellt werden. • Wen die Tasten auf der Fernbedienung nicht mehr reagieren, ersetzen Sie die alten Batterien komplett durch neue Batterien. Hinweis: Die Fernbedienung wird mit zwei 1.5 V AA-Batterien betrieben. Tauschen Sie die Batterien aus, sobald das Batteriesymbol blinkt, da die Fernbedienung sonst die Heizung nicht mehr steuern kann. -
Page 22: Reinigung Und Pflege
REINIGUNG UND PFLEGE Hinweis: Schalten Sie das Gerät aus und ziehen Sie den Stecker aus der Steckdose. Warten Sie, bis das Gerät vollständig abgekühlt ist, bevor Sie sie reinigen. • Benutzen Sie zur Reinigung der Lüftungsschlitze und Gitter einen Staubsauger. •... -
Page 23: Spezielle Entsorgungshinweise Für Verbraucher In Deutschland
SPEZIELLE ENTSORGUNGSHINWEISE FÜR VERBRAUCHER IN DEUTSCHLAND Entsorgen Sie Ihre Altgeräte fachgerecht. Dadurch wird gewährleistet, dass die Altgeräte umweltgerecht verwertet und negative Auswirkungen auf die Umwelt und menschliche Gesundheit vermieden werden. Bei der Entsorgung sind folgende Regeln zu beachten: • Jeder Verbraucher ist gesetzlich verpflichtet, Elektro- und Elek- tronikaltgeräte (Altgeräte) sowie Batterien und Akkus getrennt vom Hausmüll zu entsorgen. - Page 24 • Bei einem Vertrieb unter Verwendung von Fernkommunikationsmitteln ist die unentgeltliche Abholung am Ort der Abgabe auf Elektro- und Elektronikgeräte der Kategorien 1, 2 und 4 gemäß § 2 Abs. 1 ElektroG, nämlich „Wärmeüberträger“, „Bildschirmgeräte“ (Oberfläche von mehr als 100 cm²) oder „Großgeräte“...
-
Page 25: Produktdatenblatt
PRODUKTDATENBLATT Modellkennung(en) 10035321 Angabe Symbol Wert Einheit Angabe Einheit Wärmeleistung Nur bei elektrischen Speicher-Einzelraumheizgeräten: Art der Regelung der Wärmezufuhr Nennwärmeleistung 0.35 Manuelle Regelung der Wärmezufuhr mit k.A. integriertem Thermostat Mindestwärmeleistung 0.35 Manuelle Regelung der Wärmezufuhr k.A. (Richtwert) mit Rückmeldung der Raum- und/oder Außentemperatur Maximale kontinuierliche 0.35... -
Page 26: Produktdatenblatt
Modellkennung(en) 10035322 Angabe Symbol Wert Einheit Angabe Einheit Wärmeleistung Nur bei elektrischen Speicher-Einzelraumheizgeräten: Art der Regelung der Wärmezufuhr Nennwärmeleistung Manuelle Regelung der Wärmezufuhr mit k.A. integriertem Thermostat Mindestwärmeleistung Manuelle Regelung der Wärmezufuhr k.A. (Richtwert) mit Rückmeldung der Raum- und/oder Außentemperatur Maximale kontinuierliche Elektronische Regelung der Wärmezufuhr k.A. -
Page 27: Produktdatenblatt
Modellkennung(en) 10035323 Angabe Symbol Wert Einheit Angabe Einheit Wärmeleistung Nur bei elektrischen Speicher-Einzelraumheizgeräten: Art der Regelung der Wärmezufuhr Nennwärmeleistung Manuelle Regelung der Wärmezufuhr mit k.A. integriertem Thermostat Mindestwärmeleistung Manuelle Regelung der Wärmezufuhr k.A. (Richtwert) mit Rückmeldung der Raum- und/oder Außentemperatur Maximale kontinuierliche Elektronische Regelung der Wärmezufuhr k.A. - Page 29 Dear customer, Congratulations on your purchase. Please read the following instructions carefully and follow them to prevent potential damage. We accept no liability for damage caused by disregarding the instructions and improper use. Please scan the QR code to access the latest operating instructions and further information about the product.
-
Page 30: Technical Data
TECHNICAL DATA Heating Article number Dimensions: Power Rated voltage Power supply 10035321 660 * 635 * 35 350 + 32 W 1.7 A 10035322 1085 * 635 * 35 600 + 36 W 3.0 A 230 V ~ 50 Hz 10035323 1285 * 635 * 35 800 + 40 W... -
Page 31: Safety Instructions
SAFETY INSTRUCTIONS Warning symbols WARNING This signal word indicates a hazard with a medium level of risk which, if not avoided, may result in serious injury or death. WARNING OF ELECTRICAL VOLTAGE This symbol indicates danger to life and health of persons due to electrical voltage. - Page 32 Safety Instructions Read all safety instructions and all operating instructions. Failure to observe the warnings and instructions may result in electric shock, fire and / or serious injury. Keep all warnings and safety instructions for future reference • Failure to observe the warnings and instructions may result in electric shock, fire and / or serious injury.
- Page 33 WARNING Risk of burns! Some parts of this device can become very hot and cause burns. Special care should be taken when children and infirm persons are present. • It is dangerous to place the device near curtains and other combustible materials.
- Page 34 • When selecting power cord extensions, consider the power consumption of the unit, the cable length and the intended use. Unroll extension cables completely. Avoid electrical overloads. • Disconnect the mains plug from the mains socket before carrying out maintenance, servicing or repair work on the device. Hold the mains plug while doing so.
-
Page 35: Scope Of Delivery
SCOPE OF DELIVERY 1 x heating element 2 x suspension 1 x thermostat & 4 x screws 1 x remote control 4 x dowels 1 x operating instructions... -
Page 36: Device Overview
DEVICE OVERVIEW Front side Back side Front surface LED surround Power cable LED mains input INSTALLATION Please note: • The installation work must be carried out by a professional electrician. • LED input lines must be wired with switches that can interrupt the current- carrying lines without hindrance. - Page 37 Installation Drill four holes on the ceiling with the correct spacing A and B. Use a drill with the right diameter so that the panel does not fall down. Ceiling suspension Panel size (mm) Hole spacing of the screws (mm) 660 * 635 (or similar) A500*B100 mm 1085 * 635 (or similar)
- Page 38 First push in the rear frame of the panel. Then insert the other end of the ceiling suspension on the other side. View after completed assembly...
-
Page 39: Set Description And General Functions
SET DESCRIPTION AND GENERAL FUNCTIONS Each set consists of two parts: • A remote control with digital display, which houses the electronics, the controls and the built-in room temperature sensor. • A socket receiver that can receive and decode the signal from the remote control. -
Page 40: Remote Control
REMOTE CONTROL Learn symbol Lock Mode display Heating symbol Battery capacity Room temperature Mode ON/OFF Set temperature Program icon Date/Weekday Date Lock Temperature On/Off conversion Down Favorite temperature Mode settings (FAV temperature) Set current date and Settings time... -
Page 41: Socket Receiver
SOCKET RECEIVER Optional deactivation switch Control lamp Built in receiver Socket receiver... -
Page 42: Operation In Detail
OPERATION IN DETAIL To pair the receiver with the remote control Turn on the unit using the built-in receiver or the plug-in receiver and press the indicator light for 3 seconds to make it blink. Then press the °C / °F and MODE buttons simultaneously to pair the remote and receiver until a long beep is heard. -
Page 43: Programming Heating Periods
Activating and deactivating the key lock Press and hold the LOCK key for 3 seconds until a lock symbol appears on the remote control display. All keys are now locked. To end the key lock, press and hold the LOCK key again for 3 seconds until the lock symbol disappears from the display again. - Page 44 5+2 or 1...7 programming mode Press the MODE and TIME keys simultaneously to select programming mode 5+2 or 1...7. Programming mode 5+2 In this mode you can program 4 heating intervals each for all weekdays (Monday- Friday) and the weekend days (Saturday-Sunday). In 5+2 mode, press and hold the SET key for 3-5 seconds until the program icon (1) and MON TUE WED THU FRI are displayed with the ON icon and time icon flashing on the screen.
- Page 45 Programming mode 1...7 In this mode, you can program 2 heating intervals for each individual day of the week. In mode 1...7, press and hold the SET key for 3-5 seconds until the program icon (1) and MON are displayed while ON and the time icon flash on the screen.
- Page 46 Notes on programming • The preset start time is 00:00, the preset end time is 00:00, and the preset operating temperature is 15°C. • If you do not adjust the preset on and off time of 00:00, the programming settings will be invalid. •...
-
Page 47: Important Notes On Operation
IMPORTANT NOTES ON OPERATION • All settings must be reset after battery replacement. • If the buttons on the remote control no longer respond, replace the old batteries completely with new batteries. The remote control is powered by two 1.5 V AA batteries. Replace the batteries as soon as the battery symbol flashes, otherwise the remote control will no longer be able to control the heater. -
Page 48: Disposal Considerations
DISPOSAL CONSIDERATIONS If there is a legal regulation in your country regarding the disposal of electrical and electronic equipment, this symbol on the product or on the packaging indicates that this product must not be disposed of with household waste. Instead, it must be taken to a collection point for the recycling of electrical and electronic equipment. -
Page 49: Product Data Sheets
PRODUCT DATA SHEETS Model identifier(s): 10035321 Item Symbol Value Unit Item Unit Heat output Type of heat input, for electric storage local space heaters only Nominal heat output 0.35 manual heat charge control, with integrated thermostat Minimum heat output 0.35 manual heat charge control with room and/or (indicative) outdoor temperature feedback... - Page 50 Model identifier(s): 10035322 Item Symbol Value Unit Item Unit Heat output Type of heat input, for electric storage local space heaters only Nominal heat output manual heat charge control, with integrated thermostat Minimum heat output manual heat charge control with room and/or (indicative) outdoor temperature feedback Maximum continuous heat...
- Page 51 Model identifier(s): 10035323 Item Symbol Value Unit Item Unit Heat output Type of heat input, for electric storage local space heaters only Nominal heat output manual heat charge control, with integrated thermostat Minimum heat output manual heat charge control with room and/or (indicative) outdoor temperature feedback Maximum continuous heat...
- Page 53 Cher client, chère cliente, Toutes nos félicitations pour l’acquisition de ce nouvel appareil. Lisez attentivement les consignes suivantes et suivez-les pour éviter d'éventuels dommages. Nous ne saurions être tenus pour responsables des dommages dus au non-respect des consignes et à la mauvaise utilisation de l’appareil.
-
Page 54: Fiche Technique
FICHE TECHNIQUE Radiateur Numéro d'article Dimensions Puissance Tension Alimentation nominale 10035321 660 * 635 * 35 350 + 32 W 1,7 A 10035322 1085 * 635 * 35 600 + 36 W 3,0 A 230 V ~ 50 Hz 10035323 1285 * 635 * 35 800 + 40 W 3,6 A... -
Page 55: Consignes De Sécurité
CONSIGNES DE SÉCURITÉ Symboles d'avertissement MISE EN GARDE Cet avertissement indique un danger avec un degré de risque moyen qui, s'il n'est pas évité, peut entraîner des blessures graves voire la mort. MISE EN GARDE RELATIVE À LA TENSION ÉLECTRIQUE Ce symbole signale les dangers mortels et pour la santé... - Page 56 Consignes de sécurité Lisez toutes les consignes de sécurité et toutes les instructions d'utilisation. Le non-respect des avertissements et des instructions peut entraîner un choc électrique, un incendie et/ou des blessures graves. Conservez toutes les mises en garde et les consignes de sécurité pour pouvoir vous y référer ultérieurement •...
- Page 57 MISE EN GARDE Risque de brûlure ! Certaines parties de cet appareil peuvent être très chaudes et provoquer des brûlures. Il convient d'être particulièrement vigilant en présence d'enfants et de personnes handicapées. • Il est dangereux de placer l'appareil à proximité de rideaux ou d'autres matériaux inflammables.
- Page 58 • Lorsque vous choisissez une rallonge d'alimentation, tenez compte de la puissance absorbée par l'appareil, de la longueur du cordon et de l'usage prévu. Déroulez complètement les rallonges. Évitez les surcharges électriques. • Débranchez l'appareil de la prise de courant avant de procéder à des travaux de maintenance, d'entretien ou de réparation.
-
Page 59: Contenu De L'emballage
CONTENU DE L'EMBALLAGE 1 x radiateur 2 x suspension 1 x Thermostat & 4 x vis 1 x télécommande 4 x chevilles 1 x mode d'emploi... -
Page 60: Aperçu De L'appareil
APERÇU DE L'APPAREIL Face avant Dos de l'appareil Surface avant Encadrement LED Câble secteur Entrée secteur LED INSTALLATION Remarques importantes • Les travaux de montage doivent être effectués par un électricien professionnel ! • Les lignes d'entrée LED doivent être câblées à des interrupteurs libres d'interrompre les lignes sous tension ! •... - Page 61 Installation Percez quatre trous au plafond en respectant les distances A et B. Utilisez une mèche de diamètre approprié pour éviter que le panneau ne tombe ! Suspension au plafond Taille du panneau (mm) Distance entre les trous des vis (mm) 660 * 635 (ou similaire) A500*B100 mm...
- Page 62 Insérez d'abord le cadre arrière du panneau. Introduisez ensuite l'autre extrémité de la suspension de plafond de l'autre côté. Vue une fois le montage terminé...
-
Page 63: Description De L'ensemble Et Fonctions Générales
DESCRIPTION DE L'ENSEMBLE ET FONCTIONS GÉNÉRALES Chaque ensemble se compose de deux parties : • Une télécommande à affichage numérique dans laquelle sont logés l'électronique, les éléments de commande et la sonde de température ambiante intégrée. • Un récepteur de prise qui peut recevoir et décoder le signal de la télécommande. -
Page 64: Télécommande
TÉLÉCOMMANDE Symbole d'apprentissage Verrouillage parental Affichage du mode Icône de chauffage Capacité de la batterie Température ambiante Mode Marche / arrêt Température réglée Symbole de programme Date / jour de la semaine Date Verrouiller Choix du format Marche/arrêt d'affichage Haut Température favorite Réglage du mode (température FAV) -
Page 65: Récepteur De Prise
RÉCEPTEUR DE PRISE Interrupteur de désactivation en option Voyants lumineux Récepteur intégré Récepteur de prise... -
Page 66: Fonctionnement En Détail
FONCTIONNEMENT EN DÉTAIL Comment coupler le récepteur avec la télécommande Allumez l'appareil par le récepteur intégré ou la prise récepteur et appuyez sur le voyant pendant 3 secondes pour le faire clignoter. Appuyez ensuite simultanément sur les touches °C / °F et MODE pour coupler la télécommande et le récepteur jusqu'à... -
Page 67: Programmation De Périodes De Chauffage
Activer et désactiver le verrouillage des touches Maintenez la touche LOCK pendant 3 secondes jusqu'à ce qu'un symbole de verrouillage apparaisse sur l'écran de la télécommande. Toutes les touches sont désormais verrouillées. Pour supprimer le verrouillage des touches, appuyez à nouveau sur la touche LOCK et maintenez-la pendant 3 secondes jusqu'à ce que le symbole de verrouillage disparaisse de l'écran. - Page 68 Mode de programmation 5+2 ou 1...7 Appuyez simultanément sur les touches MODE et TIME pour sélectionner le mode de programmation 5+2 ou 1...7. Mode de programmation 5+2 Dans ce mode, vous pouvez programmer 4 intervalles de chauffage pour tous les jours de la semaine (lundi-vendredi) et du week-end (samedi-dimanche).
- Page 69 Mode de programmation 1...7 Dans ce mode, vous pouvez programmer 2 intervalles de chauffage pour chaque jour de la semaine. En mode 1...7, maintenez la touche SET pendant 3 à 5 secondes jusqu'à ce que l'icône du programme (1) et MON s'affichent, tandis que ON et l'icône de l'heure clignotent sur l'écran.
- Page 70 Remarques sur la programmation • L'heure de début par défaut est 00h00, l'heure de fin par défaut est 00h00 et la température de fonctionnement par défaut est de 15°C. • Si vous ne réglez pas l'heure d'activation/désactivation prédéfinie de 00:00, les paramètres de programmation seront invalides.
-
Page 71: Remarques Importantes Sur L'utilisation
REMARQUES IMPORTANTES SUR L'UTILISATION • Tous les paramètres doivent être réglés à nouveau après avoir changé la pile. • Si les touches de la télécommande ne répondent plus, remplacez complètement les anciennes piles par des piles neuves. Remarque : la télécommande fonctionne avec deux piles AA 1,5 V. Veuillez remplacer les piles dès que le voyant des piles clignote, sinon la télécommande ne pourra plus contrôler le chauffage. -
Page 72: Nettoyage Et Entretien
NETTOYAGE ET ENTRETIEN Remarque : Éteignez l'appareil et débranchez la fiche de la prise. Attendez que l'appareil refroidisse complètement avant de le nettoyer. • Utilisez un aspirateur pour nettoyer les fentes d'aération et la grille. • Enlevez la poussière sur les surfaces extérieures avec un chiffon humide (non mouillé). -
Page 73: Fiches De Données Produit
FICHES DE DONNÉES PRODUIT Référence(s) du modèle 10035321 Donnée Symbole Valeur Unité Donnée Unité Puissance thermique Uniquement pour les radiateurs électriques à accumulation : type de contrôle de l'apport de chaleur Puissance thermique 0,35 Contrôle manuel de l'apport de chaleur avec n.c. - Page 74 Référence(s) du modèle 10035322 Donnée Symbole Valeur Unité Donnée Unité Puissance thermique Uniquement pour les radiateurs électriques à accumulation : type de contrôle de l'apport de chaleur Puissance thermique Contrôle manuel de l'apport de chaleur avec n.c. nominale un thermostat intégré Puissance thermique Contrôle manuel de l'apport de chaleur avec n.c.
- Page 75 Référence(s) du modèle 10035323 Donnée Symbole Valeur Unité Donnée Unité Puissance thermique Uniquement pour les radiateurs électriques à accumulation : type de contrôle de l'apport de chaleur Puissance thermique Contrôle manuel de l'apport de chaleur avec n.c. nominale un thermostat intégré Puissance thermique Contrôle manuel de l'apport de chaleur avec n.c.
- Page 77 Gentile cliente, La ringraziamo per avere acquistato questo dispositivo. La preghiamo di leggere attentamente le seguenti indicazioni e di seguirle per prevenire eventuali danni. Non ci assumiamo alcuna responsabilità per danni scaturiti da una mancata osservanza delle avvertenze di sicurezza e da un uso improprio del dispositivo.
-
Page 78: Dati Tecnici
DATI TECNICI Stufa Numero articolo Dimensioni Potenza Tensione Alimentazione nominale 10035321 660 x 635 x 35 350 + 32 W 1,7 A 10035322 1085 x 635 x 35 600 + 36 W 3,0 A 230 V ~ 50 Hz 10035323 1285 x 635 x 35 800 + 40 W 3,6 A... -
Page 79: Scheda Informativa Del Prodotto
SCHEDA INFORMATIVA DEL PRODOTTO Contrassegno/i del modello Indicazione Simbolo Valore Unità Indicazione Unità Potenza termica Solo per dispositivi elettrici di accumulo di calore per locali singoli: tipo di regolazione dell'afflusso di calore Potenza termica nominale Controllo manuale dell'apporto termico con n.d. - Page 80 Contrassegno/i del modello Indicazione Simbolo Valore Unità Indicazione Unità Potenza termica Solo per dispositivi elettrici di accumulo di calore per locali singoli: tipo di regolazione dell'afflusso di calore Potenza termica nominale Controllo manuale dell'apporto termico con n.d. termostato integrato Potenza termica minima Controllo manuale dell'apporto termico con n.d.
- Page 81 Contrassegno/i del modello Indicazione Simbolo Valore Unità Indicazione Unità Potenza termica Solo per dispositivi elettrici di accumulo di calore per locali singoli: tipo di regolazione dell'afflusso di calore Potenza termica nominale Controllo manuale dell'apporto termico con n.d. termostato integrato Potenza termica minima Controllo manuale dell'apporto termico con n.d.
-
Page 82: Avvertenze Di Sicurezza
AVVERTENZE DI SICUREZZA Simboli di avvertimento AVVERTIMENTO Questa parola di segnalazione indica un pericolo con un livello medio di rischio che, se non evitato, può provocare lesioni gravi o morte. AVVERTIMENTO DI TENSIONE ELETTRICA Questo simbolo indica il pericolo per la vita e la salute delle persone a causa della tensione elettrica. - Page 83 Avvertenze di sicurezza Leggere tutte le avvertenze di sicurezza e le istruzioni per l'uso. Il mancato rispetto delle avvertenze e delle indicazioni può causare scosse elettriche, incendi e/o gravi lesioni. Conservare tutte le avvertenze di sicurezza e le istruzioni per future consultazioni.
- Page 84 AVVERTIMENTO Pericolo di ustioni! Alcuni componenti del dispositivo possono diventare estremamente caldi e causare ustioni. È necessario prestare particolare attenzione in presenza di bambini e persone inferme. • È pericoloso posizionare il dispositivo vicino a tende e altri materiali combustibili. •...
- Page 85 • Quando si scelgono le prolunghe del cavo di alimentazione, considerare il consumo energetico del dispositivo, la lunghezza del cavo e l'uso previsto. Srotolare completamente i cavi di prolunga. Evitare sovraccarichi elettrici. • Scollegare la spina dalla presa di corrente prima di eseguire lavori di manutenzione, cura o riparazione del dispositivo.
-
Page 86: Volume Di Consegna
VOLUME DI CONSEGNA 1 x elemento riscaldante 2 x ganci per la sospensione 1 x termostato & 1 x 4 x viti telecomando 4 x tasselli 1 x manuale d'uso... -
Page 87: Descrizione Del Dispositivo
DESCRIZIONE DEL DISPOSITIVO Lato anteriore Lato posteriore Superficie anteriore Bordo LED Cavo di alimentazione Ingresso di rete dei LED INSTALLAZIONE Note importanti • Le opere di installazione devono essere eseguite da un elettricista professionista! • I condotti d'ingresso dei LED devono essere cablati con interruttori in grado di interrompere senza impedimenti le linee che trasportano corrente! •... - Page 88 Installazione Realizzare quattro fori sul soffitto con la giusta distanza A e B. Usare un trapano con il diametro corretto in modo che il pannello non cada! Fissaggio in sospensione a soffitto Dimensione del pannello (mm) Distanza dei fori delle viti (mm) 660 x 635 (o simile) A500 x B100 mm 1085 x 635 (o simile)
- Page 89 Per prima cosa, spingere il telaio posteriore del pannello. Poi inserire l'altra estremità del supporto di sospensione a soffitto dall'altro lato. Vista a montaggio completato...
-
Page 90: Descrizione Del Set E Funzioni Generali
DESCRIZIONE DEL SET E FUNZIONI GENERALI Ogni set è composto da due parti: • Un telecomando con display digitale che ospita l'elettronica, gli elementi di controllo e il sensore di temperatura ambiente integrato. • Un ricevitore a presa di corrente che può ricevere e decodificare il segnale del telecomando. -
Page 91: Ricevitore Da Collegare Alla Presa Di Corrente
RICEVITORE DA COLLEGARE ALLA PRESA DI CORRENTE Interruttore ON/OFF per la modalità di accoppiamento e spia luminosa Nota: il tasto ON/OFF sul ricevitore è per la modalità di accoppiamento. Per accendere e spegnere la stufa, utilizzare il tasto ON/OFF sul telecomando. -
Page 92: Telecomando
TELECOMANDO Blocco di sicurezza per Icona di invio bambini Stufa Livello della batteria Temperatura ambiente Temperatura impostata Data Indicazione della modalità Blocco di sicurezza per bambini on/off Selezione del formato di Riscaldamento on/off visualizzazione Verso il basso Verso l'alto Temperatura preferita Impostazioni (temperatura FAV) Impostare data e ora... -
Page 93: Il Funzionamento In Dettaglio
IL FUNZIONAMENTO IN DETTAGLIO Messa in funzione Quando si usa la stufa per la prima volta, collegare prima il telecomando e il ricevitore a presa. • Per prima cosa, inserire la spina nella presa elettrica. • Tenere premuto il tasto ON/OFF sul ricevitore a presa per 3 secondi. •... - Page 94 Impostare la temperatura Premere VERSO IL BASSO o VERSO L'ALTO per impostare la temperatura da raggiungere. Se è stato impostato un timer settimanale, è possibile anche regolare la temperatura manualmente. Tuttavia, questa viene sovrascritta con la temperatura da raggiungere programmata all'inizio della fase di riscaldamento successiva.
- Page 95 Ora di avvio adattivo intelligente Se si seleziona la modalità SMART quando il timer settimanale è impostato, la stufa funziona indipendentemente dal timer preimpostato. Il telecomando calcola la differenza di temperatura tra la stanza e la temperatura da raggiungere 3 ore prima dell'ora di inizio programmata e decide quanto prima il riscaldamento deve essere acceso in modo che la temperatura sia raggiunta in tempo.
-
Page 96: Pulizia E Manutenzione
Note importanti sull'utilizzo • Un telecomando può essere collegato a diversi ricevitori allo stesso tempo e controllare diverse stufe. • Tutte le impostazioni devono essere eseguite di nuovo dopo la sostituzione o la rimozione della batteria. • Per utilizzare il timer settimanale, assicurarsi che la funzione TIMER sia stata attivata premendo a lungo il tasto MODE. -
Page 97: Avviso Di Smaltimento
AVVISO DI SMALTIMENTO Se nel vostro Paese sono vigenti regolamenti legislativi relativi allo smaltimento di dispositivi elettrici ed elettronici, questo simbolo sul prodotto o sull'imballaggio indica che non è consentito smaltire questo prodotto insieme ai rifiuti domestici. Il dispositivo deve invece essere portato in un centro di raccolta per il riciclaggio di dispositivi elettrici ed elettronici. - Page 99 Estimado cliente: Le felicitamos por la adquisición de este producto. Lea atentamente el siguiente manual y siga cuidadosamente las instrucciones de uso con el fin de evitar posibles daños. La empresa no se responsabiliza de los daños ocasionados por un uso indebido del producto o por haber desatendido las indicaciones de seguridad.
-
Page 100: Datos Técnicos
DATOS TÉCNICOS Calefacción Número del Dimensiones Potencia Tensión Suministro artículo nominal eléctrico 10035321 660 * 635 * 35 350 + 32 W 1,7 A 10035322 1085 * 635 * 35 600 + 36 W 3,0 A 230 V ~ 50 Hz 10035323 1285 * 635 * 35 800 + 40 W... -
Page 101: Ficha Técnica Del Producto
FICHA TÉCNICA DEL PRODUCTO Denominación del modelo Datos Símbolo Valor Unidad Datos Unidad Potencia calorífica Solo en calefactores eléctricos para habitaciones individuales: tipo de regulación del suministro de calor Potencia calorífica nominal Regulación manual del suministro calorífico n /A con termostato integrado Potencia calorífica mínima Regulación manual del suministro calorífico n /A... - Page 102 Denominación del modelo Datos Símbolo Valor Unidad Datos Unidad Potencia calorífica Solo en calefactores eléctricos para habitaciones individuales: tipo de regulación del suministro de calor Potencia calorífica nominal Regulación manual del suministro calorífico n /A con termostato integrado Potencia calorífica mínima Regulación manual del suministro calorífico n /A mín...
- Page 103 Denominación(es) del modelo Datos Símbolo Valor Unidad Datos Unidad Potencia calorífica Solo en calefactores eléctricos para habitaciones individuales: tipo de regulación del suministro de calor Potencia calorífica nominal Regulación manual del suministro calorífico n /A con termostato integrado Potencia calorífica mínima Regulación manual del suministro calorífico mín (valor de referencia)
-
Page 104: Indicaciones De Seguridad
INDICACIONES DE SEGURIDAD Símbolos de advertencia ADVERTENCIA Esta palabra de señalización indica un peligro con un nivel de riesgo medio que, si no se evita, puede provocar lesiones graves o la muerte. ADVERTENCIA DE TENSIÓN ELÉCTRICA Este símbolo indica peligro para la vida y la salud de las personas debido a la tensión eléctrica. - Page 105 Indicaciones de seguridad Lea todas las instrucciones de seguridad y todas las instrucciones de uso. El incumplimiento de las indicaciones de seguridad conlleva a riesgos de descarga eléctrica, incendio o lesiones personales graves. Conserve todas las advertencias e instrucciones de seguridad para futuras consultas •...
- Page 106 ADVERTENCIA ¡Peligro de quemaduras! Algunas partes del aparato se calientan mucho y pueden producir quemaduras. Tenga especial cuidado cuando haya niños y personas indefensas. • Es peligroso colocar el aparato cerca de cortinas y otros materiales combustibles. • Para evitar el riesgo de quemaduras, se debe tener especial cuidado cuando se utilice el calefactor en presencia de las siguientes personas: los bebés y los niños, las personas con piel sensible, los ancianos, los enfermos, las personas ebrias y las personas que toman pastillas para dormir.
- Page 107 • A la hora de seleccionar las extensiones de los cables de alimentación, tenga en cuenta el consumo de energía de la unidad, la longitud del cable y el uso previsto. Desenrolle completamente los cables de extensión. Evite las sobrecargas eléctricas. •...
-
Page 108: Contenido Del Envío
CONTENIDO DEL ENVÍO 1 x elemento calefactor 2 x suspensión 1 x termostato y 1 x mando a 4 x tornillo distancia 4 x taco (para tornillo) 1 x manual de instrucciones... -
Page 109: Vista General Del Aparato
VISTA GENERAL DEL APARATO Parte frontal Parte trasera Superficie frontal Borde LED Cable de alimentación Entrada de alimentación LED INSTALACIÓN Notas importantes • ¡Los trabajos de instalación deben ser realizados por un electricista profesional! • ¡Las líneas de entrada de LED deben conectarse a interruptores que estén libres para interrumpir las líneas activas! •... - Page 110 Instalación Perfore cuatro agujeros en el techo con la distancia correcta A y B. Utilice una broca con el diámetro adecuado para que el panel no se caiga Suspensión del techo Tamaño del panel (mm) Distancia entre los agujeros de los tornillos (mm) 660 * 635 (o similar) A500*B100 mm...
- Page 111 Deslice primero el marco posterior del panel. A continuación, inserte el otro extremo de la suspensión de techo en el otro lado. Vista tras el montaje completo...
-
Page 112: Descripción Del Conjunto Y Funciones Generales
DESCRIPCIÓN DEL CONJUNTO Y FUNCIONES GENERALES Cada juego consta de dos partes: • Un mando a distancia con pantalla digital que alberga la electrónica, los controles y el sensor de temperatura ambiente incorporado. • Un receptor de enchufe que puede recibir y descodificar la señal del mando a distancia. -
Page 113: Receptor De Enchufes
RECEPTOR DE ENCHUFES Interruptor ON/OFF del modo de emparejamiento y luz indicadora Nota: El botón ON/OFF del receptor es para el modo de emparejamiento. Para encender y apagar la estufa, utilice el botón ON/OFF del mando a distancia. -
Page 114: Mando A Distancia
MANDO A DISTANCIA Bloqueo infantil Icono de envío Calefacción Nivel de la batería Temperatura ambiente Temperatura configurada Fecha Señal del modo Bloqueo infantil ON/ Selección del formato Calentamiento ON/OFF de visualización Abajo Arriba Temperatura favorita Configuración (temperatura FAV) Selección de la hora Modo y el día de la semana actuales... -
Page 115: Operación En Detalle
OPERACIÓN EN DETALLE Puesta en marcha Cuando utilice la estufa por primera vez, deberá conectar primero el mando a distancia y el receptor de la toma. • Conecte el enchufe a la toma de corriente. • Mantenga pulsado el botón ON/OFF del receptor de la toma durante 3 segundos. - Page 116 Configurar la temperatura Pulse las teclas ARRIBA o ABAJO para ajustar la temperatura. Si ha programado un temporizador semanal, también puede ajustar la temperatura manualmente. Sin embargo, ésta se sobrescribe con la temperatura objetivo programada al inicio del siguiente periodo de calentamiento. Seleccionar el modo de calefacción Mantenga pulsado el botón MODE durante 3 segundos para seleccionar el modo SMART o el modo TIMER ON/OFF.
- Page 117 Hora de inicio inteligente y adaptable Si selecciona el modo SMART cuando se ajusta el temporizador semanal, la calefacción funciona independientemente del temporizador preestablecido. El mando a distancia mide la diferencia de temperatura entre la habitación y la temperatura objetivo 3 horas antes de la hora de inicio programada y decide cuánto antes se debe encender la calefacción para alcanzar la temperatura objetivo a tiempo.
-
Page 118: Limpieza Y Cuidado
Indicaciones importantes sobre el uso • Un mismo mando a distancia puede conectarse a varios receptores al mismo tiempo y así hacer funcionar varios calefactores. • Todos los ajustes deben realizarse de nuevo después de un cambio o retirada de pilas. •... -
Page 119: Indicaciones Sobre La Retirada Del Aparato
INDICACIONES SOBRE LA RETIRADA DEL APARATO Si en su país existe una disposición legal relativa a la eliminación de aparatos eléctricos y electrónicos, este símbolo estampado en el producto o en el embalaje advierte de que no debe eliminarse como residuo doméstico. - Page 121 Geachte klant, gefeliciteerd met de aanschaf van dit apparaat. Lees de hierna volgende handleiding aandachtig door en volg de instructies op om schade te voorkomen. Voor schade veroorzaakt door het niet in acht nemen van de instructies of door onjuist gebruik nemen wij geen verantwoordelijkheid. Scan de QR code voor toegang tot de meest actuele gebruikershandleiding en voor meer informatie over het artikel.
-
Page 122: Technische Gegevens
TECHNISCHE GEGEVENS Verwarming Artikelnummer Afmetingen Vermogen Nominale Stroomvoorziening spanning 10035321 660 * 635 * 35 350 + 32 W 1,7 A 10035322 1085 * 635 * 35 600 + 36 W 3,0 A 230 V~ 50 Hz 10035323 1285 * 635 * 35 800 + 40 W 3,6 A Afstandsbediening... -
Page 123: Veiligheidsinstructies
VEILIGHEIDSINSTRUCTIES Waarschuwingssymbolen LET OP Deze waarschuwing duidt op een gevaar dat, indien niet vermeden, tot zwaar letsel en zelfs de dood kan leiden. LET OP VOOR ELEKTRISCHE SPANNING Dit symbool duidt op een gevaar voor eigen leven en gezondheid van personen door elektrische spanning. Symbolen Betekenis Dit, op het apparaat aangebrachte, symbool wijst erop dat het... - Page 124 Veiligheidsinstructies Lees alle Dit symbool, dat zich op het apparaat bevindt, wijst. Het niet in acht nemen van de waarschuwingen en instructies kan leiden tot elektrische schokken, brand en/of ernstig persoonlijk letsel. Bewaar alle waarschuwingen en veiligheidsinstructies als naslagwerk. • Het niet in acht nemen van de waarschuwingen en instructies kan leiden tot elektrische schokken, brand en/of ernstig persoonlijk letsel.
- Page 125 WAARSCHUWING Verbrandingsgevaar! Sommige onderdelen van dit apparaat kunnen heel heet worden en brandwonden veroorzaken. Bijzondere oplettendheid is geboden wanneer kinderen, huisdieren en kwetsbare personen aanwezig zijn. • Het is gevaarlijk het apparaat in de nabijheid van gordijnen en andere brandbare materialen te plaatsen. •...
- Page 126 • Houdt bij de keuze van verlengsnoeren rekening met het verbruik van het apparaat, de kabellengte en het beoogde gebruik. Rol het verlengsnoer volledig af. Voorkomen elektrische overbelasting. • Haal de stekker uit het stopcontact voordat u overgaat tot reiniging, onderhoud of reparatie.
-
Page 127: Inhoud
INHOUD 1 x Verwarmingselement 2 x Ophangsysteem 1 x Thermostaat & 1 x 4 x Schroef Afstandsbediening 4 x Plug 1 x Gebruikershandleiding... -
Page 128: Overzicht Apparaat
OVERZICHT APPARAAT Voorkant Achterkant Voorkant Led rand Stroomkabel Led lichtnet INSTALLATIE Belangrijke informatie • De montagewerkzaamheden moeten door een professionele elektricien worden uitgevoerd. • Led toevoerleidingen moeten van schakelaars worden voorzien die de stroomleidingen ongehinderd kunnen onderbreken! • Koppel vóór montage en bedrading alle leidingen die naar de led toevoerleiding worden verbonden, los van het lichtnet. - Page 129 Installatie Boor vier gaten met de juiste afstand tussen A en B in het plafond. Gebruik een boormachine met de juiste doorsnede, zodat het paneel niet naar beneden valt! Plafondbevestiging Paneelformaat (mm) Afstand schroeven (mm) 660 * 635 (of gelijkwaardig) A500*B100 mm 1085 * 635 (of gelijkwaardig) A500*B300 mm...
- Page 130 Schuif eerst de achterste ramen van het paneel erin. Plaats dan het andere eind van de plafondbevestiging aan de andere kant. Zo ziet het er na voltooide montage uit.
-
Page 131: Beschrijving Set En Algemene Functies
BESCHRIJVING SET EN ALGEMENE FUNCTIES Elke set bestaat uit twee delen: • Een afstandsbediening met digitaal display, waarin de elektronica, de bediening en de ingebouwde kamertemperatuursensor zijn ondergebracht. • Een stopcontact ontvanger, die het signaal van de afstandsbediening kan ontvangen en decoderen. Functies afstandsbediening De afstandsbediening registreert met een ingebouwde sensor de kamertemperatuur en stuurt het signaal aan de stopcontact ontvanger, om de... -
Page 132: Afstandsbediening
AFSTANDSBEDIENING Kinderslot Zenden-symbool Verwarming Batterij-indicator Kamertemperatuur Ingestelde temperatuur Datum Modus weergave Kinderslot aan/uit Selectie van het Verwarming aan/uit weergaveformaat Omlaag Omhoog Voorkeurstemperatuur Instellingen (FAV temperatuur) Datum en tijd instellen Modus... -
Page 133: Stopcontact Ontvanger
STOPCONTACT ONTVANGER AAN/UIT schakelaar voor de koppelingsmodus en indicatielampje Tip! De AAN/UIT toets op de ontvanger is bestemd voor de koppelingsmodus. Voor het aan- en uitzetten van de verwarming gebruikt u de ON/OFF toets op de afstandsbediening. -
Page 134: Gebruik In Detail
GEBRUIK IN DETAIL Ingebruikname Wanneer u de verwarming voor de eerste keer gebruikt, dient u de afstandsbediening en de stopcontact ontvanger te verbinden. • Steek eerst de stopcontact ontvanger in het stopcontact. • Houdt de AAN/UIT toets op de stopcontact ontvanger 3 seconden lang ingedrukt. - Page 135 Temperatuur instellen Druk op OMHOOG of OMLAAG om de gewenste temperatuur in te stellen. Wanneer u een weektimer heeft ingesteld, kunt u de temperatuur eveneens handmatig aanpassen. De aanpassing wordt echter pas bij het begin van de nieuwe verwarmingsperiode actief. Warmtemodus kiezen Houdt de MODE toets 3 seconden lang ingedrukt om de SMART modus of de modus TIMER ON/OFF te selecteren.
- Page 136 Intelligente aangepaste starttijd Wanneer u bij een geprogrammeerde weektimer de SMART modus kiest, wordt de verwarming, onafhankelijk van de ingestelde timer, aangestuurd. De afstandsbediening meet 3 uur voor de geprogrammeerde starttijd het temperatuurverschil tussen kamer- en gewenste temperatuur en beslist hoeveel vroeger de verwarming ingeschakeld moet worden om de gewenste temperatuur op tijd te bereiken.
-
Page 137: Reiniging En Onderhoud
Belangrijke tips voor gebruik • Een afstandsbediening kan met meerdere ontvangers tegelijk worden verbonden en dus meerdere verwarmingen bedienen. • Alle instellingen moeten na het vervangen of verwijderen van de batterij opnieuw worden ingevoerd. • Om de weektimer te gebruiken zorgt u ervoor dat de TIMER functie op ON staat door lang op de MODE toets te drukken. -
Page 138: Instructies Voor Afvoer
INSTRUCTIES VOOR AFVOER Wanneer in uw land een wettelijke regeling geldt voor het afvoeren van elektrische en elektronische apparaten, wijst dit symbool, op het product zelf of op de verpakking, erop dat het betreffende product niet met het huisvuil afgevoerd mag worden. In plaats daarvan dient het naar een centraal depot voor het recyclen van elektrische en elektronische apparaten te worden gebracht Door het afval volgens de voorschriften weg te gooien beschermt u... -
Page 139: Productinformatieblad
PRODUCTINFORMATIEBLAD Identificatie model(len) 10035321 Aanduiding Symbool Waarde Eenheid Aanduiding Eenheid Warmtevermogen Alleen voor individuele elektrische accumulatiekachels: regulering van de warmtetoevoer Nominaal 0,35 Handmatige regeling van de warmtetoevoer warmtevermogen met ingebouwde thermostaat Minimaal 0,35 Handmatige regeling van de warmtetoevoer warmtevermogen met terugmelding van de kamer- en/ of (richtwaarde) externe temperatuur Maximaal continue... - Page 140 Identificatie 10035322 model(len) Aanduiding Symbool Waarde Eenheid Aanduiding Eenheid Warmtevermogen Alleen voor individuele elektrische accumulatiekachels: regulering van de warmtetoevoer Nominaal Handmatige regeling van de warmtetoevoer warmtevermogen met ingebouwde thermostaat Handmatige regeling van de warmtetoevoer Minimaal warmtevermogen met terugmelding van de kamer- en/ of (richtwaarde) externe temperatuur Maximaal continue...
- Page 141 Identificatie model(len) 10035323 Aanduiding Symbool Waarde Eenheid Aanduiding Eenheid Warmtevermogen Alleen voor individuele elektrische accumulatiekachels: regulering van de warmtetoevoer Nominaal warmtevermogen Handmatige regeling van de warmtetoevoer met ingebouwde thermostaat Minimaal warmtevermogen Handmatige regeling van de warmtetoevoer (richtwaarde) met terugmelding van de kamer- en/ of externe temperatuur Maximaal continue Elektronische regeling van de warmtetoevoer...
Need help?
Do you have a question about the MIDNIGHT SUN and is the answer not in the manual?
Questions and answers