Table of Contents
Advertisement
Available languages
Available languages
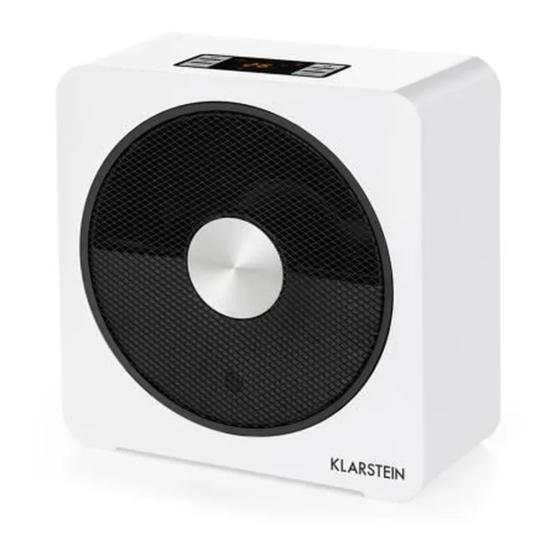
HeatPal Bloxx
Keramikheizung
Ceramic Heater
Radiador de cerámica
Chauffage en céramique
Stufa in ceramica
10032061
Hinweis: Dieses Produkt ist nur für gut isolierte Räume
oder für den gelegentlichen Gebrauch geeignet.
Note: This product is only suitable for well insulated
spaces or occasional use.
Advertencia: Este producto está indicado únicamente
en lugares abrigados o para una utilización punctual.
Remarque : Ce produit ne peut être utilisé que dans des
locaux bien isolés ou de manière occasionnelle.
Nota: Questo prodotto è adatto solo per spazi ben
isolati o uso occasionale.
Advertisement
Chapters
Table of Contents

Subscribe to Our Youtube Channel
Related Manuals for Klarstein HeatPal Bloxx


Summary of Contents for Klarstein HeatPal Bloxx
- Page 1 HeatPal Bloxx Hinweis: Dieses Produkt ist nur für gut isolierte Räume oder für den gelegentlichen Gebrauch geeignet. Note: This product is only suitable for well insulated spaces or occasional use. Keramikheizung Advertencia: Este producto está indicado únicamente Ceramic Heater en lugares abrigados o para una utilización punctual.
-
Page 3: Table Of Contents
Sehr geehrter Kunde, wir gratulieren Ihnen zum Erwerb Ihres Gerätes. Lesen Sie die folgenden Hinweise sorgfältig durch und befolgen Sie diese, um möglichen Schäden vorzubeugen. Für Schäden, die durch Missachtung der Hinweise und unsachgemäßen Gebrauch entstehen, übernehmen wir keine Haftung. Scannen Sie den folgenden QR-Code, um Zugriff auf die aktuellste Bedienungsanleitung und weitere Informationen rund um das Produkt zu erhalten:... -
Page 4: Sicherheitshinweise
SICHERHEITSHINWEISE • Kinder ab 8 Jahren, physisch und körperlich eingeschränkte Menschen dürfen das Gerät nur benutzen, wenn sie vorher von einer für Sie verantwortlichen Aufsichtsperson ausführlich mit den Funktionen und den Sicherheitsvorkehrungen vertraut gemacht wurden. • Halten Sie Kinder unter 3 Jahren von Gerät fern. VORSICHT Verbrennungsgefahr! Die Geräteteile können während dem Betrieb sehr heiß... -
Page 5: Produktdatenblatt
PRODUKTDATENBLATT Modellkennung(en) 10032061 Angabe Symbol Wert Einheit Angabe Einheit Wärmeleistung Nur bei elektrischen Speicher-Einzelraumheizgeräten: Art der Regelung der Wärmezufuhr Nennwärmeleistung Manuelle Regelung der Wärmezufuhr mit k.A. integriertem Thermostat Mindestwärmeleistung Manuelle Regelung der Wärmezufuhr k.A. (Richtwert) mit Rückmeldung der Raum- und/oder Außentemperatur Maximale kontinuierliche Elektronische Regelung der Wärmezufuhr... -
Page 6: Geräteübersicht
GERÄTEÜBERSICHT 1 Vordere Abdeckung 7 WIFI-Taste 2 Lüftungsgitter-Halterung 8 Fernbedienung 3 Lüftungsgitter 9 Hintere Abdeckung 4 Scheibe 10 Netzkabel 5 Bedienfeld und Display 1 1 Lufteinlass 6 Funktionstasten BEDIENFELD UND TASTENFUNKTIONEN Bedienfeld POWER-Taste EINSTELLUNGS-Taste PLUS-Taste HEIZUNGS-Taste MINUS-Taste ECO-Taste... -
Page 7: Inbetriebnahme Und Bedienung
Display POWER-Anzeige ECO-Anzeige WIFI-Anzeige Anzeige hohe Heizleistung Anzeige niedrige Heizleistung Fernbedienung INBETRIEBNAHME UND BEDIENUNG Inbetriebnahme Nehmen Sie das Gerät vorsichtig aus dem Karton und stellen Sie es auf einen ebenen Untergrund. - Page 8 Funktionen und Einstellungen Stecken Sie den Stecker in die Steckdose und schalten Sie das Gerät ein, indem Sie den Hauptschalter an der Rückseite des Geräts umlegen. Ein Piepton ertönt und das Gerät wechselt in den Standby-Modus. Drücken Sie im Standby-Modus auf die POWER-Taste, um das Gerät einzuschalten und die Funktionstasten zu aktivieren.
- Page 9 Drücken Sie im eingeschalteten Zustand auf die EINSTELLUNGS-Taste, um die Temperatur einzustellen. (a) Sobald Sie sich im Temperatureinstellungs-Modus befinden, blinkt sie Anzeige im Display. Drücken Sie auf [+] oder [-], um die Temperatur zwischen 5-32°C einzustellen. Mit jedem Tastendruck wird die Temperatur um 1 °C erhöht bzw.
-
Page 10: Wifi-Verbindung Einrichten
Für die drahtlose Bedienung der Heizung via WIFI benötigen Sie ein Smartphone und die zugehörige Software. Richten Sie die Verbindung wie folgt ein: Laden Sie sich die zugehörige App „HeatPal Bloxx“ auf iTunes oder im Google Play Store herunter und installieren Sie sie auf Ihrem Smartphone. - Page 11 Öffnen Sie die WLAN-Einstellungen Öffnen Sie die App „HeatPal Bloxx“. auf dem Smartphone und wählen Sie „Lian_00715f“ als Netzwerk.
- Page 12 Öffnen Sie die Einstellungen, indem Sie Tippen Sie zuerst auf die Flagge und die Taste drücken, auf die der Pfeil zeigt. wählen Sie die gewünschte Sprache aus. Tippen Sie dann auf linke Taste (2), um ins Hauptmenü zurückzukehren.
- Page 13 Fügen Sie nun das Gerät in der App Auf der nächsten Seite erhalten Sie hinzu indem Sie auf „Neues Gerät detaillierte Information zur WIFI- hinzufügen“ tippen. Verbindung. Drücken Sie auf „Weiter“.
- Page 14 Warten Sie 25 Sekunden, bis die App Sobald die Daten abgerufen wurden die Netzwerk-Informationen abgerufen werden alle Netzwerke in der hat. Umgebung angezeigt. Wählen Sie Ihr Netzwerk aus.
- Page 15 Geben Sie dann das zugehörige Die App verbindet sich nun mit Ihrem Passwort für Ihr Netzwerk ein und Netzwerk. Wenn Sie die Verbindung drücken Sie auf „Anfang“. unterbrechen möchten, drücken Sie auf „Stopp“. Hilfe bei Verbindungsproblemen • Sollte es zu Problemen bei der Verbindungsherstellung kommen, überprüfen Sie zuerst, ob Ihr sich Ihr Smartphone noch im Netzwerk „Lian_00715f“befindet.
- Page 16 Sobald die Verbindung mit Ihrem Wenn Sie das Gerät beim nächsten Netzwerk hergestellt ist, öffnet sich mal starten, öffnen Sie die App und die Bedienoberfläche. Eine genaue wählen Sie es aus der Geräteliste aus. Beschreibung der Bedienoberfläche Sobald Sie es antippen, öffnet sich die finden Sie auf der folgenden Seite.
- Page 17 Die App-Oberfl äche im Überblick Zum Bedienfeld wechseln Timer POWER-Taste Temperatur einstellen ECO-Modus Heizleistung einstellen Gerät löschen oder umbenennen (1) Gerät umbenennen: Wischen Sie den Stift nach links, um das Gerät und das Passwort umzubenennen. Voreingestellter Name: 10032061 Voreingestelltes Passwort: 123456 (2) Gerät löschen: Wischen Sie den Mülleimer nach links, um das verbundene Gerät zu löschen.
-
Page 18: Reinigung Und Pflege
REINIGUNG UND PFLEGE HINWEIS: Schalten Sie das Gerät aus und ziehen Sie vor der Wartung oder Reinigung den Stecker aus der Steckdose, um Stromschläge zu vermeiden. Lassen Sie das Gerät vor der Reinigung vollständig abkühlen. • Reinigen Sie die Geräteoberfläche mit einem weichen Lappen. Falls die Oberfläche schmutzig ist, reinigen Sie sie mit einem leicht feuchten Lappen und etwas Spülmittel. -
Page 19: Hinweise Zur Entsorgung
HINWEISE ZUR ENTSORGUNG Befindet sich die linke Abbildung (durchgestrichene Mülltonne auf Rädern) auf dem Produkt, gilt die Europäische Richtlinie 2012/19/EU. Diese Produkte dürfen nicht mit dem normalen Hausmüll entsorgt werden. Informieren Sie sich über die örtlichen Regelungen zur getrennten Sammlung elektrischer und elektronischer Gerätschaften. -
Page 21: Technical Data
Dear Customer, Congratulations on purchasing this equipment. Please read this manual carefully and take care of the following hints to avoid damages. Any failure caused by ignoring the items and cautions mentioned in the instruction manual is not covered by our warranty and any liability. Scan the QR code to get access to the latest user manual and other information about the product: CONTENT... -
Page 22: Safety Instructions
SAFETY INSTRUCTIONS • This appliance can be used by children aged from 8 years and above and persons with reduced physical, sensory or mental capabilities or lack of experience and knowledge if they have been given supervision or instruction concerning use of the appliance in a safe way and understand the hazards involved. -
Page 23: Product Data Sheet
PRODUCT DATA SHEET Model identifier(s): 10032061 Item Symbol Value Unit Item Unit Heat output Type of heat input, for electric storage local space heaters only Nominal heat output manual heat charge control, with integrated thermostat Minimum heat output manual heat charge control with room and/or (indicative) outdoor temperature feedback Maximum continuous heat... -
Page 24: Product Description
PRODUCT DESCRIPTION 1 Front shell 7 WIFI button 2 Iron net support 8 Remote control 3 Iron net 9 Back cover 4 CD stripe 10 Power cord 5 Display panel 1 1 Air inlet 6 Buttons CONTROL PANEL AND KEY FUNCTIONS Control Panel POWER key SETTING key... -
Page 25: Use And Operation
Display POWER indicator ECO indicator WIFI indicator High heating power indicator Low heating power indicator Remote Control USE AND OPERATION Getting Started Take out the machine from the package. Carefully put the machine on a stable floor at the correct side. - Page 26 Functions and Settings Check up and make sure the plug voltage is accord with the service voltage (220V-240V), then plug in. Put on the power switch at the back of the machine, enters standby mode after “Bi” sound, all functions and display are closed. Under standby model, all the pressing are invalid except POWER key.
- Page 27 In working condition, press SETTING key enter into temperature setting. (a) Temperature setting: Press SETTING key, the temperature indicator light [°C] will be on, the LED light in the display will flicker per 0.5 second. You can change the temperature by pressing [+] or [-] key. The range of the temperature is from 5~35°C, the temperature will be added or minus 1°C every press.
-
Page 28: Set Up Wifi Connection
For wireless operation of the heater via WIFI, you will need a smartphone and the associated software. Set up the connection as follows: Download the related ‘HeatPal Bloxx’ app on itunes or the google play store and install it on your smartphone. - Page 29 Open the WiFi settings on your Open the app ‘HeatPal Bloxx’. smartphone and select ‘Lian_00715f’ as the network.
- Page 30 Open the settings by pressing the key to First, tap the flag to select the desired which the arrow is pointing. language. Then tap the button on the left (2) to return to the main menu.
- Page 31 Now add the device to the app by On the next page, you will find detailed tapping ‘Add New Device’. information about the WIFI connection. Press ‘Next’.
- Page 32 Wait 25 seconds for the app to retrieve Once the data has been retrieved, all the network information. networks in the environment will be displayed. Select your network.
- Page 33 Next, enter the appropriate password for The app will now connect to your your network and press ‘Start’. network. If you wish to disconnect, press ‘Stop’. Help with connection problems • If there are problems with the connection, first check whether your smartphone is still on the network ‘Lian_00715f’.
- Page 34 As soon as the connection to your When you start the device the next time, network has been established, the open the app and select it from the user interface will open. A detailed device list. As soon as you touch it, the description of the user interface can be user interface will open.
- Page 35 The App Interface at a Glance Enter the Control Panel Timer POWER key Temperature setting ECO mode HI/LO power setting Delete or rename device (1) Rename device: swipe the stylus to the left to rename the device and password. Default Name: 10032061 Default Password: 123456 (2) To delete the device: swipe the dustbin to the left to delete the...
-
Page 36: Care And Cleaning
CARE AND CLEANING NOTE: Turn off the unit, and unplug it from the wall outlet before maintenance or cleaning to avoid electric shock. Make sure the heater has become cool. • Please use soft cloth to wipe the dust on the heater’s surface; If the surface is too dirty, it is better to wipe it with the water lower than 50 C mixed with neutral detergent •... -
Page 37: Hints On Disposal
HINTS ON DISPOSAL According to the European waste regulation 2012/19/ EU this symbol on the product or on its packaging indicates that this product may not be treated as household waste. Instead it should be taken to the appropriate collection point for the recycling of electrical and electronic equipment. - Page 39 Estimado cliente, Le felicitamos por la adquisición de este producto. Lea atentamente las siguientes instrucciones y sígalas para evitar posibles daños. No asumimos ninguna responsabilidad por los daños causados por el incumplimiento de las instrucciones y el uso inadecuado. Escanee el siguiente código QR para obtener acceso a la última guía del usuario y más información sobre el producto: ÍNDICE DE CONTENIDOS...
-
Page 40: Indicaciones De Seguridad
INDICACIONES DE SEGURIDAD • Los niños mayores de 8 años y las personas con discapacidades físicas o psíquicas solamente podrán utilizar el aparato si han sido previamente instruidas sobre su uso y conocen las indicaciones de seguridad. • Mantenga a los niños menores de 3 años alejados del aparato. AVISO Riesgo de quemaduras Las piezas del aparato pueden alcanzar temperaturas muy elevadas durante el funcionamiento. -
Page 41: Hoja De Datos Del Producto
HOJA DE DATOS DEL PRODUCTO Denominación del modelo 10032061 Dato Símbolo Valor Unidad Dato Unidad Potencia térmica Solo con disposítivos de acumulación de calor eléctricos para abastecimiento local: Tipo de regulación del abastecimiento de calor Potencia térmica nominal Regulación manual del abastecimiento de calor con termostato integrado: Potencia térmica mínima Regulación manual de abastecimiento de calor... -
Page 42: Descripción Del Aparato
DESCRIPCIÓN DEL APARATO 1 Cubierta delantera 7 Botón WIFI 2 Soporte de rejilla de ventilación 8 Mando a distancia 3 Rejilla de ventilación 9 Cubierta trasera 4 Disco 10 Cable de alimentación 5 Panel de control y display 1 1 Entrada de aire 6 Botones de función PANEL DE CONTROL Y FUNCIONES DE LOS BOTONES... -
Page 43: Puesta En Marcha Y Uso
Display Indicador POWER Indicador ECO Indicador WIFI Indicador nivel de calefacción alto Indicador nivel de calefacción bajo Mando a distancia PUESTA EN MARCHA Y USO Puesta en marcha Saque el aparato de su caja con cuidado y colóquelo sobre una superficie plana. - Page 44 Funciones y ajustes Conecte el enchufe a la toma de corriente y encienda el aparato presionando el interruptor principal situado en la parte trasera del radiador. Suena un pitido y el aparato entra en modo standby. Pulse el botón power en modo standby para encender el aparato y activar los botones de función.
- Page 45 Con el aparato encendido, pulse el botón AJUSTES para configurar la temperatura. (a) En cuanto se encuentre en el modo de configuración de la temperatura, el indicador parpadea en el display. Pulse [+] o [-] para ajustar la temperatura entre 5-32 °C.
-
Page 46: Establecer Conexión Wifi
Para controlar el calefactor a través de la red wifi, necesitará un teléfono inteligente y la aplicación correspondiente. Siga los pasos descritos a continuación: Descargue la aplicación «HeatPal Bloxx» en iTunes o Google Play Store e instálela en su teléfono inteligente. - Page 47 Abra los ajustes de wifi en su teléfono Abra la aplicación «HeatPal Bloxx». inteligente y seleccione «Lian_00715f» como red.
- Page 48 Abra «Ajustes» pulsando el botón al que Pulse primero en la bandera y elija el señala la flecha. idioma deseado. Después, pulse el botón izquierdo (2) para volver al «Menú principal».
- Page 49 Pulse «Agregue el nuevo dispositivo» En la siguiente página aparece una para añadir el aparato a la aplicación. información más detallada sobre la conexión wifi. Pulse «Siguiente».
- Page 50 Espere 25 segundos hasta que la Después de recabar los datos, se aplicación complete la información mostrarán todas las redes disponibles en sobre la red. su entorno. Seleccione su red.
- Page 51 Introduzca la contraseña para su red y La aplicación se conectará pulse «Empiezo». automáticamente a su red. Si desea detener la conexión, pulse en «Deténgase». Asistencia durante los problemas de conexión • Si encuentra problemas durante la conexión, compruebe que su teléfono inteligente esté...
- Page 52 Después de conectarse a su red, abra Cuando desee encender el aparato, la interfaz de usuario. En la siguiente abra la aplicación y seleccione el página encontrará la descripción aparato de la lista. A continuación, se detallada de la interfaz de usuario. abrirá...
- Page 53 Descripción de la interfaz de usuario Ir a panel de control Temporizador Botón POWER Ajustar la temperatura Modo ECO Ajustar la potencia de calefacción Eliminar o renombrar el aparato (1) Renombrar el aparato: elija el icono de un lápiz para cambiar el nombre del aparato y la contraseña Nombre preestablecido:...
-
Page 54: Limpieza Y Cuidado
LIMPIEZA Y CUIDADO ADVERTENCIA: Apague el aparato y desconecte el enchufe de la toma de corriente antes de realizar labores de limpieza o mantenimiento para evitar descargas eléctricas. Deje que el aparato se enfríe por completo antes de limpiarlo. • Limpie la superficie del aparato con un paño suave. Limpie la superficie del aparato con un paño suave y húmedo y un poco de lavavajillas si está... -
Page 55: Retirada Del Aparato
RETIRADA DEL APARATO INDICACIONES PARA LA RETIRADA DEL APARATO Si el aparato lleva adherida la ilustración de la izquierda (el contenedor de basura tachado) entonces rige la normativa europea, directiva 2012/19/UE. Este producto no debe arrojarse a un contenedor de basura común. Infórmese sobre las leyes territoriales que regulan la recogida separada de aparatos eléctricos y electrónicos. - Page 57 Chère cliente, cher client, Toutes nos félicitations pour l’acquisition de ce nouvel appareil. Veuillez lire attentivement et respecter les instructions de ce mode d’emploi afin d’éviter d’éventuels dommages. Nous ne saurions être tenus pour responsables des dommages dus au non-respect des consignes et à...
-
Page 58: Consignes De Sécurité
CONSIGNES DE SÉCURITÉ • Les enfants à partir de 8 ans ainsi que les personnes dont les capacités physiques, mentales ou sensorielles sont réduites peuvent utiliser l’appareil uniquement s’ils ont assimilé les consignes d’utilisation et de sécurité de l’appareil transmises par la personne responsable de leur sécurité. -
Page 59: Fiche De Données Produit
FICHE DE DONNÉES PRODUIT Référence (s) du produit 10032061 Donnée Symbole Valeur Unité Donnée Unité Puissance calorifique Uniquement pour les radiateurs électriques à accumulation : Type de régulation de l'apport de chaleur Puissance calorifique Régulation manuelle de l'apport de chaleur Sans nominale avec thermostat intégré... -
Page 60: Aperçu De L'appareil
APERÇU DE L’ APPAREIL 1 Cache avant 7 Touche WIFI 2 Support de la grille de ventilation 8 Télécommande 3 Grille de ventilation 9 Cache arrière 4 Disque 10 Câble secteur 5 Panneau de contrôle et écran 1 1 Entrée d’air 6 Touches de fonctions PANNEAU DE COMMANDE ET TOUCHES DE FONCTIONS... -
Page 61: Mise En Service Et Utilisation
Écran Témoin POWER Témoin ECO Témoin WIFI Témoin de forte puissance de chauffage Témoin de faible puissance de chauffage Télécommande MISE EN SERVICE ET UTILISATION Mise en service Retirez l’appareil de l’emballage avec précaution et posez-le sur un sol horizontal. - Page 62 Fonctions et réglages Branchez la fiche dans une prise et allumez l’appareil en basculant l’interrupteur principal au dos de l’appareil. Un bip retentit et l’appareil passe en mode veille. En mode veille, appuyez sur la touche POWER pour allumer l’appareil et activer les touches de fonction.
- Page 63 L’appareil étant allumé, appuyez sur la touche RÉGLAGES pour régler la température. (a) Dès que vous vous trouvez en mode de réglage de la température, le témoin clignote à l’écran. Appuyez sur [+] ou [-] pour régler la température entre 5 et 32°C.
-
Page 64: Configuration De La Connexion Wifi
Pour commander le radiateur sans fil par WIFI, il vous faut un smartphone et le logiciel associé. Etablissez la connexion de la façon suivante : Téléchargez l‘application associée „HeatPal Bloxx“ sur iTunes ou le Google Play Store et installez-la sur votre smartphone. - Page 65 Ouvrez les paramètres Wi-Fi sur le Ouvrez l'application "HeatPal Bloxx". smartphone et sélectionnez le réseau "Lian_00715f".
- Page 66 Ouvrez les paramètres en appuyant sur Appuyez d'abord sur le drapeau et la touche indiquée par la flèche. sélectionnez la langue souhaitée. Appuyez ensuite sur la touche de gauche (2) pour revenir au menu principal.
- Page 67 Ajoutez maintenant l'appareil à Sur la page suivante, vous trouverez des l'application en appuyant sur "Ajouter un informations détaillées sur la connexion nouveau périphérique". WIFI. Appuyez sur "Suivant".
- Page 68 Attendez 25 secondes pour que Une fois les données récupérées, tous l'application récupère les informations les réseaux accessibles sont affichés. du réseau. Sélectionnez votre réseau.
- Page 69 Entrez alors le mot de passe de votre L'application se connecte maintenant à réseau et appuyez sur "Début". votre réseau. Pour vous déconnecter, appuyez sur "Arrêtez". Aide en cas de problème de connexion • En cas de problème de connexion, vérifiez d‘abord si votre smartphone est toujours sur le réseau „Lian_00715f“.
- Page 70 Dès que la connexion à votre réseau Au prochain démarrage de l'appareil, est établie, l'interface utilisateur s'ouvre. ouvrez l'application et choisissez-le Vous trouverez une description détaillée dans la liste des appareils. Dès que vous de l'interface utilisateur à la page le sélectionnez, l'interface utilisateur suivante.
- Page 71 Aperçu de l‘interface utilisateur de l‘application Passer au panneau de commande Minuterie Touche POWER Réglage de la température Mode ECO Réglage de la puissance de chauffage Pour supprimer ou renommer un périphérique (1) Pour renommer le périphérique : balayez le stylet vers la gauche pour renommer le périphérique et modifi er le mot de passe.
-
Page 72: Nettoyage Et Entretien
NETTOYAGE ET ENTRETIEN REMARQUE : éteignez l’appareil et débranchez la fiche de la prise avant toute opération d’entretien ou de nettoyage, afin d’éviter les risques d’électrocution. Avant le nettoyage, laissez l’appareil refroidir complètement. • Nettoyez les surfaces externes de l’appareil avec un chiffon doux. Si les surfaces sont sales, nettoyez-les avec un chiffon doux et un peu de liquide vaisselle. -
Page 73: Conseils Pour Le Recyclage
CONSEILS POUR LE RECYCLAGE Le pictogramme ci-contre apposé sur le produit signifie que la directive européenne 2012/19/UE s‘applique (poubelle à roues barrée d’une croix). Ces produits ne peuvent être jetés dans les poubelles domestiques courantes. Renseignez- vous concernant les règles appliquées pour la collecte d’appareils électriques et électroniques. - Page 75 Gentile cliente, La ringraziamo per aver acquistato il dispositivo. La preghiamo di leggere attentamente le seguenti istruzioni per l’uso e di seguirle per evitare possibili danni. Non ci assumiamo alcuna responsabilità per danni scaturiti da una mancata osservazione delle avvertenze di sicurezza e da un uso improprio del dispositivo.
-
Page 76: Avvertenze Di Sicurezza
AVVERTENZE DI SICUREZZA • I bambini di età superiore a 8 anni e le persone con capacità fi siche, sensoriali o mentali ridotte non possono utilizzare il dispositivo, a meno che siano attentamente sorvegliate o ben istruite relativamente all’utilizzo del dispositivo stesso da parte di un supervisore responsabile della loro sicurezza. -
Page 77: Scheda Informativa Del Prodotto
SCHEDA INFORMATIVA DEL PRODOTTO Identificazione del modello (i) 10032061 Indicazione Simbolo Valore Unità Indicazione Unità Potenza termica Solo per gli apparecchi per il riscaldamento d'ambiente locale elettrici ad accumulo: Tipo di controllo dell´apporto termico Potenza termica nominale Controllo manuale del carico termico con N.D. -
Page 78: Descrizione Del Prodotto
DESCRIZIONE DEL PRODOTTO 1 Coperchio frontale 7 Tasto WIFI 2 Supporto griglia di areazione 8 Telecomando 3 Griglia di areazione 9 Coperchio posteriore 4 Disco 10 Cavo di alimentazione 5 Pannello dei comandi e display 1 1 Ingresso aria 6 Tasti funzione PANNELLO DEI COMANDI E TASTI FUNZIONE Pannello dei comandi Tasto POWER... -
Page 79: Messa In Funzione E Utilizzo
Display Spia POWER Spia ECO Spia WIFI Spia riscaldamento a potenza elevata Spia riscaldamento a bassa potenza Telecomando MESSA IN FUNZIONE E UTILIZZO Messa in funzione Rimuovere con cautela il dispositivo dalla confezione e posizionarlo su una superficie piana. - Page 80 Funzioni e impostazioni Inserire la spina nella presa e accendere il dispositivo tramite l‘interruttore principale sul retro. Viene emesso un segnale acustico e il dispositivo passa in modalità standby. In modalità standby, premere il tasto POWER per accendere il dispositivo e attivare i tasti funzione.
- Page 81 Premere il tasto SETTING con il dispositivo acceso per impostare la temperatura. (a) Non appena si è in modalità di impostazione della temperatura, la spia lampeggia sul display. Premere [+] o [-] per impostare una temperatura compresa tra 5 e 32°C. La temperatura aumenta o diminuisce di 1°C ad ogni pressione del tasto.
-
Page 82: Stabilire La Connessione Wifi
STABILIRE LA CONNESSIONE WIFI Per utilizzare la stufa tramite WIFI è necessario uno smartphone con il relativo software. Stabilire la connessione in questo modo: Scaricare la app “HeatPal Bloxx” da iTunes o da Google Play Store e installarla sullo smartphone. Apple Andoid Accendere il dispositivo. - Page 83 Aprire le impostazioni WLAN sullo Aprire la app “HeatPal Bloxx”. smartphone e selezionare la rete “Lian_00715f”.
- Page 84 Aprire le impostazioni premendo il tasto Per prima cosa, cliccare sulla bandiera indicato dalla freccia. (1) e selezionare la lingua desiderata. Premere poi il tasto a sinistra (2) per tornare al menu principale.
- Page 85 Aggiungere il dispositivo alla app Nella pagina seguente si ricevono premendo “Aggiungi un nuovo informazioni dettagliate sulla dispositivo”. connessione WIFI. Premere “Avanti”.
- Page 86 Attendere 25 secondi, fino a quando Non appena i dati sono stati caricati, la app ha caricato le informazioni sulla vengono mostrate tutte le reti nelle rete. vicinanze. Selezionare la rete desiderata.
- Page 87 Inserire la password della rete e premere La app si collega alla rete. Se si desidera “Inizio”. interrompere la connessione, premere “Stop”. Come procedere in caso di problemi di connessione • Se dovessero esserci problemi mentre si stabilisce la connessione, controllare per prima cosa se lo smartphone si trova ancora nella rete “Lian_00715f”.
- Page 88 Non appena è stata stabilita la Quando si attiva nuovamente il connessione alla rete, si apre l’interfaccia dispositivo, aprire la app e selezionarlo di controllo. Per una descrizione dalla lista dei dispositivi. L’interfaccia dettagliata dell’interfaccia di controllo, di controllo si apre appena ci si clicca vedere la pagina seguente.
- Page 89 Panoramica dell’interfaccia di controllo della app passare al pannello dei comandi Timer Tasto POWER impostare la temperatura Modalità ECO impostare la potenza riscaldante Cancellare o rinominare il dispositivo (1) Rinominare il dispositivo: far scorrere il simbolo della penna verso sinistra per cambiare password e nome del dispositivo.
-
Page 90: Pulizia E Manutenzione
PULIZIA E MANUTENZIONE NOTA: spegnere il dispositivo e staccare la spina dalla presa prima della pulizia. Lasciare raffreddare completamente il dispositivo prima di pulirlo. • Pulire le superfici del dispositivo con un panno morbido. Se le superfici sono sporche, pulirle con un panno leggermente umido e con un po‘ di detergente. •... -
Page 91: Smaltimento
SMALTIMENTO Se sul prodotto è presente la figura a sinistra (il cassonetto dei rifiuti mobile sbarrato), si applica la direttiva europea 2012/19/UE. Questi prodotti non possono essere smaltiti con i rifiuti normali. Informarsi sulle disposizioni vigenti in merito alla raccolta separata di dispositivi elettrici ed elettronici. Non smaltire i vecchi dispositivi con i rifiuti domestici.
Need help?
Do you have a question about the HeatPal Bloxx and is the answer not in the manual?
Questions and answers