Table of Contents
Advertisement
Quick Links
Advertisement
Table of Contents

Subscribe to Our Youtube Channel
Related Manuals for Itowa TINY


Summary of Contents for Itowa TINY
- Page 1 User Manual Remote Control TINY...
- Page 2 IT’S FORBIDDEN TO FULLY OR PARTIALLY REPRODUCE THIS MANUAL WITHOUT THE PRIOR WRITTEN AUTHORISATION FROM ITOWA. IN THE EVENT OF INFRINGEMENT, ITOWA RESERVES THE RIGHT TO TAKE THE ACTION IT DEEMS NECESSARY IN ACCORDANCE WITH THE CURRENT LAW. ITOWA RESERVES THE RIGHT TO MODIFY THIS MANUAL WITHOUT PRIOR NOTIFICATION.
-
Page 3: Table Of Contents
REMOTE CONTROL TINY USER MANUAL 1.1. GCFI VERSION 2. GENERAL TERMS FOR THE CORRECT AND SAFE USE OF THE RADIO REMOTE CONTROL 5 3. DESCRIPTION OF THE SET 3.1. REMOTE CONTROL 3.1.1. DESCRIPTION OF MANOEUVRES 3.1.2. LED INFORMATION 3.2. BATTERY CHARGER (only for equipment with battery) 3.2.1. -
Page 4: Gcfi Version
USER MANUAL 1. INTRODUCTION The manual you have in your hands is a guide for the correct use of the TINY remote control. This unit, together with the associated receiver, has been specifically designed for the wireless remote control of electromechanically operated machinery. -
Page 5: General Terms For The Correct And Safe Use Of The Radio Remote Control
REMOTE CONTROL TINY USER MANUAL 2. GENERAL TERMS FOR THE CORRECT AND SAFE USE OF THE RADIO REMOTE CONTROL The user, in order to have the maximum security in the handling of the remote control, must follow the rules described in this manual. -
Page 6: Description Of The Set
In the case of models incorporating the GCFI version, the transmitter becomes a transceiver in order to establish a two-way communication with the receiver. PUSHBUTTONS SWITCHES CONTROL TRANSCEIVER COMMUTATORS 3.1.1. DESCRIPTION OF MANOEUVRES The different configurations of the standard TINY CIEGO remote control model are shown below:... - Page 7 REMOTE CONTROL TINY USER MANUAL Fig. 3-1. Transmitter TINY CIEGO Optionally, this range of remote controls can incorporate the following functions: • Tandem / Trolley pre-selection: the transmitter can communicate with two different receivers. • Pitch & Catch: operating mode in which several transmitters (between 2 and 4) and 1 receiver are associated.
-
Page 8: Led Information
REMOTE CONTROL TINY USER MANUAL 3.1.2. LED INFORMATION The various operating and fault diagnosis statuses are indicated by 2 LEDs: Indication Radio function status. On indicates that the remote control is transmitting. GCFI versions: flashing rapidly or temporarily off indicates correct communication. -
Page 9: Battery Charging Process
REMOTE CONTROL TINY USER MANUAL 3.2.1. BATTERY CHARGING PROCESS The charger has two LED indicators, a power LED, which indicates that the device is connected to the power supply, and a charging LED, which indicates that charging is in progress. When the battery is inserted, the charger checks the charge level and, depending on this, it can perform two actions: •... -
Page 10: Technical Specifications
REMOTE CONTROL TINY USER MANUAL 4. TECHNICAL SPECIFICATIONS 4.1. TRANSMITTER Number of orders: Up to 48 digital Probability of wrong manoeuvre: ≥ 6 Hamming distance: Programmable code: Till 16777216 Order response time: <50 ms Active emergency time: <50 ms... -
Page 11: Battery Charger
REMOTE CONTROL TINY USER MANUAL 4.2. BATTERY CHARGER Power supply: 100 - 240 Vac Consumption: 3,6 VA Max. Power: 6 VA Charging intensity: 400 mA Charging time: 2,5 hours Protection: IP30 Charger dimensions: 90 x 105 x 65 mm Approx. -
Page 12: Installation And Start-Up
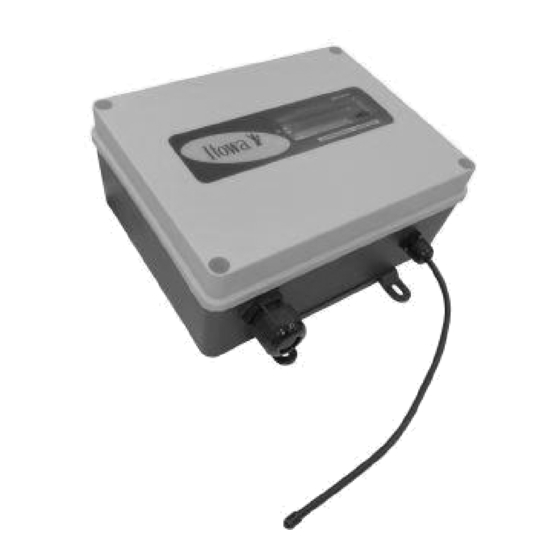
REMOTE CONTROL TINY USER MANUAL 5. INSTALLATION AND START-UP 5.1. INSTALLATION OF THE RECEIVER The details of the receiver installation can be found in the corresponding manual. It is indispensable that you consult the mentioned manual before starting up. -
Page 13: Maintenance Of The Remote Control
Generally, it’s advisable to carry out a complete revision of the water tightness devices that protect both the receiver and the transmitter from bad weather conditions every now and then. It’s advisable that this revision is done by a Technical Assistance Service accredited by ITOWA, since a bad waterproofing can cause irreparable damage to the equipment. -
Page 14: Charger Maintenance (Only For Equipment With Battery)
6.2. BATTERY CHARGING The batteries included in the ITOWA equipment have no memory effect, which means that they can be put into charge without being completely discharged. For this reason, and in order to extend their useful... -
Page 15: Display Of The Equipment Code
REMOTE CONTROL TINY USER MANUAL 7. DISPLAY OF THE EQUIPMENT CODE In case you need to know the equipment's code, the receiver allows you to display it. You can consult the manual of the receiver associated to this remote control to see the procedure that has to be followed, in... -
Page 16: Display Of The Working Channel
REMOTE CONTROL TINY USER MANUAL 8. DISPLAY OF THE WORKING CHANNEL It’s important to know the frequency channel in which you are working to make a frequency change or to detect possible interferences from other equipment on the communication between the transmitter and receiver. -
Page 17: Changing The Working Frequency (Not Valid For Gcfi Versions)
REMOTE CONTROL TINY USER MANUAL 9. CHANGING THE WORKING FREQUENCY (NOT VALID FOR GCFI VERSIONS) ATTENTION!: THE WORKING FREQUENCY SHOULD ONLY BE CARRIED OUT BY AUTHORISED STAFF. ATTENTION!: IF THE BATTERY HAS BEEN PUT ON STANDBY DUE TO LOW CHARGE, IT WILL NOT BE POSSIBLE TO SELECT A FREQUENCY CHANGE MODE OR CHANGE THE FREQUENCY. -
Page 18: Checking The Selected Channel
REMOTE CONTROL TINY USER MANUAL Receiver Tens Units If the frequency change is not successful, repeat the process until the receiver picks up a free channel. After changing the working channel, in order to continue operating with the radio control it’s necessary to unlock the emergency stop button (EMERGENCY STOP, reconnect STOP 1 and 2) and press the START button. -
Page 19: Channel Assignment Table
REMOTE CONTROL TINY USER MANUAL 9.3. CHANNEL ASSIGNMENT TABLE RADIO CHANNELS Country Scope Channels Frecuency Band Outside the European Union Channels from 1 to 70 433-434 MHz Frecuency Band Internal the European Union Channels from 41 to 70 433-434 MHz Frecuency Band... -
Page 20: Possible Incidents And Solutions
REMOTE CONTROL TINY USER MANUAL 10. POSSIBLE INCIDENTS AND SOLUTIONS INCIDENT STATUS SOLUTION Check that the battery is correctly inserted. If a key or switch is fitted, check that it is in the ON position. Neither of the transmitter indicators light up. - Page 21 REMOTE CONTROL TINY USER MANUAL INCIDENT STATUS SOLUTION Check fuses in receiver. If there is any melted, it must be replaced by a new one of the same value (see value in the technical specifications section of the receiver).
-
Page 22: Quick Display Guide
REMOTE CONTROL TINY USER MANUAL 11. QUICK DISPLAY GUIDE 11.1 SUMMARY OF FUNCTIONALITY OF THE REMOTE CONTROL LEDS ICON MEANING LED off. Slow blink. LED switch off with fast blinking on. LED switch on with fast blinking off. Fixed LED switched on. -
Page 23: Recyclability
REMOTE CONTROL TINY USER MANUAL 12 RECYCLABILITY INFORMATION FOR THE CORRECT MANAGEMENT OF ELECTRICAL WASTE AND ELECTRONIC EQUIPMENT (RAEE) At the end of the lifetime of the device, it must not be disposed together with general waste. It can be delivered, free of charge, to specific collection places, differentiated by local authorities, or distributors that provide this service. - Page 24 REMOTE CONTROL TINY USER MANUAL www.itowa.com SINDITO, S.L. Faraday, 159 08224 Terrassa (Barcelona) Spain Tel. +34 93 733 98 50...
Need help?
Do you have a question about the TINY and is the answer not in the manual?
Questions and answers