Advertisement
Quick Links
Pro1 Technologies
P.O. Box 3377
Springfield, MO 65804
Toll Free : 888-776-1427
Web: www.pro1iaq.com
Hours of Operation: M-F 9AM - 6PM Eastern
Table of Contents
Specifications
Installing Batteries
Mounting the Outdoor Sensor
Establishing Communication
Technician Setup and Warranty
The R250W requires the PROsync™ Wireless System
T755WHO thermostat.
Caution: Equipment
Damage Hazard
Do not operate the cooling
system if the outdoor
temperature is below 50˚F
(10˚ C) to prevent possible
compressor damage.
Una version en espanol de este
manual se puede descargar en la
pagina web de la compania.
Specifications
Operating Temperature ...................... -40˚F to 140˚F (-40˚C to 60˚ C)
Operating humidity............................... 90% non-condensing maximum
Dimensions of sensor .......................... 3.875"W x 3.875"H x 1.125"D
U.S. Registered Trademark. Patents pending
1
Copyright
2024 All Rights Reserved.
Mounting the Outdoor Sensor
Mounting the Outdoor Remote Sensor
To install remove the front cover and
place a screw in the left and right
screw holes.
IMPORTANT:
For best results, install on a
north-facing wall, sheltered by
a roof overhang or something
similar. Do not install in direct
sunlight.
Roof Shelter
Installation Tips
Before installing the outdoor sensor cover, proceed to page 4 to establish
a connection between the Equipment Module and the Outdoor Sensor.
3
R250W
* P M - R 2 5 0 W - I M - 2 4 0 3 *
PM-R250W-IM-2403
Page
1
2
3
4
5-7
North Facing Wall
Installing Batteries
To install 2 AA batteries remove the cover of the front housing and
insert batteries as show below.
After batteries are installed you will
see the light turn on for aroximately
10 seconds.
NOTE About Low Batteries:
When the outdoor battery needs to be changed the Main
Thermostat will flash OUTDOOR LO BAT as seen above.
When OUTDOOR LO BAT appears, user has ~3 months
to change the batteries.
Battery types
• Alkaline AA batteries will perform well in most
applications.
• Lithium AA primary cell batteries are recommended
for cold climates. See the battery manufacturer product
specifications for details.
• Rechargeable batteries are not recommended.
Rev. 2403
Connecting to the Main Thermostat
The Outdoor Sensor must be paired to a
PROsync Equipment Module
(sold seperately)
On the Equipment Module:
1. Press the PAIR button below the LED.
- The equipment module will begin
double blinking pink for 2 minutes
while it waits for a remote to join.
2. Press the button on the inside of the
outdoor remote sensor (A). The LED on
the outdoor remote sensor will begin to
flash pink (B).
3. When the equipment module receives
the pairing message , it will blink blue
repeatedly, then return to blinking
green.
4. The outdoor remote sensor will blink
green 10 times when it is paired, then
the LED on the outdoor sensor will turn
off.
Checking outdoor remote sensor
temperature:
After the outdoor remote sensor is
paired, on the indoor remote sensor
press the light button on the main
thermostat and WAIT 30 seconds.
The antenna icon(A) will flash 3 times,
and the outdoor temperature(B) will
appear at the top of the LCD screen.
To check the connection of the outdoor remote sensor to the equipment
module at the installation site, press the button on the outdoor sensor
(located under the front cover) and wait 15 seconds. The LED will blink
white while the outdoor sensor is checking the connection and then show
the following status indicators: BLUE - Good Connection - YELLOW -
Weak Connection - RED - No Connection / out of range.
Installing Batteries
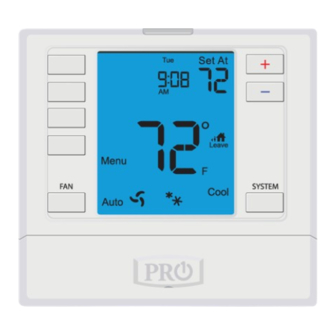
Set At
FAN ON
COOL ON
LEAVE
Establishing Communication
Set At
Zone
Zone
Menu
Menu
LEAVE
2
4
Advertisement

Related Manuals for Pro1 Technologies R250W


Summary of Contents for Pro1 Technologies R250W
- Page 1 Installing Batteries FAN ON Mounting the Outdoor Sensor COOL ON Establishing Communication Technician Setup and Warranty The R250W requires the PROsync™ Wireless System After batteries are installed you will T755WHO thermostat. LEAVE see the light turn on for aroximately 10 seconds.
- Page 2 Technician Setup Technician Setup These steps must be done from the MAIN Thermostat in your Tech Setup Steps LCD Will Show Adjustment Options Default PROsync System. This thermostat has a technician setup menu for This feature will bring in outside Use the buttons easy installer configuration.
Need help?
Do you have a question about the R250W and is the answer not in the manual?
Questions and answers