
Related Manuals for Digitus DS-55328


Summary of Contents for Digitus DS-55328
- Page 1 Receiver Unit for 4K Wireless HDMI KVM Extender Set (DS-55328) Quick Installation Guide DS-55329...
-
Page 2: Table Of Contents
Table of Contents 1. Safety Instructions ............... 3 2. Introduction ................. 3 3. Main Features ................4 4. Package Contents ................. 4 5. Product Specifications ..............4 6. Product Overview ................ 7 7. Connection Instruction ..............8 8. Installation Guide ................. 9 8.1 Connecting the transmitter ............ -
Page 3: Safety Instructions
2. Introduction With this additional receiver unit, you can extend the 4K Wireless HDMI® KVM Extender Set (DS-55328) for up to 4 receivers (output devices). Distribute your AV signals wirelessly on up to 4 screens. -
Page 4: Main Features
3. Main Features • Point-to-multipoint connection - 1x transmitter (source) + up to 4x receivers (output device) • Touch Screen Back Control - Supports touch panels (via USB connection on the receiver) • Wireless channel: IEEE 802.11.b/g/n/ac • Frequency band: Dual Band, 2,4/5G •... - Page 5 1080i/60fps, 720p/30fps, 720p60fps, 480p/60fps Transmission Resolution Maximum 4K30 Latency About 100 ms latency Audio Format Audio Channel 2 channels IR Extended Function Supports 38 KHz to 56 KHz wide frequency USB KVM Supports mouse/keyboard/touch panel back control Wireless Standard IEEE 802.11b/g/n/ac, 2.4G/5GHz, 2T2R Platform Supported Any devices that support HDMI port...
- Page 6 I/O Ports 1x HDMI® out 2.0 1x USB-C™ 1x IR 2x USB 1x Power Button 1x Reset Button 2x blue LED Power Supply DC 5V/2A Power Consumption About 5W Dimensions 154*77.5*21 mm Weight 330 g Operating Temperature 0 °C to +40 °C Storage Temperature -10 °C to +60 °C Operating Humidity...
-
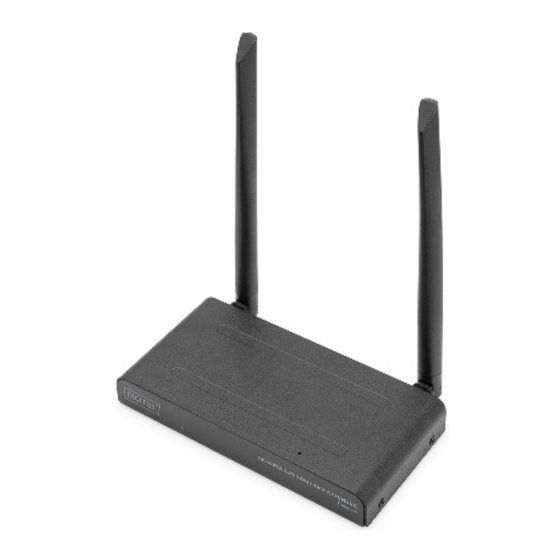
Page 7: Product Overview
6. Product Overview 1. HDMI® out: Connect with display 2. USB: Connect with mouse and keyboard for USB KVM function, you can also connect with touch panel USB port for touch panel back control 3. Reset: Reset to factory 4. USB-C™: Connect with 5V/2A power adapter 5. -
Page 8: Connection Instruction
7. Connection Instruction A standard wireless HDMI® extender kit includes one transmitter and one receiver, which are paired before shipment. Normally you don’t need to pair them again. However, if you buy additional receiver, you need to follow the instruction below to pair the new receiver with the transmitter. 1) Power on transmitter. -
Page 9: Installation Guide
8. Installation Guide 8.1 Connecting the transmitter The transmitter sends the HD video signal wirelessly to the receiver in another room. Therefore, place the transmitter near your HDMI® source (for example: set top box, Blu-ray player, Media Player, Media Center PC/laptop). 1. -
Page 10: Connecting The Receiver
LED indicator of TX Description TX system is booting on Blue Connected Purple No video in 8.2 Connecting the receiver Connect the power adapter to the connector marked "5V" and insert the plug into the wall socket. Place the receiver in the room (bedroom, study, or other room) where you want to connect the second TV or projector. -
Page 11: Two Streaming Modes
8.3 Two streaming modes 8.3.1 One TX to one RX mode Normally, when you connect TX and RX by following above step, the TX and RX will connect automatically. -
Page 12: One Tx To Multiple Rx Mode
8.3.2 One TX to multiple RX mode The 4K Wireless HDMI® KVM Extender Set also supports multicast function, which means video transmission from one transmitter is streamed to a group of receivers simultaneously. One transmitter can support up to 4 receivers. If you buy a new receiver, after power on the receiver, the transmitter will recognize and stream the video to the second receiver automatically. -
Page 13: Connecting Infrared Return
8.4 Connecting infrared return The 4K Wireless HDMI® KVM Extender Set has a Built in “infrared return" that enables continued operation of the connected HDMI® sources from another room. For example, operate your HDMI® source downstairs from your bedroom (location of second TV). The IR cable receives the commands sent by the IR receiver and forward it to your connected HDMI®... -
Page 14: Testing The Ir Return Function
shining a torch on the front panel, searching for the IR sensor window. Please experiment with correct placement before final attachment of the IR LED. Please note! The adhesive strip may cause discoloration on certain surfaces or leave adhesive residues after removal. 8.5 Testing the IR return function Once you have connected the IR cable according to the above description, it is recommended to test the function first. -
Page 15: Connecting The Usb Extension
8.6 Connecting the USB extension In addition to an infrared return feature, the 4K Wireless HDMI® KVM Extender Set also features a built-in USB extension function. This helps you to continue to operate connected HDMI® sources, such as a Media Center PC or laptop, from another room, using a mouse and/or keyboard. -
Page 16: Testing The Usb Extension Function
8.7 Testing the USB extension function Once you have connected the Micro USB cable and your mouse/keyboard according to the above description, it is recommended to test the feature first. 1. Take your mouse/keyboard and use one of the functions. 2. - Page 17 If the transmitter and receiver still no connection, please follow the below step for pairing. 1) Power on the transmitter. 2) Power on the receiver till it’s on the main screen. 3) Press the receiver’s reset button and hold for 5 seconds till the LED is flashing fast.
- Page 18 Q4. The IR blaster doesn’t work. 1) Make sure to use the original remote control of the video source. 2) Please stick the IR emitter probe in the surface of IR window of the source device, if you are not sure the correct position of IR window of source device, 3) please refer to the manual of source device.
- Page 19 radio or television reception, which can be determined by turning the equipment off and on, the user is encouraged to try to correct the interference by one or more of the following measures: - Reorient or relocate the receiving antenna. - Increase the separation between the equipment and receiver.
- Page 20 Disclaimer The terms HDMI® and HDMI® High-Definition Multimedia interface, and the HDMI® Logo are trademarks or registered trademarks of HDMI® Licensing LLC in the United States and other countries. Hereby ASSMANN Electronic GmbH declares that the Declaration of Conformity is part of the shipping content. If the Declaration of Conformity is missing, you can request it by post under the below mentioned manufacturer address.
Need help?
Do you have a question about the DS-55328 and is the answer not in the manual?
Questions and answers