Advertisement
Power Reclining Loveseat with Power Headrest and Lumbar
IMPORTANT NOTE
Read these instructions carefully, and familiarize yourself
with each procedure before assembling the furniture.
Check that you have all the component parts, and
familiarize yourself with each part before proceeding.
Take all the fittings out of the plastic bag and separate
them into groups. Ensure you have enough space to lay
out all the parts before assembly. To prevent damage to the
parts, we recommend that you assemble the unit on a soft,
level surface.
Part List
A. Back Cushion
2 pieces
B. Seat Cushion
1 piece
Assembly Instructions
STEP 1
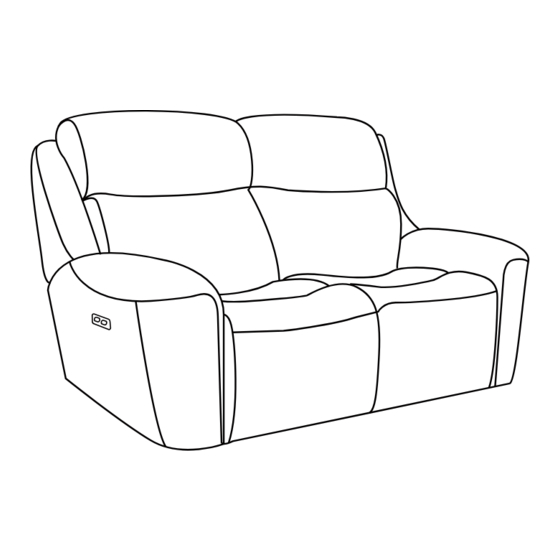
Detach the transformer from the back of the Seat (B). (See Figure 1.)
Figure 1
A
A
B
Advertisement
Table of Contents

Related Manuals for FLEXSTEEL Power Reclining Loveseat with Power Headrest and Lumbar


Summary of Contents for FLEXSTEEL Power Reclining Loveseat with Power Headrest and Lumbar
- Page 1 Power Reclining Loveseat with Power Headrest and Lumbar IMPORTANT NOTE Read these instructions carefully, and familiarize yourself with each procedure before assembling the furniture. Check that you have all the component parts, and familiarize yourself with each part before proceeding.
- Page 2 Assembly Instructions STEP 2 Attach the Backs (A) to the Seat (B). Ensure the latches fit well. (See Figure 2.) Figure 2 STEP 3 Flip up the back flaps, and remove the headrest and lumbar cables from the Backs (A). Plug the Lumbar and Headrest connecters (if applicable).
Need help?
Do you have a question about the Power Reclining Loveseat with Power Headrest and Lumbar and is the answer not in the manual?
Questions and answers
Can I use battery packs for the 1043 Linden loveseat?
Yes, the FLEXSTEEL Power Reclining Loveseat with Power Headrest and Lumbar includes a built-in battery backup system that activates during a power failure.
This answer is automatically generated
trying to move power reclining love seat through standard door. How do i take back cushions off to move through door?