
Related Manuals for GreenWorks CS40L410


Summary of Contents for GreenWorks CS40L410
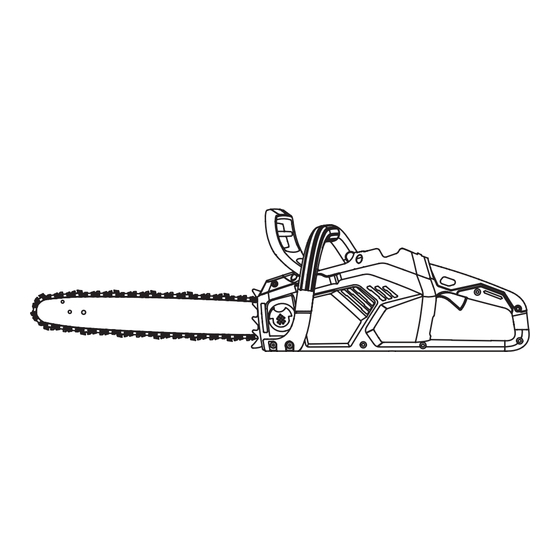
- Page 1 40V 16’’ BRUSHLESS CHAINSAW CS40L410 Owner’s Manual TOLL-FREE HELPLINE: 1-888-90WORKS (888.909.6757) www.GreenWorksTools.com Read all safety rules and instructions carefully before operating this tool.
-
Page 2: Table Of Contents
CONTENTS Contents ..........................2 Product Specifications ......................2 Safety Information ....................... 3 Symbols ..........................8 Know Your Chainsaw ......................10 Assembly ...........................11 Operation ........................... 15 Maintenance ........................24 Environmentally Safe Battery Disposal ................32 Troubleshooting ........................ 33 Warranty ..........................35 Exploded View ........................ -
Page 3: Safety Information
SAFETY INFORMATION GENERAL POWER TOOL SAFETY WARNINGS W A R N I N G Read and understand all instructions before using this product. Failure to follow all instructions listed below may result in electric shock, fire, and/or serious personal injury. Save all warnings and instructions for future reference. - Page 4 SAFETY INFORMATION • Remove any adjusting key or wrench before turning the power tool on. A wrench or a key left attached to a rotating part of the power tool may result in personal injury. • Do not overreach. Keep proper footing and balance at all times. This enables better control of the power tool in unexpected situations.
- Page 5 SAFETY INFORMATION • Have your power tool serviced by a qualified repair person using only identical replacement parts. This will ensure that the safety of the power tool is maintained. CHAINSAW SAFETY WARNINGS • Keep all parts of the body away from the saw chain when the chainsaw is operating. Before you start the chainsaw, make sure the saw chain is not contacting anything.
- Page 6 SAFETY INFORMATION W A R N I N G (PROPOSITION 65) This product contains a chemical known to the state of California to cause cancer, birth defects or other reproductive harm. Some dust created by power sanding, sawing, grinding, drilling and other construction activities contains chemicals known to cause cancer, birth defects or other reproductive harm.
- Page 7 SAFETY INFORMATION W A R N I N G Kickback may occur when the moving chain contacts an object at the upper portion of the tip of the guide bar or when the wood closes in and pinches the saw chain in the cut. Contact at the upper portion of the tip of the guide bar can cause the chain to dig into the object and stop the chain for an instant.
-
Page 8: Symbols
SYMBOLS Some of the following symbols may be used on this product. Please study them and learn their meaning. Proper interpretation of these symbols will allow you to operate the product better and safer. SYMBOLS DESIGNATION EXPLANATION Volts Voltage Amperes Current Hertz Frequency (cycles per second) - Page 9 SYMBOLS The following signal words and meanings are intended to explain the levels of risk associated with this product. SYMBOL SIGNAL MEANING DANGER Indicates an imminently hazardous situation, which, if not avoided, will result in death or serious injury. WARNING Indicates a potentially hazardous situation, which, if not avoided, could result in death or serious injury.
-
Page 10: Know Your Chainsaw
KNOW YOUR CHAIN SAW KNOW YOUR CHAIN SAW The safe use of this product requires an understanding of the information on the product and in this operator’s manual as well as a knowledge of the project you are attempting. Before use of this product, familiarize yourself with all operating features and safety rules. -
Page 11: Assembly
ASSEMBLY Before beginning to operate this product, make sure all parts are present. Compare parts with package contents list. If any part is missing or damaged, do not attempt to operate the product. UNPACKING This product has been shipped completely assembled. •... - Page 12 ASSEMBLY W A R N I N G If any parts are damaged or missing, do not operate this product until the parts are replaced. Using a product with damaged or missing parts could result in serious personal injury. W A R N I N G Do not attempt to modify this product or create accessories not recommended for use with this product.
- Page 13 ASSEMBLY NOTE: Chainsaw comes from the factory with no bar and chain oil added. The level should also be checked after every 20 minutes of use and refilled as needed. NOTE: • Do not use dirty, used or otherwise contaminated oils. Damage may occur to the bar or chain.
- Page 14 ASSEMBLY TO REMOVE THE BATTERY: 1. Press the battery release button on the battery. 2. Grasp the chainsaw firmly and pull the battery out of the handle. I M P O R T A N T The battery may not be charged when it is purchased. Before using the chain saw for the first time, place the battery in the battery charger and charge it fully.
-
Page 15: Operation
OPERATION STARTING AND STOPPING THE CHAINSAW A. Starting Chainsaw: • Make sure chain tension is at desired setting. Refer to adjusting the chain tension in the Care and Maintenance section of this manual. • Make sure the bar nuts are tight. •... - Page 16 OPERATION PREPARING FOR CUTTING Proper grip on handles See General Safety Rules for appropriate safety equipment. • Wear non-slip gloves for maximum grip and protection. • Hold the saw firmly with both hands. Always keep your left hand on the front handle and your right hand on the rear handle so that your body is to the left of the chain line.
- Page 17 OPERATION PROPER CUTTING STANCE • Balance your weight with both feet on solid ground. • Keep left arm with elbow locked in a “straight arm” position to withstand any kickback force • Keep your body to the left of the chain line. •...
- Page 18 OPERATION REMOVING BUTTRESS ROOTS A buttress root is a large root extending from the trunk of the tree above the ground. Remove large buttress roots prior to felling. Make the horizontal cut into the buttress first, followed by the vertical cut. Remove the resulting loose section from the work area. Follow the correct tree felling procedure as stated in Proper Procedure For Tree Felling after you have removed the large buttress roots.
- Page 19 OPERATION • Felling Backcut. As the felling cut gets close to the hinge, the tree should begin to fall. If there is any chance the tree may not fall in the desired direction or it may rock back and bind the saw chain, stop cutting before the felling cut is complete and use wedges of wood, plastic or aluminum to open the cut and drop the tree along its desired line of fall.
- Page 20 OPERATION BUCKING Bucking is the term used for cutting a fallen tree to the desired log length. • Always make sure your footing is secure and your weight is distributed evenly on both feet • Cut only one log at a time. •...
- Page 21 OPERATION BUCKING LOGS UNDER STRESS When the log is supported on one end, cut 1/3 the diameter from the underside. Then make the finished cut by overbucking to meet the first cut. When the log is supported on both ends, cut 1/3 of the diameter from the top overback.
- Page 22 OPERATION LIMBING Limbing is removing branches from a fallen tree. • Work slowly, keeping both hands on the chain saw with a firm grip. Always make sure your footing is secure and your weight is distributed evenly on both feet. •...
- Page 23 OPERATION When bucking on a slope always stand on the uphill side of the log. when cutting through to maintain complete control release the cutting pressure near the end of the cut without relaxing your grip on the chainsaw handle. Don’t let the chain contact the ground. After completing the cut wait for the saw chain to stop before you move the chainsaw.
-
Page 24: Maintenance
MAINTENANCE GENERAL MAINTENANCE Avoid using solvents when cleaning plastic parts. Most plastics are susceptible to damage from various types of commercial solvents and may be damaged by their use. Use clean cloths to remove dirt, dust, lubricant, grease, etc., firmly to maintain control. •... - Page 25 MAINTENANCE REPLACING THE GUIDE BAR AND CHAIN • Remove the battery from the chain saw. • Remove the two chain cover lock nuts from the chain cover by rotating them counterclockwise with the wrench. • Remove the chain cover from the mounting surface.
- Page 26 MAINTENANCE • Lift the tip of the guide bar up to check for sag. • Release the tip of the guide bar and turn the chain adjustment screw 1/2 turn clockwise. Repeat this process until sag does not exist. • Hold the tip of the guide bar up and tighten the chain cover lock nuts by turning them with the wrench.
- Page 27 MAINTENANCE QUICK REFERENCE OF CHAIN & BAR ASSEMBLY 1. Unscrew the bar nuts from the bar 1. Unscrew the bar nuts from the bar 2. Then loosen the adjustment screw 2 2. Then loosen the adjustment screw 2 3. The bar and chain can now be 3.
- Page 28 MAINTENANCE CHAIN MAINTENANCE Use only a low-kickback chain on this saw. This fast-cutting chain provides kickback reduction when properly maintained. For smooth and fast cutting, maintain the chain properly. The chain requires sharpening when the wood chips are small and powdery, the chain must be forced through the wood during cutting, or the chain cuts to one side.
- Page 29 MAINTENANCE SHARPENING THE CUTTERS • Be careful to file all cutters to the specified angles and to the same length, as fast cutting can be obtained only when all cutters are uniform. • Tension the chain prior to sharpening. • Use a 5/32 in.
- Page 30 MAINTENANCE TOP PLATE FILING ANGLE • CORRECT 30° – file holders are marked with guide marks to align file properly to produce correct top plate angle. • LESS THAN 30° – for cross cutting. • MORE THAN 30° – feathered edge dulls quickly. Top Place Filling Angle Side Plate Filling Angle Correct...
- Page 31 MAINTENANCE SIDE PLATE ANGLE • Maintain the depth gauge at a clearance of 1/32 in. (0.6 mm). Use a depth gauge tool for checking the depth gauge clearances. • Every time the chain is filed, check the depth gauge clearance. •...
-
Page 32: Environmentally Safe Battery Disposal
ENVIRONMENTALLY SAFE BATTERY DISPOSAL The batteries used in this chainsaw's battery pack contain the following toxic and corrosive mate- rial: LITHIUM-ION. W A R N I N G Toxic materials must be disposed of in a specific manner in order to prevent contamination of the environment. -
Page 33: Troubleshooting
TROUBLESHOOTING PROBLEM POSSIBLE CAUSE SOLUTION Bar and saw chain Check saw chain tension for Tension saw chain. running hot and overtightened condition. smoking. No oil in the oil tank. Refill oil into the oil tank. The discharge port is blocked by Refer to the manual to remove the bar and debris. - Page 34 TROUBLESHOOTING Motor running, but Motor stops after about 3 Recharge the battery. cutting abnormal. seconds. If the unit cuts off and beeps Release the trigger and restart the during a cut, it went into chainsaw. Let the chainsaw do the work protection mode.
-
Page 35: Warranty
® for a period of four (4) years against defects in materials, parts or workmanship. Greenworks at its own discretion will repair or replace any and all parts found to be defective, through normal use, free of charge to the customer. -
Page 36: Exploded View
EXPLODED VIEW... -
Page 37: Part List
Mounting surface 339012028A Chain Sprocket 329012028 Tension Spring 329042028 Connecting piece 339022028 Strap 329032028 Knee Link 329072028 Flat Spring Greenworks Tools P.O. Box 1238 Mooresville, NC 28115 TOLL-FREE HELPLINE: 1-888-90WORKS (888.909.6757) Rev: 00 (12-10-17) Printed in China on 100% Recycled Paper...
Need help?
Do you have a question about the CS40L410 and is the answer not in the manual?
Questions and answers