Advertisement
Quick Links
Advertisement

Related Manuals for Outland Living Firebowl 893


Summary of Contents for Outland Living Firebowl 893
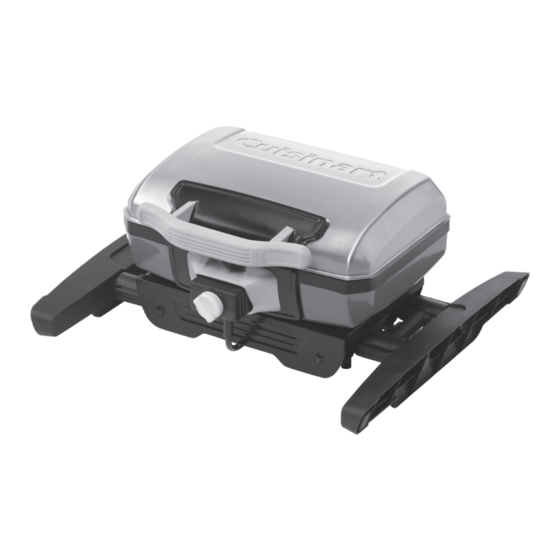
- Page 1 Cuisinart CGG-180T Petit Gourmet Portable Tabletop Propane Gas Grill, Red 17.6 x 18.6 x 11.8-Inch User Manual of Product 2: Outland Living Firebowl 893 Deluxe Outdoor Portable Propane Gas Fire Pit with Cover & Carry Kit, 19-Inch Diameter 58,000 BTU, Black...
-
Page 2: Important Safeguards
O u t d o o r G r i l l i n g P r o d u c t s PORTABLE ELECTRIC GRILL MODEL: CEG-980 OWNER’S GUIDE You must read this Owner’s Guide This grill is intended for outdoor household use only. -
Page 3: Table Of Contents
1. IMPORTANT SAFEGUARDSns Table of Contents DANGER Failure to follow the Dangers, Warnings and Cautions contained in this Owner’s Manual may result in serious bodily injury or death, or in fire or an explosion causing damage to property. 1. Important Safeguards WARNINGS: WARNING: Do not use charcoal or other combustible fuels in this grill. -
Page 4: Illustrated Parts List
2. Illustrated Parts List 3. Exploded Diagram Lid & Firebox 1 pc Left Foot 1 pc Right Foot 1 pc Cooking Grate 1 pc Probe Decoration Panel Decoration Panel Lid Handle Base Assy Lock Handle Upper Leg Lid Handle Probe Assembly Button Hook Firebox Assembly... -
Page 5: Assembly Instructions
4. Assembly Instructions 4. Assembly Instructions Step 4: Lift Grill to Height Remove all the contents from packaging, and make sure all parts are present before attempting to assemble! Hold both sides of the chassis and lift up until the legs standing on the ground. Step 1: Attach Feet Put the left foot and right foot on the lower leg as illustrated. - Page 6 To Collapse grill 4. Assembly Instructions (cont.) Step 1: Wait for Grill to cool completely Step 6: Put the Drip Tray to the correct position as shown. Step 2 : Be sure gas bottle or supply hose is disconnected Step 3 : Place one foot on each grill foot and lift grill chassis up- wards to unlock legs...
-
Page 7: Warnings
5. WARNINGS 8. STORAGE STORAGE AND/OR NON-USE • Cover grill or store in weather protected area when not in WARNING: The grill is not intended for installation in WARNINGS • During periods of non-use, the Temperature Controller use. or on recreational vehicles, SUVs and/or boats. •... - Page 8 For troubleshooting, FAQs or customer service, visit us at www.cuisinartgrilling. com/customerservice or contact us at 1-866-994-6390 To order replacement parts or additional Cuisinart Grilling products, visit us at www.cuisinart.com or call 1-800-211-9604 Model# CEG 980 North American Distributor: The Fulham Group Newton, MA 02466...
- Page 9 Owner’s Manual Model number FMPPC2A-2 Series number 893 D.893.000.V3 FMI BRANDS INC. 107 – 19052 26 Avenue | Surrey, B.C. Canada V3Z 3V7 | Toll Free 1-888-514-1663 | Fax 1-888-797-9931...
- Page 10 Owner & Safety Manual Model number FMPPC2A-2, Series Number 893 - Tested by CSA International DANGER: If you smell gas: 1 Shut off gas to the appliance. 2 Extinguish any open flame. 3 If odour continues, keep away from the appliance and immediately call your gas supplier or fire department.
- Page 11 Disconnected cylinders must have threaded valve plugs tightly WARNING: installed and must not be stored in a building, garage or any other enclosed area. Improper installation, adjustment, alteration, service or maintenance can cause injury or property damage. Read The gas pressure regulator provided with this appliance must be the installation, operating and maintenance instructions used, and must be the same model as supplied with the unit.
- Page 12 Owner & Safety Manual All LP cylinders to be used with this appliance must be: WARNING: a. Constructed and marked in accordance with the specifications for LP-gas cylinders Standard, CAN/CSA Ensure that the LP gas cylinder is kept at a minimum B339, Cylinders, Spheres and Tubes for the Transportation of distance of three feet (36 inches) away from the appliance.
- Page 13 LEAK TEST: Keep the appliance area clear and free from combustible materials, gasoline and other flammable vapors and liquids. 1. DO NOT USE OR PERMIT SOURCES OF IGNITION IN THE AREA WHILE DOING THE LEAK TEST. Solid fuels shall not be burned in this appliance. THIS INCLUDES SMOKING.
- Page 14 Owner & Safety Manual SECTION 1: ASSEMBLY NOTE TO USER: STEP 1 Enclosed are four bags of rocks, one factory installed 10' Before igniting the unit for the first time, follow steps one propane-rated hose with attached regulator, one propane tank through 5 in the below Ignition section.
- Page 15 SECTION 2: IGNITION CONTINUED STEP 6 STEP 7 Using a lighter or match, ignite Once the unit is burning normally lighter and hold flame slightly set the dial to desired flame above the burner, then open the height. valve on the appliance slowly by turning (counter-clockwise) until the unit ignites.
- Page 16 Owner & Safety Manual SECTION 4: EXTINGUISHING THE APPLIANCE STEP 1 STEP 2 STEP 3 Turn cylinder valve to the “Closed” position. Turn appliance valve to the “Off” position Allow unit to cool for at least five (5) by pushing and turning knob clockwise. minutes before relighting.
Need help?
Do you have a question about the Firebowl 893 and is the answer not in the manual?
Questions and answers