Table of Contents
Advertisement
Advertisement
Table of Contents

Related Manuals for UPPAbaby ARIA


Summary of Contents for UPPAbaby ARIA
- Page 1 From 4-30 lbs...
- Page 3 Limited Lifetime Warranty, you MUST register within three months of purchase and provide a valid purchase receipt form an authorized UPPAbaby retailer. The “lifetime” of the product is defined as the period of use by the registrant for use with his/her children up to 7 years from date of manufacture.
-
Page 4: Table Of Contents
Before You Begin Base Installation With Lower Anchors Registration Leveling Base Certification Attaching the Lower Anchors Child Use Recommendations Installing Load Leg Notice of Expiration What is a Waterfall? Safety Check Warnings and General Safety Instructions Uninstalling Base Storing Load Leg Features Overview Overview of Base Base Installation With Vehicle Seat Belt... - Page 5 Carrier Installation with Vehicle Seat Belt Stroller Compatibility Determining Best Installation Method Fitting Carrier to Stroller Frame Leveling the Carrier Releasing Carrier from Stroller Frame Lap/Shoulder Belt Preferred Routing Method Care and Maintenance Lap/Shoulder Belt Optional Routing Method SIP Padding Removal Lap Belt Only Routing Method Seat Padding Removal Safety Check...
-
Page 6: Before You Begin
276 Weymouth Street, Rockland, MA 02370 or call (844) 823-3132 or register online at: uppababy.com/register/carseat. For recall information, call the U.S. Government’s Vehicle Safety Hotline at 1-888-327-4236 (TTY: 1-800-424-9153), or go to www.NHTSA.gov... -
Page 7: Child Use Recommendations
Children should remain rear-facing for as long as possible. UPPAbaby advises that all infants and toddlers should ride in a rear-facing car safety seat (CSS) as long as possible, until they reach the highest weight or height allowed by their CSS’s manufacturer. This child restraint is for use by children who meet BOTH requirements below: WEIGHT REQUIREMENTS: 4 –... -
Page 8: Notice Of Expiration
BEFORE YOU BEGIN NOTICE OF EXPIRATION Discontinue use of this child restraint after 7 years from the date of manufacture or after a crash. Refer to labels on bottom of Carrier and Base. -
Page 9: Warnings And General Safety Instructions
WARNINGS AND GENERAL SAFETY INFORMATION WARNING DEATH OR SERIOUS INJURY CAN OCCUR According to accident statistics, children are statistically safer when properly restrained in the rear seating positions than in the front seating positions, whether there are airbags, advanced airbags or no airbags at all. To ensure your child’s safety refer to approved seating positions on page 20 in this manual or your Vehicle’s Owner Manual. - Page 10 WARNINGS AND GENERAL SAFETY INFORMATION NEVER place this child restraint on a front seat with an airbag. DEATH OR SERIOUS INJURY can occur. An airbag can strike a rear-facing infant restraint with enough force to crack the shell and seriously injure or kill an infant. The back seat is the safest place for children 12 and under.
- Page 11 WARNINGS AND GENERAL SAFETY INFORMATION WARNING Children have STRANGLED in loose or partially buckled harness straps. Fully restrain the child even when carrier is used outside the vehicle. SUFFOCATION HAZARD: Infant carrier can roll over on soft surfaces and suffocate child. NEVER place carrier on beds, sofas, or other soft surfaces. •...
- Page 12 WARNINGS AND GENERAL SAFETY INFORMATION • NEVER hang strings on or over the carrier or attach to handle. • NEVER place items with a string around a child’s neck, such as hood strings, pacifier cords, etc. FALL HAZARD: Child’s movement can slide carrier. •...
- Page 13 WARNINGS AND GENERAL SAFETY INFORMATION WARNING FALL HAZARD: The carrier can fall from the shopping cart. DO NOT USE on shopping cart. SAFETY WARNINGS Failure to follow these instructions could result in serious injury to your child or other vehicle occupants. •...
- Page 14 WARNINGS AND GENERAL SAFETY INFORMATION • DO NOT lubricate buckles and fasteners. • ALWAYS check all surfaces of restraint before securing your child. In warm weather, Child Restraints can become very hot. Park in the shade or where sun does not directly hit the child restraint. Cover the Child Restraint with a sheet or blanket when not in use.
- Page 15 WARNINGS AND GENERAL SAFETY INFORMATION • DO NOT use clothing or blankets that interfere with fastening or tightening the harness INSTEAD place a blanket over the child after being properly secured in the harness. • DO NOT use this child restraint system if the top of the child’s head is less than 1"...
- Page 16 • DO NOT allow children to play with this Child Restraint. It is not a toy. • DO NOT use any accessories, pads, or products supplied by other manufacturers with this Child Restraint, unless approved and tested by UPPAbaby. Items not tested with this restraint could injure your child.
-
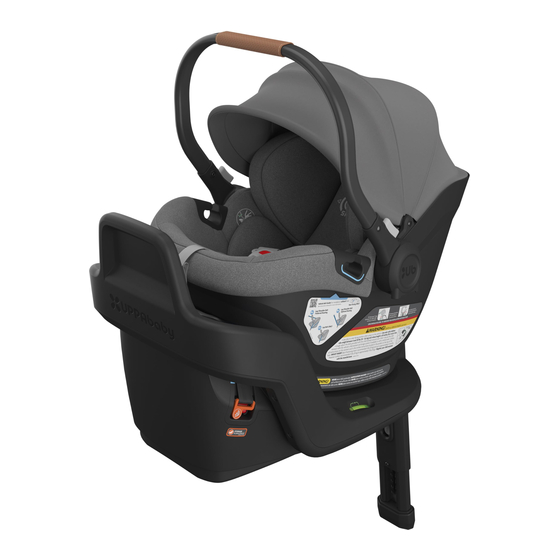
Page 18: Features Overview
FEATURES OVERVIEW – Overview of Base 1 Vehicle Belt Path (2) 2 Lower Anchor Connector Release Buttons (2) 3 Anti-Rebound+ Panel 4 Tightness Indicator 5 Lower Anchor Connectors 6 Lower Anchor Connector Webbing 7 Vehicle Belt Lock-Off (Closed) 8 Level Adjust Handle 9 Instruction Manual Storage 10 Vehicle Belt Lock-Off (Open) 11 Load Leg Angle Indicator... - Page 19 FEATURES OVERVIEW – Overview of Base...
-
Page 20: Overview Of Carrier
FEATURES OVERVIEW – Overview of Carrier 1 Side Impact Protection (SIP) 2 Harness Covers (2) 3 Buckle 4 Infant Insert 5 Harness Adjuster Release 6 Harness Adjuster Strap 7 Buckle Latch Plates (2) 8 Vehicle Seat Belt Guides (2) 9 Retainer Clip 10 Harness Straps 11 Canopy 12 (SIP) Adjustment Tab... - Page 21 FEATURES OVERVIEW – Overview of Carrier...
-
Page 22: Vehicle Compatibility
If the Aria does not install best in the rear center seating location, it is recommended to move to one of the outboard seating positions. -
Page 23: Determining Best Installation Method
VEHICLE COMPATIBILITY – Determining Best Installation Method At this point take out your VEHICLE OWNER'S INSTRUCTION MANUAL. You will need this to look up different features in your vehicle that might affect the installation. WARNING: NEVER place a rear-facing only child restraint in front of an active airbag. -
Page 24: Latch (Lower Anchors And Tethers For Children)
VEHICLE COMPATIBILITY LATCH (Lower Anchors and Tethers for Children) Most vehicles manufactured after September 1, 2002 are equipped with LATCH (Lower Anchors and Tethers for CHildren). Check your vehicle owner’s instruction book to determine lower anchor compatible seating positions. NOTE: No tether is required with this rear-facing carrier. -
Page 25: Overview Of Vehicle Seat Belt Systems
VEHICLE COMPATIBILITY Overview of Vehicle Seat Belt Systems If you do not use lower anchor to properly VEHICLE SEAT (LAP/SHOULDER BELT) VEHICLE SEAT (LAP BELT ONLY) secure the child restraint you must use the WEBBING VEHICLE SEAT BELT SYSTEM. Seat belt systems vary by make, model, and year of |your vehicle. -
Page 26: Unsafe Vehicle Seat Belt Systems And Seating
VEHICLE COMPATIBILITY – Unsafe Vehicle Seat Belt Systems and Seating This Child Restraint can only be installed on vehicle seats that face forward. DO NOT install in seats that face to the sides or rear of the vehicle. ALWAYS park on a level surface when installing a Child Restraint. - Page 27 VEHICLE COMPATIBILITY – Unsafe Vehicle Seat Belt Systems and Seating DO NOT use this Child Restraint with the following seat belt systems: Lap belts with Motorized (automatic) Lap/Shoulder with Door mounted Inflatable emergency locking two retractors retractor WARNING! DEATH OR SERIOUS INJURY CAN OCCUR. CHECK YOUR Vehicle instruction book for information regarding your vehicle seat belt system(s).
-
Page 28: Base Installation With Lower Anchors
BASE INSTALLATION WITH LOWER ANCHORS We recommend using the load leg to optimize safety of the child in the seat. Load leg should be placed in stowed position when not in use. If installing without the load leg, bypass step 1 and proceed to step 2. LEVELING BASE 1 Press the load leg release button on bottom of the base and pull load leg out from storage. -
Page 29: Attaching The Lower Anchors
BASE INSTALLATION WITH LOWER ANCHORS ATTACHING THE LOWER ANCHORS 1 Locate the lower anchor connectors on either side of the base and remove by pushing the corresponding orange button while pulling the connector out of the lower anchor storage pocket. 2 Attach the lower anchor connectors to the vehicle lower anchors located in the vehicle seat bight (crease of seat). -
Page 30: Installing Load Leg
BASE INSTALLATION WITH LOWER ANCHORS CONTINUE IF USING PREFERRED LOAD LEG INSTALLATION INSTALLING LOAD LEG 1 After the base is secured, rotate load leg extension until its showing fully GREEN. 2 Using two hands, separate the two ends to remove any showing. -
Page 31: What Is A Waterfall
2 Adjust the level adjustment foot to achieve proper recline level. 3 Push the base into the seat back. If there is a gap between the top of the Aria base and the back of the vehicle seat, place a rolled hand towel in the gap flush with the top of the base. -
Page 32: Safety Check
BASE INSTALLATION WITH LOWER ANCHORS – Safety Check Base doesn’t move more than 1" (2.5 cm) side-to-side and front-to-back at the belt path. Lower anchor connector webbing is secure and untwisted. Ensure tightness indicator is GREEN after each use. If it is not, apply pressure by pushing base into seat bight (crease of seat) to tighten. - Page 33 BASE INSTALLATION WITH LOWER ANCHORS – Safety Check Recline angle is correct. Check the level angle indicator on base to ensure the bubble is still within the lines. NO partial bubble allowed. ALWAYS check the Recline Position Indicator on the base and adjust the recline bubble to be between the designated range indicated for the infant insert use.
-
Page 34: Uninstalling Base
BASE INSTALLATION WITH LOWER ANCHORS UNINSTALLING BASE 1 Press the button on the lower anchor connector while pulling the connector off the vehicle anchor. 2 Store lower anchor connectors in designated housing found on each side of the base. -
Page 35: Storing Load Leg
BASE INSTALLATION WITH LOWER ANCHORS STORING LOAD LEG 1 Push load leg extension release button on back of load leg and bring foot up until it locks into place. 2 Bring load leg back into base until it clicks into secure/ stowed position. -
Page 36: Base Installation With Vehicle Seat Belt
BASE INSTALLATION WITH VEHICLE SEAT BELT We recommend using the load leg to optimize safety of the child in the seat. Load leg should be placed in stowed position when not in use. If installing without the load leg, bypass step 1 and proceed to step 2. LEVELING BASE 1 Press the load leg release button on bottom of the base and pull load leg out from storage. - Page 37 BASE INSTALLATION WITH VEHICLE SEAT BELT If proper angle cannot be achieved with level adjustable foot, a rolled towel may be used. Foot must be in fully extended position. Proceed to chosen installation method: LAP/SHOULDER ROUTING METHOD Page 36 LAP BELT ONLY ROUTING METHOD Page 38...
-
Page 38: Lap/Shoulder Routing Method
BASE INSTALLATION WITH VEHICLE SEAT BELT Lap/Shoulder Routing Method 1 Route the vehicle belt through the vehicle belt path while guiding the lap portion of the belt as close as possible to the top of the lock-off where the door hinges. Buckle the vehicle belt. 2 Hold shoulder portion of belt above base. - Page 39 BASE INSTALLATION WITH VEHICLE SEAT BELT Lap/Shoulder Routing Method 3 While holding the shoulder belt firmly, check the indicator. If GREEN, close the top of the lock-off over the lap/shoulder belt. NOTE: Tightness indicator should be GREEN. 4 Push the bottom of the lock-off all the way down until you hear an audible click.
-
Page 40: Lap Belt Only Routing Method
BASE INSTALLATION WITH VEHICLE SEAT BELT Lap Belt Only Routing Method 1 Route the vehicle belt through the belt path while guiding the lap portion of the belt as close as possible to the topside of the lock-off where the door hinges. Buckle the vehicle 2 With one hand push down base and hold firm as you pull lap belt to tighten and remove any slack. - Page 41 BASE INSTALLATION WITH VEHICLE SEAT BELT Lap Belt Only Routing Method 3 While holding the excess lap belt webbing, firmly check the indicator. If GREEN, close the top of the lock-off over the vehicle belt. NOTE: Tightness indicator should be GREEN. 4 Push the bottom of the lock-off all the way down until you hear an audible click.
-
Page 42: Installing Load Leg
BASE INSTALLATION WITH VEHICLE SEAT BELT CONTINUE IF USING Preferred LOAD LEG INSTALLATION INSTALLING LOAD LEG 1 After the base is secured, rotate load leg extension until its showing fully GREEN. 2 Using two hands, separate the two ends to remove any showing. -
Page 43: What Is A Waterfall
2 Adjust the level adjustment foot to achieve proper recline level. 3 Push the base into the seat back. If there is a gap between the top of the Aria base and the back of the vehicle seat, place a rolled hand towel in the gap flush with the top of the base. -
Page 44: Safety Check
BASE INSTALLATION WITH VEHICLE SEAT BELT Safety Check Lock-off must be used at all times when installing with a vehicle seat belt. Vehicle Belt is secure and untwisted. Base doesn’t move more than 1" (2.5 cm) side-to-side and front-to-back at the belt path. Ensure tightness indicator is GREEN after each use. - Page 45 BASE INSTALLATION WITH VEHICLE SEAT BELT Safety Check Recline angle is correct. Check the level angle indicator on base to ensure the bubble is still within the lines. NO partial bubble allowed. ALWAYS check the Recline Position Indicator on the base and adjust the recline bubble to be between the designated range indicated for the infant insert use.
-
Page 46: Uninstalling Base And Storing Load Leg
BASE INSTALLATION WITH VEHICLE SEAT BELT UNINSTALLING BASE AND STORING LOAD LEG 1 Unbuckle seat belt. Open lock-off and remove seat belt. 2 Push load leg extension release button on back of load leg and bring foot up until it locks into place. 3 Bring load leg back into base until it clicks into secure/stowed position. -
Page 47: Carrier Installation With Vehicle Seat Belt
CARRIER INSTALLATION WITH VEHICLE SEAT BELT DETERMINING BEST INSTALLATION METHOD Carrier-only Installation can only be performed using the vehicle seat belt. There are (3) methods of carrier-only installation. LAP/SHOULDER PREFFERED LAP/SHOULDER OPTIONAL LAP BELT ONLY METHOD ROUTING METHOD ROUTING METHOD No shoulder belt is used. -
Page 48: Leveling The Carrier
CARRIER INSTALLATION WITH VEHICLE SEAT BELT LEVELING THE CARRIER 1 Place the carrier rear-facing on the vehicle seat. 2 The line on the carrier must be level to the vehicle floor. For a more stable installation, a rolled towel may be used. -
Page 49: Lap/Shoulder Belt Preferred Routing Method
CARRIER INSTALLATION WITH VEHICLE SEAT BELT Lap/Shoulder Belt Preferred Routing Method If shoulder belt does not route around the back of the Aria carrier, follow LAP/SHOULDER BELT OPTIONAL ROUTING METHOD page 50. 1 Route the lap portion of the seat belt through both lap belt guides on the carrier, and buckle the seat belt. - Page 50 CARRIER INSTALLATION WITH VEHICLE SEAT BELT Lap/Shoulder Belt Preferred Routing Method 3 Lock vehicle seat belt. 4 Push the carrier into the vehicle seat bight (crease of the seat) and gently apply pressure from behind the carrier into the vehicle seat back. At the same time, pull on the shoulder portion of the vehicle belt closest to the buckle and hold tightly.
- Page 51 CARRIER INSTALLATION WITH VEHICLE SEAT BELT Lap/Shoulder Belt Preferred Routing Method REVIEW SAFETY CHECK ON PAGE 53. All steps must be achieved.
-
Page 52: Lap/Shoulder Belt Optional Routing Method
CARRIER INSTALLATION WITH VEHICLE SEAT BELT Lap/Shoulder Optional Routing Method 1 Route the lap portion of the seat belt through both lap belt guides on the carrier, and buckle the seat belt. 2 Lock vehicle seat belt. 3 Push the carrier into the vehicle seat bight (crease of the seat) and gently apply pressure from behind the carrier into the vehicle seat... - Page 53 CARRIER INSTALLATION WITH VEHICLE SEAT BELT Lap/Shoulder Optional Routing Method 4 Feed excess webbing into the vehicle retractor. 5 Rotate carry handle forward to the (5th) rebound position when in use. NOTE: Check that the carrier is still properly leveled. REVIEW SAFETY CHECK ON PAGE 53.
-
Page 54: Lap Belt Only Routing Method
CARRIER INSTALLATION WITH VEHICLE SEAT BELT Lap Belt Only Routing Method 1 Route the lap belt through both guides on the carrier, and buckle the seat belt. 2 Push the carrier into the vehicle seat bight (crease of the seat) and gently apply pressure from behind the carrier into the vehicle seat back. -
Page 55: Safety Check
Angle is correct when The line on the carrier is level with the vehicle floor. Seating position is permitted by both UPPAbaby and your vehicle manufacturer for use with the type of Vehicle Seat Belt. The carry handle must be locked in the (5th) rebound position when in use. -
Page 56: Aircraft Installation
THIS CHILD SEAT IS CERTIFIED FOR AIRCRAFT USE WHEN USED WITHOUT A BASE. UPPABABY AND THE FAA RECOMMEND THAT A CHILD WEIGHING UP TO 40 LBS (18 KG) USE A CERTIFIED HARNESSED CHILD SEAT WHILE TRAVELING ON AN AIRCRAFT. CONTACT THE AIRLINE ABOUT THEIR POLICY PRIOR TO TRAVELING. -
Page 57: General Use Infant Insert
GENERAL USE – Infant Insert The infant insert is designed to optimize fit and body positioning NOTE: Prior to installation, locate for smaller infants. We recommend you use the infant insert start- the fastener tabs on both sides of the headrest. ing at 4 lbs (1.8 kg) and up to approximately 4 months. - Page 58 GENERAL USE – Infant Insert INFANT INSERT USAGE WITH PREEMIE CUSHION AND BACK POSITION INSERT To ensure a better fit for smaller infants, use the 2-piece infant insert (included) for infants between 4 lbs (1.8 kg) and approximately 9 lbs (4.1 kg). This infant insert was designed to optimize fit and body positioning for your child. NOTE: Continue to use the 2-piece infant insert until all criteria is met below: •...
- Page 59 GENERAL USE – Infant Insert HARNESS SHOULD BE SNUG. Pinch harness webbing at child’s shoulders. If you can pinch webbing, the harness is too loose and should be tightened. ALWAYS check the Recline Position Indicator on the base and adjust the recline bubble to be between the designated range indicated for the infant insert use.
-
Page 60: Sip Carriage And Harness Positioning
. Harness should be at the shoulders or 1-2 positions below WARNING: DO NOT place rolled towels or small blankets around head or SIP carriage. NEVER use non-regulated products with this child restraint, unless approved by UPPAbaby. -
Page 61: Securing Your Child
Place harness over child and insert buckle tongues into the buckle until a “click” is heard. Pull up on the buckle tongues to make sure they are locked. NEVER use non-regulated products with this child restraint, unless approved by UPPAbaby. - Page 62 GENERAL USE – Securing Your Child 4 Pull up on the harness to remove excess slack around the child’s legs. 5 Pull the harness adjuster strap to snugly adjust the harness straps around your child. 6 Close retainer clip and position at armpit level. Make sure the shoulder pads don’t interfere with positioning the chest clip.
-
Page 63: Attaching Carrier To Base
GENERAL USE – Attaching Carrier to Base 1 Place carrier on base until a click is heard. 2 Check for a secure connection by pulling up on carry handle. Carry handle must be locked in the (5th) rebound position when in use in the vehicle. -
Page 64: Removing Carrier From Base
GENERAL USE – Removing Carrier from Base 1 Pull and hold carrier release button on back of the carrier. 2 Lift carrier off base. -
Page 65: Using Canopy
GENERAL USE – Using Canopy Hide-away canopy easily adjusts to one of two (2) positions. TO EXTEND CANOPY Slowly pull forward on main canopy frame until resting in desired position. TO STOW CANOPY Gently push upward on main canopy frame allowing the center support and canopy fabric to guide into the storage compartment in carrier. -
Page 66: Using Carry Handle
, and rebound (vehicle use) WARNING: NEVER hang toys and other objects from the carry handle when using in the vehicle. These products have not been tested by UPPAbaby and therefore are not approved for use with this child restraint. -
Page 67: Safety Check
• The child must weigh between 4 and 30 lbs (1.8 and 13.6 kg) and be no taller than 30" (76.2 cm). • The back seat is the safest place for children aged 13 and under. • NEVER use non-regulated products with this child restraint, unless approved by UPPAbaby. • NEVER place in front of an active airbag. - Page 68 STROLLER COMPATIBILITY – Fitting Carrier to Stroller Frame Prior to fitting Aria carrier to stroller frame, engage brake on stroller and remove toddler seat from frame. 1 With carrier facing stroller handle and carrier handle in carry position, align carrier handle hubs with attachment posts on stroller.
- Page 69 STROLLER COMPATIBILITY – Releasing Carrier from Stroller Frame 1 Engage and hold the stroller release button on the back of the carrier. 2 Lift the carrier off stroller frame.
- Page 70 CARE AND MAINTENANCE – SIP Padding Removal Following are fabric removal instructions for cleaning. 1 With SIP in the highest position, unbuckle retainer clip and harness. Remove harness pads. 2 Pull up and forward on SIP padding releasing SIP adjustment tab. 3 Pull SIP padding toward you and down from bottom and release from harness straps.
- Page 71 CARE AND MAINTENANCE – Seat Padding Removal 1 Start with headrest in the highest position. Release buckle from cover. Push buckle through opening under padding. 2 Unsnap harness adjustment strap. 3 Remove back panel of fabric by releasing closure and pull fabric out from under the SIP. 4 Remove the 2 plastic tabs at side of carrier and 2 plastic tabs at front of carrier to release fabric at front.
- Page 72 CARE AND MAINTENANCE – Seat Padding Removal 5 Remove buckle and harness adjustment strap through opening releasing the fabric. 6 Move SIP to the lowest headrest position. Release fabric from canopy clip at top of seat. 7 Pull fabric forward to release from top of the seat. 8 Pull fabric over the headrest to release from the seat.
- Page 73 CARE AND MAINTENANCE – Seat Padding Installation 1 With the SIP in the lowest position, lay seat pad over the carrier and over the headrest. 2 Clip fabric back in place at canopy clip at top of seat. 3 While the fastened flap at the seat back is still open, raise the SIP headrest to its maximum height.
- Page 74 CARE AND MAINTENANCE – Seat Padding Installation 4 Slip buckle up through opening in seat cover and buckle cover. 5 Thread the harness adjustment webbing through the fabric opening. 6 Finish by securing the fabric around the front edge of the seat.
- Page 75 CARE AND MAINTENANCE – SIP Padding Installation 1 Secure SIP cover tightly around SIP ears feeding SIP adjustment tab through opening in fabric. 2 Replace harness straps in front of SIP back padding. 3 Insert lower part of SIP carriage into pocket on the back of SIP padding.
- Page 76 CARE AND MAINTENANCE – Cleaning Cleaning Fabrics Fabrics include: seat pad, infant inserts, buckle pads, shoulder pad, seat padding, SIP padding, harness pads, and buckle cover. DO NOT iron or dry clean. Dry flat and away from direct Machine wash in warm water on gentle cycle sunlight before re-use or storage.
- Page 77 7 years from date of manufacture. Your UPPAbaby product is warranted to be free from any manufacturing defects for a period of 2 years from the date of purchase under normal use and in compliance with the operating instructions.
- Page 78 • Products Involved in an accident. UPPAbaby reserves the right to determine if warranty terms and conditions have been met. For warranty service: In the US and CA please contact UPPAbaby customer service (844) 823-3132 and visit uppababy.com/support to send an email.
- Page 80 All rights reserved. © 2023 UPPAbaby. UPPAbaby and all associated logos are trademarks. All product specifications are correct at time of print. UPPAbaby reserves the right to change anything at any time without prior notice. Color representation is as close as print processes allow. Not all colors available at all retailers. UbMAN159-V08...
Need help?
Do you have a question about the ARIA and is the answer not in the manual?
Questions and answers