
Related Manuals for Siemens SX67ZX06CE


Summary of Contents for Siemens SX67ZX06CE
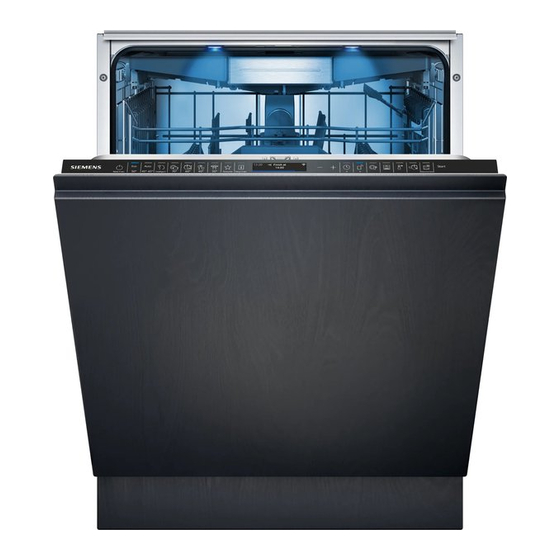
- Page 1 SX67ZX06CE Dishwasher EN Instructions for use Register your appliance on My Siemens and discover exclusive services and offers. Siemens Home Appliances...
-
Page 2: Table Of Contents
Translated from German to English - www.onlinedoctranslator.com Further information and explanations can be found online: Table of contents 1 Security ........4 7 additional functions ......23 1.1 General information ....4 8 Equipment ........ 24 1.2 Intended 8.1 Upper dish rack ....24 use ........... - Page 3 13 Tableware ........35 20 Customer service ......57 13.1 Damage to glass and 20.1 Product number (E-No.), dishes......... 35 production number (FD) and counting number (Z-No.)..57 13.2 Putting away the dishes....36 20.2 AQUA-STOP guarantee.... 57 13.3 Clearing out the dishes....37 21 Technical data ....
-
Page 4: Security
Security 1 Security Please note the following safety instructions. 1.1 General information ¡Read these instructions carefully. ¡Save the instructions and product information later use or subsequent ownership. ¡Do not connect the device if it is damaged during transport. 1.2 Intended use Use the device only: ¡to wash household dishes. - Page 5 Security WARNING - Risk of electric shock! Improper installations are dangerous. ▶ Only connect and operate the device in accordance with the information on the nameplate. ▶ Always use the power cable supplied with the new device. ▶ Only connect the device to an alternating current power supply via a properly installed earthed socket.
-
Page 6: Safe Use
Security Contact between the device and installation cables can lead to a defect in the installation cables, e.g. E.g., gas pipes and power lines. Gas from a corroded gas line can ignite. A damaged power line can lead to a short circuit. ▶... - Page 7 Security Strongly caustic-alkaline or highly acidic cleaning agents in conjunction with aluminum parts in the washing compartment of the device can lead to explosions. ▶ Never use highly caustic-alkaline or highly acidic cleaning agents, especially from the commercial or industrial sector, in conjunction with aluminum parts (e.g.
-
Page 8: Damaged Device
Security ▶ Never bend, squeeze or change the power cable. WARNING - Danger of burns! The blow-out opening of the zeolite container becomes hot and can cause burns. ▶ Never touch the blow-out opening of the zeolite container. 1.6 Damaged device WARNING - Risk of electric shock! A damaged device or a damaged power cable is dangerous. -
Page 9: Dangers For Children
Security 1.7 Dangers for children WARNING - Danger of suffocation! Children can pull packaging material over their heads or wrap themselves in it and suffocate. ▶ Keep packaging material away from children. ▶ Do not let children play with packaging materials. Children can inhale or swallow small parts and thereby suffocate. - Page 10 Security WARNING - Risk of injury! Children can get their little fingers caught in the slots in the tab tray and injure themselves. ▶ Keep children away from the open device.
-
Page 11: Avoid Material Damage
avoid Contact between the device and avoid Property damage water pipes may cause corrosion of avoid the water pipe and the water pipe may leak. Make sure there is at least 5 cm ▶ avoid 2.1 Safe Installation distance between the device and the water pipe. -
Page 12: Environmental Protection And Saving
Environmental protection and saving Special salt for dishwashers can 3.2 Save energy damage the washing container If you follow these instructions, your through corrosion. device will use less electricity and ▶ To ensure that overflowed special water. salt is rinsed out of the rinsing container, fill the special salt into the Use the Eco 50°... -
Page 13: Sensors
Setting up and connecting Tip:In order not to impair the Sensor level description functionality of the zeolite drying, do niger or eco-cleaning not place any dishes directly in front ger with low of the suction opening and blow-out Amounts of active ingredients. opening of the zeolite container. -
Page 14: Setting Up And Connecting The Device
Setting up and connecting Make sure that the drain hose is not 4.2 Set up and connect the kinked, crushed or twisted. device You can install your under-counter Make sure that there is no cover in device or integrated device in the kitchen unit between wooden walls the drain that prevents the waste and plastic walls. - Page 15 Setting up and connecting ¡Please note that the water Safety system only works when there is power supply. Insert the cold appliance plug of the mains connection cable into the device. Plug the power plug of the device's power cord into a socket near the device.
-
Page 16: Getting To Know Each Other
Get to know 5 Getting to know each other 5.1 Device Here you will find an overview of the components of your device. type label Type plate with E number and FD number → Page 57 . You need the data for customer service → Page 57 . - Page 17 Get to know Fill the cleaner chamber with cleaner. Cleaner chamber → "Cleaner", page 32 Lower dish rack → Page 25 Lower dish rack Fill the special salt storage container with Storage container for special special salt. salt → "Softening system", page 28 Lower spray arm The lower spray arm cleans the dishes in the lower basket.
-
Page 18: Controls
Get to know 5.2 Controls You can use the control panel to set all of your device's functions and receive information about its operating status. Some buttons allow you to perform various functions. 4 5 6 7 8 9 10 16 15 14 13 12 Switch on device →... - Page 19 Get to know Set time delay → Page 38 Time delay → "Remote Start", page 44 Remote start programs Program buttons and additional → "Programs", page 20 functions Additional functions → "Additional functions", page 23 Start program → Page 38 Start button Keys Use these buttons to scroll...
-
Page 20: Programs
programs 6 programs Here you will find an overview of the If the rinse aid system is switched on or if adjustable programs. Depending on there is a lack of rinse aid, the running time the device configuration, various changes. programs are available, which you You can find the consumption values can find on the control panel of your... -
Page 21: Information For Test Institutes
programs program Program Sequence Dishes: Particularly gentle ¡delicate dishes, handling and improved brilliantShine plug, temperature-sensitive Drying: plastics and glasses ¡Pre-rinse Degree of pollution: ¡Clean 40°C ¡ ¡low-stick, fresh food Intermediate rinsing ¡Rinse 50 °C ¡Dry to leftovers shine Dishes: Time optimized: ¡mixed dishes and dishes ¡Clean 60°C ¡... -
Page 22: Intelligent
programs The pre-rinse program is stored on this button at the factory. Pre-rinsing is suitable for all types of dishes. The dishes are cleaned by rinsing them in cold water. Tip:You can use the Home Connect app to download additional programs and save them to the button. -
Page 23: Additional Functions
Additional functions 7 additional functions Here you will find an overview of the additional functions that can be set. Depending on the device configuration, various additional functions are available, which you can find on the control panel of your device. Depending on the program, you can choose certain additional functions. -
Page 24: Equipment
Furnishing Press the levers on the left and right 8 equipment on the outside of the dish rack inwards. Here you will get an overview of the possible features of your device and how it can be used. The equipment depends on your device variant. -
Page 25: Cake Stand
Furnishing 8.2 Cake stand Use the cake stand and the space underneath to store small cups and glasses or larger pieces of cutlery, e.g. E.g. wooden spoon or serving cutlery. 8.4 Folding spines Use the folding spikes to safely sort dishes, e.g. -
Page 26: Cutlery Drawer
Furnishing Push the lever forward and fold To fold down the side shelf, push down the folding spikes the lever forward and fold down the side shelf. To use the folding spikes again, fold them up. To fold down the folding spikes, push the lever forward and fold aThe folding spines click audibly down the folding spikes... -
Page 27: Glasszone
Furnishing Set the slider to ON or OFF. 8.6 glassZone Insert the upper dish rack. Use the glassZone in the upper basket to clean all types of glasses gently and thoroughly. Clean glass zone Limescale and impurities from the rinse water can clog the nozzles. A notice:Always operate the device with the glassZone installed. -
Page 28: Before First Use
Hang the glassZone in the upper Switch on the device. dish rack and lock it into place. aThe display shows the settings for the first commissioning. Press repeatedly until the display shows the desired setting. A notice:If you are setting up for the first time If you select Home Connect, make the further settings using the Home... -
Page 29: Overview Of The Water Hardness Settings
Softening system water with a hardness above 7 °dH must be softened. 10.1 Overview of the water hardness settings Here you will find an overview of the adjustable water hardness values. You can ask your local waterworks about the water hardness level or use a water hardness tester. -
Page 30: Switching Off The Softening System
Softening system DANGER! 10.4 Switch off the softening Cleaner can damage the softening system system. Only fill the storage container of ▶ If the special salt refill indicator the softening system with special bothers you, e.g. B. if you use salt for dishwashers. -
Page 31: Regenerating The Softening System
Rinse aid system 10.5 Regenerate the softening 11 Rinse aid system system In order to maintain the trouble-free 11.1 Rinse aid function of the softening system, the device regenerates the softening For optimal drying results, use rinse system at regular intervals. aid. -
Page 32: Setting The Amount Of Rinse Aid Added
cleanser Overflowing rinse aid can lead to press. excessive foam formation during To open the basic settings, press for the rinse cycle. approx. 3 seconds. Close the lid of the rinse aid Press repeatedly until the display reservoir. shows “rinse aid addition”. or press until the display shows aThe lid clicks into place audibly. -
Page 33: Unsuitable Cleaners
cleanser Tabs use additional special salt → Page 29 and rinse aid Tabs are suitable for all cleaning → Page 31 tasks and do not need to be dosed. Combined cleaners With shortened programs, tabs may In addition to traditional solo cleaners, not dissolve completely and cleaning a number of products with additional residue may remain. -
Page 34: Notes On Cleaners
cleanser 12.3 Notes on cleaners 12.4 Fill in cleaner Follow the instructions for cleaners To open the cleaner chamber, press in daily use. the locking latch. ¡Cleaning products with the label Pour cleaner into the dry cleaner "Organic" or "eco" labels usually use chamber. -
Page 35: Tableware
Dishes Close the cleaner chamber lid. 13.1 Damage to glass and dishes Only wash glasses and porcelain that are marked as dishwasher-safe by the manufacturer. Avoid damage to glass and dishes. Caused Recommendation Just rinse The following thing Dishes, that dishes are not dishwasher from manufacturer... -
Page 36: Putting Away The Dishes
Dishes ¡For better washing results and Caused Recommendation To maintain drying results, place If you are strong Strong caustic alkaline parts with bulges and depressions ash or strong caustic alkaline at an angle to allow water to drain acidic rice or strongly acidic away. -
Page 37: Clearing Out The Dishes
service – Do not place any small parts in 4 basic operation the tab collecting tray and do not service block it with dishes so as not to block the lid of the detergent compartment. service 14.1 Switch on the device press. -
Page 38: Setting The Time Delay
service ¡To save energy, switch Press the button for the ▶ appropriate additional function. The device switches off 1 minute after → "Additional functions", page 23 the end of the program. If you open the device door immediately after the end aThe additional function is set of the program, the device switches off and the additional function button flashes. - Page 39 service Tip:If you press during the rinse cycle, the current program will be interrupted. When you turn on the device, the program continues automatically.
-
Page 40: Basic Settings
Basic settings 15 basic settings You can adjust the basic settings of your device to suit your needs. 15.1 Overview of the basic settings The basic settings depend on the features of your device. Basic setting Description Selection Time setting 00:00 - 24:00 Set the current time. - Page 41 Basic settings Basic setting Description Selection Cold water Set cold water connection or hot water Water connection Hot water connection. Only set the device to hot water if the hot water is produced in an energy- efficient manner and a suitable installation is available, e.g.
-
Page 42: Changing Basic Settings
Basic settings Basic setting Description Selection Turn wireless network connection Wi-Fi on or off. Out of The basic “Wi-Fi” setting is only available after you have connected the device to the Home Connect app. → "Home Connect", page 43 → "Remote Start", page 44 Remote start activate or Out of... -
Page 43: Home Connect
Home Connect 16.1 Home Connect quick start 6 Home Connect Connect T his device is network capable. Connect Connect your device to a mobile device Connect your device to a mobile device quickly and easily. to operate functions via the Home Connect app. -
Page 44: Remote Start
Home Connect Open the Home Connect app and 16.3 Data Protection scan the following QR code. Please note the information on data protection. When your device is connected to a home network connected to the Internet for the first time, your device transmits the following categories of data to the Home Connect Server... -
Page 45: Cleaning And Care
B. due to food approved machine care and machine residues and lime. To avoid cleaner for dishwashers online at malfunctions and reduce odors, clean https://www.siemens- the device at regular intervals. home.bshgroup.com/store or via customer service. Machine care, in conjunction with... -
Page 46: Sieve System
Cleaning and care phase distance from cleanser placement food residues Machine cleaner Cleaner chamber and deposits For optimal cleaning performance, the ¡Turn on the function → "glassZone", page 27 program doses the cleaners separately in the corresponding cleaning phase. Remove any coarse dirt in the This requires the correct placement of interior with a damp cloth. - Page 47 Cleaning and care Press the locking lugs together and Micro sieve remove the coarse sieve upwards. fine sieve coarse sieve Clean sieves Impurities from the rinse water can clog the sieves. After each rinse, check the sieves for residue. Turn the coarse sieve counterclockwise and remove the sieve system.
-
Page 48: Cleaning The Spray Arms
Cleaning and care Pull the lower spray arm upwards. 17.6 Clean spray arms Limescale and impurities from the rinse water can block the nozzles and bearings of the spray arms. Clean the spray arms regularly. Unscrew the upper spray arm and pull it downwards. -
Page 49: Troubleshooting
This way you avoid unnecessary costs. Tip:Further information and explanations for troubleshooting can be found online by scanning the QR code in the table of contents and on our website siemens-home.bsh-group.com. WARNING Danger of electric shock! Improper repairs are dangerous. - Page 50 Troubleshooting Cause and troubleshooting Disturbance E:3200 or display Take the strainer out of the inlet hose for water supply shines. Clean the sieve. Place the strainer in the inlet hose. Screw on the water connection. 8th. Check the water connection for leaks. Connect the power supply.
- Page 51 Troubleshooting Cause and troubleshooting Disturbance No device error. The siphon connection is still closed E:6103 lights up. What- water is not pumped or the waste water hose is kinked or blocked. out. Check the connection on the siphon and open it if necessary.
- Page 52 Troubleshooting Cause and troubleshooting Disturbance All LEDs light up Electronics have detected an error. or flashing. Press the main switch button for about 4 seconds. The device will reset and restart. If the problem occurs again: Turn off the device. ‒...
- Page 53 Troubleshooting Cause and troubleshooting Disturbance Leftover food on dishes dishes. Sieves are inserted incorrectly and/or not locked. Insert the sieves correctly. → "Sieve system", page 46 Lock the sieves into place. Washing program selected that is too weak. Choose a stronger washing program. ▶...
- Page 54 Troubleshooting Cause and troubleshooting Disturbance Removable streaks Place dishes in the upper dish rack so that the tab are located on glasses, drip tray is not blocked by dishes. glasses with a metallic → appearance "Putting away the dishes", page 36 and cutlery.
-
Page 55: Cleaning The Waste Water Pump
Transport, storage and disposal Insert the pump cover and press 18.1 Clean the waste water 8th. down. pump Coarse food residue or foreign objects can block the wastewater pump. As soon as the flushing water no longer drains properly, you have to clean the waste water pump. -
Page 56: Making The Device Frost-Proof
Transport, storage and disposal 19.2 Make the device frost- 19.4 Dispose of old device proof Valuable raw materials can be reused through environmentally If the device is in a room at risk of friendly disposal. frost, e.g. B. in a holiday home, empty the device completely. -
Page 57: Customer Service
Customer service 20.2 AQUA-STOP guarantee 20 Customer Service In addition to warranty claims against Functionally relevant original spare the seller from the purchase contract parts in accordance with the relevant and in addition to our manufacturer's Ecodesign Regulation are available guarantee, we provide replacement from our customer service for a under the following conditions. -
Page 58: Technical Data
Technical data 21 Technical data Weight Max.: 60kg Tension 220 - 240V, 50Hz or 60Hz 2000 - 2400 W Connection value validation 10 - 16 A ¡at least 50 kPa (0.5 bar) ¡ Water pressure max. 1000 kPa (10 bar) at least 10 l/min Inflow quantity Cold water. -
Page 59: Declaration Of Conformity
Directive 2014/53/EU. You can find a detailed RED declaration of conformity online at BSH Hausgeräte GmbH hereby siemens-home.bsh-group.com on the declares that the device with Home product page of your device among Connect functionality is in accordance the additional documents. - Page 60 NL Geproduceerd door BSH Hausgeräte GmbH onder de handelsmerklicentie van Siemens AG BSH Hausgeräte GmbH Carl-Wery-Straße 34 81739 München, GERMANY siemens-home.bsh-group.com *9001851631* 9001851631 (030413) 650 P5...
Need help?
Do you have a question about the SX67ZX06CE and is the answer not in the manual?
Questions and answers