Advertisement
Quick Links
Montageanleitung | Instructions de montage
Assembly Instructions| Instrucciones de
montaje
SKU NUMBER:WF316833AAG
GB
This set comes in 2 boxes. If you do not receive a full set of 2
boxes, please contact our customer service.
DE
Dieses Set wird in 2 Schachteln geliefert. Wenn Sie nicht ein
komplettes Set von 2 Boxen erhalten, kontaktieren Sie bitte unseren
Kundenservice.
FR
Ce set est livré en 2 boîtes. Si vous ne recevez pas un jeu complet
de 2 boîtes, veuillez contacter notre service clientèle.
WF316834AAG
01/18
Advertisement

Related Manuals for Otto WF316833AAG


Summary of Contents for Otto WF316833AAG
- Page 1 Montageanleitung | Instructions de montage Assembly Instructions| Instrucciones de montaje SKU NUMBER:WF316833AAG WF316834AAG This set comes in 2 boxes. If you do not receive a full set of 2 boxes, please contact our customer service. Dieses Set wird in 2 Schachteln geliefert. Wenn Sie nicht ein komplettes Set von 2 Boxen erhalten, kontaktieren Sie bitte unseren Kundenservice.
- Page 2 English IMPORTANT ! KEEP FOR FUTURE REFERENCE : READ CAREFULLY ·To be assembled by an adult. Assembly must be checked by an adult before use ·WARNING ! Keep all screws, small parts and plastic bags out of the reach of children ·Properly identify all parts before assembling ·Never use your item if any of its parts are broken or missing ·Should any problems arise, please contact our After Sales Service...
- Page 3 More Tips English - Before installation, you can place the parts on a carpet or other soft fabric, in order to avoid damaging your floor. Français - Avant l'installation, vous pouvez placer les pièces sur un tapis ou un autre tissu doux, afin d'éviter d'endommager votre sol.
- Page 4 15.1 15.2 15.3 15.4 15.2 15.1 04/18...
- Page 5 WF316833AAG 05/18...
- Page 6 WF316834AAG 15.1 15.2 15.3 15.4 06/18...
- Page 7 Hardware List-Hardware-Liste-Liste du matériel WF316834AAG M8x30mm M8x45mm M8x16mm M4x50mm M3x16mm 07/18...
- Page 8 F x32pcs A x1pc G x24pcs 08/18...
- Page 9 A x1pc G x8pcs M8X16mm M8X30mm A x1pc B x4pcs D x4pcs H x2pcs The headboard can be adjustable. You can chose the different holes according to the thickness of your mattress. a&c-hole 1 for #H b&d-hole 2 for #H c&e-hole 3 for #H Das Kopfteil kann verstellbar sein.
- Page 10 M8X16mm M8X45mm A x1pc C x2pcs D x8pcs E x2pcs M8X16mm A x1pc D x12pcs H x2pcs I x2pcs 10/18...
- Page 11 M8X16mm A x1pc D x2pcs J x1pc M8X16mm A x1pc D x4pcs 11/18...
- Page 12 M4X50mm A x1pc K x2pcs 12/18...
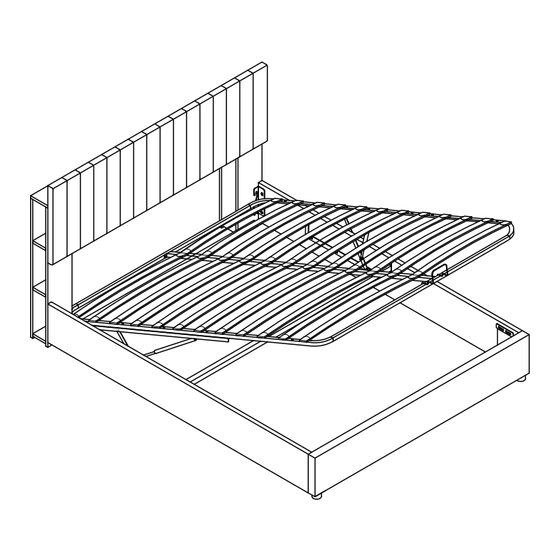
- Page 13 M8X16mm A x1pc D x6pcs L x4pcs Please note that the hole position here is oval, and the screw can be adjusted back and forth. Please ensure that the position of the left and right bedside hydraulic rods is roughly always. Please don't install one screw at the front of the hole and the other at the back of the hole, as this will affect the movement of the slat frame.
- Page 14 M8X45mm A x1pc C x8pcs N x8pcs M x1pc O x12pcs P x24pcs 14/18...
- Page 15 M8X45mm A x1pc C x6pcs N x6pcs Q x1pc M3X16mm A x1pc R x3pcs S x1pc 15/18...
- Page 16 T x1pc U x1pc 16/18...
- Page 17 WHY WON'T MY HYDRAULIC BED STAY DOWN ? 1. In fact, nine times out ten the reason why hydraulic won’t close is because you need to put your mattress on top of the bed. Yep, it really is that easy. This is because the hydraulic pistons need the weight of the mattress to provide enough pressure to close your bed.
-
Page 18: Important Notice
IMPORTANT NOTICE OTTOMAN OPERATING INSTRUCTIONS Once your bed frame is completely assembled, the slat unit will not operate correctly unless a mattress is placed on the slat frame. Position the mattress on the slat frame whilst it is in the closed position. PLEASE NOTE - It takes a lot of force to make the initial movement of the ottoman.
Need help?
Do you have a question about the WF316833AAG and is the answer not in the manual?
Questions and answers