Advertisement
Quick Links
IN221100351V01_UK
842-303V70
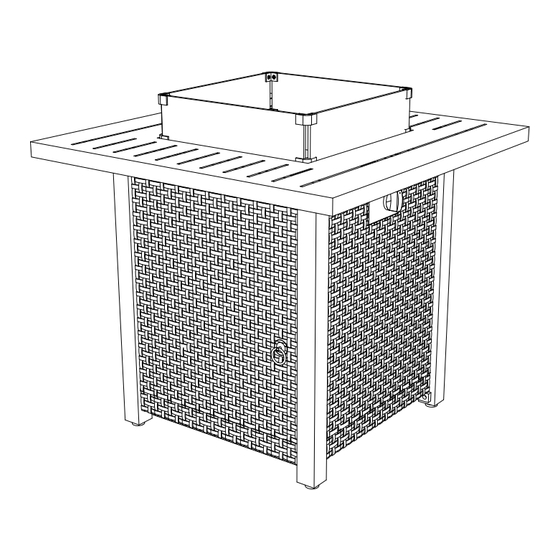
This appliance is intended for decorative purposes
Warning: For Outdoor use only!
Not for domestic use!
Keep the instruction for future reference!
Read the instructions before installation and use!
"These instructions are only valid if the country symbol appears on the instruction manual
and on the appliance"
Advertisement

Related Manuals for Outsunny 842-303V70


Summary of Contents for Outsunny 842-303V70
- Page 1 IN221100351V01_UK 842-303V70 This appliance is intended for decorative purposes Warning: For Outdoor use only! Not for domestic use! Keep the instruction for future reference! Read the instructions before installation and use! “These instructions are only valid if the country symbol appears on the instruction manual...
-
Page 2: Before Assembly
TABLE OF CONTENTS Table of Contents................2 • Warning and Cautions..............3-5 • Tools and Parts.................6-9 • Assembly...................10 • • Lighting Operation................ 1 1-12 • Maintenance and Storage............13-14 Trouble Shooting................15 • REMINDER BEFORE ASSEMBLY Verify that all parts are included with your gas fire pit BEFORE you begin assembly by checking the Parts and Hardware List. - Page 5 appliance...
- Page 6 M6x12 screw(x9) (x2) M6x25 screw(x16) DD. Screwdriver Blas�ng mat...
- Page 7 Checking the gas control 1. Check that the control knob ( M ) for the gas supply system is turned to assembly. 2. Attach left back leg (G), left front leg (H), right back leg (F) and right front leg(I) to the metal stand (J) using 4 pcs M6 x 25 screws (BB) and 4 pcs washers (CC).
- Page 8 Assembly instruc . Insert the door ( ) into the bottom secure top connec�on using 1 pc M6 x 12 screw (AA) and 1 pc washer (CC). . . Att 8 pcs M6 x 12 screws (AA (CC). into the met st e sure the et st completely.
- Page 9 Assembly instruc A�aching the regulator Regulator 7.Turn the knob to the posi�on shown in the figure(1).Then press the regulator down in the direc�on shown in the figure(1) while Knob Button holding down the regulator bu�on to connect the regulator connector with the gas cylinder Adapter of the gas tank adapter .Release the bu�on,pull the regulator by hand to make sure that the regulator is...
- Page 10 Assembly Assembling the glass Unscrew all preassembled screws on the glass clamps. Then, assemble one glass panel to the other glass panel . Repeat for the rest two glass panels. Then, assemble the two glass panel pieces together with the final glass clamps as shown below. Inserting the glass Insert the glass assembly made in step 1 into the ridge on the top of the fire table body .
- Page 12 Before each use, inspect the hose. Replace hose if there are any signs of cutting, wear or abrasion. Turn the cylinder valve on the gas tank counter-clockwise to open the gas supply. Close the storing door on the fire bowl for the gas tank.
- Page 13 appliance...
- Page 14 appliance appliance appliance...
- Page 16 Dear customer, Thank you for purchasing this product. So that your appliance serves you well, please read all the instructions in this user's manual. If you have any questions, please contact our customer care center. Our contact details are below: Country Phone Email...
Need help?
Do you have a question about the 842-303V70 and is the answer not in the manual?
Questions and answers