Table of Contents
Advertisement
Quick Links
486 SLC Manual
Chapter 1: System Overview_________2
Chapter 2: Basic Operation__________7
Chapter 3: Data Storage Devices______15
Chapter 4: Using The Keyboard_______25
Chapter 7: Power Options___________46
Chapter 8: BIOS Setup Program______50
Chapter 9: Troubleshooting__________60
Appendix A: Connector Pinouts______63
Advertisement
Table of Contents

Subscribe to Our Youtube Channel
Related Manuals for Winbook SLC


Summary of Contents for Winbook SLC
-
Page 1: Table Of Contents
486 SLC Manual Chapter 1: System Overview_________2 Chapter 2: Basic Operation__________7 Chapter 3: Data Storage Devices______15 Chapter 4: Using The Keyboard_______25 Chapter 5: Basic MS-DOS Usage_____32 Chapter 6: Connecting Peripherals_____41 Chapter 7: Power Options___________46 Chapter 8: BIOS Setup Program______50 Chapter 9: Troubleshooting__________60... -
Page 2: Chapter 1: System Overview
VLSI (Very Large Scale Integration) technology. As a result, the WinBook is extremely light and more reliable due to the reduction in the number of on-board components. The WinBook is IBM AT and MS-DOS compatible and can run most software designed for use on IBM AT systems in an MS-DOS environment including Windows and Windows applications. -
Page 3: The Central Processing Unit
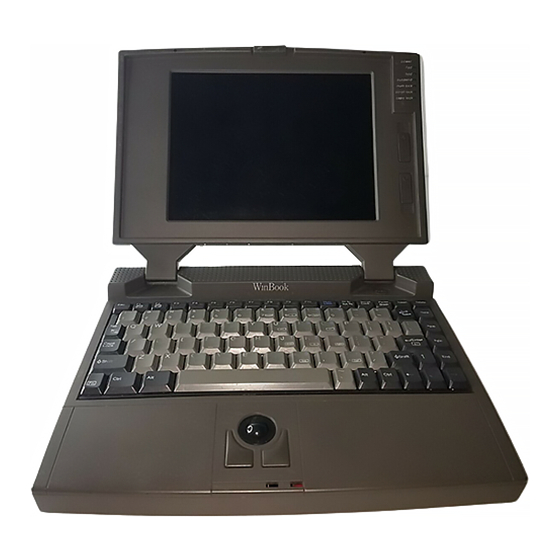
This manual contains full instructions for using all the functions of the WinBook. Some items in the WinBook may vary, such as the hard disk drive type, but all basic functions will be the same. In this section, a brief introduction to the various components in the system are given to give you an overall understanding of the key parts and the names that will be used in this manual to describe them. - Page 4 LED indicators for Num Lock, Caps Lock and Scroll Lock The LCD Display The WinBook comes with a built-in LCD (Liquid Crystal Display) with a resolution of 640 pixels (dots) by 480 pixels. This display takes the place of the monitor in conventional desktop computer systems.
-
Page 5: Unpacking And Component Checklist
Unpacking and Component Checklist Your WinBook comes in a single carton. When you open this carton for the first time, check that all the items listed below are present: 1. One WinBook Computer. 2. One AC adapter and charger. 3. One AC power cable. -
Page 6: Software Requirements
Software Requirements Please note that the WinBook comes in several configurations, some of which may include the MS-DOS operating system. Other configurations may also include certain software packages. The WinBook is compatible with IBM PC/AT standard and can run most software designed for that standard. -
Page 7: Chapter 2: Basic Operation
We assume that you will be running the WinBook off the AC power adapter when you use your system for the first time. - Page 8 Figure 2-2 WinBook with Power Adapter Connected Opening the LCD Screen Having connected the power adapter, turn the system so you are looking at the front. Slide the latch on the front of the system to the right, as illustrated below.
- Page 9 Figure 2-4 Ideal Seating Position for Maximum comfort Figure 2-5 WinBook Set Up and Ready for Use Turning the Power On Locate the Power ON/OFF switch at the rear of the left side of the WinBook, as shown in the illustration below.
- Page 10 Figure 2-6 Locating the Power ON/OFF Switch Press the switch and the Power ON LED indicator © on the top of your WinBook Will illuminate. The backlight of the LCD screen will also come on and the system will then start to boot up.
-
Page 11: User Controls
User Controls In order to get the most out of your WinBook it is essential that you have a good understanding of the controls and indicators on the system. In this section, a detailed explanation of all the controls on your WinBook is given and we recommend that you read the whole section through before you start using your system. - Page 12 When you press the Suspend switch, the display will become blank and to all intents and purposes your WinBook will appear to have been turned off. In this state, your system is using a minimum of power. When in suspend mode, the Suspend LED on the LCD screen will illuminate.
- Page 13 The LED Indicators On the right side o f the LCD screen is a row of seven LED indicators which indicate the status of certain functions. These are detailed below. Fig. 2.7 (from page 2.6) 4 – Power LED The Power LED will be illuminated when your system is turned on, and will remain illuminated until you turn the power off.
- Page 14 Scroll LOCK key. 10 - Caps Lock LED The Caps Lock LED refers to the Caps Lock key on the WinBook’s keyboard. On a conventional keyboard, this LED is usually situated on the keyboard itself. When illuminated, the Caps Lock LED indicates that the Caps Lock key has been pressed, in which case all letter keys will be typed in upper case (capital).
-
Page 15: Chapter 3: Data Storage Devices
They can be broadly divided into two types – 5.25” and 3.5”. This measurement refers to the size of the diskette that is used with each type, through your WinBook uses only the smaller 3.5” drive. This does not impose any limitation on the software you can use, since all popular software packages are available in both 5.25”... - Page 16 – 720Kbytes and 1.44M. The floppy disk drive installed in your WinBook is a 1.44M drive. In order to be able to take advantage of the full 1.44M capacity, high-density diskettes must be used. Such diskettes are marked 2HD.
- Page 17 IC cards are simple to use and should be inserted directly into the IC card slot, which is situated next to the power switch on the left side of the WinBook. As you insert the IC card, a push button will protrude from the IC card unit. To remove the IC card press this button in and the...
-
Page 18: Hard Disk Drives
MS-DOS diskette into a floppy disk drive every time you turn on your computer. The hard disk drive included in the standard configuration of the WinBook is s 2.5” AT bus version with various options on the storage capacity. - Page 19 have to reformat the disk drive, destroying any data existing on it.
- Page 20 Both these commands are external MS-DOS commands and can be run from the MS-DOS diskette(s). NOTE The hard disk drive installed in your WinBook has been low level formatted by the manufacturer so it is not necessary to low level format the hard disk drive.
-
Page 21: How To Start Fdisk
How To Start FDISK 1. Place the MS-DOS system diskette in floppy disk drive A: 2. Turn on your computer and boot up the system with MS-DOS. 3. Insert the MS-DOS diskette containing the FDISK.COM command in drive A: 4. At the DOS prompt type FDISK <Enter>... - Page 22 Enter choice : [1] Press ESC to return to FDISK Options You must create a primary MS-DOS partition first before you can create any extended MS-DOS partitions on your disk. In most cases, you will need only one MS-DOS partition for your entire disk.
- Page 23 Formatting Your Hard Disk Drive After partitioning your hard disk drive with the FDISK command you must format the hard disk using the MS-DOS FORMAT command. Insert the MS-DOS diskette containing the FORMAT.COM command in drive A: and type the following command: FORMAT C:/S<Enter>...
- Page 24 Your hard disk is now formatted and the system files have been transferred to the hard disk drive. You will now be able to boot your computer from the hard disk, and will no longer need to insert an MS-DOS diskette in the A: drive to boot. Note: The above procedure is valid for MS-DOS version 4.0 and above.
-
Page 25: Chapter 4: Using The Keyboard
The layout, however, is slightly different. If you are familiar with a conventional PC keyboard, you will soon get used to the WinBook keyboard. Read through this chapter carefully to make sure you are well acquainted with the special function keys and key combinations. - Page 26 If you are used to using a standard typewriter you will have no difficulty getting used to your computer keyboard. However, there are some important differences between using a typewriter and a computer keyboard. All the keys are “typematic” which means that they repeat as long as you hold them down.
- Page 27 The Backspace Key In MS-DOS and in most software, the Backspace key moves the cursor one space to the left, simultaneously deleting the character to the left of the cursor. The function of the backspace key may be different in some software. The Enter Key When typing in data, the Enter key functions in the same way as the carriage return key on a typewriter.
- Page 28 In MS-DOS the F1 function key can be used to retype the last command issued one letter at a time. The F3 function key can be used to retype the last command issued with a single keystroke. The Cursor Control Keys Fig.
- Page 29 The final group of keys on your keyboard is the Numeric Keypad. On a conventional keyboard, the numeric keypad is usually a separate block of keys. On the 486SX/DX- WinBook these keys have been integrated into the main typewriter keys. Fig. 4-4 The Integrated Numeric Keypad...
- Page 30 toggled On or OFF, and whether the Fn key has been pressed. When Num Lock is toggled on (the Num Lock LED in the control panel will illuminate), the M, J, K, L, U, I, O, 7/&, 8/*, and 9/(keys will function as 0, 1, 2, 3, 4, 5, 6, 7, 8, 9 respectively.
- Page 31 that each software has its own rules for the keyboard. Although many of the keys, especially the typewriter keys and cursor movement keys, have these same functions in most different software packages, some keys, especially the function keys F1 to F12, will often have completely different functions.
-
Page 32: Chapter 5: Basic Ms-Dos Usage
SLC Chapter 5 Basic MS-DOS Usage SLC Chapter 5 Basic MS-DOS Usage CHAPTER 5 BASIC MS-DOS USAGE Introduction If you are a newcomer to computing you may be a total loss as to how to start using your computer. This section is especially for you. Here we explain what MS-DOS is, how it interacts with your computer, and why you need it no matter what software you intend to use. - Page 33 SLC Chapter 5 Basic MS-DOS Usage system diskette. Earlier versions of DOS came on a single diskette, but the latest versions such as 3.3, 4.00 and 4.01 consist of several diskettes. The reason for this is that more commands and features have been added, making it impossible to store everything on a single diskette.
- Page 34 SLC Chapter 5 Basic MS-DOS Usage memory every time you turn on your computer. When we talk about “booting” your computer, this means to turn on your computer and load the COMMAND.COM. When the DOS prompt appears, this tells you that the COMMAND.COM file has been loaded and that you can start your computing operations.
- Page 35 SLC Chapter 5 Basic MS-DOS Usage word processing program called WRITER, which is contained on a single floppy diskette. You have booted DOS from the A drive, so the A> prompt is shown. Remove the DOS diskette from you’re a drive, and insert the WRITER diskette in its place. Then simply type the name of the command to run the Writer program, which for this example we assume is WRITER, as below: A>WRITER<ENTER>...
- Page 36 SLC Chapter 5 Basic MS-DOS Usage file called LETTER>TXT on your B: drive and you want to see the date on which the file was last modified, you could type: A>DIR B:LETTER.TXT<ENTER> Notice how the B: used to tell DOS to look on the B: drive is placed after the DIR command and before the file name.
- Page 37 SLC Chapter 5 Basic MS-DOS Usage A> Obviously care should be taken when using the DEL command to ensure that you do not accidentally delete a file you wished to keep. COPY – Copy a File COPY is another command you will often use. As its name suggests it is used to copy files from one disk or diskette to another.
- Page 38 SLC Chapter 5 Basic MS-DOS Usage version 3.30 or above to run. If your VER command tells you the version you are using is 3.10, then that program may not run. The instance of this is very small and 99% of programs will run under any version of DOS above 3.00.
- Page 39 SLC Chapter 5 Basic MS-DOS Usage Insert new diskette for drive A: And strike ENTER when ready Make sure that the blank diskette is correctly inserted in drive A: and press < Enter>. The FORMAT command will count through the heads and cylinders on your screen and when the...
- Page 40 SLC Chapter 5 Basic MS-DOS Usage free. The CHKDSK command can also be used to check the contents of a hard disk drive in a similar way. The CHKDSK command does not only look for information, however, but also detects if there are any errors among the files on the disk or diskette being checked.
-
Page 41: Chapter 6: Connecting Peripherals
In order to be able to connect an external keyboard you will need to use the adapter provided with the unit. To connect an external keyboard, first turn your WinBook off. Then, plug the external keyboard into the external keyboard socket. Now turn your WinBook on again. When an external keyboard is connected, you may use either the internal keyboard or external keyboard to input data as both will be activated. - Page 42 The External CRT Monitor Port The external CRT (Cathode Ray Tube) monitor port is located behind the right-hand cover on the rear of the 486SX/DX-WinBook as shown in the illustration below. To gain access to the external monitor connector, simply pull the cover open.
- Page 43 COM 1 and COM 2 The serial port on your WinBook is configured as COM1. The COM2 serial port is used by the built-in trackball. When you connect a device to your WinBook, you will have some software to configure and run the device.
- Page 44 Connecting a Printer If you wish to connect a printer to your WinBook first make sure the printer is a parallel printer and not a serial printer. The vast majorities of PC printers are parallel devices and can therefore be connected to the parallel port on your WinBook.
- Page 45 Other Available Options Note that the following options are also available for the WinBook, but these options are NOT ones the user can install, an authorized dealer must install them. For further information, please call your dealer.
-
Page 46: Chapter 7: Power Options
AC power operations. Using the Battery The WinBook can also be run off the battery supplied, so you can use your system even when no AC power is available. The battery is inserted into the battery cavity in the WinBook that is accessed by removing the battery cover. - Page 47 POWER.EXE program, more than two hours of usage will be possible. Please refer to page 7-4 for details. If you turn on your WinBook when the power adapter is NOT connected, the system will automatically use the battery. As soon as you connect the power adapter, the system will automatically use the power adapter.
- Page 48 Due to the advanced design of the charger circuit, the battery in the WinBook will fully charge in 1 to 1.5 hours no matter whether you are using the computer or not.
- Page 49 SLC Chapter 7 Power Options Please refer to your DOS user’s manual. 1. Save the CONFIG.SYS file and reboot y our computer. The POWER.EXE will automatically be loaded each time your computer is turned on and will ensure that power overhead is kept to a minimum by monitoring the system during usage.
-
Page 50: Chapter 8: Bios Setup Program
CHAPTER 8 BIOS SETUP PROGRAM One of the components on the mainboard inside your WinBook is the BIOS (Basic Input Output System). This consists of firmware (software burned into hardware) which handles basic routines. The BIOS also includes a SETUP program to allow you to configure the computer and set certain power management features. - Page 51 SLC Chapter 8 setup program in order to correctly setup your hardware configuration. Highlight STANDARD CMOS SETUP and press <Enter>. A warning message will appear on your screen as shown on the following page. Figure 8-2 The BIOS SETUP Program Warning Message Read this message and then press any key to call up the STANDARD CMOS SETUP display, which will appear on your screen, as shown below.
- Page 52 SLC Chapter 8 The bottom right hand of the screen shows a calendar. The month displayed will depend on the date set in your system clock, and one day will be flashing indicating the current date. Since you have not yet set the time and date, the date displayed is probably incorrect.
- Page 53 When you save the settings your system will reboot and these settings will be automatically implemented every time you turn your computer on. The WinBook Advanced CMOS Setup To access the advanced CMOS Setup Program, highlight ADVANCED CMOS SETUP in the main menu and press <Enter>.
- Page 54 SLC Chapter 8 you release the key. This item is disabled by default. Typematic Rate Delay (msec) You can use this item to define the period after which the typematic function becomes active i.e. how long after you press a key the characters will be repeated.
- Page 55 SLC Chapter 8 You may enable/disable this item to define whether the system will look for a floppy disk drive to boot from at power-on, or go directly to the hard disk drive. System Boot Up Sequence You may define whether the system will look first at drive A: and then at drive C: when booting up, or vice versa.
- Page 56 SLC Chapter 8 The Main system ROM may also be shadowed as explained above. Shadowing the main system ROM will result in improved performance. Set Display Type This item has a choice of three options: LCD, Auto and SimulSCAN. Select LCD to use the built-in LCD display;...
- Page 57 WinBook. Hard Disk 1 Timeout As for hard disk 0 above, note that the WinBook only supports the use of one hard disk drive unless you are using the optional docking station. Floppy Disk Timeout Enter the amount of time of non-usage, i.e.
- Page 58 SLC Chapter 8 In addition to the user configurable power saving modes detailed above, the WinBook features some transparent features to enhance power economy. These include a “Smart CPU” mode. This means that when the CPU is not being accessed it will automatically switch to a slow cycle mode in which it uses less power.
- Page 59 SLC Chapter 8 The first time you run this option simply press <Enter>. It is possible that the default password “AMI” is enabled. In this case, pressing <Enter> will not allow you to enter a new password, since you must enter the default password first. In this case, you must first type in “AMI” as the default password before you can enter a new password.
-
Page 60: Chapter 9: Troubleshooting
Do not place heavy objects on top of the WinBook. Do not place the WinBook near to any heat source or subject it to extreme temperature changes. Avoid using the computer in an excessively hot or cold environment. - Page 61 There are a million different scenarios most of which are beyond the scope of this manual. In this chapter we mention only some of the more basic hardware problems that are directly linked to the WinBook, and how to solve these problems. 2 of 4 remove any dirt that may have adhered to the ball itself.
- Page 62 If running from the power adapter, check that the adapter is correctly plugged into both the AC outlet and the WinBook, and that there is power in the power outlet. The power LED on the power adapter should be on. When running on the battery, check that the battery is correctly installed.
-
Page 63: Appendix A: Connector Pinouts
APPENDIX A__________ CONNECTOR PINOUTS For your reference, we list here the pin signals of the external connectors on the WinBook user’s manual. It is not necessary to use this information to connect peripherals, as all connectors conform to the industry standards. - Page 64 SLC Appendix A: Connector Pinouts 1. Carrier Detect 2. Receive Data 3. Transmit Data 4. Data Terminal Ready 5. Signal Ground 6. Data Set Ready 7. Request to Send 8. Clear to Send 9. Ring Indicator EXTERNAL PARALLEL PORT CONNECTOR Pin No.
- Page 65 SLC Appendix A: Connector Pinouts 2. Keyboard Data 3. Ground 4. + 5V 5. PS/2 Clock 6. Keyboard Clock EXTERNAL DOCKING STATION CONNECTOR 3 of 4 SIGNAL SIGNAL IOCHK- SA10 DACK2- RESET IRQ9 BALE DRQ2 OWS- MEMCS16- SMEMW- IOCS16- SMEMR-...
- Page 66 SLC Appendix A: Connector Pinouts 4 of 4 SA13 LA18 IRQ5 DACK7- SA12 LA17 IRQ4 DRQ7 SA11 MEMR- IRQ3 MASTER- file:///C|/test/HtmlHelp/SLC Appendix A Connector Pinouts.htm INIT- SLIN- STB- PDIAG IDECS1- IDECS0- ACTIVE- 3/2/99 10:13 AM...
Need help?
Do you have a question about the SLC and is the answer not in the manual?
Questions and answers